

Hey there! Are you new to the world of blogging? Or maybe you’re just looking for some tips to improve your writing skills? Well, you’ve come to the right place! In this blog post, we’ll be diving into the wonderful world of blogging and exploring all the ins and outs of this exciting medium. Blogging has become incredibly popular in recent years, and for good reason. It’s a fantastic way to share your thoughts, ideas, and expertise with the world.
Whether you’re a budding writer, an aspiring influencer, or simply someone who wants to document their adventures and experiences, blogging offers a platform to express yourself and connect with others who share your interests. But where do you start? How do you create content that is engaging, informative, and keeps your readers coming back for more? That’s where we come in. Throughout this blog, we’ll be sharing valuable tips and tricks that will help you kickstart your writing journey and take your blog to the next level.
From crafting attention-grabbing headlines to structuring your posts in a way that keeps readers hooked, we’ll cover it all. We’ll also delve into the importance of optimizing your blog for search engines, as well as ways to promote your content and grow your audience. So, whether you’re a seasoned blogger looking to freshen up your approach or a complete newbie eager to dip your toes into the blogging waters, we’ve got you covered.
Stick around and let’s embark on this exciting journey together. Get ready to unleash your creativity, find your unique voice, and captivate readers from all around the globe. Are you ready to take the blogging world by storm? Let’s get started!
Table of Contents
What is an RV Slide Out Awning?
If you’re looking to replace the fabric on your RV slide out awning, you’re in the right place! An RV slide out awning is a retractable fabric cover that extends and retracts with the slide out room of your RV. It provides shade and protection from the elements, ensuring that your slide out stays clean and in good condition. Over time, the fabric on the awning may become worn or damaged, and it will need to be replaced.
Replacing the fabric on an RV slide out awning is a relatively straightforward process that can be done by most RV owners with basic tools.
Why Replace the RV Slide Out Awning Fabric?
If you’re an RV owner, you know how important it is to keep your slide out awning fabric in good shape. Over time, the fabric can become worn out, torn, or damaged, making it less effective at protecting your slide out from the elements. That’s why it’s important to replace the RV slide out awning fabric when it starts to show signs of wear and tear.
By doing so, you can ensure that your slide out is properly protected and extend the life of your awning system. But how do you go about replacing the fabric? Well, it’s actually a relatively simple process that you can do yourself with just a few tools and a bit of patience. First, you’ll want to measure the length and width of your current fabric to ensure that you purchase the correct size replacement.
Then, you’ll need to remove the old fabric from the roller assembly, which can usually be done by loosening a few screws or bolts. Once the old fabric is removed, you can simply slide the new fabric onto the roller assembly and secure it in place. Finally, you’ll want to test the awning to make sure it’s operating properly before hitting the road.
With a little bit of time and effort, you can easily replace the RV slide out awning fabric and keep your slide out protected for years to come.
Tools and Materials Needed
When it comes to replacing the fabric on your RV slide out awning, there are a few tools and materials that you will need to have on hand. First and foremost, you will need the replacement fabric itself. Make sure to measure your existing fabric before purchasing so that you get the right size.
You will also need a ladder to access the awning, as well as a drill with the appropriate bit for removing the screws that hold the fabric in place. A wrench or pliers may also be necessary to remove any nuts or bolts. Additionally, you will need some basic hand tools such as a tape measure, screwdriver, and hammer.
It’s always a good idea to have some extra screws and washers on hand, just in case any get lost or damaged during the process. Once you have all of these tools and materials ready, you’ll be well-prepared to tackle the job of replacing your RV slide out awning fabric.
Step-by-Step Instructions
Replacing the fabric on your RV slide out awning may seem like a daunting task, but with the right instructions, it can be a straightforward process. First, make sure you have the necessary tools on hand, such as a ladder, a tape measure, and a drill. Next, measure the width of your awning fabric and order a replacement that matches those measurements.
Once you have the new fabric, start by extending the slide out to its full length. Use the ladder to access the awning roller and remove the screws holding the old fabric in place. Carefully slide the old fabric out of the roller, taking note of how it was attached.
Now, it’s time to attach the new fabric. Start by threading the new fabric through the roller, making sure it is centered. Use the tape measure to ensure it is positioned correctly.
Once in place, secure the fabric using the screws, following the same attachment method as the old fabric. Test the slide out to ensure that it is working properly, and you’re all set! Replacing the fabric on your RV slide out awning may take a bit of time and effort, but it is a manageable task that will extend the life of your awning and keep your RV looking great.
Step 1: Measure the Awning Fabric
awning fabric measurement. When it comes to replacing or repairing the fabric on your awning, the first step is to measure the fabric accurately. This will ensure that you get the right size and avoid any complications down the line.
To start, you’ll need a measuring tape and a pen and paper to jot down the measurements. First, extend your awning fully so that you can measure the entire width of the fabric. Begin by measuring from one end of the fabric to the other, making sure to measure from the edge of the hem.
Next, measure the height of the fabric by starting at the top and measuring down to the bottom, again including the hem. Write down both measurements and double-check that they are accurate. Taking the time to measure your awning fabric correctly from the get-go will save you time and frustration later on.
Step 2: Remove the Old Awning Fabric
In this step-by-step guide, we will walk you through the process of removing the old fabric from your awning. Whether you’re looking to replace the worn-out fabric or giving your awning a new look, this is an essential first step. To begin, gather all the tools you will need: a ladder, a wrench or screwdriver (depending on the type of fasteners used), pliers, and a utility knife.
Safety will always be a top priority, so make sure to use caution when working at heights and take necessary precautions. Start by extending the awning fully and securing it in place. You may need someone to help you with this step, especially if your awning is larger in size.
Once the awning is securely extended, locate the fasteners holding the fabric in place. These could be screws, nuts, or bolts, depending on the design of your awning. Using the appropriate tool, carefully remove the fasteners, taking care not to damage any surrounding parts.
Set aside the fasteners in a safe place, as you will need them when installing the new fabric. Once the fasteners are removed, slowly and gently pull the fabric away from the awning frame. As you remove the old fabric, pay close attention to how it is attached to the frame.
You may need to detach any additional clips, clamps, or hooks that are holding the fabric in place. Take note of how these attachments are positioned, as this will help when installing the new fabric later on. After the fabric is completely removed, take a moment to inspect the awning frame for any damage or wear.
This is an ideal time to replace any broken or worn-out parts before installing the new fabric. Make sure the frame is clean and free of any debris or dirt that may hinder the installation process. With the old fabric removed and the frame inspected, you’re now ready to move on to the next step: selecting and installing the new awning fabric.
Step 3: Prepare the New Awning Fabric
awning fabric, prepare, new, step-by-step instructions In this step-by-step guide, I’ll walk you through the process of preparing the new awning fabric. Whether you’re replacing an existing awning or installing a brand new one, it’s important to properly prepare the fabric before attaching it to the awning frame. This will ensure a smooth and long-lasting installation.
First, start by unrolling the new awning fabric on a clean and flat surface. Make sure there are no wrinkles or folds in the fabric. This will help to avoid any creases or unevenness once the awning is installed.
Next, measure the dimensions of the awning frame and trim the fabric accordingly. Use a fabric-friendly cutting tool, such as sharp scissors or a rotary cutter, to ensure clean and precise cuts. Be sure to leave a few inches of excess fabric on all sides to allow for adjustments during the installation process.
Once the fabric is trimmed, use a sewing machine or a needle and thread to create a hem around the edges. This will help to reinforce the fabric and prevent fraying. You can also use fabric adhesive or heat-seal tape to create a secure edge.
After the edges are finished, it’s time to reinforce any stress points on the awning fabric. These are the areas that will bear the most weight or tension, such as the corners and attachment points. Use a fabric patch or extra strip of fabric to add additional strength to these areas.
Finally, take a moment to clean the awning fabric. Use a mild detergent and warm water to gently scrub away any dirt or stains. Rinse thoroughly and allow the fabric to dry completely before proceeding with the installation.
Step 4: Install the New Awning Fabric
Installing new awning fabric can give your outdoor space a fresh new look and provide much-needed shade. To begin the process, first, make sure you have all the necessary tools and materials, including the new fabric, a ladder, a drill, and screws. Start by removing the old fabric from the awning frame, being careful not to damage any of the other components.
Once the old fabric is removed, lay the new fabric over the frame, making sure it is centered and straight. Next, use the drill and screws to secure the fabric to the frame, starting from the top and working your way down. Make sure to pull the fabric tight as you go to avoid sagging.
Once the fabric is securely attached, trim any excess with a sharp pair of scissors. Finally, stand back and admire your handiwork – you now have a beautiful new awning that will provide shade and style for years to come.
Tips and Tricks for a Successful Replacement
If you’re an RV owner and you notice that your slide-out awning fabric is starting to show signs of wear and tear, it may be time to replace it. But don’t worry, replacing the fabric on your slide-out awning is actually a fairly easy and straightforward process. Before you begin, make sure you have the new fabric and any necessary tools on hand.
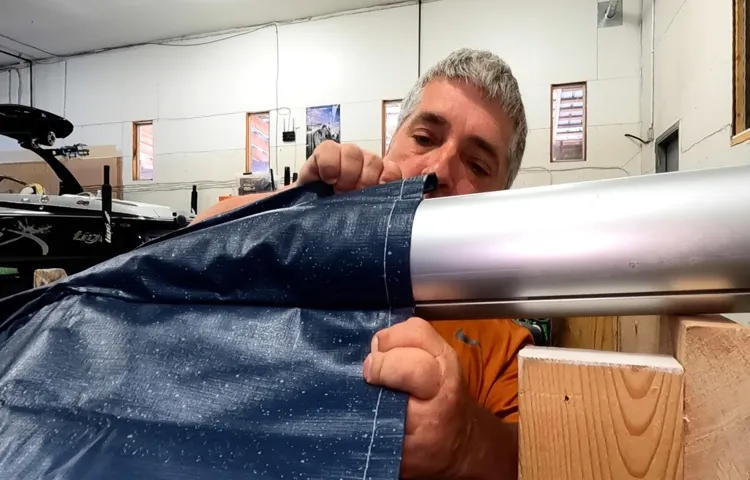
Start by extending the slide-out awning fully, and then remove the tension on the roller by unwinding the torsion assembly. Next, remove the fabric from the roller tube by undoing the screws or bolts that hold it in place. Once the old fabric is removed, simply attach the new fabric to the roller tube using the same screws or bolts.
Finally, wind the torsion assembly back up to put tension on the roller, and your new slide-out awning fabric is ready to go. With a little bit of time and effort, you can have your RV looking great with a brand new slide-out awning fabric.
Tip 1: Clean the RV Slide Out Awning
RV slide out awnings are an essential part of any recreational vehicle, providing shade and protection from the elements. However, over time, these awnings can become dirty and worn, making them less effective. Cleaning your RV slide out awning is a simple task that can extend its lifespan and keep it looking its best.
To clean your awning, start by sweeping off any debris and leaves. Then, use a soft brush or cloth to gently scrub away any dirt or stains. For tougher stains, you can use a mild detergent mixed with water.
Be sure to rinse the awning thoroughly with water to remove any soap residue. Finally, allow the awning to dry completely before retracting it. By taking the time to clean your RV slide out awning regularly, you can ensure that it remains in top condition for years to come.
Tip 2: Have a Helper
In the process of a home improvement project, having a helper can make all the difference. Whether you’re replacing a worn-out appliance or upgrading a fixture, having someone there to assist you can make the job go much smoother. A helper can lend a hand in carrying heavy objects, holding things in place, or even offering a second opinion on design choices.
They can also help with the practical aspects of the project, such as fetching tools or running to the store for last-minute supplies. Having a helper not only lightens the workload but also provides an extra set of eyes and hands, making the replacement process more efficient and enjoyable. So don’t hesitate to ask a friend or family member to lend a hand – their assistance can make your replacement project a success.
Tip 3: Double Check Measurements
When it comes to replacing a part or piece of furniture, one of the most crucial steps is to double-check your measurements. This is especially important if you’re ordering a replacement online, as you won’t have the opportunity to see and try out the item in person before it arrives. Taking accurate measurements ensures that the new piece will fit seamlessly into your space, preventing any headaches or disappointments with a mismatched size.
So, grab your tape measure and get precise measurements of your furniture’s dimensions, taking into account any protruding features like legs or arms. Don’t rely on estimations or assumptions – take the time to measure each aspect of the item, from width and height to depth and length. And remember, it’s always better to measure twice than to receive an ill-fitting replacement.
Trust me, you’ll thank yourself for the extra effort when your new piece fits perfectly into your space.
Conclusion
So, there you have it – a step-by-step guide on how to replace your RV slide out awning fabric. It may seem daunting at first, but with a little patience and a lot of determination, you can easily tackle this DIY project. Remember, the key to success is preparation.
Make sure you have all the necessary tools and materials, as well as a clear understanding of the process. Take your time and follow each step carefully, and soon enough, you’ll have a brand new, beautiful awning fabric to enjoy on your RV. And who knows, maybe you’ll even become a pro at replacing RV slide out awning fabric, offering your services to fellow RV enthusiasts and becoming the go-to awning fabric replacement expert at campgrounds around the country.
So why wait? Get out there and give your RV the facelift it deserves. Happy awning fabric replacement, and may the road always rise to meet you..
.with a perfectly installed, stylish awning!”
FAQs
How do I replace the fabric on my RV slide out awning?
To replace the fabric on your RV slide out awning, you will need to remove the old fabric, measure the new fabric, and install it onto the awning roller.
Can I replace the fabric on my RV slide out awning myself?
Yes, you can replace the fabric on your RV slide out awning yourself with the right tools and instructions.
What tools do I need to replace the fabric on my RV slide out awning?
You will need a ladder, a wrench or socket set, a tape measure, a utility knife, and possibly a drill or screwdriver, depending on your awning’s setup.
How often should I replace the fabric on my RV slide out awning?
The fabric on your RV slide out awning should be replaced every 5-7 years or as needed if it becomes damaged or worn.
Where can I buy replacement fabric for my RV slide out awning?
You can purchase replacement fabric for your RV slide out awning from RV supply stores, online retailers, or directly from the manufacturer of your awning.
Are there different fabric options available for RV slide out awnings?
Yes, there are different fabric options available for RV slide out awnings, including different colors, patterns, and materials such as vinyl or acrylic.
Can I hire a professional to replace the fabric on my RV slide out awning?
Yes, if you are not comfortable or able to replace the fabric on your RV slide out awning yourself, you can hire a professional RV technician or awning installer to do the job for you.