

Are you looking to refresh the look of your home’s exterior? One great way to do this is by replacing the fabric on your awning with Alumaguard. Alumaguard is a durable and stylish material that will not only protect your awning from the elements but also give it a sleek and modern appearance. Replacing the fabric on your awning may seem like a daunting task, but with the right tools and a little bit of patience, you can easily tackle this DIY project.
In this blog post, we will guide you through the step-by-step process of replacing the fabric on your awning with Alumaguard. First, let’s talk about why you should consider using Alumaguard as your awning fabric. This innovative material is made from a combination of aluminum and PVC, making it incredibly durable and weather-resistant.
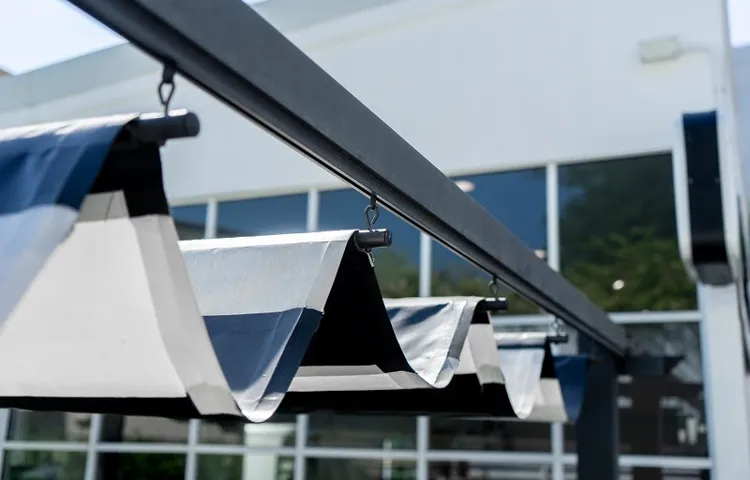
It is also available in a wide range of colors and patterns, allowing you to customize your awning to match your home’s style. Whether you prefer a classic striped design or a bold solid color, Alumaguard has options to suit every taste. Now that you know why Alumaguard is a great choice for your awning, let’s dive into the process of replacing the fabric.
The first step is to remove the old fabric from your awning frame. Start by carefully cutting away any stitching or fasteners that are holding the fabric in place. Be sure to take your time and work slowly to avoid damaging the frame.
Once the old fabric is removed, it’s time to measure and cut the Alumaguard fabric. Lay out the Alumaguard material on a flat surface and measure it to fit your awning frame. Use a sharp pair of scissors or a utility knife to cut the fabric to the correct size.
Remember to double-check your measurements before making any cuts to ensure a perfect fit. Now that you have your Alumaguard fabric cut to size, it’s time to attach it to the awning frame. Start by positioning the fabric over the frame and aligning it with the edges.
Table of Contents
Introduction
Are you looking to give your awning a fresh new look? If your awning has alumaguard, replacing the fabric can be a fairly simple process. Alumaguard is a protective film that is applied to the fabric of the awning, helping to increase its durability and lifespan. To replace the fabric on your awning, start by removing the old fabric from the roller tube.
This can usually be done by removing the end cap and sliding the fabric off the tube. Once the old fabric is removed, measure and cut your new fabric to the correct size. Be sure to leave extra fabric on each end to allow for hemming.
Hem the edges of the fabric using a sewing machine or fabric glue. Place the new fabric onto the roller tube and secure it in place. Finally, reattach the end cap and test the awning to ensure it rolls up and down smoothly.
With a little bit of time and effort, you can have a brand new looking awning with alumaguard fabric.
What is Alumaguard?
Alumaguard is a versatile and durable product that provides excellent protection against the elements. It is commonly used in the construction industry to shield and extend the life of buildings, equipment, and other surfaces. Alumaguard is made from a special blend of aluminum and other materials, making it resistant to corrosion, UV rays, moisture, and frost.
This means that it can withstand extreme temperatures and harsh weather conditions without losing its effectiveness. Whether it’s protecting a roof, a wall, or a piece of machinery, Alumaguard ensures that the surface underneath remains intact and intact. Its easy installation process and low maintenance requirements make it an ideal choice for both residential and commercial applications.
In short, Alumaguard is the go-to solution for those looking for reliable and long-lasting protection for their assets.
Why Replace the Fabric on Your Awning?
“awnings”, “replace fabric”, “benefits of replacing fabric on awnings” Introduction: If you have an awning on your property, you know how valuable it can be in providing shade and protection from the elements. However, over time, the fabric on your awning can start to show signs of wear and tear. Sun exposure, rain, wind, and dirt can all take a toll on the fabric, leaving it faded, torn, or stained.
When this happens, it’s time to consider replacing the fabric on your awning. Not only will it restore the aesthetics of your exterior, but it will also provide numerous benefits. In this blog post, we will explore why replacing the fabric on your awning is a smart investment and how it can enhance the functionality and appearance of your outdoor space.
So, let’s dive in and see why giving your awning a fabric makeover is worth it!
Tools and Materials
If you have an awning with alumaguard and need to replace the fabric, don’t worry! It’s a straightforward process that you can do yourself with just a few tools and materials. First, gather your supplies: a replacement fabric specifically made for awnings with alumaguard, a ladder, a measuring tape, a screwdriver, and a helper if needed. Start by carefully removing the old fabric from the awning frame.
Use a screwdriver to loosen any screws or fasteners holding the fabric in place. Once the old fabric is off, lay it out flat and use it as a template to measure and cut the new fabric. Leave a few inches of extra material on all sides to ensure a proper fit.
Then, with the help of a ladder and your helper, attach the new fabric to the awning frame. Begin by securing one end of the fabric and then gradually work your way to the other end, ensuring that it is evenly stretched and taut. Finally, tighten any screws or fasteners to secure the fabric in place.
And that’s it! You’ve successfully replaced the fabric on your awning with alumaguard and restored its functionality and beauty.
List of Tools Needed
Tools and Materials When it comes to tackling any DIY project, having the right tools and materials on hand can make all the difference. Whether you’re an experienced handyman or a beginner just starting out, having the necessary tools is essential for success. First and foremost, a good set of basic hand tools is a must.
This includes items such as a hammer, screwdrivers of various sizes, pliers, a tape measure, and an adjustable wrench. These tools will come in handy for a wide range of projects, from hanging pictures to assembling furniture. Power tools are another essential component of any DIY toolbox.
A cordless drill is a versatile tool that can be used for drilling holes and driving screws. A jigsaw is perfect for cutting curves and shapes in wood, while a circular saw is great for making straight cuts. A sander will help smooth out rough edges and surfaces, while a router can add decorative finishes.
In addition to the basic tools and power tools, there are also a variety of materials that you’ll need for your DIY project. This can include things like screws, nails, sandpaper, wood glue, paint, and brushes. Depending on the project, you may also need specialty materials such as plumbing supplies, electrical wiring, or adhesive tape.
It’s important to have the right tools and materials before you start your DIY project to avoid any frustrations or setbacks. By being prepared and having everything you need on hand, you’ll be able to tackle any project with confidence. So, take the time to gather the necessary tools and materials, and get ready to unleash your inner handyman!
List of Materials Needed
tools and materials needed to complete a project.
Removing the Old Fabric
If your awning has alumaguard and you need to replace the fabric, don’t worry, it’s actually a straightforward process. The first step in replacing the fabric on your awning is to remove the old fabric. Start by retracting the awning fully and locating the screws or bolts that hold the fabric in place.
These screws or bolts are usually located on the ends of the roller tube and the awning arms. Once you have located the screws or bolts, use a screwdriver or wrench to loosen and remove them. Be sure to keep track of any washers or spacers that may be attached.
Once all the screws or bolts are removed, you can carefully remove the old fabric from the roller tube and awning arms. Take your time and be careful not to damage the fabric or the awning arms during removal. Once the old fabric is removed, you can proceed with replacing it with the new fabric of your choice.
Step 1: Secure the Awning
When it comes to securing the awning on your patio or deck, the first step is to remove the old fabric. This process can vary depending on the type of awning you have, but there are a few general steps to follow. First, make sure you have all the necessary tools and supplies, including a ladder, screwdriver, and pliers.
Next, carefully remove any screws or bolts that are holding the old fabric in place. Be sure to keep track of where these fasteners go, as you will need them later. Once the fabric is free, carefully roll it up and set it aside.
Now you’re ready to move on to the next step: preparing the new fabric.
Step 2: Remove the Retractable Arms
When it comes to revamping your outdoor space, one essential step is removing the old fabric from your retractable arms. This is an important task because the fabric can become worn, faded, or damaged over time, and replacing it will give your outdoor area a fresh and updated look. To remove the old fabric, start by retracting the arms fully and securing it in place.
This will make it easier to access the fabric and ensure a smooth removal process. Then, carefully unhook the fabric from the arms, making sure to release any tension and fold it neatly as you go. Depending on the type of retractable system you have, there may be screws or clips holding the fabric in place.
Remove these carefully, keeping track of any hardware for later use. Once the fabric is removed, you can proceed to the next steps of cleaning or replacing it to transform your outdoor space into a cozy retreat.
Step 3: Unroll the Fabric
Are you ready to give your old furniture a fresh new look? One of the first steps in reupholstering a piece of furniture is removing the old fabric. This allows you to start with a clean slate and ensures that the new fabric will lay smoothly. To begin, unroll the fabric you have chosen for the project and lay it out on a flat surface.
This will help you to get a better idea of how much fabric you will need and also allows you to inspect the fabric for any flaws or imperfections. Make sure to smooth out any wrinkles or creases in the fabric before you begin measuring and cutting. Removing the old fabric can be a time-consuming task, but it is an important step in the reupholstering process.
Using a seam ripper or scissors, carefully remove any stitches or staples that are holding the old fabric in place. Take your time and be gentle to avoid damaging the furniture underneath. Once the old fabric is completely removed, you can move on to the next step in the reupholstering process.
Step 4: Cut and Remove the Fabric
When it comes to reupholstering a piece of furniture, one of the first steps is to remove the old fabric. This can sometimes be a daunting task, but with a little patience and the right tools, it can easily be done. To begin, start by inspecting the item and determining how the fabric is attached.
Most likely, you will find staples or tacks securing the fabric in place. Using a pair of pliers, carefully remove these fasteners, taking care not to damage the wood underneath. As you remove the fabric, you may come across padding or foam that also needs to be replaced.
Take note of the condition of these materials and make a plan to replace them if necessary. Once all of the fabric has been removed, you can move on to the next step of the reupholstering process.
Preparing the New Fabric
Are you looking to replace the fabric on your awning that has Alumaguard? Well, you’ve come to the right place! In this blog post, we will guide you through the process of preparing the new fabric for your awning. First things first, you’ll need to gather all the necessary tools and materials. This includes the new fabric, a measuring tape, scissors, a ladder, and a staple gun.
Once you have everything ready, it’s time to start the process. The first step is to remove the old fabric from your awning. Carefully detach any attachments or fasteners that are holding it in place.
Once the old fabric is removed, take some time to clean the frame and make sure it’s free from any debris or dirt. Next, you’ll need to measure the dimensions of your awning frame. Use a measuring tape to get accurate measurements of the width and length of the frame.
Make sure to add a few inches to each measurement to account for any overlaps or excess fabric. Once you have the measurements, it’s time to cut the new fabric. Lay the fabric flat on a clean surface and use the measurements you took to cut it to the appropriate size.
Be sure to cut it straight and smooth, as any jagged edges may cause issues during the installation process. After cutting the fabric, it’s time to attach it to the awning frame. Start by securing the fabric at one corner of the frame and then work your way around, pulling the fabric taut as you go.
Use a staple gun to attach the fabric to the frame, making sure to keep it evenly spaced and secure. Once the fabric is securely attached to the frame, trim off any excess fabric using a pair of scissors. Double-check that all the attachments and fasteners are properly secured, and give the fabric a gentle tug to make sure it’s tight and in place.
Step 1: Measure and Cut the New Fabric
In order to recover or reupholster a piece of furniture, the first step is to measure and cut the new fabric. This is an essential part of the process as it ensures that the new fabric will fit properly and look seamless once it is attached. To begin, you will need to measure the dimensions of the piece of furniture that you are reupholstering.
Start by measuring the length, width, and height of the seat or backrest. It’s also important to measure the thickness of any cushions or padding that will be covered with fabric. Once you have these measurements, add a few inches to each side to allow for folding and stapling.
This will ensure that you have enough fabric to cover the entire piece without it being too tight or stretched. Finally, use a pair of fabric scissors to cut the new fabric according to your measurements. Take your time and cut carefully to ensure that the edges are clean and straight.
With the new fabric measured and cut, you are now ready to move on to the next step in the reupholstering process.
Step 2: Reinforce the Edges
To reinforce the edges of your fabric, you first need to prepare the new fabric that you will be using for this step. It’s essential to choose a fabric that is durable and matches the original fabric as closely as possible. This will ensure that your repairs blend seamlessly and are not easily noticeable.
Start by cutting a piece of fabric that is slightly larger than the area you need to reinforce. This will give you some room to work with and prevent any fraying or unraveling. Once you have your piece of fabric, you can move on to the next step of reinforcing the edges.
Step 3: Attach Zippers or Velcro
When it comes to recovering your seat cushions, one of the essential steps is attaching zippers or Velcro to the new fabric. This will allow you to easily remove the cover for washing or to change it out in the future. Before you begin attaching the zippers or Velcro, it’s important to prepare the new fabric properly.
Start by ironing the fabric to remove any wrinkles or creases. This will ensure that the finished cover looks smooth and professional. Next, lay the fabric flat and measure the dimensions of your seat cushion.
Add an extra inch to each side to allow for seam allowances. Once you have cut the fabric to the correct size, you can then move on to attaching the zippers or Velcro. Zippers are a popular choice as they allow for easy removal of the cover, but Velcro can also be a convenient option.
Whichever method you choose, make sure to securely attach the fasteners to the edges of the fabric so that the cover stays in place when in use. With the zippers or Velcro securely attached, you can now move on to the next step of recovering your seat cushions.
Installing the New Fabric
If you’re looking to replace the fabric on your awning that has alumaguard, don’t worry! It may seem like a daunting task, but with the right tools and a little bit of knowledge, you can easily install the new fabric yourself. The first step is to remove the old fabric by carefully unscrewing it from the frame. Once the old fabric is removed, you can take measurements to ensure you purchase the correct size for the replacement fabric.
When installing the new fabric, begin by attaching it to one end of the frame and gradually work your way across, making sure to tighten the fabric as you go. Finally, secure the fabric tightly to the frame with screws or other fasteners. With some patience and attention to detail, you’ll have a brand new fabric on your awning in no time!
Step 1: Reattach the Retractable Arms
Installing the new fabric on your retractable arms is an essential step in reattaching them to your awning. This process requires careful precision and attention to detail to ensure a secure and long-lasting hold. Begin by removing the old fabric from the arms, taking note of its orientation and any specific markings or patterns.
Once removed, lay the new fabric out flat and align it with the arms, making sure it is smooth and taut. Gently fold the edges of the fabric over the arms and attach it using the provided clips or fasteners. Take your time to ensure the fabric is evenly distributed and free of wrinkles or creases.
Once attached, give it a gentle tug to test its sturdiness. If it feels secure, congratulations! You have successfully installed the new fabric on your awning’s retractable arms. Now you can enjoy the benefits of a refreshed and functional outdoor space.
Step 2: Roll Out and Align the New Fabric
When it comes to installing new fabric for your furniture, there are a few simple steps you can follow to ensure a successful and professional-looking result. The second step in this process is to roll out and align the new fabric. This is an important step because it ensures that the fabric is properly positioned and aligned with the furniture frame.
First, start by unrolling the fabric and laying it out flat on a clean and smooth surface. Make sure to remove any wrinkles or creases by gently smoothing it out with your hands or a fabric brush. Next, carefully lift the fabric and place it over the furniture, making sure to align it with the edges and corners.
Take extra care when working with patterned fabric, as you’ll want to ensure that the pattern lines up correctly. You can use pins or clips to temporarily hold the fabric in place while you adjust and align it. Once you’re satisfied with the alignment, you can move on to the next step in the process.
Step 3: Secure the Fabric
Installing the New Fabric Now that you’ve prepared the area and removed any old fabric or covering, it’s time to install the new fabric. This is where your creativity really gets to shine, as you choose the color, pattern, and texture that will bring your space to life. Start by measuring the area where you want to install the fabric.
Take accurate measurements, ensuring you have enough fabric to cover the entire space and allow for any necessary adjustments. Once you have your measurements, head to your local fabric store or browse online to find the perfect fabric for your project. When installing the new fabric, it’s important to work carefully and methodically.
Start by laying the fabric out flat on the ground nearby, ensuring it is free from any wrinkles or creases. Next, position it over the area you are covering, making sure it is centered and aligned correctly. Carefully smooth the fabric down, starting in the center and working your way out towards the edges.
Use your hands or a soft cloth to press the fabric firmly in place, ensuring it adheres evenly and securely. If necessary, use small pins or clips to hold the fabric in place while you work. Once the fabric is in place, take a step back and assess the overall appearance.
Make any necessary adjustments, such as smoothing out wrinkles or repositioning the fabric, until you are satisfied with the results. Remember, installing new fabric is just the beginning. The next step will be securing the fabric in place to ensure it stays looking great for years to come.
Stay tuned for our next blog post, where we will explore the different methods of securing fabric and discuss which option might be best for your specific project.
Maintenance and Care
If you have an awning that has Alumaguard fabric and it’s time to replace it, don’t worry – it’s not as difficult as it may seem. With a few simple steps and the right tools, you can have your awning looking like new in no time. First, remove any screws or fasteners that are holding the old fabric in place.
Once the fabric is removed, carefully measure and cut your new fabric to fit. Make sure to leave a little extra material on all sides to account for any stretching or shrinking that may occur. Next, attach the new fabric to the awning using a heavy-duty adhesive or sewing it in place if possible.
Finally, secure the fabric in place with new screws or fasteners, making sure it is evenly tensioned. With a little patience and attention to detail, you’ll have your awning looking brand new and ready to provide shade for many more summers to come.
Cleaning the Alumaguard Fabric
Cleaning the Alumaguard fabric is an essential part of its maintenance and care. Over time, dirt, grime, and other debris can accumulate on the fabric, making it look dull and dirty. To keep your Alumaguard fabric looking its best, regular cleaning is recommended.
Fortunately, cleaning the fabric is a relatively simple process that can be done with a few basic tools and materials. First, remove any loose dirt or debris from the fabric by gently brushing it with a soft bristle brush or using a vacuum cleaner with a brush attachment. This will help to loosen and remove any surface dirt or dust.
Next, fill a bucket with warm water and add a mild detergent or fabric cleaner. Avoid using harsh chemicals or bleach, as these can damage the fabric. Dip a soft cloth or sponge into the soapy water and gently scrub the fabric, paying particular attention to any stains or heavily soiled areas.
After scrubbing, rinse the fabric thoroughly with clean water to remove any soap residue. You can do this by spraying it with a garden hose or using a clean sponge and bucket of water. Once the fabric is clean, allow it to air dry completely before using or storing it.
Avoid using a dryer or heat source to speed up the drying process, as this can cause shrinkage or damage to the fabric. By following these simple cleaning steps, you can maintain the appearance and extend the lifespan of your Alumaguard fabric. Regular cleaning will help to remove dirt, stains, and other contaminants, keeping the fabric looking fresh and vibrant for years to come.
Inspecting for Damage
When it comes to maintaining your property, one crucial aspect that often gets overlooked is inspecting for damage. Whether you own a residential or commercial property, regular inspections are essential to ensure that everything is in working order and to identify any potential issues before they become more significant problems. Taking the time to inspect your property for damage can save you both time and money in the long run.
From checking for leaks and cracks to assessing the condition of your roof, walls, and foundation, a thorough inspection can help you catch any issues early on and prevent them from worsening. Plus, by addressing problems promptly, you can avoid costly repairs or even complete replacements down the line. So, don’t neglect the importance of regular maintenance and care, including inspecting your property for damage.
It’s a simple yet effective way to keep your property in excellent condition and maintain its value over time.
Repairing Small Tears or Holes
maintenance and care, small tears or holes, repairing, fabric When it comes to maintaining and caring for your clothing, it’s important to be proactive in fixing any small tears or holes that may occur. Ignoring these issues can lead to larger problems down the line and potentially ruin your favorite garments.
Thankfully, repairing small tears or holes is a relatively simple task that you can do at home. Depending on the fabric of your clothing, there are a few different methods you can use to mend the damage. For instance, if you’re dealing with a small tear in a knit fabric like a sweater or a t-shirt, you can try using a needle and thread to sew the edges together.
Be sure to match the thread color as closely as possible to the fabric so that the repair is not too noticeable. If you’re dealing with a hole in a woven fabric like denim or cotton, you can use a patch to cover the area. Cut a piece of fabric that is slightly larger than the hole and sew it onto the garment, making sure to secure the edges.
Again, try to match the fabric as closely as possible to ensure a seamless repair. It’s important to note that these repairs are best suited for small tears or holes. If you’re dealing with a larger tear or a more complicated fabric, it may be best to consult a professional tailor or seamstress.
However, with a little bit of patience and practice, you can become adept at fixing small tears and holes in your clothing, saving yourself time and money in the long run. So, next time you notice a small tear or hole in your favorite garment, don’t throw it away – grab a needle and thread and give it a repair!
Conclusion
So, there you have it, my dear readers. A step-by-step guide on how to replace the fabric on your awning that has alumaguard. I hope you found this witty and clever explanation both informative and entertaining.
Now, I understand that replacing the fabric on your awning may seem like a daunting task, especially if you’re not particularly handy. But fear not, for with the right materials and a bit of patience, you’ll be able to tackle this project like a seasoned DIY-er. Remember, the key to success is in the preparation.
Make sure you have all the necessary tools and materials at hand, and don’t forget to do a thorough inspection of your awning before starting the replacement process. You wouldn’t want to discover any surprises midway through, now would you? Once you’re ready to go, take your time and follow each step carefully. As they say, haste makes waste, and trust me, you don’t want to end up with a wonky, lopsided awning that resembles a sad, deflated parachute.
Take it slow, be precise, and don’t be afraid to ask for help if needed. Now, when it comes to removing the old fabric, be gentle but firm. Think of it as a delicate dance between you and the awning, where every move counts.
Slowly peel the fabric away, unveiling the hidden potential of your awning like the curtain rising on a Broadway show. Embrace the transformation that is about to take place, my friends. And finally, when it’s time to attach the new fabric, remember that it’s all about the details.
Pay close attention to the alignment, making sure the patterns match seamlessly, creating a symphony of colors and textures that will make your neighbors green with envy. This is your chance to showcase your impeccable taste and superior craftsmanship, so don’t shy away from perfection. In conclusion, replacing the fabric on your awning that has alumaguard is a task that requires both skill and creativity.
FAQs
How do I replace the fabric on my awning that has Alumaguard?
To replace the fabric on your awning that has Alumaguard, follow these steps:
1. Remove any screws or fasteners holding the fabric in place.
2. Carefully remove the old fabric from the awning frame, taking care not to damage the Alumaguard.
3. Measure the dimensions of the old fabric and cut a new piece of fabric to size.
4. Attach the new fabric to the frame, making sure it is taut and properly aligned.
5. Secure the fabric in place with screws or fasteners.
6. Test the awning to ensure it opens and closes smoothly with the new fabric.
7. Enjoy your refreshed awning with new fabric!
Can I replace the fabric on my awning with Alumaguard by myself, or do I need professional help?
While it is possible to replace the fabric on your awning with Alumaguard by yourself, it may be a complex and time-consuming task. If you have basic DIY skills and feel confident in your abilities, you can try replacing the fabric yourself by following the manufacturer’s instructions. However, if you are unsure or uncomfortable with the process, it is recommended to seek professional help to ensure the job is done correctly.
Where can I purchase replacement fabric for my awning with Alumaguard?
You can purchase replacement fabric for your awning with Alumaguard from various places. Some options include:
1. Online retailers: There are many websites that specialize in awning fabrics and accessories. You can browse through their selection, compare prices, and order the fabric that meets your needs.
2. Local awning supply stores: Check if there are any local stores in your area that sell awning fabric. They may have a physical showroom where you can see and feel the fabric before making a purchase.
3. Awning manufacturers: If your awning was made by a specific manufacturer, they may offer replacement fabric options. Contact the manufacturer directly to inquire about purchasing fabric specifically designed for their awning models.
How often should I replace the fabric on my awning with Alumaguard?
The frequency of fabric replacement for your awning with Alumaguard can depend on various factors such as climate, usage, and the overall condition of the fabric. However, a good general guideline is to replace the fabric every 5-10 years. Regular inspection of the fabric for signs of wear, tear, fading, or damage can help you determine when it is time for a replacement.
Can I choose a different color or pattern for the replacement fabric on my awning with Alumaguard?
Yes, you can usually choose a different color or pattern for the replacement fabric on your awning with Alumaguard. Many manufacturers and retailers offer a wide range of fabric options to suit different preferences and styles. Before making a purchase, ensure that the chosen fabric is compatible with your awning frame and that it meets any specific requirements or recommendations from the manufacturer.
Are there any special maintenance tips for the replacement fabric on my awning with Alumaguard?
While Alumaguard is known for its durability and resistance to damage, there are some general maintenance tips you can follow to prolong the life of the replacement fabric on your awning:
1. Regularly clean the fabric using mild soap, water, and a soft brush or sponge.
2. Avoid using harsh chemicals or abrasive cleaners that could damage the fabric or Alumaguard.
3. Remove any dirt, debris, or leaves from the awning fabric to prevent buildup and potential damage.
4. Consider using a fabric protector or UV treatment spray to enhance the fabric’s resistance to fading and weathering.
5. Inspect the fabric regularly for any signs of wear, tear, or damage, and address any issues promptly to prevent further deterioration.
Can I replace the fabric on my awning with Alumaguard if it has a motorized operation?
Yes, you can replace the fabric on your motorized awning with Alumaguard. The process of replacing the fabric may be slightly different compared to a non-motorized awning, as you will need to disconnect and remove the motorized components before replacing the fabric. It is recommended to consult the manufacturer’s instructions or seek professional help for replacing the fabric on motorized awnings to ensure proper handling of the electrical components and a seamless installation.