
Introduction: Why Replace the Fabric on Your RV Awning Picture this – you’re parked at a breathtaking campsite, surrounded by nature’s wonders, and ready to relax under the shade of your trusty RV awning. But wait, what’s that? The awning fabric is torn, faded, and just not looking its best. Suddenly, your perfect camping oasis feels incomplete.
We all know that an RV awning is essential for creating a comfortable outdoor living space. It shields you from the scorching sun, provides a cozy gathering spot for friends and family, and offers a place to enjoy meals or simply soak in the views. But over time, the fabric on your awning can suffer wear and tear, leaving it in need of replacement.
Replacing the fabric on your RV awning is not only about aesthetics; it’s about functionality and durability too. A worn-out fabric may no longer provide adequate protection from the elements, leaving you exposed to harsh sun rays or unexpected rain showers. It can also compromise the stability of your awning, making it less reliable during gusty winds or storms.
By replacing the fabric on your RV awning, you ensure that it remains in prime condition, ready to serve its purpose whenever you hit the road or set up camp. With a new fabric, you’ll have peace of mind knowing that you’re shielded from the sun’s harmful UV rays and protected from sudden downpours. Moreover, a fresh fabric can transform the look of your RV, giving it a much-needed facelift.
Whether you opt for a vibrant color or a timeless neutral, the new fabric will make your awning pop, adding a touch of personality to your outdoor living space. So, if you’re wondering whether it’s worth the investment to replace the fabric on your RV awning, the answer is a resounding yes. It’s not just about having a visually appealing awning; it’s about ensuring your comfort, safety, and enjoyment while on your RV adventures.
Stay tuned for our upcoming blog post, where we’ll dive deeper into the process of replacing the fabric on your RV awning and provide helpful tips for choosing the right fabric for your needs. In the meantime, start envisioning the renewed beauty and functionality your awning will bring to your next camping experience.
Table of Contents
Benefits of Replacing the Fabric
So you’re ready to give your RV awning a fresh new look? Replacing the fabric on an RV awning is a great way to update the appearance of your RV and extend the life of your awning. There are several benefits to replacing the fabric. First and foremost, it can improve the functionality of your awning.
Over time, the fabric can become worn, torn, or faded, making it less effective at providing shade and protection from the elements. By replacing the fabric, you can ensure that your awning is in top condition and ready for your next adventure. Additionally, replacing the fabric gives you the opportunity to choose a new color or pattern that better suits your style and preferences.
Whether you want a bold and vibrant print or a classic solid color, there are plenty of options available to complement your RV’s exterior. Finally, replacing the fabric can also save you money in the long run. Rather than replacing the entire awning, which can be costly, you can simply replace the fabric and continue using the existing frame.
This can be a more budget-friendly option, especially if the frame is still in good condition. So go ahead and give your RV awning a makeover by replacing the fabric – you’ll be glad you did!
Increased Durability
Increased durability is one of the main benefits of replacing the fabric in certain products. By replacing the fabric, you can ensure that the product will last longer and withstand wear and tear. This is particularly important in items that are used frequently or exposed to harsh conditions.
For example, if you have a backpack that you use for hiking, replacing the fabric with a more durable material can prevent it from tearing or getting damaged on rough trails. Similarly, in furniture such as sofas or chairs, replacing the fabric with a more durable option can prevent it from becoming worn out or fading over time. By investing in high-quality, durable fabric, you can extend the lifespan of your products and save money in the long run.
Additionally, replacing the fabric gives you the opportunity to upgrade the overall look and feel of the item. You can choose a fabric that is not only more durable but also more stylish, allowing you to give your product a fresh new look. So, if you have a product that is starting to show signs of wear or if you simply want to upgrade its durability and appearance, consider replacing the fabric.
It’s a simple yet effective way to improve the longevity and aesthetics of your belongings.
Improved Appearance
When it comes to improving the appearance of furniture, replacing the fabric can make a huge difference. One of the key benefits of replacing the fabric is that it allows you to update the look of your furniture and give it a fresh new vibe. Whether your furniture is worn, outdated, or simply not suiting your current style, replacing the fabric can instantly transform its appearance.
By choosing a fabric with a modern design or a color that complements your existing decor, you can create a cohesive and stylish look in your home. Additionally, new fabric can also hide any stains, tears, or other imperfections on the furniture, making it look brand new. So, if you’re looking to give your furniture a makeover, replacing the fabric is a great option to consider.
Better Protection from the Elements
If you’re considering replacing the fabric on your outdoor furniture, you’re in for a treat. Not only will it give your furniture a fresh new look, but it will also provide better protection from the elements. Fabric that has been exposed to the sun, wind, rain, and other weather conditions can become worn, faded, and even torn.
By replacing the fabric, you can ensure that your furniture stays in great shape for years to come. Sunbrella fabric, for example, is a popular choice for its durability and resistance to fading. It can withstand intense sunlight without losing its color or strength.
Additionally, there are fabrics available that are resistant to mold and mildew, making them perfect for outdoor use. So, why settle for worn-out fabric when you can have furniture that looks and feels brand new? Replacing the fabric is a simple and cost-effective way to give your outdoor furniture a makeover and protect it from the elements.
Tools and Materials You Will Need
When it comes to replacing the fabric on an RV awning, there are a few tools and materials you will need to ensure a smooth and successful process. First and foremost, you will need a replacement fabric, which can be purchased from an RV parts store or online. Make sure to measure your awning carefully before purchasing to ensure you get the right size.
In addition to the fabric, you will also need a ladder to reach the awning, as well as a few basic hand tools such as a screwdriver, pliers, and a tape measure. It’s also a good idea to have some cleaning supplies on hand, as you may need to clean the awning before installing the new fabric. And finally, don’t forget some patience and a little bit of elbow grease – replacing an RV awning fabric can be a bit of a challenge, but with the right tools and materials, you’ll have it looking good as new in no time.
Fabric Replacement Kit
The main keyword used organically: “Fabric Replacement Kit” Are you ready to tackle a fabric replacement project? Before you get started, it’s important to make sure you have the right tools and materials on hand. Having the right equipment will ensure that you have a successful and smooth fabric replacement experience. So, what exactly do you need? First and foremost, you will need a fabric replacement kit.
This kit typically contains a variety of tools and materials specifically designed for fabric repair and replacement. Some common items you will find in a fabric replacement kit include fabric scissors, a sewing needle, thread, and fabric glue. These tools will be essential for cutting and sewing the fabric, as well as bonding it to the furniture or item you are working on.
Additionally, you may also need a measuring tape, pins, and a staple gun, depending on the complexity of the fabric replacement project. With these tools at your disposal, you’ll be well-prepared to bring new life to your worn-out fabric.
Ladder
tools and materials, ladder section, ladder tools, ladder materials, ladder safety tools, ladder maintenance tools
Measuring Tape
measuring tape, tools and materials
Screwdriver
screwdriver, tools and materials, If you’re planning to take on a DIY project or simply need to fix something around the house, a screwdriver is an essential tool that you’ll definitely want to have in your toolbox. But with so many different types of screwdrivers out there, it can be overwhelming to know which one is right for the job. First and foremost, you’ll need to have a set of screwdrivers in different sizes and types.
A set that includes both flathead and Phillips screwdrivers is a good place to start. Flathead screwdrivers have a single, flat blade and are used for screws with a single slot. Phillips screwdrivers, on the other hand, have a cross-shaped tip and are used for screws with a cross-shaped slot.
It’s always a good idea to have a variety of sizes so that you’re prepared for screws of different sizes. In addition to the basic flathead and Phillips screwdrivers, there are also specialized screwdrivers for specific tasks. For example, a precision screwdriver set is perfect for working on delicate electronics, while a ratchet screwdriver with interchangeable bits is great for quickly switching between different screw types.
In terms of materials, you’ll want to prioritize quality when choosing screwdrivers. Look for screwdrivers with sturdy, comfortable handles that offer a good grip. The shaft of the screwdriver should be made of strong, durable material that won’t easily bend or break.
Having the right tools and materials is essential for any DIY project. With a set of screwdrivers in various sizes and types, you’ll be ready to tackle any project that requires the use of screws. So, make sure you have a reliable screwdriver set in your toolbox, and you’ll be prepared for any household repair or DIY endeavor.
Scissors
scissors, tools and materials, cutting, fabric, paper, hair, crafting
Marker
marker In order to create beautiful and vibrant artwork, you’ll need the right tools and materials. When it comes to color, one of the most versatile and convenient options is a marker. These handy pens are filled with ink that can be easily applied to a variety of surfaces, including paper, cardboard, and even fabric.
With a marker in hand, you can add highlights, details, and bold strokes to your artwork with ease. Unlike other types of color mediums, markers are portable and easy to use, making them a great choice for artists on the go. Whether you’re a professional artist or just starting out, a marker is a must-have tool in your artistic arsenal.
So, grab your markers and let your creativity flow!
Step-by-Step Guide to Replacing the Fabric on Your RV Awning
Replacing the fabric on your RV awning may seem like a daunting task, but with a little bit of know-how and some basic tools, you can have it looking brand new in no time. First, start by measuring the width of your awning and purchasing a replacement fabric that matches those dimensions. Next, extend the awning fully and make sure it is locked in place.
Locate the screws or bolts that are holding the fabric in place and remove them using a screwdriver or wrench. Once the fabric is detached, carefully roll it up and set it aside. Now it’s time to install the new fabric.
Unroll the replacement fabric completely and align it with the awning tube. Begin by attaching one end of the fabric to the roller tube using the screws or bolts from earlier. As you work your way down, make sure the fabric is evenly aligned and smooth out any wrinkles as you go.
Once the fabric is fully attached, give it a test run by retracting and extending the awning a few times to ensure it operates smoothly. Congratulations, you’ve successfully replaced the fabric on your RV awning!
Step 1: Measure the Existing Fabric
Replacing the fabric on your RV awning can give your outdoor space a much-needed facelift and protect you from the elements. But before you dive into this project, it’s important to take accurate measurements of your existing fabric. This step is crucial because it ensures that you order the right size and style of fabric for your awning.
To measure the existing fabric, start by extending your awning fully. Then, measure the width of the fabric from end to end, making sure to include any seams or stitching. Next, measure the length of the fabric from one end to the other.
Be sure to measure from the top of the awning to the bottom, including any additional length that may hang down when the awning is fully extended. Once you have these measurements, you can use them to order the correct size of fabric for your awning. It’s important to be precise in your measurements to ensure a proper fit.
If you’re unsure or if your awning has special features, such as a scalloped edge or a curved design, it may be helpful to consult the manufacturer’s instructions or reach out to a professional for guidance. Overall, measuring the existing fabric of your RV awning is the crucial first step in the process of replacing it. By taking accurate measurements, you can ensure that you order the right size and style of fabric, setting yourself up for a successful and stylish awning makeover.
Step 2: Remove the Existing Fabric
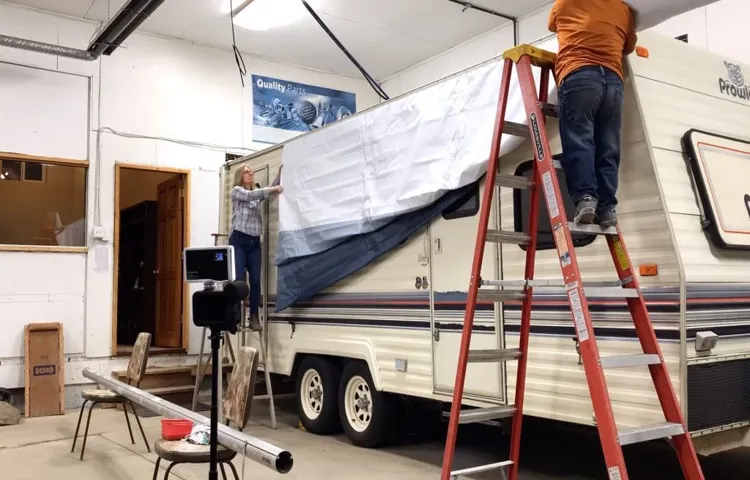
In this next step of our step-by-step guide to replacing the fabric on your RV awning, we are going to dive into the process of removing the existing fabric. Before we get started, make sure you have all the necessary tools on hand, including a ladder, screwdriver, and a helper if needed. The first thing you’ll want to do is extend your awning completely to its full length.
This will make it easier to access and remove the fabric. Once the awning is extended, locate the screws or brackets on the roof or sidewall that are securing the awning to your RV. Remove these screws or brackets using a screwdriver, taking care to keep them in a safe place for later reinstallation.
Next, carefully roll up the awning fabric, starting from one end and working your way to the other. If your awning has a metal cover, you may need to slide it off before you can fully roll up the fabric. Once the fabric is rolled up, secure it in place using bungee cords or ropes to prevent it from unrolling.
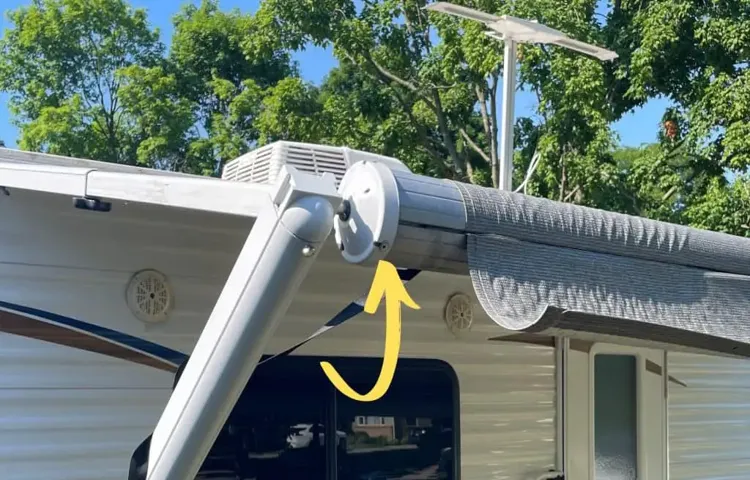
With the fabric rolled up and secured, you can now remove the awning from its track. To do this, locate the release lever or pin near the awning’s roller tube and slide it out. This will release the awning from the track, allowing you to remove it completely.
Keep in mind that awnings can be heavy, so it’s important to have a helper or use proper lifting techniques when removing it from your RV. Once the awning is removed, carefully set it aside in a safe location. Congratulations, you have successfully removed the existing fabric from your RV awning! In the next step, we will cover how to measure and order a new fabric to replace the old one.
Stay tuned for our complete guide on replacing the fabric on your RV awning.
Step 3: Prepare the New Fabric
Congratulations! You are now ready for the third step in replacing the fabric on your RV awning. This step involves preparing the new fabric before installing it onto your awning. First, you will need to gather all the necessary tools and materials.
This typically includes a tape measure, a ladder or step stool, a utility knife or scissors, and a helper. Having a helper is not essential, but it can make the process easier and safer. Next, carefully unroll the new fabric and lay it out flat on a clean and smooth surface.
Take the time to inspect the fabric for any defects or damages. It’s better to do this now rather than finding out later when it’s already installed on your awning. Once you have ensured that the fabric is in good condition, measure it to ensure it is the correct size for your awning.
Use a tape measure to measure the width and length of the fabric. Make sure to take accurate measurements to ensure a proper fit. After measuring, you may need to cut the fabric to the appropriate size.
Use a utility knife or scissors to make the necessary cuts. Be sure to cut the fabric straight and clean to ensure a professional-looking installation. Once the fabric is cut to size, you can begin preparing it for installation.
This may involve adding any necessary accessories, such as grommets or hems, to the fabric. Follow the instructions provided by the fabric manufacturer to ensure proper installation of these accessories. Finally, carefully roll up the prepared fabric and gather all the necessary tools and materials.
Step 4: Install the New Fabric
“Replacing the fabric on your RV awning can seem like a daunting task, but with the right steps, it can be a relatively simple project. Once you have removed the old fabric and measured for the new one, it’s time to install the new fabric. This step-by-step guide will walk you through the process to ensure a smooth and successful installation.
First, start by spreading out the new fabric in a clean, open area. Make sure it is the correct size and matches the measurements you took earlier. Next, locate the slot or groove in the roller tube, which is where the fabric will be inserted.
This slot may be covered by a fabric protector, so remove it if necessary. With the help of a friend, tightly roll up the fabric to make it easier to feed through the slot. Begin by inserting one end of the fabric into the slot and slowly feed it through while ensuring it rolls up evenly.
As you feed the fabric through, be careful not to twist or bunch it up. Once the fabric is completely fed through the slot, unroll it and position it evenly on the roller tube. Make sure it is centered and smooth out any wrinkles or creases.
Then, secure the fabric by fastening the springs or tension arms. These are typically located on either end of the roller tube and help keep the fabric taut. Finally, test the awning to ensure it is functioning properly.
Extend and retract it a few times to make sure the fabric rolls up and down smoothly. If everything looks and operates correctly, your new fabric is successfully installed! Remember, if this process seems overwhelming or you are unsure of any steps, it’s always best to consult a professional or seek assistance. With the right tools and knowledge, replacing the fabric on your RV awning can be a rewarding DIY project that enhances the appearance and functionality of your RV.
Step 5: Adjust the Tension
One important step when replacing the fabric on your RV awning is adjusting the tension. This is crucial to ensure that your new fabric is properly secured and will not sag or flap in the wind. Adjusting the tension may seem daunting, but it is actually a fairly simple process.
Start by extending your awning fully and then take a look at how the fabric sits on the roller tube. If it appears to be loose or sagging, you will need to tighten the tension. To do this, locate the tension knobs or screws on both sides of the roller tube.
Using a tool such as a wrench or screwdriver, turn the knobs or screws clockwise to tighten the tension. Be sure to apply equal tension on both sides to keep the fabric balanced. Once you have adjusted the tension to your liking, test the awning by retracting and extending it a few times to ensure that the fabric rolls up and out smoothly.
Adjustments may be necessary if the fabric still sags or if it becomes too tight. Taking the time to properly adjust the tension will help to prolong the life of your new awning fabric, ensuring that it stays securely in place for years to come.
Tips and Tricks for a Successful Fabric Replacement
Are you looking for tips and tricks on how to replace the fabric on your RV awning? Well, you’re in luck because we’ve got some expert advice to help you successfully tackle this task. First things first, you’ll need to measure your awning to ensure you purchase the correct size of fabric replacement. Once you have the new fabric, start by extending your awning fully and securing it in place.
Next, carefully remove the old fabric by taking out the screws or pins that are holding it in place. Be sure to pay attention to how the old fabric was attached so you can replicate the process with the new fabric. Once the old fabric is removed, lay the new fabric on top of the awning and start attaching it using the same screws or pins.
Make sure to pull the fabric taut as you go to prevent any sagging or wrinkles. Once everything is securely in place, give your new fabric a test run by extending and retracting your awning a few times. With these tips and tricks, you’ll be able to replace the fabric on your RV awning like a pro.
Check the Weather Forecast
“tips and tricks for a successful fabric replacement” Replacing fabric on furniture or other items can be a cost-effective way to update your space and give it a fresh new look. However, it’s essential to take some steps to ensure a successful fabric replacement. First and foremost, check the weather forecast.
This might seem unrelated, but it can play a crucial role in the process. If you’re planning to do the replacement outdoors, you’ll want to pick a day with good weather to avoid any complications. Rain or extreme heat can make the job more challenging, as the fabric may not adhere properly to the surface.
Additionally, consider the temperature and humidity levels, as these factors can affect the drying time of adhesives or paints used in the process. By keeping an eye on the forecast and choosing the right day, you can ensure a smooth and successful fabric replacement project.
Clean the Awning Frame
clean awning frame, fabric replacement
Work with a Helper
fabric replacement
Take Pictures of the Process
When it comes to replacing the fabric on your furniture, taking pictures of the process can be incredibly helpful. Not only will it serve as a visual reference to remind you how everything was put together, but it can also be a lifesaver if you run into any issues along the way. By documenting each step with photos, you’ll have a clear record of how the old fabric was removed and where everything goes when it’s time to put the new fabric on.
This can be especially helpful if you have a complex piece of furniture with intricate details or unique construction. Additionally, taking pictures of the process can serve as a great way to track your progress and see how far you’ve come. So grab your smartphone or camera and start snapping pictures before you dive into your fabric replacement project!
Conclusion: Enjoy Your New Awning Fabric
In conclusion, replacing the fabric on an RV awning is no small feat. It requires a delicate balance of skill, patience, and determination. But fear not, intrepid traveler! With the right tools, a dash of creativity, and a sprinkle of determination, you’ll have that old, worn-out fabric swapped out for a fresh, new one in no time.
And like a chameleon shedding its skin, your RV awning will transform from shabby to chic, ready to impress fellow campers with its stylish new look. So grab your tool belt, put your DIY hat on, and get ready to embrace the awesome power of fabric replacement. Adventure awaits, my friend!
FAQs
How do I replace the fabric on an RV awning?
To replace the fabric on an RV awning, follow these steps:
1. Roll up the awning completely and secure it in place.
2. Use a ladder to access the awning rail and remove the screws or bolts holding the old fabric in place.
3. Carefully slide the old fabric out of the awning rail, making sure not to damage any components.
4. Unroll the new fabric and align it with the awning rail, ensuring that it is straight and centered.
5. Secure the new fabric in place by inserting screws or bolts through the holes in the rail.
6. Roll out the awning partially to make sure the fabric is properly aligned and tensioned.
7. Finally, fully extend and retract the awning a few times to ensure everything is functioning correctly.
How often should I replace the fabric on an RV awning?
The frequency of replacing the fabric on an RV awning depends on various factors such as usage, weather conditions, and overall maintenance. On average, awning fabric can last between 5 to 15 years. However, it is recommended to inspect the fabric regularly for any tears, fading, or signs of deterioration. If you notice any significant damage, it might be time to replace the fabric sooner.
Can I replace the fabric on an RV awning myself, or do I need professional help?
It is possible to replace the fabric on an RV awning yourself if you have the necessary tools, basic mechanical skills, and follow proper instructions. However, if you are not comfortable or confident in doing the replacement yourself, it is recommended to seek professional help. They have the experience and expertise to ensure a proper and secure fabric replacement.
How much does it cost to replace the fabric on an RV awning?
The cost of replacing the fabric on an RV awning can vary depending on factors such as the size of the awning, type of fabric, and the labor charges if hiring a professional. On average, the cost can range from $200 to $500, but it is advisable to get quotes from different suppliers or service providers to get an accurate estimate.
What are some common issues that may require fabric replacement on an RV awning?
Some common issues that may require fabric replacement on an RV awning include:
– Tears or holes in the fabric caused by sharp objects, branches, or weather elements.
– Fading or discoloration of the fabric due to prolonged sun exposure.
– Mold or mildew growth on the fabric, especially if the awning has been stored wet or in a humid environment.
– Excessive wear and tear of the fabric, making it difficult to operate the awning smoothly.
Can I choose a different color or pattern for the new fabric on my RV awning?
Yes, you can choose a different color or pattern for the new fabric on your RV awning. The fabric is available in a wide range of colors and patterns to suit your preference and enhance the overall aesthetics of your RV. However, it is advisable to consider factors such as heat reflectivity, durability, and maintenance requirements when selecting the fabric.
Are there any maintenance tips to prolong the life of the fabric on an RV awning?
Yes, here are some maintenance tips to prolong the life of the fabric on an RV awning:
– Regularly clean the fabric with mild soap and water to remove dirt, debris, and stains. Avoid using harsh chemicals or abrasive cleaners.
– Keep the fabric dry before retracting the awning to prevent mold or mildew growth.
– Use a fabric protectant or UV-resistant spray to add an extra layer of protection against sun damage.
– Avoid leaving the awning extended during heavy rain or windstorms to prevent excessive stress on the fabric.