

Hey there! Are you ready to dive into the fascinating world of introductions? Well, buckle up because we’re about to take a deep dive into this essential aspect of writing. Just like meeting someone for the first time, the introduction sets the tone for the entire piece of writing. It’s like that captivating opening line in a book or the first few chords of a catchy song.
It grabs your attention, piques your curiosity, and leaves you wanting more. Think of it as the gateway to the rest of the content. A well-crafted introduction can hook the reader, make them eager to keep reading, and even leave a lasting impression.
So, let’s explore the art of introductions and discover how to make them shine! Whether you’re writing a blog post, an essay, or a novel, nailing the introduction is crucial. It’s your chance to make a strong first impression and establish your voice. But it’s not just about being captivating.
An effective introduction also provides a roadmap of what’s to come, giving the reader a clear sense of what they can expect from the piece. Crafting an engaging introduction requires a mix of creativity, precision, and knowing your audience. It’s all about finding the perfect balance between hooking the reader and providing relevant information.
In this blog series, we’ll explore a wide range of introduction techniques, from intriguing anecdotes and thought-provoking questions to powerful statistics and captivating metaphors. We’ll also delve into the importance of understanding your audience and tailoring your introduction to their needs and interests. So, whether you’re a seasoned writer looking to sharpen your skills or a beginner taking your first steps into the writing world, this blog series has got you covered.
Get ready to embark on a journey that will transform your introductions from mediocre to marvelous!
Table of Contents
Understanding RV Awnings
Changing the fabric of an RV awning may seem like a daunting task, but with a little knowledge and some basic tools, it can be done easily. First, you will need to remove the old fabric from the awning roller tube. Start by extending the awning to its full length and locking it into place.
Locate the screws or bolts that hold the fabric in place and remove them. Gently pull the fabric off the roller tube, being careful not to damage it. Once the old fabric is removed, lay out the new fabric on a clean, flat surface and align it with the roller tube.
Use a tape measure to ensure that the fabric is properly aligned and centered. Then, use a staple gun or fabric adhesive to secure the new fabric to the roller tube. Replace the screws or bolts to hold the fabric in place.
Finally, extend and retract the awning a few times to ensure that the fabric is properly tensioned. With these simple steps, you can easily change the fabric of your RV awning and give it a fresh new look.
What is an RV awning?
An RV awning is a great addition to any recreational vehicle, providing shade, protection from the elements, and a cozy outdoor living space. But what exactly is it? Well, picture this: it’s a sunny day, and you’re parked at your favorite camping spot. You want to relax outside, but the sun is relentless, and there’s no shade in sight.
That’s where an RV awning comes in. It’s a retractable cover that attaches to the side of your RV, extending outward to create a shaded area. Think of it as a portable roof that you can easily deploy when needed and retract when you’re ready to hit the road.
RV awnings typically consist of a sturdy frame and a fabric material that can withstand wind, rain, and even the scorching sun. Some even come with additional features like LED lights or wind sensors. So whether you’re lounging in a camping chair, hosting a cookout, or simply enjoying the view, an RV awning is a must-have accessory for any RV enthusiast.
Importance of maintaining RV awnings
RV awnings are an essential feature of any recreational vehicle, providing shade and protection from the sun, rain, and elements. Understanding the importance of maintaining RV awnings can help prolong their lifespan and ensure they continue to function properly. Just like any other part of an RV, awnings can suffer from wear and tear, weather damage, and general wear over time.
Regular maintenance is crucial to prevent issues such as tears, mold, and mildew. By cleaning awnings regularly and inspecting them for any signs of damage, RV owners can avoid costly repairs or the need for replacements. Additionally, maintaining RV awnings can contribute to the overall aesthetic appeal of the vehicle, enhancing its appearance and value.
So don’t neglect your RV awning, give it the attention it deserves and enjoy the benefits it brings on your next outdoor adventure.
Reasons for Changing RV Awning Fabric
Changing the fabric of an RV awning is a common maintenance task for many RV owners. There are several reasons why someone might want to change the fabric of their RV awning. One reason is that the current fabric may be worn out or damaged, either from age or from exposure to the elements.
This can result in tears or holes in the fabric, which can compromise the functionality and appearance of the awning. Another reason to change the fabric is to update the look of the RV. Over time, trends and personal preferences may change, and a new fabric can give the RV a fresh and updated look.
Lastly, changing the fabric can also provide an opportunity to upgrade the quality of the fabric. Some RV owners may choose to invest in a higher-quality fabric that provides better protection from the sun or is more durable. Overall, changing the fabric of an RV awning can improve both the aesthetics and functionality of the RV.
Worn-out fabric
RV awning fabric can become worn-out over time due to various reasons. One of the most common reasons is exposure to the elements. Sunlight, rain, wind, and other weather conditions can cause the fabric to fade, crack, or tear.
Another reason for fabric wear is frequent use. When you open and close your awning frequently, the fabric rubs against the frame and can become frayed or damaged. Additionally, accidents or mishaps can also lead to fabric damage, such as a tree branch falling on the awning or a pet scratching at it.
Whatever the reason, when your RV awning fabric becomes worn-out, it’s important to replace it to ensure the functionality and aesthetics of your awning.
Desire for a different color or pattern
One of the most common reasons why RV owners decide to change their awning fabric is the desire for a different color or pattern. Let’s face it, the standard fabric that comes with most RVs is often plain and unimaginative. RV owners who want to add a personal touch to their vehicle often opt for a fabric that reflects their style and personality.
Whether it’s a bold and vibrant color or a fun and eye-catching pattern, changing the awning fabric can instantly transform the look of the RV and make it stand out from the crowd. Plus, with so many options available on the market, RV owners can easily find a fabric that suits their taste and complements the overall design of their vehicle. So if you’re tired of the same old fabric on your RV awning, why not consider a change? Adding a splash of color or a unique pattern can make a world of difference and bring new life to your outdoor living space.
Damage or tears in the fabric
RV awning fabric can become damaged or torn over time due to several reasons. One common cause is exposure to harsh weather conditions such as strong winds, heavy rain, or intense sunlight. The constant battering from these elements can wear down the fabric and weaken its structural integrity.
Another reason for damage is accidents or mishaps that occur during the setup or takedown of the awning. It’s not uncommon for the fabric to get caught on something or snagged, resulting in tears or punctures. Additionally, wear and tear from regular use can also lead to fabric damage.
The constant folding and unfolding of the awning can cause friction and strain on the fabric, causing it to wear out or fray. When any of these situations occur, it’s important to replace the RV awning fabric to ensure the awning continues to provide shade and protection effectively.
Preparing for the Fabric Replacement
If you’re looking to give your RV awning a fresh new look, changing the fabric is a great option. Not only does it breathe new life into your outdoor space, but it also provides the added benefit of protecting you from the elements. So, how exactly do you go about changing the fabric of your RV awning? Well, first and foremost, it’s important to choose the right replacement fabric for your specific awning model.
Once you have the correct fabric, the next step is to carefully remove the old fabric from the roller assembly. This can often be done by simply sliding the fabric out of the track or by loosening any screws or bolts that may be securing it in place. With the old fabric removed, it’s time to install the new fabric.
This is typically done by threading the fabric through the roller assembly and then securing it in place using any necessary screws or bolts. It’s important to double-check that the fabric is properly aligned and tensioned to ensure a smooth and problem-free operation. With the fabric securely in place, give it a test run to make sure everything is working as it should.
And there you have it – a newly refreshed RV awning ready for your next adventure!
Taking accurate measurements
Accurate measurements are crucial when it comes to preparing for fabric replacement. Before replacing the fabric on any furniture or other items, it’s essential to take precise measurements to ensure a perfect fit. This is especially true for items such as couches or chairs, where the fabric needs to be stretched and tailored to fit the piece perfectly.
Taking accurate measurements involves using a tape measure to determine the length, width, and height of the item. It’s important to take into account any curves or angles in the furniture piece and measure accordingly. Additionally, you may need to measure any cushions or pillows separately to ensure they are covered properly.
By taking the time to measure accurately, you can avoid any issues with the replacement fabric not fitting properly and ensure a seamless and professional-looking result.
Ordering the right fabric
Ordering the right fabric is a crucial step in preparing for a fabric replacement project. Whether you are reupholstering a piece of furniture or creating new curtains, choosing the right fabric can make all the difference in the final result. There are a few key factors to consider when ordering fabric, such as the type of fabric, the color and pattern, and the quantity needed.
The type of fabric will depend on the project and the desired look and feel. For example, if you are reupholstering a sofa that will be used frequently, you will want to choose a durable fabric such as linen or microfiber. On the other hand, if you are making curtains for a child’s room, you may want to choose a lightweight cotton fabric that is easy to clean.
The color and pattern of the fabric should also be carefully considered to ensure it complements the overall aesthetic of the space. It can be helpful to order swatches of fabric before making a final decision to see how it looks in the actual space. Lastly, it is important to calculate the exact quantity of fabric needed to avoid running short or ordering too much.
Taking accurate measurements and consulting with a professional can help ensure that you order the right amount. By considering these factors and taking the time to research and order the right fabric, you will be setting yourself up for a successful fabric replacement project.
Gathering necessary tools and materials
fabric replacement
Step-by-Step Instructions for Changing the Fabric
So you’ve noticed that the fabric on your RV awning is looking a little worse for wear and it’s time for a change. Don’t worry, with a bit of time and effort, you can easily swap out the old fabric for a brand new one. Here’s a step-by-step guide on how to change the fabric of an RV awning.
First, start by carefully extending the awning to its full length. Make sure it is securely locked in place. Next, locate the rod that runs through the fabric sleeve.
This rod is usually located towards the front of the awning. Remove any pins or screws that are holding the rod in place and slide it out of the sleeve. Once the rod is removed, you can start to detach the old fabric from the awning frame.
Begin by removing any screws or bolts that are securing the fabric to the frame. Take care not to damage the frame or any other components. Once the fabric is free, carefully slide it off the frame.
Now it’s time to prepare the new fabric for installation. Lay it flat on a clean surface and ensure it is properly aligned. Double-check that the new fabric is the correct size and shape for your awning.
If necessary, trim any excess fabric. To attach the new fabric to the awning frame, start by sliding it onto the frame in the same manner the old fabric was removed. Make sure it is evenly distributed and snugly fits onto the frame.
Removing the old fabric
“changing fabric”
Attaching the new fabric
Changing the fabric on your furniture can give it a fresh new look and extend its lifespan. Attaching the new fabric may seem like a daunting task, but with the right tools and a bit of patience, you can do it yourself. Here are step-by-step instructions to guide you through the process.
Prepare your workspace: Clear a large, flat area where you can work comfortably. Lay down a clean sheet or a drop cloth to protect your furniture and the floor from any spills or stains.
Remove the old fabric: Carefully remove the existing fabric, taking note of how it was attached. Use a seam ripper or scissors to carefully cut the stitches and gently peel away the fabric from the frame.
Clean the frame: Before attaching the new fabric, take the time to clean the frame of your furniture. Remove any dirt or debris using a soft brush or a vacuum cleaner.
This will ensure that your new fabric adheres properly and looks its best. Cut the new fabric: Lay the new fabric flat on your workspace and place the old fabric pieces on top as templates.
Use fabric scissors to cut the new fabric to the same size and shape as the old pieces. Leave a few inches of extra fabric on all sides to allow for adjustments.
Ensuring proper tension and alignment
Changing the fabric on your sewing machine may seem like a daunting task, but with the right instructions, it can be a straightforward process. One important step in changing the fabric is ensuring proper tension and alignment. This ensures that your stitches will be even and secure.
To do this, start by making sure your sewing machine is turned off and unplugged. Next, remove the old fabric by gently pulling it away from the machine. Take note of how the fabric was threaded through the machine, as you will need to replicate this when adding the new fabric.
Before threading the new fabric, check the tension and alignment knobs on your machine. These knobs are typically located on the top or side of the machine and can be adjusted using a screwdriver or by turning them by hand. Make small adjustments to the tension and alignment knobs until the fabric is evenly tensioned and aligned.
Once you are satisfied with the tension and alignment, thread the new fabric through the machine following the same path as the old fabric. Be sure to follow any specific threading instructions provided by your sewing machine manufacturer. Once the fabric is threaded, you can reattach the presser foot and plug in the machine.
Test your stitches on a scrap piece of fabric to ensure that the tension and alignment are correct. If necessary, make further adjustments to the tension and alignment knobs until you achieve the desired results. By taking the time to ensure proper tension and alignment, you can create beautiful and professional-looking stitches every time you change the fabric on your sewing machine.
Tips and Tricks
Are you looking to give your RV awning a fresh new look? Changing the fabric of your RV awning is a fairly simple and cost-effective way to update the appearance of your outdoor space. The first step in this process is to remove the old fabric from the awning. Start by extending the awning fully so that it is easier to work with.
Next, locate the screws or fasteners that are holding the fabric in place and remove them using a screwdriver or drill. Once the fabric is free, carefully remove it from the awning frame. Now that the old fabric is gone, it’s time to install the new fabric.
Start by measuring the width and length of your awning frame so that you can order the correct size fabric. Most RV awning fabrics come with pre-installed grommets and a rope or track system for easy installation. Simply feed the rope or track through the grommets and slide the fabric into place on the awning frame.
Finally, secure the fabric in place with screws or fasteners and enjoy your refreshed RV awning!
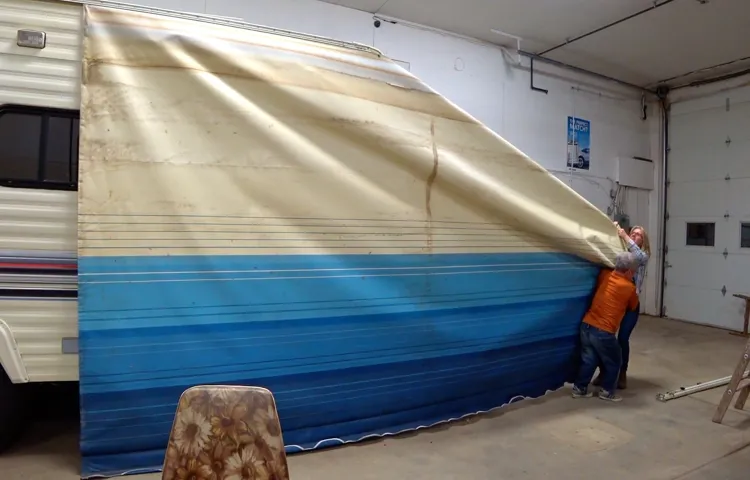
Using a helper for easier installation
Using a helper for easier installation is a great tip and trick when it comes to setting up a new system or software. It can save you time and frustration, especially if you are not familiar with the installation process. A helper can guide you through the steps, provide helpful tips, and troubleshoot any issues that may arise.
Think of it like having a personal assistant who can assist you every step of the way. Whether it’s installing a new computer program or setting up a smart home device, a helper can make the process much smoother. So, next time you find yourself facing an installation task, consider using a helper to make things easier for you.
Cleaning and maintaining the new fabric
cleaning fabric, maintaining fabric, fabric care, fabric cleaning tips
Conclusion
In conclusion, changing the fabric of an RV awning is like giving your vacation home on wheels a fashion makeover. Just like swapping out your old, worn-out jeans for a sleek, stylish pair, updating your awning fabric can completely transform the look and feel of your mobile sanctuary. But this isn’t just a cosmetic upgrade; it’s a practical one too.
By replacing the fabric, you’re not only adding a touch of personality to your outdoor space, but you’re also ensuring that your awning is functioning at its best. Say goodbye to pesky leaks, unsightly tears, and fading colors, and say hello to a canopy that’s as sturdy and reliable as your trusty road trip companion. Now, let’s not underestimate the sheer satisfaction that comes with tackling a DIY project like this.
As you measure, cut, and attach the new fabric, you’re essentially playing fashion designer and engineer all at once. The end result? A customized awning that not only fits your personal style but also showcases your resourcefulness and hands-on skills. So, as you embark on this awning adventure, remember to approach it with a sense of creativity and playfulness.
Embrace your inner Bob the Builder or Martha Stewart, and let your RV awning be the canvas for your outdoor masterpiece. Who knows, you might even inspire envy among fellow campers at the next campground, prompting them to initiate their own RV fabric revolution. In the end, changing the fabric of an RV awning is more than just a simple task; it’s an opportunity to breathe new life into your second home on wheels.
So grab your measuring tape, your sewing kit, and a whole lot of enthusiasm, and get ready to embark on a transformation that will make your RV the talk of the campground. Happy fabric swapping, my road tripping friends!
FAQs
How often should I change the fabric of my RV awning?
It is recommended to change the fabric of your RV awning every 3-5 years, or sooner if you notice any signs of wear and tear.
What tools do I need to change the fabric of my RV awning?
To change the fabric of your RV awning, you will need a ladder, a screwdriver, a wrench, and a replacement fabric specifically designed for your awning model.
Can I change the fabric of my RV awning myself, or do I need professional help?
It is possible to change the fabric of your RV awning yourself if you have some DIY experience. However, if you’re not confident in your abilities, it is advisable to seek professional help to ensure the job is done correctly.
How long does it take to change the fabric of an RV awning?
The time it takes to change the fabric of an RV awning can vary depending on your skill level and the specific awning model. On average, it can take anywhere from 2-4 hours.
What are the signs that indicate the need to change the fabric of my RV awning?
Signs that indicate the need to change the fabric of your RV awning include excessive fading, tears or holes in the fabric, mold or mildew growth, and difficulty retracting or extending the awning.
Can I use any fabric to replace my RV awning fabric?
It is recommended to use a replacement fabric specifically designed for your RV awning model. These fabrics are typically made of high-quality materials that are weather-resistant and durable.
Is it necessary to fully extend the awning before changing the fabric?
Yes, it is important to fully extend the awning before changing the fabric to ensure easy access and adequate workspace. Be sure to follow the manufacturer’s instructions for your specific awning model.