
So, you’ve noticed that your manual awning’s fabric is showing signs of wear and tear. Maybe it’s faded from years of exposure to the sun, or it’s starting to develop small tears and holes. Whatever the case may be, it’s time to replace the awning fabric.
But where do you start? How do you know which fabric to choose, and how do you go about replacing it? In this blog post, we’ll take you through the process step-by-step, so you can have your awning looking as good as new in no time. Let’s dive in!
Table of Contents
Introduction
If your manual awning is looking worn out or damaged, it may be time to replace the fabric. While this may seem like a daunting task, it’s actually quite simple if you follow the right steps. First, you’ll need to measure your current awning fabric to ensure you buy the correct size.
Once you have the new fabric, you’ll need to remove the old fabric from the roller tube and arms. This may require using a screwdriver or wrench to loosen any screws or bolts holding the fabric in place. Once the old fabric is removed, you can then attach the new fabric by sliding it onto the roller tube and attaching it to the arms using the screws or bolts.
It’s important to make sure the fabric is evenly tensioned and straight before tightening everything. With a little patience and attention to detail, you can have your manual awning looking brand new in no time.
Overview of the process of replacing awning fabric on a manual awning
“Replacing the fabric on a manual awning can be a daunting task, but with a little know-how, it is a DIY project that can save you money and give your outdoor space a fresh new look. Whether you are tired of the old, faded fabric or it has been damaged by weather or wear and tear, replacing the awning fabric can breathe new life into your awning. In this blog post, we will walk you through the process of replacing the awning fabric step by step, so you can confidently tackle this project on your own.
“
Step 1: Gather the necessary materials
So, you’ve decided it’s time to replace the fabric on your manual awning. Great choice! The first step in this process is to gather all the necessary materials. You’ll need a few things to get started.
First and foremost, you’ll need the new fabric for your awning. Make sure to measure the dimensions of your existing fabric so that you can purchase the correct size. You’ll also need a ladder or step stool to reach the height of your awning.
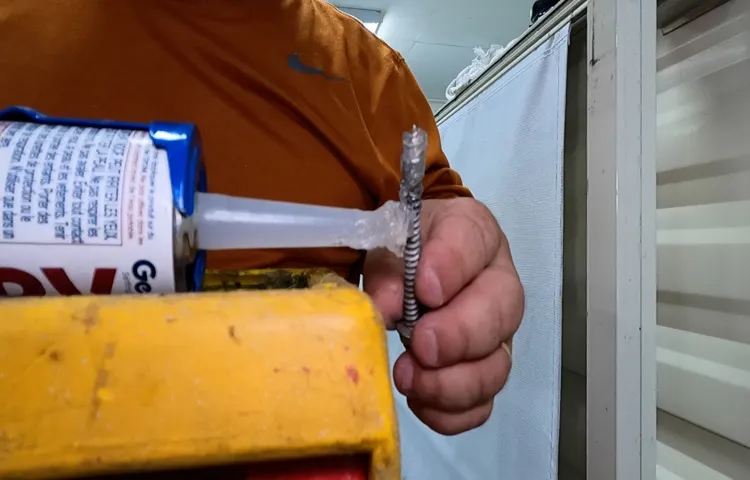
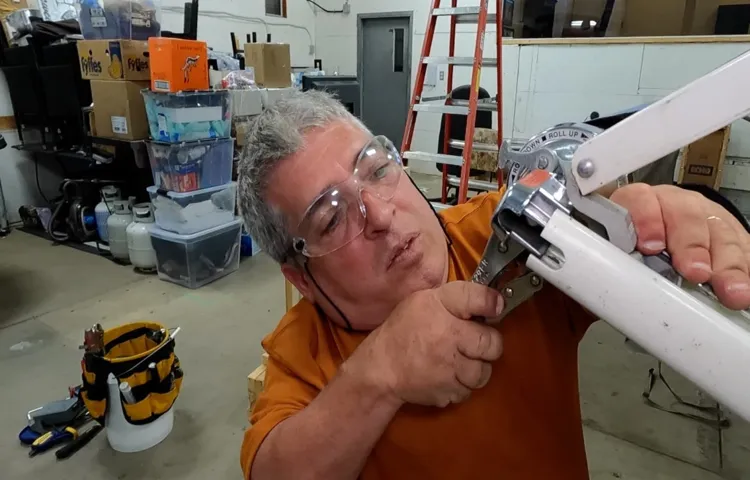
It’s important to prioritize safety during this project, so make sure you have a sturdy and stable platform to work from. Additionally, you’ll need some basic tools such as a screwdriver, pliers, and possibly a wrench, depending on your awning’s design. Having these tools on hand will make the process much smoother.
Finally, don’t forget to gather any additional materials specified by the manufacturer, such as replacement grommets or hooks. With everything gathered and ready, you’re well-prepared to take on the task of replacing your awning fabric.
List of materials needed for the replacement process
When it comes to replacing something, having all the necessary materials on hand can save you time and frustration. The same goes for replacing a part or component in your home. In this case, we are talking about gathering the necessary materials for a replacement process.
It is essential to have everything you need before you start, ensuring a smooth and efficient process. So, what materials do you need? Well, it depends on what you’re replacing, but here is a general list to get you started. First, you’ll need the new component or part that you’re replacing.
This could be anything from a faucet to a light switch. Next, you’ll need any tools required to remove the old component and install the new one. This could include a wrench, screwdriver, or pliers.
Additionally, you may need additional materials such as screws, nails, or adhesive to secure the new component in place. Lastly, make sure you have any safety equipment necessary, such as gloves or goggles, to protect yourself during the process. Having all these materials ready before you begin will make the replacement process much smoother and ensure that you can complete the task without any delays or interruptions.
Step 2: Remove the old fabric
Alright, let’s move on to the next step in replacing the fabric of your manual awning. Once you have gathered all the necessary tools and have removed the awning from its frame, it’s time to remove the old fabric. This step is crucial in ensuring a clean and smooth installation of the new fabric.
Start by carefully inspecting the fabric for any tears or damages, as you may need to make repairs or replace certain sections. Next, locate the stitching that holds the fabric in place. You’ll want to remove this stitching using a seam ripper or small scissors.
Be cautious not to damage the frame or any other components while doing so. Once you have removed the stitching, you can begin pulling the old fabric off the frame, starting from one end and working your way across. You may need to use a flat-head screwdriver or pliers to gently pry the fabric loose if it’s stuck in certain areas.
Once the old fabric is completely removed, take a moment to clean the frame and remove any debris or dirt that may have accumulated. This will ensure a clean and smooth surface for the new fabric to adhere to. With the old fabric removed and the frame cleaned, you’re now ready to move on to the next step in replacing the awning fabric.
Instructions on how to safely remove the old fabric from the awning
awnings, remove old fabric, safely, instructions
Step 3: Measure and cut the new fabric
Now that you have gathered your supplies and removed the old fabric, it’s time to move on to the next step – measuring and cutting the new fabric for your manual awning. This is a crucial step to ensure that your new fabric fits perfectly and functions properly. Start by measuring the length and width of your awning, making sure to include any overhangs or valances.
It’s always better to measure slightly larger than smaller, as you can always trim down the fabric if needed. Once you have your measurements, you can lay out your new fabric and use a straight edge and fabric marker to mark the dimensions. Take your time and be precise with your measurements and cuts to ensure a professional-looking installation.
Remember to leave extra fabric for any hems or seams that may be required. With patience and careful attention to detail, you’ll have your new awning fabric ready to install in no time.
Tips on accurate measurement and cutting of the new fabric
When it comes to measuring and cutting the new fabric for your project, accuracy is key. You want to make sure you have enough fabric to cover your desired area, but you don’t want to waste any either. One tip is to measure twice before making any cuts.
This will help ensure that you have the correct measurements and minimize the risk of cutting too much or too little fabric. Another tip is to use a sharp pair of fabric scissors. This will make cutting the fabric much easier and reduce the chances of fraying.
Additionally, consider using a ruler or measuring tape to ensure that your cuts are straight and even. Taking the time to measure accurately and make precise cuts will make a big difference in the final outcome of your project. So take your time, double-check your measurements, and cut with care.
Step 4: Attach the new fabric to the awning frame
Now that you have removed the old fabric from your manual awning frame, it is time to attach the new fabric. This step may seem intimidating, but with a little patience and the right tools, it can be a straightforward process. Start by laying out the new fabric and aligning it with the awning frame.
Make sure that it is centered and evenly positioned. Then, using a staple gun or a heavy-duty adhesive, start attaching the fabric to the frame. Begin at one end and work your way towards the other, making sure to pull the fabric taut as you go.
Secure the fabric in place every few inches to ensure it stays in place. Once you have attached the fabric to one side of the frame, repeat the process on the other side. Finally, check that the fabric is evenly stretched and adjust as necessary.
Congratulations! You have successfully replaced the fabric on your manual awning. Now you can sit back, relax, and enjoy the shade.
Detailed instructions on how to properly attach the new fabric to the awning frame
In order to properly attach the new fabric to the awning frame, you’ll need to follow a few simple steps. First, make sure you have the new fabric and any necessary tools or supplies at hand. Lay the fabric out flat and ensure it is the correct size and shape for your awning frame.
Next, carefully drape the fabric over the frame, making sure it is centered and aligned properly. Take your time to ensure that the fabric is taut and free of wrinkles. Once the fabric is in the correct position, begin attaching it to the frame using a staple gun or other appropriate fasteners.
Start at one corner and work your way around the frame, pulling the fabric tight as you go. Be sure to space the fasteners evenly to ensure a secure and even attachment. Once all of the fabric is attached, go over it again to ensure that it is secure and straight.
Trim any excess fabric if necessary. With these steps, you can confidently attach the new fabric to your awning frame and enjoy a refreshed, stylish awning.
Step 5: Adjust and secure the new fabric
Now that you have successfully removed the old awning fabric, it’s time to install the new one. This step is crucial to ensure that your awning functions properly and looks great. Start by laying out the new fabric on a clean surface and align it with the edges of the awning frame.
Make sure that the fabric is centered and evenly distributed. Once the fabric is in place, use a staple gun or fabric glue to secure it to the frame. Start at one corner and work your way around, making sure to pull the fabric taut as you go.
Be careful not to overstretch the fabric, as this can cause it to tear or warp over time. Once the fabric is securely fastened, trim any excess material using a sharp pair of scissors. Finally, take a step back and admire your handiwork.
Your awning is now sporting a brand new fabric and is ready to provide shade and protection for years to come.
Tips on properly adjusting and securing the new fabric to ensure proper functionality and longevity
When it comes to replacing the fabric on your furniture, one crucial step is adjusting and securing the new fabric properly. This will ensure that your furniture not only looks good but also functions well and lasts for a long time. Whether you’re reupholstering a chair, sofa, or any other furniture piece, here are some tips to help you get it right.
First, make sure the fabric is stretched tightly across the furniture and doesn’t sag or bunch up. This will give your furniture a smooth and professional finish. Use upholstery tacks or staples to secure the fabric in place, ensuring that it is firmly attached to the frame.
Additionally, take the time to smooth out any wrinkles or creases in the fabric, as these can affect the overall appearance and comfort of your furniture. Finally, make sure all the edges of the fabric are properly secured and trimmed, giving your furniture a neat and polished look. By following these tips, you can ensure that your newly upholstered furniture looks fantastic and stands the test of time.
So go ahead and give your furniture a makeover with confidence!
Step 6: Test the new fabric
Once you have removed the old fabric from your manual awning, it’s time to test the new fabric. Double-check that it is the correct size and shape for your awning before proceeding. Lay the fabric out flat on a clean surface and make sure it is free of any wrinkles or creases.
Then, carefully attach the fabric to the awning roller by securing the edge into the groove and using the appropriate awning cord or roller tube. Once the fabric is attached, extend the awning to its full length to ensure that it rolls out smoothly and evenly. Check for any signs of resistance or uneven tension, as this could indicate that the fabric is not properly attached or aligned.
Make any necessary adjustments before continuing. Additionally, it’s a good idea to test the fabric’s ability to withstand wind by gently tugging on it from different angles. This will give you an idea of its durability and how well it will hold up in outdoor conditions.
Overall, testing the new fabric before fully installing it will help ensure that you have a properly functioning and long-lasting manual awning.
Instructions on how to test the functionality and effectiveness of the new fabric
testing the functionality and effectiveness of the new fabric. Once the new fabric has been manufactured and integrated into the final product, it is crucial to test its functionality and effectiveness. This step ensures that the fabric meets the desired standards and performs as expected.
To begin testing, you can start by conducting a series of durability tests. The fabric should be subjected to different levels of wear and tear to determine its resistance to stretching, tearing, and shrinking. Another important aspect to consider is the fabric’s colorfastness.
This can be tested by exposing the fabric to different types of solvents and detergents and assessing whether the color remains intact. Additionally, it is essential to test the fabric’s breathability and moisture-wicking properties. This can be done by conducting tests that simulate real-life conditions, such as exposing the fabric to different levels of moisture and measuring its ability to keep the wearer dry.
By performing these tests, you can ensure that the new fabric meets the required functionality and effectiveness standards.
Conclusion
In conclusion, replacing the fabric on a manual awning may seem like a daunting task, but with a few simple steps and a dash of determination, you’ll have your awning looking fresh and fabulous in no time. Just remember to always measure twice and cut once, because as the saying goes, a taut sail makes for smooth sailing. So grab your tools, channel your inner Bob Ross, and let’s get ready to make a masterpiece out of your awning.
You’ll be the envy of the neighborhood, the talk of the town, and the maestro of shade. Happy awning adventures!”
Wrapping up the awning fabric replacement process and final tips for maintenance
Once you have successfully replaced the fabric on your awning, it is important to test it before considering the job complete. Testing the new fabric ensures that it is properly installed and functioning as it should. To test the fabric, simply extend the awning fully and then retract it back in.
Pay close attention to the smoothness of the movement and listen for any unusual sounds or resistance. You can also try opening and closing the awning multiple times to ensure that it is working consistently. If everything seems to be in order, then congratulations! Your awning fabric replacement process is complete.
However, it’s always a good idea to perform regular maintenance on your awning to keep it in good condition. This can include hosing down the fabric to remove any dirt or debris, checking the hardware for any signs of damage or wear, and keeping an eye out for any tears or rips in the fabric that may need repair. By properly maintaining your awning, you can prolong its lifespan and continue to enjoy its benefits for years to come.
FAQs
How often should I replace the fabric on a manual awning?
The frequency of fabric replacement depends on several factors, such as the climate and usage, but generally it is recommended to replace the fabric every 5-10 years.
What tools do I need to replace the fabric on a manual awning?
You will typically need a ladder, a screwdriver, pliers, a wrench, and a helper to assist with the process.
Can I replace the fabric on a manual awning by myself or do I need professional help?
It is possible to replace the fabric on a manual awning by yourself, but having some knowledge of basic DIY skills and following the manufacturer’s instructions is important to ensure a successful installation.
Is it difficult to replace the fabric on a manual awning?
While it requires some manual labor and attention to detail, replacing the fabric on a manual awning is generally considered a moderate DIY project that can be completed with careful planning and following instructions.
How long does it take to replace the fabric on a manual awning?
The time it takes to replace the fabric on a manual awning can vary depending on factors such as the size of the awning and your level of experience, but it can typically be completed within a few hours.
Is there a specific fabric I should use to replace a manual awning?
It is recommended to use a fabric specifically designed for awnings, as they are made to withstand outdoor conditions and provide durability. There are different types of fabrics available, such as canvas, vinyl, or polyester, so consider your specific needs and preferences.
Are there any tips or precautions I should keep in mind when replacing the fabric on a manual awning?
Some tips to keep in mind include measuring the awning properly before ordering the fabric, taking safety precautions when working at heights, and following the manufacturer’s instructions carefully. Additionally, it’s important to clean and maintain the awning regularly to prolong the lifespan of the new fabric.