
Hey there! Welcome to our blog. Today, we’re diving into the fascinating topic of “Introduction.” Yes, that’s right, we’re talking about the art of grabbing attention, setting the stage, and getting readers hooked from the very beginning.
Whether you’re a seasoned writer or just starting out, the introduction is a crucial part of any piece of writing. It’s like the opening act of a concert, the first impression that can make or break the entire experience. So, let’s embark on this journey together and explore the wonders of introductions! Imagine walking into a room full of strangers.
You want to make a good impression, right? The same goes for writing. Your introduction is your chance to make a connection with your readers, to pique their curiosity, and to set the tone for what’s to come. It’s like that first sentence in a book that makes you go, “I have to know more.
” Think of it this way: the introduction is like a trail of breadcrumbs, leading the reader into your piece and making them eager to discover what lies ahead. It’s like when you start watching a TV show and the opening scene instantly grabs your attention, making you binge-watch the entire series in one sitting. But here’s the thing – introductions aren’t just about grabbing attention.
They’re also about giving your readers a sneak peek into what they can expect from your writing. It’s like a movie trailer that teases the plot without revealing too much. In a few short paragraphs, you have the power to inform, entertain, and engage your audience.
So, whether you’re writing an essay, a blog post, or a novel, the introduction is your chance to shine. It’s where you can show off your creativity, your wit, and your ability to hook readers from the get-go. And with the right combination of storytelling, intrigue, and a sprinkle of magic, you can leave your audience wanting more.
Table of Contents
What is an RV Awning?
When it comes to enjoying the great outdoors, RVs provide the perfect solution for traveling and living comfortably. And one important feature of an RV is its awning. However, even though an RV awning is a great addition, it may need to be changed from time to time.
So, how do you change an RV awning? Well, the first step is to determine the type of awning your RV has. There are different types of awnings available, such as manual or electric retractable awnings. If you have a manual awning, you will need a few tools to remove the old awning fabric and install the new one.
On the other hand, if you have an electric awning, the process may be a bit more complicated and it is recommended to seek professional help. In either case, it is important to carefully follow the manufacturer’s instructions to ensure the proper installation of the new awning fabric. By changing your RV awning when needed, you can continue to enjoy your outdoor adventures with the comfort and shade that it provides.
Definition and purpose of an RV awning
RV awnings are an essential part of any recreational vehicle (RV) setup, providing shade and protection from the elements. But what exactly is an RV awning? Simply put, it is a retractable fabric cover that extends from the side of an RV, creating an additional outdoor living space. This space is typically used for relaxation, dining, or entertaining, allowing RV owners to make the most of their outdoor experience.
An RV awning is typically made of durable materials such as vinyl or acrylic, which are designed to withstand varying weather conditions. The awning can be easily extended and retracted using a manual or motorized system, giving RV owners the flexibility to adapt to different outdoor conditions. Whether you want to shield yourself from the sun, protect your outdoor furniture from rain, or simply create a cozy outdoor space, an RV awning serves an important purpose.
It enhances the overall RV experience by providing a comfortable and versatile outdoor living area. So, the next time you hit the open road in your RV, don’t forget to extend your awning and enjoy the benefits of outdoor living at its best.

When to Change Your RV Awning?
If you’re an avid RV traveler, you know that the awning is an essential part of your setup. It provides shade and protection from the elements, allowing you to enjoy the outdoors while still being comfortable. But just like any other part of your RV, the awning will eventually need to be replaced.
So, when should you change your RV awning? Well, there are a few signs to look out for. First, if you notice any tears or holes in the fabric, it’s time for a replacement. These can quickly worsen and compromise the integrity of the awning.
Additionally, if the awning is becoming difficult to open or close, or if it no longer rolls up straight, it may be time for a new one. Another indicator is if the frame or support arms are damaged or bent. This can affect the stability and safety of the awning, so it’s crucial to address the issue promptly.
Overall, it’s important to regularly inspect your RV awning for any signs of wear and tear, and to replace it when necessary to ensure your continued enjoyment on the road.
Signs that indicate the need for an awning replacement
RV awnings are not designed to last forever, and there are typically signs that indicate when it’s time for a replacement. One of the most obvious signs is when the awning fabric starts to show signs of wear and tear. If you notice any holes, tears, or fraying in the fabric, it’s time to consider replacing your awning.
Another sign that it’s time for a replacement is if the awning arms or hardware are damaged or not functioning properly. This could be due to rust, corrosion, or general wear and tear. Additionally, if you’re experiencing difficulties in extending or retracting the awning, it may be a sign that it needs to be replaced.
It’s important to pay attention to any strange noises or resistance when using the awning, as this could indicate underlying issues. Lastly, if you’ve had your awning for a long time and it’s simply outdated or no longer matches the aesthetic of your RV, it may be worth considering a replacement for purely cosmetic reasons. Ultimately, it’s important to regularly inspect and maintain your RV awning to ensure its longevity, but when these signs start to appear, it’s time to start thinking about a replacement.
Importance of regular maintenance
“RV awnings are a great addition to any recreational vehicle, providing shade and protection from the elements while you’re out on the road. However, like any other part of your RV, regular maintenance and timely replacement are essential to ensure their longevity and functionality. So, when should you change your RV awning? Well, there are a few telltale signs that it might be time for a replacement.
Firstly, if you notice any tears or holes in the fabric, it’s a clear indication that the awning has been damaged and needs to be replaced. Additionally, if your awning is becoming difficult to open or close, or if the arms or supports are showing signs of wear and tear, it’s probably time for a new one. Regularly inspecting your RV awning and addressing any issues promptly will not only ensure your comfort and safety but also save you from costly repairs down the line.
So, don’t neglect your RV awning and make sure to change it when the need arises!”
Tools and Materials You Will Need
When it comes to changing an RV awning, there are a few tools and materials that you will need to have on hand. First and foremost, you will need the new awning itself. Make sure to measure the length of your old awning before purchasing a new one to ensure the proper fit.
Additionally, you will need a ladder or step stool to reach the awning, as well as a power drill or screwdriver to remove any screws or bolts holding the awning in place. It’s also a good idea to have some sealant on hand to ensure a secure and watertight installation. Finally, a helping hand can be useful when it comes to holding the new awning in place during installation.
With these tools and materials, you’ll be ready to tackle the task of changing your RV awning.
List of necessary tools and materials
When it comes to tackling any DIY project, having the right tools and materials is essential. Whether you’re a seasoned pro or a beginner, having the correct tools can make all the difference in the success of your project. So, what tools and materials do you need for your next DIY venture? Well, it all depends on the task at hand.
For general home improvement projects, you’ll want to have a basic set of tools such as a hammer, screwdriver set, measuring tape, level, and a utility knife. These tools are versatile and will come in handy for a variety of projects around the house. In addition to these basic tools, you may also need more specialized tools depending on the specific project.
For example, if you’re planning on doing some plumbing work, you’ll need a pipe wrench and pliers. If you’re working on electrical projects, a voltage tester and wire cutters are a must. When it comes to materials, it’s important to gather all the necessary supplies before starting your project.
This may include things like screws, nails, sandpaper, paint, and any other materials specific to your project. By having the right tools and materials on hand, you’ll be well-equipped to tackle any DIY project that comes your way.
Step-by-Step Guide to Changing Your RV Awning
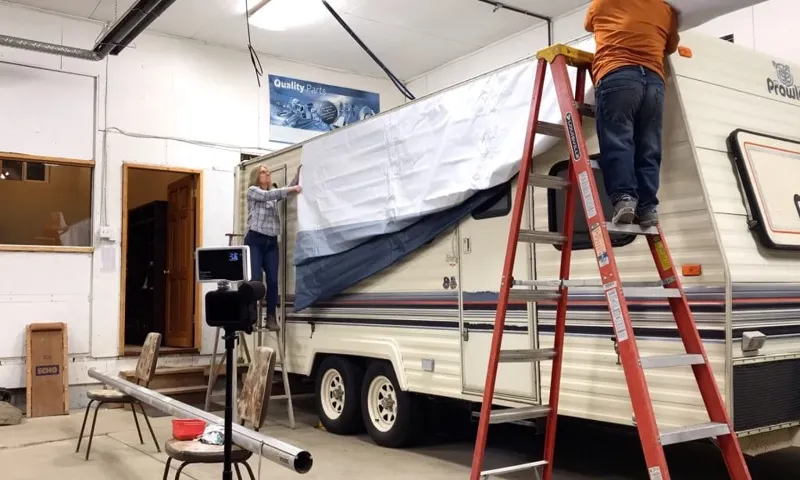
Changing the awning on your RV may seem like a daunting task, but with the right tools and a little know-how, it can be a relatively straightforward process. First, you’ll need to gather your materials: a replacement awning, a ladder, a drill, and a few screws. Once you have everything ready, start by extending your current awning to its full length.
Next, locate the screws that attach the awning to the RV and carefully remove them. Take note of how the awning is secured, as you will need to replicate this when installing the new one. Carefully take down the old awning and set it aside.
Now, it’s time to install the new awning. Begin by attaching the main support arms to the RV, lining them up with the existing holes. Secure them in place using the screws provided.
Next, attach the roller tube to the support arms, making sure it is centered and level. Once the roller tube is in place, attach the fabric of the new awning to the tube, ensuring it is evenly distributed. Finally, extend the awning to its full length and make any necessary adjustments.
With a little patience and some careful attention to detail, you’ll have your RV looking brand new in no time!
Preparation
rv awning replacement, RV awning installation, changing your RV awning
Removing the old awning
Changing the awning on your RV can be a daunting task, but with a little know-how and some patience, you can easily remove the old awning and install a new one. The first step in this process is to remove the old awning fabric. Start by rolling up the awning and securing it in place.
Then, carefully remove the screws or bolts that are holding the fabric in place. Once the screws are removed, gently pull the fabric out of the track and set it aside. Be careful not to damage the fabric as you remove it, as you may be able to reuse it or sell it later.
Once the fabric is removed, you can proceed to remove the roller tube, arms, and other hardware. This may involve removing more screws or bolts, so be sure to keep track of all the fasteners you remove. Take your time to ensure that you are removing everything properly and safely.
Once all the hardware is removed, you can then install your new awning.
Installing the new awning
“RV awnings have a way of transforming your outdoor space and making it more comfortable and enjoyable. However, over time, they can become worn out or damaged, and it may be necessary to replace them. If you’re wondering how to install a new awning on your RV, fear not! In this step-by-step guide, we’ll walk you through the process so you can enjoy a brand new awning in no time.
From gathering the necessary tools to measuring and removing the old awning, we’ll cover it all. So let’s get started and give your RV a fresh new look!”
Final touches and adjustments
Changing your RV awning can be a straightforward process with the right steps and tools. After preparing the area and removing the old awning, it’s time to install the new one. Start by lining up the top rail of the awning with the brackets on your RV, making sure it is level.
Then, slide the awning into place and secure it with the appropriate screws or bolts. Double-check that everything is secure and tight before moving on. Once the awning is securely attached, open it up and check for any adjustments that may be needed.
This could include tightening or loosening the tension or adjusting the angle of the awning. Take the time to make any necessary tweaks to ensure the awning is functioning properly. Finally, give your new awning a test run by opening and closing it a few times to ensure smooth operation.
Taking these final touches and adjustments will help guarantee that your new RV awning is ready for all your outdoor adventures.
FAQs – Common Questions About Changing an RV Awning
If you’re wondering how to change an RV awning, you’re not alone. It’s a common question among RV owners who are looking to update or replace their awnings. The process can seem daunting at first, but with the right tools and a little bit of know-how, it can be a relatively straightforward task.
The first step is to measure your RV awning to determine the correct size for your replacement. Once you have the correct measurements, you can then remove the old awning by carefully unrolling it and disconnecting any attachments. Installing the new awning is simply a matter of reversing the removal process and securing it in place.
It’s important to follow the manufacturer’s instructions and take any necessary safety precautions. With a little time and effort, you’ll have a fresh new awning for your RV in no time.
Can I change my RV awning by myself?
Yes, you can change your RV awning by yourself! Many RV owners choose to replace their awnings on their own to save money and have control over the process. However, it’s important to note that this task does require some skill and basic tools. Before you begin, you should carefully read the instructions provided by the awning manufacturer and gather all the necessary materials.
You will need a ladder to reach the awning, as well as a socket or wrench to remove the bolts holding it in place. It’s also a good idea to have a friend or family member to help you during the process, as the awning can be heavy and difficult to maneuver on your own. Overall, with the right tools and a little patience, changing your RV awning can be a manageable DIY project.
How long does it take to change an RV awning?
“How long does it take to change an RV awning?” Changing an RV awning is a common task that many RV owners want to tackle themselves. One of the most frequently asked questions about this process is how much time it takes. Well, the answer can vary depending on a variety of factors.
In general, changing an RV awning can take anywhere from a couple of hours to a full day. The time it takes will depend on factors such as the size and type of awning, the level of experience of the person doing the job, and any unforeseen complications that may arise. If you are a beginner or have never changed an RV awning before, it may take you longer to complete the task.
It’s essential to read through the manufacturer’s instructions and gather all the necessary tools before starting. Taking your time and following the steps carefully will help ensure a successful awning replacement. On the other hand, if you have experience or have changed an RV awning in the past, the process may go much quicker.
The more familiar you are with the steps and have the right tools readily available, the smoother the process will be. To get a more accurate estimate of how long it will take to change your specific RV awning, it’s best to consult the awning manufacturer’s instructions or consult with an RV professional. They will be able to give you a better idea of the time frame based on the specific awning model and your level of experience.
So, whether you’re a beginner or a seasoned RVer, changing an RV awning is a task that can be accomplished with the right tools and instructions. While it may take some time and effort, the end result of a fresh, new awning will be worth it.
What are some common issues when changing an RV awning?
When it comes to changing an RV awning, there are a few common issues that may arise. One common issue is difficulty removing the old awning fabric. Over time, the fabric can become stuck or worn, making it challenging to remove.
This can require some extra effort and possibly the use of tools to carefully remove the old fabric without damaging the awning frame. Another common issue is aligning the new awning fabric correctly. Installing the new fabric may require careful measurement and alignment to ensure it is centered and properly secured to the awning frame.
This can take some time and patience, especially for those who are new to RV awning replacement. Additionally, there may be issues with the awning roller or arms. If the roller or arms are damaged or worn, they may need to be repaired or replaced along with the awning fabric.
This can add additional time and cost to the awning replacement process. Overall, changing an RV awning can be a DIY project but can also have its challenges. It is important to carefully follow the manufacturer’s instructions and take the necessary precautions to ensure a successful and safe awning replacement.
If unsure, it is recommended to seek the assistance of a professional for guidance or assistance.
Conclusion
So there you have it, a step-by-step guide on how to change a RV awning. With a little bit of effort and some handy tools, you can transform your old, worn-out awning into a brand new one that will make your neighbors jealous at the campground. Just remember to measure twice and cut once, because as they say in the RV world, “measurements are like campfire jokes – you can never have too many, but you definitely don’t want to end up with one that falls flat!” Happy awning changing, fellow adventurers!”
FAQs
How do I change a RV awning?
To change a RV awning, you will first need to remove the old awning by unscrewing it from the RV. Next, you will need to measure the size of the awning fabric and purchase a replacement. Once you have the new awning fabric, you can attach it to the RV by sliding it into the roller tube and securing it with screws. Finally, you can extend the awning and test it to ensure it is working properly.
What tools do I need to change a RV awning?
To change a RV awning, you will likely need the following tools: a screwdriver or drill with the appropriate bits, a tape measure, a ladder or step stool (depending on the height of your RV), and possibly a helper to assist with holding the awning in place during installation.
Can I change a RV awning by myself or do I need professional help?
While it is possible to change a RV awning by yourself, it is recommended to have a helper, especially for larger awning installations. The awning can be heavy and difficult to maneuver, so having an extra set of hands can make the process easier and safer. If you are not confident in your DIY skills, or if your awning installation requires extensive repairs or modifications, it may be best to hire a professional to do the job.
How long does it take to change a RV awning?
The time it takes to change a RV awning can vary depending on the size of the awning and your level of experience. On average, it can take anywhere from 1-3 hours to remove the old awning and install a new one. However, this timeframe may be longer if there are any complications or if you are unfamiliar with the process.
How often should I change my RV awning?
The lifespan of a RV awning can vary depending on factors such as the quality of the awning fabric, exposure to weather conditions, and frequency of use. However, on average, RV awnings last around 5-10 years. If you notice any signs of damage, such as tears, fading, or difficulty operating the awning, it may be time to consider replacement.
Can I change the color or style of my RV awning?
Yes, you can change the color or style of your RV awning by purchasing a replacement fabric in the desired color or pattern. Most RV awning manufacturers offer a range of fabric options to choose from, allowing you to customize the look of your RV.
Are there any safety precautions I should take when changing a RV awning?
When changing a RV awning, it is important to take certain safety precautions. Make sure to use a sturdy ladder or step stool and have someone hold it steady for you. Wear protective gloves and safety glasses to prevent any injuries while handling tools or sharp edges. If you are working on a tall RV, consider using a safety harness or tether to prevent falls. Always follow the manufacturer’s instructions and guidelines for installation to ensure proper and safe installation.