

Hey there! Are you interested in learning more about the fascinating world of “Introduction”? Well, you’re in the right place! In this blog, we’ll dive into the ins and outs of introductions, explore their importance, and discover how to create an engaging and captivating one for any piece of writing. Think of an introduction as the front door to your written work. It’s the first thing your readers encounter, and it’s your chance to grab their attention, set the tone, and lay the groundwork for what’s to come.
Just like a catchy hook in a song or an opening scene in a movie, a well-crafted introduction can draw readers in and make them eager to explore further. But what makes a great introduction? Well, it’s all about striking the right balance between intrigue and information. You want to pique your readers’ curiosity without giving away too much, leaving them wanting more.
It’s like tossing breadcrumbs along a trail, guiding your readers deeper into the forest of your ideas. An effective introduction should also give readers a clear sense of what to expect from the rest of the piece. It’s like a roadmap that points out the key points and themes they’ll encounter along the way.
By providing this roadmap, you’re helping your readers navigate the terrain, ensuring they stay engaged and connected to your writing from start to finish. So whether you’re writing a blog post, an essay, or even a novel, mastering the art of introductions is essential. With the right introduction, you can captivate your audience, make a lasting impression, and set the stage for a memorable reading experience.
In the upcoming blog posts, we’ll explore different types of introductions, discuss proven strategies for making a strong first impression, and provide practical tips on how to craft compelling opening paragraphs. We’ll also delve into the psychology behind introductions, uncovering the secrets of what makes them so effective at hooking readers. So if you’re ready to take your writing skills to the next level and become a master of introductions, stick around! Together, we’ll unlock the power of that crucial first impression and learn how to leave a lasting impact on our readers.
Get ready to captivate, engage, and inspire with the art of introduction. Let’s dive in!
Table of Contents
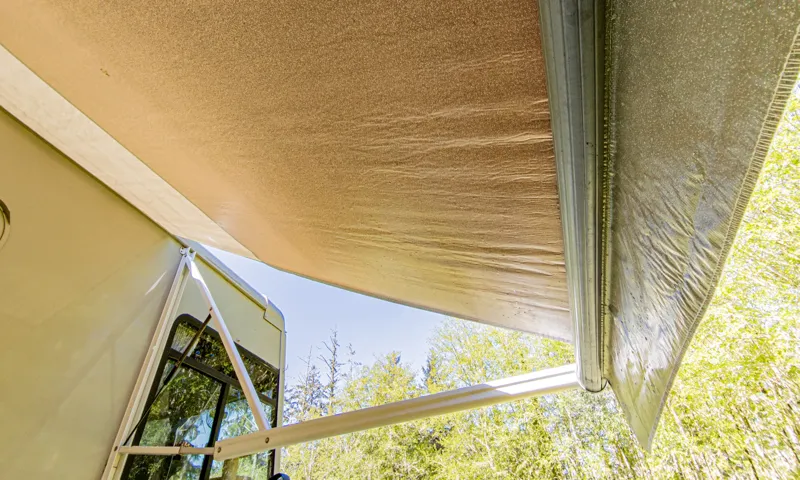
Why Waterproof Your RV Awning?
One important aspect of maintaining your RV awning is making sure it is waterproof. If you’re wondering how to waterproof your RV awning, there are a few steps you can take to ensure it is protected from rain and other elements. First, you can apply a waterproofing spray or solution to the fabric of the awning.
This will create a barrier that repels water and prevents it from seeping through. Additionally, you can check for any holes or tears in the awning and patch them up using a waterproof patching material. This will help to prevent water from entering through these areas.
Finally, it’s important to regularly clean and maintain your awning to keep it in good condition. This includes removing any debris or dirt that has accumulated and ensuring that the awning is properly stored when not in use. By taking these steps, you can make sure your RV awning is protected and ready for your next adventure.
Protect from Rain and Moisture
“RV awnings are a valuable addition to any outdoor adventure, providing shade and protection from the sun’s harsh rays. But what about rain and moisture? It’s important to consider waterproofing your RV awning to ensure it can withstand the elements and keep you dry. Nobody wants to experience an unexpected downpour while enjoying a picnic or relaxing under their awning, only to find themselves scrambling to find shelter.
By waterproofing your awning, you can enjoy peace of mind knowing that no matter the weather, you’re protected. Just like a raincoat keeps you dry during a storm, waterproofing your RV awning acts as a shield, preventing water from seeping through and ruining your outdoor experience. So, why take the risk of getting wet when you can easily invest in waterproofing and enjoy your time outdoors rain or shine?”
Prevent Mold and Mildew Growth
waterproof RV awning, prevent mold and mildew growth
Extend Lifespan of Awning Fabric
waterproof RV awning When it comes to your RV awning, one of the best ways to extend its lifespan and keep it looking great for years to come is by waterproofing it. But why is waterproofing your RV awning so important? Well, think about it like this: your awning is constantly exposed to the elements, from rain and snow to sun and dirt. Over time, all of these things can take a toll on the fabric, causing it to fade, become brittle, and potentially even tear.
By waterproofing your awning, you create a protective barrier that helps to repel water and keep it from seeping into the fabric. This not only helps to prevent damage from rain and snow but also helps to keep your awning cleaner and easier to maintain. Plus, a waterproof awning gives you the freedom to enjoy the great outdoors even when the weather isn’t cooperating, keeping you dry and comfortable.
So, if you want to keep your awning looking its best and maximize its lifespan, consider waterproofing it today.
Choosing the Right Waterproofing Product
If you’re planning on using your RV awning during the rainy season, it’s important to make sure it’s properly waterproofed. One way to do this is by using a waterproofing product specifically designed for RV awnings. These products are typically spray-on or brush-on formulas that create a protective barrier on the fabric, preventing water from seeping through.
When choosing a waterproofing product, it’s important to consider factors such as the type of fabric your awning is made of and the level of waterproofing you need. Additionally, reading customer reviews and doing research on the different products available can help you make an informed decision. By taking the time to properly waterproof your RV awning, you can ensure that it will last for years to come, even in the harshest weather conditions.
So, don’t let a rainy day ruin your outdoor plans – invest in a quality waterproofing product for your RV awning and enjoy your time on the road, rain or shine.
Consider the Awning Material
When it comes to choosing the right waterproofing product for your awning, you want to make sure you pick the right material. The material you choose will determine how well your awning can withstand the elements and keep you protected from the rain. There are a few different options to consider when it comes to awning material, each with its own advantages and disadvantages.
One popular material is vinyl, which is known for its durability and resistance to water. It’s also relatively low maintenance and easy to clean. Another option is canvas, which is a more traditional choice.
Canvas is known for its breathability and ability to withstand heavy rain, but it may require more maintenance and needs to be properly waterproofed. Ultimately, the right awning material will depend on your specific needs and budget. So, take some time to consider the different options and choose the material that will best suit your needs and protect you from the rain.
Evaluate Waterproofing Options
waterproofing options
Read Customer Reviews
Choosing the right waterproofing product can be a daunting task, with so many options available in the market. One useful strategy to help make your decision is to read customer reviews. These reviews can provide valuable insights into the effectiveness, durability, and overall quality of different waterproofing products.
By hearing from people who have actually used the product, you can get a better understanding of its performance and whether it will meet your specific needs. Reading customer reviews can also help you identify any potential drawbacks or issues that may not be highlighted by the manufacturer. This can save you time and money in the long run by avoiding products that may not live up to their promises.
So, before making your final decision, take the time to read customer reviews and gather as much information as possible to choose the right waterproofing product for your needs.
Preparing the Awning for Waterproofing
If you want to enjoy your RV awning all year round, it’s important to make sure it’s properly waterproofed. This will help protect it from the elements and keep it looking new for longer. The first step in waterproofing your awning is to clean it thoroughly.
Start by brushing off any dirt or debris with a broom or a soft brush. Then, use a mild detergent mixed with warm water to gently scrub away any stains or marks. Rinse the awning thoroughly with a hose, making sure to remove any soap residue.
Once the awning is clean, you can apply a waterproofing spray or solution. This will help to seal the fabric and prevent water from seeping through. Be sure to follow the instructions on the product carefully and apply it evenly across the entire surface of the awning.
Allow the waterproofing solution to dry completely before retracting or folding up the awning. Regularly inspect the awning for any signs of wear or damage, and reapply waterproofing as needed to keep it protected. With the proper care and maintenance, your RV awning will stay waterproof and provide you with years of enjoyment.
Clean the Awning Thoroughly
preparing the awning for waterproofing, clean the awning thoroughly
Inspect for Damages
When preparing your awning for waterproofing, it’s crucial to first inspect it for any damages. Take a close look at the fabric, seams, and frame to ensure there are no tears, rips, or signs of wear and tear. Look out for any loose or missing screws or bolts that may need to be tightened or replaced.
Additionally, check for any mold or mildew growth, as this can be a sign of water damage. By thoroughly inspecting your awning before waterproofing, you can address any issues upfront and ensure that your waterproofing efforts are effective in protecting your awning from the elements.
Remove Any Existing Waterproofing
When preparing to waterproof your awning, it’s crucial to start with a clean slate. This means removing any existing waterproofing that may be present. Waterproofing can deteriorate over time, causing it to become less effective in protecting your awning from the elements.
To remove the waterproofing, you can use a variety of methods. One option is to use a pressure washer to gently wash away the existing waterproofing. Another option is to use a specialized waterproofing remover, which can be found at most hardware stores.
Once the old waterproofing has been removed, you’ll be ready to apply a fresh coat and ensure your awning is fully protected.
Applying the Waterproofing Product
Looking to protect your RV awning from the elements? One of the best ways to do this is by applying a waterproofing product. Waterproofing your RV awning can help extend its lifespan and prevent damage from rain, sun, and other outdoor elements. The process is fairly simple and can be done with just a few materials.
First, make sure your awning is clean and dry. Remove any dirt or debris with a broom or brush. Next, choose a waterproofing product specifically designed for awnings.
These products come in various forms, such as sprays or liquid solutions. Apply the waterproofing product evenly to the entire surface of your awning, making sure to cover all areas thoroughly. Once applied, allow the product to dry completely before retracting or using your awning.
It’s important to note that waterproofing products may require reapplication over time, especially if your awning is exposed to harsh weather conditions frequently. By taking the time to properly waterproof your RV awning, you can ensure it stays protected and in great condition for years to come.
Follow Manufacturer’s Instructions
Applying a waterproofing product to your home is an important step in protecting it from damage caused by water. However, it is crucial to follow the manufacturer’s instructions to ensure that the product is applied correctly and effectively. The instructions will provide specific guidelines on how to prepare the surface, how much product to use, and the best application method.
By following these instructions, you can achieve the best results and ensure that the waterproofing product bonds properly to the surface. It is also important to note that different products may have different application requirements, so always refer to the specific instructions for the product you are using. Taking the time to follow these instructions will help you avoid any potential issues and ensure that your waterproofing efforts are successful.
So remember, always read and follow the manufacturer’s instructions when applying a waterproofing product to your home.
Apply Evenly and Generously
waterproofing product, apply evenly, apply generously
Pay Attention to Seams and Edges
When it comes to waterproofing a surface, paying attention to the seams and edges is crucial. These are the vulnerable areas where water can easily seep through if not properly sealed. To apply the waterproofing product effectively, start by thoroughly cleaning the surface and ensuring it is dry.
Then, carefully apply the product along the seams and edges using a brush or roller, making sure to cover any gaps or cracks. It’s important to be thorough and ensure complete coverage, as even the smallest opening can lead to water damage over time. Think of it like filling in the gaps between puzzle pieces – every seam and edge needs to be sealed tightly to prevent water from getting in.
So take your time, be meticulous, and don’t overlook these critical areas when applying your waterproofing product.
Curing and Testing the Waterproofing
Have you ever been caught in a downpour while enjoying a beautiful day outside in your RV? It can put a damper on your outdoor plans and even cause damage to your awning. That’s why it’s essential to waterproof your RV awning. One of the most effective ways to do this is by using a waterproofing spray.
These sprays are specifically designed to repel water and prevent it from soaking into the fabric of your awning. Simply spray the waterproofing solution evenly over the entire awning, making sure to cover all areas. Be sure to let it dry completely before retracting the awning to avoid any sticky residue.
Testing the effectiveness of the waterproofing is also crucial. You can do this by spraying water on the awning and observing if it beads up and rolls off or if it soaks into the fabric. If the water beads up, then you know your waterproofing efforts have been successful.
If it soaks in, you may need to reapply the waterproofing spray or consider alternative methods of waterproofing. So, go ahead and waterproof your RV awning to ensure a dry and enjoyable outdoor experience, rain or shine!
Allow Sufficient Drying Time
Allow Sufficient Drying Time
Perform a Water Test
water test, curing, waterproofing
Check for Any Leaks or Imperfections
waterproofing, leaks, imperfections, curing, testing When it comes to waterproofing, a crucial step in the process is checking for any leaks or imperfections. After all, the last thing you want is to invest time and money into waterproofing only to discover that your efforts have been in vain. So, how can you ensure that your waterproofing is up to par? One method is through curing and testing.
Curing involves allowing the waterproofing materials to set and harden, ensuring a strong and durable bond. This process can take some time, depending on the type of waterproofing you are using. Once the curing process is complete, it’s time to put your waterproofing to the test.
Testing the waterproofing involves creating conditions that mimic potential water exposure and checking for any signs of leakage. This can be done by spraying water onto the surface or even immersing it in water for a period of time. By doing so, you can identify any areas where the waterproofing might be compromised.
If you do come across leaks or imperfection during testing, don’t panic. It doesn’t necessarily mean that your waterproofing has completely failed. In many cases, it may just be a matter of addressing some minor issues, such as filling in a small hole or reinforcing a weak spot.
Remember, waterproofing is not a one-time task. It’s an ongoing process that requires regular maintenance and inspection. By checking for leaks and imperfections and addressing them promptly, you can ensure that your waterproofing remains effective in protecting your property against water damage.
So, don’t neglect this important step and take the time to secure your property from potential water intrusion.
Maintaining the Waterproof Coating
If you’re an RV owner, you know the importance of keeping your awning in tip-top shape. One crucial aspect of awning maintenance is ensuring that it remains waterproof. Over time, the waterproof coating on your RV awning may begin to wear off, exposing it to the elements and potentially leading to leaks and damage.
To maintain the waterproofing on your RV awning, there are a few steps you can take. First and foremost, regularly clean your awning to remove dirt and debris that can degrade the waterproof coating. Use a mild soap or specialized awning cleaner and a soft brush or sponge to gently scrub the surface.
After cleaning, thoroughly rinse off the soap residue and allow your awning to dry completely before retracting it. Once dry, you can apply a waterproofing agent specifically designed for awnings. This will help restore the protective coating and ensure that your awning remains waterproof.
Remember to follow the manufacturer’s instructions when applying the waterproofing agent and reapply as necessary. By taking these simple steps, you can help prolong the life of your RV awning and keep it waterproof for years to come.
Regular Cleaning and Inspection
Regular cleaning and inspection are essential for maintaining the waterproof coating on any surface. Over time, dirt, debris, and other contaminants can build up on the coating, compromising its ability to repel water. To prevent this, it’s important to regularly clean the surface using appropriate cleaning products and techniques.
This will not only remove any dirt and grime but also help to maintain the integrity of the waterproof coating. In addition to cleaning, regular inspection is important to identify any signs of damage or wear. This could include cracks, peeling, or bubbling in the coating.
By catching these issues early, you can address them promptly and prevent further damage to the waterproofing. Overall, regular cleaning and inspection are simple yet effective ways to prolong the life and effectiveness of the waterproof coating, ensuring that it continues to provide the protection you need.
Reapply Waterproofing as Needed
waterproofing, waterproof coating, reapply waterproofing, maintaining waterproof coating
Conclusion
And there you have it, folks! Your step-by-step guide on how to waterproof your RV awning. Just remember, an awning that’s protected from the rain is like a lucky charm for your outdoor adventures. It’s your secret weapon against the elements and your ticket to a dry and cozy camping experience.
So, don’t let a leaky awning rain on your parade – follow these tips and tricks to keep your RV awning high and dry. Happy travels and waterproofing!”
FAQs
How long does a waterproof RV awning last?
The longevity of a waterproof RV awning depends on the quality of materials and how well it is maintained. On average, a well-maintained waterproof RV awning can last anywhere from 5 to 10 years.
Can I waterproof my RV awning myself?
Yes, you can waterproof your RV awning yourself. There are various waterproofing products available in the market that you can use to seal the fabric of your awning.
What is the best method to waterproof an RV awning?
The best method to waterproof an RV awning is to use a waterproofing spray specially designed for outdoor fabrics. Make sure to follow the instructions provided by the manufacturer for the best results.
How often should I waterproof my RV awning?
It is recommended to waterproof your RV awning at least once a year, or as needed. Regularly inspecting the condition of the awning and reapplying waterproofing when necessary will help extend its lifespan.
Can waterproofing my RV awning prevent mold and mildew growth?
Yes, waterproofing your RV awning can help prevent mold and mildew growth. The waterproofing seal will create a barrier that helps repel water and prevent moisture from seeping into the fabric, reducing the chances of mold and mildew formation.
Are there any specific maintenance tips for a waterproof RV awning?
Yes, there are some maintenance tips you can follow to keep your waterproof RV awning in good condition. These include regularly cleaning the awning, avoiding sharp objects that can tear the fabric, and promptly repairing any damages or tears.
Can I still retract my RV awning after waterproofing it?
Yes, you can still retract your RV awning after waterproofing it. The waterproofing spray is designed to create a protective layer without interfering with the retractable functionality of the awning. However, it is advisable to let the waterproofing spray dry completely before retracting the awning.