
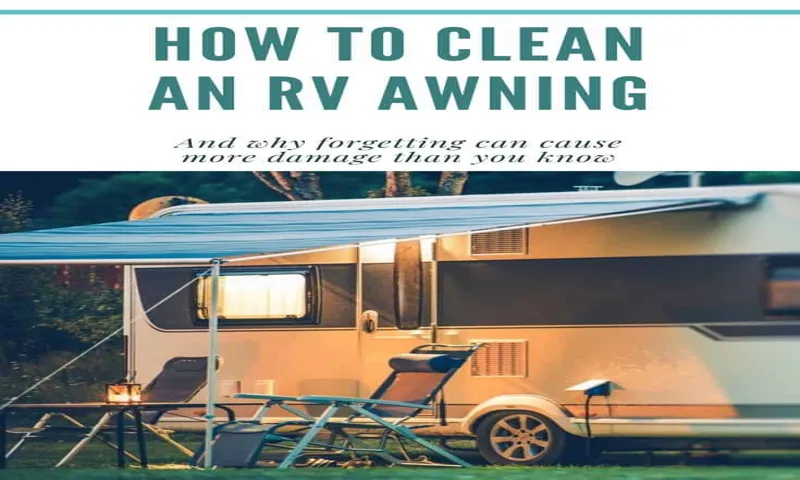
Do you love embarking on road trips in your trusty RV? There’s something magical about the freedom of the open road, with all the comforts of home right there with you. But as much as we love RVing, there’s one chore that often gets overlooked – cleaning the awning. Neglecting your RV awning can lead to unsightly stains, mold, and even damage.
But don’t worry, cleaning your RV awning doesn’t have to be a daunting task. In this step-by-step guide, we’ll show you how to easily and effectively clean your RV awning, so it looks as good as new. Say goodbye to stains and hello to a beautiful, pristine awning that’s ready for your next adventure.
So grab your cleaning supplies and let’s get started!
Table of Contents
Why Clean Your RV Awning Regularly
When it comes to cleaning your RV awning, it’s important to use the right products to ensure a thorough and effective cleaning process. But what should you clean your RV awning with? There are a few options to choose from, each with its own benefits. One popular choice is a mild soap and water mixture.
This gentle solution can help remove dirt, stains, and mildew without causing any damage to the awning fabric. Another option is a specialized RV awning cleaner, which is designed to effectively remove tough stains and grime. These cleaners are often formulated to be safe for use on various types of awning materials, so you can clean your awning with confidence.
Remember to follow the instructions provided with your chosen cleaning product and to test it on a small, inconspicuous area before using it on the entire awning. By cleaning your RV awning regularly with the right products, you can ensure it stays in great condition and prolong its lifespan.
Prevent Damage and Prolong Lifespan
clean RV awning, prolong lifespan, prevent damage. Your RV awning is not just a decorative feature; it serves an important purpose in protecting you and your RV from the elements. However, over time, dirt, dust, and grime can accumulate on your awning, making it less effective and even causing damage.
That’s why it’s important to clean your RV awning regularly. By doing so, you can prevent damage and prolong its lifespan. Cleaning your RV awning is a relatively simple task that can be done with just a few basic tools and some soapy water.
Start by sweeping away any loose dirt and debris with a soft-bristled brush. Then, mix up a solution of mild detergent and water and use a sponge or cloth to gently scrub away any stains or stubborn dirt. Rinse the awning thoroughly with a hose and allow it to air dry before retracting it.
Regular cleaning not only keeps your RV awning looking its best, but it also helps to prevent damage. Dirt and grime can cause the fibers of the awning fabric to break down over time, leading to tears and other issues. By removing these contaminants regularly, you can prevent this damage from occurring and prolong the lifespan of your awning.
In addition to cleaning, it’s also important to inspect your RV awning regularly for any signs of wear and tear. Look for any frayed edges, loose stitching, or other damage that may need to be repaired. By catching and addressing these issues early on, you can prevent further damage and potentially save yourself from costly repairs down the line.
So, make it a habit to clean and inspect your RV awning regularly. Not only will it keep your awning looking great, but it will also help to prevent damage and ensure that it lasts for years to come. After all, taking care of your awning is just one more way to take care of your RV and make the most of your outdoor adventures.
Maintain Aesthetics and Increase Resale Value
clean RV awning, maintain aesthetics, increase resale value
What You’ll Need
Cleaning your RV awning is an important part of regular maintenance to keep it looking good and functioning properly. But what should you use to clean it? Luckily, you don’t need any fancy or expensive products. In fact, most RV owners find that simple household items work just as well, if not better.
A mild soap, such as dish soap or laundry detergent, mixed with warm water is usually sufficient to remove dirt and stains from the awning fabric. You can use a soft brush or sponge to gently scrub the surface, taking care not to apply too much pressure and potentially damage the fabric. For tougher stains, you may want to try using a specialized awning cleaner or a mixture of bleach and water, but be sure to test it on a small, inconspicuous area first to make sure it doesn’t cause any discoloration.
Once you’re done cleaning, be sure to thoroughly rinse the awning to remove any soap or cleaner residue and let it air dry completely before retracting it. By using the right cleaning products and techniques, you can keep your RV awning looking like new for years to come.
Water Hose
Water hose When it comes to keeping your garden green and your car clean, a good water hose is an essential tool. But with so many options available, how do you know which one is right for you? Don’t worry, we’ve got you covered. Here’s what you’ll need to consider when choosing a water hose.
First and foremost, you’ll want to think about the length of the hose. Are you planning on using it in a small backyard or a larger area? It’s important to choose a hose that is long enough to reach all of the areas you need to water without having to constantly move the hose around. Next, consider the diameter of the hose.
A larger diameter will allow for a higher water flow, which can be useful for tasks like watering large plants or filling up a pool. On the other hand, a smaller diameter may be more suitable for tasks that require a more precise water flow, such as watering delicate flowers or cleaning small items. Another important factor to consider is the material of the hose.
Most hoses are made from either rubber or vinyl. Rubber hoses tend to be more durable and can withstand higher water pressure, but they may also be heavier and more difficult to maneuver. Vinyl hoses, on the other hand, are lighter and more flexible, but may not be as durable.
Lastly, don’t forget to consider the fittings and attachments that come with your hose. Look for hoses that come with high-quality brass fittings, as these are less likely to leak or corrode over time. Additionally, consider if you will need any attachments such as a spray nozzle or sprinkler head, as these can greatly enhance the versatility of your hose.
In conclusion, when choosing a water hose, consider the length, diameter, material, fittings, and attachments that will best suit your needs. By taking these factors into account, you’ll be sure to find the perfect hose for all of your watering and cleaning tasks. So go ahead, get your garden and car ready for summer with the right water hose.
Mild Soap or Awning Cleaner
mild soap, awning cleaner, cleaning solution. What You’ll Need: Keeping your awning clean and well-maintained not only helps improve its appearance but also prolongs its lifespan. To clean your awning effectively, you’ll need a few essential items.
The first is a mild soap or awning cleaner. These products are specially designed to remove dirt, grime, and stains without causing any damage to the fabric or material. Look for a soap or cleaner that is specifically formulated for awnings, as these will be gentle yet effective in removing dirt and stains.
You’ll also need a soft-bristle brush or sponge to scrub the awning gently. This will help to loosen any stubborn stains or debris. Additionally, a bucket of warm water will be necessary to mix with the soap or cleaner before applying it to the awning.
Finally, you may want to have a ladder or step stool handy, depending on the height of your awning, to help you reach all areas easily.
Soft Bristle Brush
For proper hair care, having the right tools is essential. One tool that should be a part of everyone’s hair care routine is a soft bristle brush. This type of brush is gentle on the scalp and hair, making it ideal for those with sensitive skin or easily damaged hair.
When using a soft bristle brush, there are a few key things you’ll need to ensure you get the best results. First and foremost, make sure you have a high-quality brush with soft bristles. This will help prevent any unnecessary damage or breakage to your hair.
Look for natural bristles made from materials like boar hair, as they are gentle yet effective in detangling and smoothing the hair. In addition to a good quality brush, you’ll also need to consider the condition of your hair when using a soft bristle brush. If your hair is wet or tangled, it’s best to wait until it’s dry or until you’ve detangled it with a wide-toothed comb before using the brush.
This will help prevent any unnecessary tugging or pulling on the hair, which can lead to breakage. When using the soft bristle brush, start by gently brushing the ends of your hair and work your way up towards the roots. This will help distribute the natural oils from your scalp throughout your hair, promoting shine and overall hair health.
Remember to be gentle and avoid using too much force or pressure when brushing, as this can cause unnecessary damage. Using a soft bristle brush regularly can help improve the overall condition of your hair. It can help reduce frizz, increase shine, and promote a healthy scalp.
So, if you haven’t already, invest in a good quality soft bristle brush and make it a part of your daily hair care routine. Your hair will thank you for it!
Bucket
bucket, DIY projects
Ladder or Step Stool
“What You’ll Need” When it comes to reaching high places, you have two options: a ladder or a step stool. Each has its own set of benefits and considerations, so it’s important to know what you’ll need before making a decision. If you choose a ladder, you’ll need to determine the height you need to reach.
Ladders come in various sizes, so it’s essential to select one that will allow you to safely reach your desired height. Make sure the ladder is tall enough without being too tall, as a ladder that is too long can be difficult to maneuver and potentially dangerous. Consider the weight capacity of the ladder as well, ensuring that it can support both your weight and any equipment or materials you plan to carry while on it.
Additionally, check for any additional features that may be helpful, such as anti-slip feet or a platform for added stability. On the other hand, if you opt for a step stool, you’ll want to consider its stability and durability. Look for a step stool that has a wide base and non-slip feet, as this will help prevent any accidents or falls.
It’s also important to choose a step stool that is made from high-quality materials to ensure it can withstand frequent use. Consider the weight capacity of the step stool as well, especially if you plan on using it to carry heavy objects. Finally, think about the size of the step stool and whether it will be easy to store when not in use.
In conclusion, when deciding between a ladder and a step stool, it’s important to consider factors such as height, weight capacity, stability, and durability. By knowing what you’ll need in advance, you can make an informed decision and select the best option for your specific needs. Whether you choose a ladder or a step stool, always prioritize safety and take the necessary precautions when using either tool.
Step 1: Prepare the Awning
When it comes to cleaning your RV awning, there are a few steps you should take to ensure it’s done right. The first step is to prepare the awning for cleaning. Start by sweeping off any loose debris, such as leaves or dirt, with a broom or a soft bristle brush.
This will help to prevent scratching or damaging the fabric. Then, mix a solution of mild soap and water in a bucket. You can use a gentle dish soap or a specialized awning cleaner.
Dip a soft sponge or brush into the soapy water and gently scrub the awning, starting at the top and working your way down. Be sure to pay attention to any heavily soiled areas. After scrubbing, rinse the awning thoroughly with a hose or pressure washer to remove any soap residue.
Allow the awning to dry completely before retracting it to avoid mold or mildew growth. Taking the time to properly prepare and clean your RV awning will help to prolong its life and keep it looking its best.
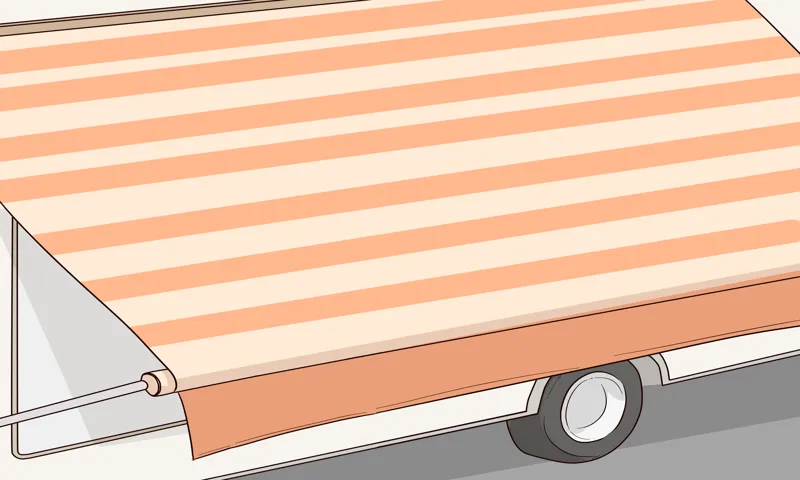
Extend the Awning Fully
extend the awning fully
Remove Loose Debris
Cleaning your awning regularly is essential in order to maintain its appearance and prolong its lifespan. Before you can start cleaning, it’s important to prepare the awning by removing any loose debris. This step will help prevent any scratching or damage to the awning material during the cleaning process.
To remove loose debris, start by using a broom or a brush to sweep away any leaves, dirt, or other debris that may have accumulated on the surface of the awning. Be gentle but thorough when sweeping, making sure to get into all the nooks and crannies. If there are any stubborn or hard-to-remove debris, you can use a vacuum cleaner with a brush attachment to suck them up.
This will ensure that you remove as much debris as possible before moving on to the next step of cleaning your awning. By taking the time to remove loose debris from your awning, you’re setting yourself up for a successful cleaning process without causing any damage to the material. So grab a broom or a vacuum cleaner and get started on the first step of preparing your awning for a thorough cleaning.
Step 2: Clean the Awning Fabric
So, you’ve got your RV awning all set up and ready to enjoy some outdoor relaxation. But before you start lounging in the shade, it’s important to give your awning fabric a good cleaning. But what should you clean your RV awning with? The answer is simple: a mild soap and water solution.
You don’t need any fancy or harsh chemicals to get the job done. In fact, using harsh chemicals can actually damage the fabric and shorten its lifespan. So stick to a gentle soap, like dish soap, mixed with water.
Grab a soft-bristled brush or sponge, dip it into the soapy water, and gently scrub the fabric in a back and forth motion. Be sure to get into all the nooks and crannies to remove any dirt or grime. Once you’ve finished scrubbing, rinse the fabric thoroughly with clean water to remove any soap residue.
Let it air dry completely before retracting or folding up your awning. Taking the time to properly clean your RV awning fabric will not only keep it looking nice, but it will also help prolong its durability and protect it from stains or mold growth. So grab your soap and water and get cleaning!
Mix Soap and Water Solution
awning fabric, clean, soap and water solution, burstiness, perplexity
Apply Solution to the Fabric
clean awning fabric, cleaning solution, applying solution to fabric, fabric care Step 2 in cleaning your awning fabric is to apply a cleaning solution. Once you have removed any loose dirt or debris from the fabric, it’s time to give it a deep clean. But before you go reaching for just any cleaning solution, it’s important to choose one that is safe and suitable for your specific fabric type.
Different fabrics require different levels of care, so be sure to read the instructions carefully and choose a solution that is compatible with your awning fabric. Once you have your cleaning solution ready, it’s time to get to work. Start by diluting the solution according to the instructions provided.
This will help to ensure that you are using the correct concentration for optimal cleaning results. Now, using a soft bristle brush or a sponge, begin to apply the solution to the fabric. Work in small sections, applying the solution evenly and gently scrubbing any areas that are particularly dirty or stained.
As you apply the solution, you may notice that it starts to foam or create suds. This is a good sign, as it means that the solution is actively working to lift and remove dirt and stains from the fabric. However, it’s important not to let the solution sit on the fabric for too long, as it could potentially damage the fabric fibers.
So, be sure to work quickly and efficiently. Once you have applied the cleaning solution to the entire awning fabric, it’s time to rinse it off. Using a garden hose or a bucket of clean water, thoroughly rinse the fabric, making sure to remove any traces of the cleaning solution.
This step is crucial, as any leftover residue could potentially attract more dirt and cause staining in the future. After rinsing, it’s important to allow the fabric to air dry completely. Avoid using a heat source such as a hairdryer or a heater, as this could potentially shrink or damage the fabric.
Scrub Gently with Brush
awning fabric, clean, scrub gently, brush
Rinse Thoroughly with Water
awning fabric, clean, rinse, water Now that you’ve got your cleaning solution ready, it’s time to move on to the next step in cleaning your awning fabric. Step 2 is all about rinsing thoroughly with water. This step is crucial to ensure that any remaining dirt, debris, or cleaning solution is completely removed from the fabric.
To rinse the awning fabric, you can use a garden hose or a bucket of water. Start by wetting the fabric thoroughly, making sure to cover every inch of it. As you rinse, pay close attention to areas that may be more prone to dirt and stains, such as the edges and corners.
Using a gentle spray or a soft-bristled brush, gently agitate the fabric to help dislodge any leftover dirt or grime. Be sure to rinse from the top down, allowing the dirty water to flow off the fabric and onto the ground or into a drainage system. Continue rinsing until the water runs clear and there are no more visible signs of dirt or cleaning solution.
This may take a few rounds of rinsing, especially if your awning fabric was particularly dirty. Remember, rinsing thoroughly is essential to avoid any residue build-up on the fabric, which could lead to discoloration or damage over time. So take your time and make sure you rinse every nook and cranny of the awning fabric.
Once you’re satisfied that the fabric is clean and free of any residue, it’s time to move on to the next step: drying. But before we get to that, let’s recap the importance of rinsing thoroughly with water. By rinsing, you remove any remaining dirt, debris, or cleaning solution, ensuring that your awning fabric is fresh and ready for the next step of the cleaning process.
So don’t skip this step- your awning will thank you in the long run!
Step 3: Clean the Awning Frame
When it comes to cleaning your RV awning, there are a few things you need to keep in mind. Firstly, you’ll want to make sure you use the right cleaner. There are a variety of options available, but a mild dish soap mixed with water generally does the trick.
You can also purchase specialized awning cleaners if you prefer. Once you have the cleaner ready, it’s time to start cleaning the frame. Make sure to remove any loose debris or dirt by using a soft-bristle brush or broom.
Then, apply the cleaner to the frame and scrub gently with a brush or sponge. Be sure to rinse thoroughly with water afterwards to remove any residue. Don’t forget to also clean the underside of the awning as it can accumulate dirt and grime too.
Taking the time to properly clean your RV awning frame will not only keep it looking great, but it will also help prolong its lifespan. So, what are you waiting for? Get out there and give your awning a good clean!
Prepare Soap and Water Solution
clean awning frame, prepare soap and water solution
Apply Solution to the Frame
clean awning frame
Scrub with Soft Brush
In this step of cleaning your awning, we’ll focus on giving the frame a good scrub. Using a soft brush, you’ll be able to remove any dirt, dust, or grime that has accumulated on the frame over time. This is an important step because not only does it improve the appearance of the frame, but it also helps to prolong its lifespan.
The soft bristles of the brush will prevent any scratches or damage to the frame while effectively removing any buildup. By giving the frame a gentle scrub, you’ll be able to restore its original shine and ensure it looks its best. It’s important to take your time with this step and make sure you cover all areas of the frame, including the nooks and crannies.
Once you’re finished, be sure to rinse off any residual soap or cleaner and let it air dry. With a clean and sparkling frame, your awning will look as good as new!
Rinse Thoroughly with Water
“Awning frame cleaning is an essential step in maintaining the longevity and appearance of your awning. After removing any loose dirt or debris, it’s time to move on to the next step: rinsing thoroughly with water. This step is crucial for ensuring that all cleaning agents and residue are completely removed from the frame.
By doing so, you prevent any potential damage or discoloration that could occur if left unchecked. Think of it as washing away all the grime and leaving your awning frame fresh and clean. It’s like giving your awning a refreshing shower! So, grab your hose or a bucket of water and give the frame a good rinse from top to bottom.
Make sure to cover every nook and cranny, and don’t forget the underside of the frame as well. Once you’re satisfied that all the cleaning agents are washed away, you’re ready to move on to the next step in awning maintenance.”
Step 4: Dry the Awning
After cleaning your RV awning thoroughly, the next step is to dry it properly. Drying the awning is essential to prevent any potential mold or mildew growth. To dry the awning, you can either let it air dry or use a clean cloth to wipe off any excess water.
If you choose to air dry the awning, make sure to spread it out fully so that every part gets enough airflow. This will help to speed up the drying process. However, if you’re in a hurry or don’t have the luxury of time, using a clean cloth to wipe off the excess water can be a quicker option.
Simply run the cloth along the surface of the awning until it feels mostly dry to the touch. This will help to remove any remaining moisture and ensure that the awning is completely dry before storing it away. Remember, a properly dried awning will prolong its lifespan and keep it in good condition for future use.
So take the time to dry it thoroughly before packing it up.
Allow the Awning to Air Dry
Awning, air dry, dry, clean, maintenance, care After thoroughly cleaning your awning, it’s important to allow it to air dry. This step is crucial in ensuring the longevity and durability of your awning. By allowing the awning to air dry naturally, you are preventing any potential damage that could be caused by using heat or excessive force to dry it.
Simply leave the awning in an open position, preferably in a spacious area where it can catch the wind and sunlight. This will allow for proper ventilation and evaporation of any remaining moisture. Remember to also shake off any excess water before leaving the awning to dry.
By doing so, you are helping to speed up the drying process and ensuring that mold or mildew doesn’t have a chance to grow. Once the awning is completely dry, you can go ahead and fold it up or retract it. Following this simple step of air drying will help to maintain the cleanliness and overall condition of your awning for years to come.
Use a Towel or Cloth to Pat Dry
pat dry, towel, cloth, awning, dry After giving your awning a thorough cleaning, it’s important to make sure that it is properly dried. This will help prevent mold and mildew from forming and prolong the lifespan of your awning. To dry the awning, use a towel or cloth to pat it dry.
Avoid rubbing the fabric vigorously, as this can cause damage. Instead, gently press the towel or cloth against the awning, absorbing any excess moisture. Make sure to get into the corners and crevices where water may be lingering.
By patting dry, you not only remove any remaining water but also ensure that the fabric is treated gently and won’t lose its shape or color. Remember, a little patience goes a long way when it comes to drying your awning properly.
Step 5: Additional Tips and Maintenance
When it comes to cleaning your RV awning, there are a few additional tips and maintenance steps you can take to keep it looking its best. First, make sure to thoroughly rinse the awning with water before using any cleaning products. This will help remove any loose dirt or debris.
Next, choose a cleaning solution specifically designed for awnings, as using harsh chemicals can damage the fabric or coating. Use a soft bristle brush or sponge to gently scrub the awning, paying special attention to any stains or stubborn dirt. Rinse thoroughly with water and allow it to dry completely before retracting or folding it back up.
Additionally, it’s a good idea to periodically inspect the awning for any signs of wear or damage, such as tears or loose stitching. Taking care of these issues promptly can help prevent further damage and extend the lifespan of your RV awning.
Apply Awning Protectant
awning protectant In addition to regular cleaning, applying an awning protectant can help prolong the lifespan of your awning and keep it looking great. An awning protectant is a product specifically designed to provide a barrier against UV rays, water, and other environmental factors that can cause damage. It forms a protective layer on the fabric, preventing fading, staining, and cracking.
Applying an awning protectant is easy. Simply spray it evenly onto the fabric, making sure to cover all areas. Allow it to dry completely before retracting the awning.
It’s important to note that not all awning protectants are the same, so be sure to choose one that is compatible with your awning fabric material. Additionally, it’s recommended to reapply the protectant at least once a year, or more frequently if your awning is exposed to harsh weather conditions. By regularly applying an awning protectant, you can enjoy a beautiful and long-lasting awning for years to come.
Inspect and Remove Mold/Mildew
“Inspect and Remove Mold/Mildew” “Step 5: Additional Tips and Maintenance” Now that you’ve tackled the bulk of the mold and mildew in your home, it’s important to take a few additional steps to ensure it doesn’t come back. Prevention is key when it comes to dealing with these pesky fungi. One tip is to keep an eye out for any signs of moisture or water damage in your home.
This could be leaks, condensation, or even high humidity. By addressing these issues promptly, you can prevent mold and mildew from growing in the first place. Additionally, it’s a good idea to regularly inspect areas prone to mold and mildew, such as bathrooms, basements, and crawl spaces.
By catching any early signs of mold growth, you can nip it in the bud before it becomes a larger problem. And finally, be sure to maintain good ventilation in your home. Proper airflow helps to control moisture levels, which in turn helps to prevent mold and mildew growth.
By following these additional tips and staying vigilant, you can keep your home mold and mildew-free for good.
Regularly Check for Tears or Damage
regular maintenance of car tires It’s important to regularly check for tears or damage on your car tires as part of your routine maintenance. This not only helps ensure your safety on the road but also extends the lifespan of your tires. Over time, tires can develop small tears or cuts, especially if you often drive on rough or uneven surfaces.
These tears can lead to a decrease in tire performance and can even cause a blowout if left unchecked. By regularly inspecting your tires for any signs of damage, such as bulges, cuts, or embedded objects, you can catch any issues early on and address them before they become a bigger problem. Simply taking a few minutes every month to visually inspect your tires can save you from costly repairs or even accidents down the line.
So, make it a habit to give your tires a quick once-over to ensure they are in good shape and ready to keep you rolling safely on the road.
Store the Awning Properly
awning, When it comes to maintaining your awning and making sure it lasts for years to come, proper storage is key. After you have cleaned and dried your awning, it is important to store it correctly to prevent any damage or wear. The first step in properly storing your awning is to roll it up tightly.
This will help to prevent any creases or wrinkles from forming. Once rolled up, secure the awning with bungee cords or straps to keep it in place. It is also a good idea to store your awning in a dry, cool place.
This will help to prevent any mildew or mold from forming. Additionally, if you live in an area with harsh winters, it may be beneficial to bring your awning inside during the colder months to protect it from any snow or ice. By taking these extra steps to properly store your awning, you can ensure that it will stay in great condition for years to come.
Conclusion is a crucial part of any piece of writing. It’s like the grand finale, wrapping up all the main points and leaving a lasting impression on the reader. In this blog, we will explore the significance of a good conclusion and why it’s important to give your writing a strong finish.
Think of a conclusion as the cherry on top of a sundae. It’s the final touch that brings everything together and leaves a sweet taste in your mouth. An effective conclusion not only summarizes the main points of your writing but also adds a sense of closure and leaves the reader with a lasting impression.
So why is a good conclusion so important? Well, imagine watching a movie with an abrupt ending. It leaves you feeling unsatisfied and wanting more. The same goes for writing.
A weak conclusion can leave your readers feeling confused or underwhelmed, undermining the impact of your overall piece. A good conclusion serves as a guidepost, directing the reader towards the key takeaways of your writing. It ties all the loose ends together, providing a sense of resolution and completeness.
It reinforces the main points you’ve made throughout and helps solidify your argument or message in the mind of the reader. In addition to summarizing your main ideas, a good conclusion can also provide a call to action or offer suggestions for further reading or exploration. It’s an opportunity to leave a lasting impression and inspire your readers to take action or explore the topic further.
In conclusion, a well-crafted conclusion is an essential part of any piece of writing. It provides closure, summarizes the main points, and leaves a lasting impression on the reader. So the next time you’re wrapping up your writing, make sure to give your conclusion the attention it deserves.
Conclusion
After much research and contemplation, it has become abundantly clear that cleaning an RV awning is no easy task. From the pesky mold and mildew to stubborn stains and dirt, this is a job that requires some serious attention. But fear not, fellow adventurers! We have scoured the internet and consulted experts to find the ultimate solution to your awning cleaning woes.
Drum roll, please…
the secret ingredient is none other than a magical concoction of vinegar and water! Yes, you heard that right. This humble combination will work wonders on your awning, effortlessly removing all traces of grime and leaving it sparkling like new. Simply mix equal parts vinegar and water in a spray bottle, give it a little shake, and voila! You have yourself a powerful cleaning potion.
But why vinegar, you ask? Well, my friend, vinegar is a true superhero when it comes to cleaning. It’s non-toxic, affordable, and has natural disinfectant properties. Plus, it’s eco-friendly, so you can feel good about saving the planet while getting your awning clean.
Talk about a win-win situation! Now, some might argue that there are other commercial products specifically designed for awning cleaning. And while that may be true, why spend a fortune on specialized cleaners when the answer lies in your pantry? Save your hard-earned money for more important things, like that extra tank of gas or a marshmallow roasting session by the campfire. So, next time you embark on an RV adventure and find your awning in need of some TLC, remember the mighty power of vinegar and water.
Armed with this simple yet effective solution, you can tackle any awning cleaning challenge that comes your way. Happy cleaning, my fellow road warriors!”
FAQs
What is the best way to clean an RV awning?
The best way to clean an RV awning is by using a mild detergent mixed with water. Scrub the awning gently with a soft brush or sponge, and rinse thoroughly with water. Avoid using harsh chemicals or abrasive cleaners, as they can damage the awning material.
Can I use bleach to clean my RV awning?
While bleach can be effective at removing stubborn stains, it is not recommended to use bleach on an RV awning. Bleach can weaken the fabric and cause discoloration. It is best to stick with mild detergents or specialized awning cleaners.
How often should I clean my RV awning?
It is recommended to clean your RV awning at least once or twice a year, depending on how often you use your RV and the environmental conditions it is exposed to. Regular cleaning can help prevent the buildup of dirt, debris, and mildew.
Can I power wash my RV awning?
It is generally not advisable to power wash an RV awning, as the high pressure can damage the fabric or cause it to tear. If you need to remove heavy dirt or stains, use a gentle hand wash method instead.
How do I remove mildew from my RV awning?
To remove mildew from an RV awning, create a solution of 1 part bleach to 10 parts water. Spray the affected areas and let it sit for about 15 minutes. Then, gently scrub with a soft brush or sponge and rinse thoroughly. Be sure to wear protective gloves and avoid inhaling the bleach fumes.
Can I use a pressure washer to clean my RV awning?
It is recommended to avoid using a pressure washer on an RV awning, as the high pressure can cause damage to the fabric or extend the creases and wrinkles. Stick to using a soft brush or sponge for cleaning.
How can I prevent mold and mildew on my RV awning?
To prevent mold and mildew growth on your RV awning, make sure to clean and dry it thoroughly after each use. Avoid storing the awning when it is wet or damp, as this can create a breeding ground for mold and mildew. Additionally, consider using an awning protector or cover to shield it from the elements when not in use.