
Hey there! Have you ever found yourself needing a little guidance when starting a new endeavor? Well, look no further because in this blog, we are diving into the exciting topic of introductions. Whether it’s introducing yourself to someone new, presenting a project to a group, or even starting a blog post, introductions play a vital role in setting the tone and capturing the attention of your audience. Just like the opening act at a concert, the introduction sets the stage for what’s to come and can make or break the overall experience.
So, let’s explore the art of introductions together and learn how to captivate and engage our readers right from the start. Get ready to master the art of “Hello, world!”
Table of Contents
Determining the Need for Replacement
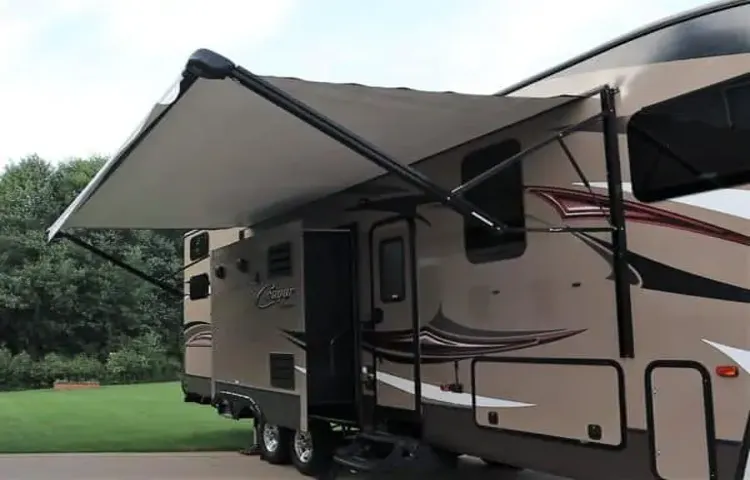
Are you looking to replace your RV awning by yourself? Well, you’re in luck because it’s entirely possible to do it on your own with a little bit of know-how. The first step in replacing your RV awning is determining whether or not it actually needs to be replaced. Look for signs of wear and tear such as rips, holes, or fading fabric.
If you notice any of these issues, it’s a good indication that your awning may need to be replaced. Additionally, check the operation of the awning to ensure that it opens and closes smoothly. If it’s difficult to extend or retract, this could also be a sign that a replacement is necessary.
By assessing these factors, you can make an informed decision about whether or not to proceed with replacing your RV awning.
Evaluating the condition of the current awning
awning replacement
Identifying the specific type of awning
awning replacement
Gathering the Necessary Tools and Materials
When it comes to replacing your RV awning by yourself, gathering the necessary tools and materials is the first step. You’ll need a few basic tools, such as a ladder, a tape measure, a drill with the appropriate bits, and a rubber mallet. Additionally, you’ll need the new awning fabric, which you can purchase from an RV supply store or online.
It’s important to measure your existing awning first to ensure you purchase the correct size fabric. You may also need to purchase new awning arms or other hardware if they are damaged or worn. It’s always a good idea to have some extra screws, nuts, and bolts on hand in case any are missing or broken.
By gathering all the necessary tools and materials before you begin, you’ll be well-prepared to tackle the task of replacing your RV awning.
Making a list of required tools
When it comes to tackling any DIY project, gathering the necessary tools and materials is the first step to set yourself up for success. Making a list of the required tools is essential in ensuring you have everything you need to complete the job efficiently and effectively. By taking the time to compile a comprehensive list, you can avoid running back and forth to the hardware store or delaying your project due to missing tools.
Start by assessing the project at hand and determine the specific tools and materials that you will need. Consider the size, complexity, and materials involved in the project to get an accurate idea of what you will need. Whether it’s a simple home improvement task or a more intricate woodworking project, having the necessary tools on hand can make all the difference in achieving a professional and polished result.
Choosing the right replacement awning
When it comes to choosing the right replacement awning, there are a few tools and materials you’ll need to gather before getting started. First and foremost, you’ll need a measuring tape to accurately measure the dimensions of your old awning and determine the size of the new one you’ll need. You’ll also need a ladder or step stool to safely reach the awning and remove it from its current location.
Additionally, you’ll need basic hand tools such as a screwdriver or drill to remove any screws or fasteners that are holding the old awning in place. Lastly, you’ll need the replacement awning itself, which can be purchased from a variety of retailers specializing in outdoor furnishings and supplies. By gathering these tools and materials beforehand, you’ll be well-prepared to take on the task of replacing your awning and enjoying a fresh, new look for your outdoor space.
Removing the Old Awning
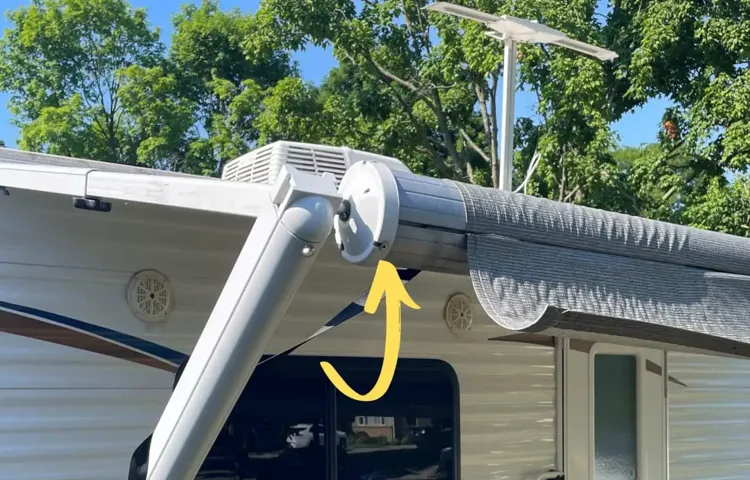
Replacing an old RV awning may seem like a daunting task, but with some basic tools and a little patience, you can do it yourself. The first step is to remove the old awning. Start by retracting the awning completely, making sure it is securely locked in place.
Locate the screws or bolts that attach the awning to the RV. Use a wrench or screwdriver to carefully remove these fasteners, being cautious not to strip them. As you remove each fastener, keep track of them so they can be reused when installing the new awning.
Once all the fasteners are removed, gently slide the old awning off of the brackets. Be mindful of any tension or springs that may be attached and ensure they are properly released before removing the awning completely. With the old awning removed, you are now ready to proceed with installing the new one.
Securing the RV and ensuring safety
Securing your RV and ensuring safety should be a top priority for any RV owner. One important aspect of this is removing the old awning when it becomes worn out or damaged. The awning is not only a source of shade and protection from the elements, but it also plays a role in the structural integrity and stability of your RV.
By removing the old awning and replacing it with a new one, you can avoid potential accidents and ensure the safety of your RV and everyone inside. So, how do you remove the old awning? First, you’ll need to gather the necessary tools and materials. This may include a ladder, screwdriver, pliers, and a helper to assist you.
Start by extending the awning fully so that it is easier to work with. Then, locate the screws that hold the awning in place. These screws are typically found on the ends of the awning arms and the brackets that attach it to the RV.
Using a screwdriver or pliers, carefully remove the screws from each bracket. Make sure to hold onto the awning as you do this, as it may become loose once the screws are removed. Once all the screws are removed, you can gently lift the awning out of the brackets.
If it is stuck, you may need to use some force or wiggle it back and forth to loosen it. Once the awning is free from the brackets, carefully lower it down and place it on a flat surface. Depending on the size of the awning, you may need assistance with this step.
With the old awning removed, you can now clean the brackets and the area where the awning was attached. This will ensure a smooth installation of the new awning. Removing the old awning may seem like a daunting task, but with the right tools and a little patience, it can be easily accomplished.
Removing any accessories or attachments
Removing any accessories or attachments is an important step when it comes to removing an old and worn-out awning. Before you can start taking down the awning itself, it’s essential to remove any additional parts that may be attached to it. This could include things like lights, curtains, or any other decorative elements that may be hanging from the awning.
These accessories can add weight and complexity to the process of removing the awning, so it’s best to tackle them first. By taking the time to remove these attachments, you’ll make the process of removing the old awning much smoother and easier.
Unfastening the awning from the RV
unfastening the awning, removing the old awning
Installing the New Awning
If you’re an RV owner and your awning is in need of a replacement, don’t worry! This is a task that you can easily do yourself with a little bit of know-how. The first step is to measure your old awning and order a new one that matches the exact dimensions. Once you have the new awning, the next step is to remove the old one.
Start by releasing the tension in the awning fabric and then unscrew it from the RV. Be careful not to damage the RV or the awning arms during this process. Once the old awning is removed, it’s time to install the new one.
Start by attaching the new awning fabric to the roller tube and then secure it to the RV using the same screws as the old awning. Finally, extend the awning and adjust the tension to your liking. Voila! You’ve successfully replaced your RV awning all on your own.
Preparing the RV for installation
rv awning installation.
Attaching the new awning to the RV
Installing a new awning on your RV can provide much-needed shade and protection from the elements. When it comes to attaching the new awning, there are several important steps to follow. First, make sure you have all the necessary tools and materials, including the awning itself, mounting brackets, screws, and a drill.
Begin by measuring and marking the desired location for the awning on your RV. Next, carefully attach the mounting brackets to the RV using the screws and drill. Make sure the brackets are securely fastened and level.
Once the brackets are in place, carefully lift the awning and align it with the brackets. Use the provided hardware to attach the awning to the brackets, making sure it is securely in place. Finally, test the awning to ensure it opens and closes smoothly and is properly attached to the RV.
By following these steps, you can easily install a new awning on your RV and enjoy the added comfort and convenience it provides.
Ensuring proper tension and alignment
Installing a new awning not only enhances the aesthetics of your outdoor space but also provides much-needed shade and protection. However, it’s crucial to ensure proper tension and alignment when installing the new awning to ensure its functionality and longevity. This involves carefully following the manufacturer’s instructions and using the right tools and equipment.
Proper tension ensures that the fabric of the awning is taut and doesn’t sag, preventing water pooling and damage. Additionally, aligning the awning correctly ensures that it covers the desired area and operates smoothly. By taking the time to install the new awning with proper tension and alignment, you’ll be able to enjoy its benefits for years to come.
So, don’t rush through the installation process and make sure to double-check your work before finalizing everything.
Testing and Adjusting the New Awning
Replacing an RV awning may seem like a daunting task, but with a little knowledge and the right tools, you can do it yourself. One important thing to remember is that not all awnings are the same, so it’s crucial to find the correct replacement for your specific RV model. Once you have the new awning, start by removing the old one.
This typically involves unscrewing the awning arms from the RV and carefully detaching the fabric. Once the old awning is removed, you can begin installing the new one. Follow the manufacturer’s instructions for attaching the awning arms and securing the fabric.
Take your time and make sure everything is properly aligned and tightened. Testing the new awning is essential to ensure it operates smoothly and without any issues. Adjust the tension of the fabric if necessary and make sure the roller tube is operating correctly.
With a little patience and attention to detail, you’ll have a new awning that’s ready to provide shade and protection for your RV adventures.
Operating the awning to check functionality
awning testing and adjusting, functionality testing, operating the awning, awning functionality, adjust the new awning
Making any necessary adjustments or repairs
Testing and Adjusting the New Awning Once you have installed a new awning, it’s important to test and adjust it properly to ensure it is functioning correctly and providing the desired shade and protection. Start by opening and closing the awning a few times to ensure it moves smoothly and without any sticking or hesitation. If you notice any issues, check the installation to make sure it is secure and level.
Adjust any brackets or supports as needed to ensure proper alignment. Next, test the fabric to make sure it is taut and free from wrinkles or sagging. Adjust the tension in the fabric by tightening or loosening the adjustable arms or springs.
This will help to keep the fabric looking its best and prevent damage from wind or rain. Finally, check the angle of the awning to ensure it provides the desired amount of shade. Adjust the pitch or angle of the awning as needed to maximize shade coverage.
By testing and adjusting your new awning, you can ensure it is in optimal working condition and will provide you with years of enjoyment and protection from the elements.
Maintenance and Care Tips for RV Awnings
Replacing an RV awning may seem like a complicated task, but with a little patience and the right tools, you can do it yourself. First, you’ll need to measure the size of your awning to ensure you order the correct replacement. Once you have the new awning, start by removing the old fabric by carefully unscrewing it from the RV.
Next, attach the new fabric to the roller tube, making sure it is evenly aligned. Finally, reattach the awning to the RV, ensuring that it is secure and properly tensioned. By following these steps and taking your time, you can easily replace your RV awning without the need for professional assistance.
Regular cleaning and inspection
Regular cleaning and inspection are essential for maintaining and prolonging the life of your RV awning. Over time, dirt, debris, and water can accumulate on the fabric, which can lead to mold, mildew, and damage. To keep your awning looking and functioning its best, it’s important to clean it regularly.
Start by using a hose to remove loose dirt and debris, then use a mild soap and water solution to scrub away any remaining dirt and stains. Be sure to thoroughly rinse the awning to remove all soap residue. In addition to cleaning, it’s also important to inspect your awning for any signs of wear or damage.
Look for tears, fraying, or loose stitching, as well as any bent or damaged hardware. Catching and addressing any issues early can prevent further damage and costly repairs down the road. By regularly cleaning and inspecting your RV awning, you can ensure that it remains in good condition and ready to provide shade and protection for your outdoor adventures.
Protecting the awning from harsh weather and UV rays
Regular maintenance and care of your RV awning is crucial to protect it from harsh weather and UV rays. One essential tip is to always keep your awning clean. Dirt, debris, and bird droppings can accumulate on the fabric and cause damage over time.
By regularly brushing off and washing your awning, you can prevent these particles from embedding themselves into the fabric and causing long-term issues. Another important aspect of maintenance is to make sure your awning is properly secured. Check the tension and tightness of the straps, as loose straps can cause the awning to flap in the wind, leading to tears or breakages.
Additionally, it is essential to consider the weather conditions before using your awning. If there are strong winds or heavy rain forecasted, it is best to retract the awning to avoid potential damage. Lastly, protecting your awning from UV rays is crucial.
Applying a UV protectant spray can help prevent the fabric from fading and deteriorating. By following these simple maintenance and care tips, you can ensure that your RV awning remains in good condition for years to come.
Repairing minor damages and avoiding further issues
RV awnings are a great addition to any camping trip or outdoor adventure. They provide shade and protection from the elements, allowing you to enjoy the outdoors without worrying about sunburn or rain showers. However, like any outdoor accessory, RV awnings can be prone to wear and tear.
If you notice minor damages such as small tears or loose seams, it’s important to address them before they become bigger issues. One of the easiest ways to repair minor damages is by using a patch kit specifically designed for awnings. These kits usually come with adhesive patches that can be applied directly to the damaged area.
Simply clean the area with a mild soap and water solution, allow it to dry completely, and then apply the patch according to the instructions. This will create a strong, waterproof seal that will prevent further damage and extend the life of your awning. Additionally, it’s important to regularly inspect your awning for signs of wear and tear, such as loose seams or weak fabric.
If you notice any issues, it’s best to address them as soon as possible to avoid further damage. In some cases, you may need to replace a damaged section of fabric or tighten loose seams. While these repairs may require a bit more time and effort, they can help prevent more expensive repairs down the line.
By taking care of minor damages and regularly maintaining your RV awning, you can ensure that it continues to provide shade and protection for many outdoor adventures to come.
Conclusion
So there you have it, folks. Now you know exactly how to replace your RV awning all by yourself. With a little bit of patience, some handy tools, and a YouTube tutorial in the background, you’ll be transforming your RV’s exterior faster than you can say “campground envy.
” So go ahead, embrace your inner handyman (or handywoman) and show that awning who’s boss. And who knows, maybe you’ll even inspire your fellow campers to tackle their own DIY projects. Just remember, if all else fails, you can always blame the squirrels.
“
Final thoughts on replacing an RV awning
RV awnings are a great addition to any RV, providing shade and protection from the elements. However, like any other part of your RV, they require regular maintenance and care to ensure they stay in good working order. One of the most important things you can do to keep your RV awning in top shape is to clean it regularly.
This will help remove any dirt, debris, or mildew that may have accumulated on the fabric. To clean your awning, simply use a mild soap and water solution and a soft brush or cloth. Gently scrub the fabric and then rinse it off with a hose.
Avoid using harsh chemicals or abrasive cleaners, as these can damage the fabric. Additionally, it’s important to regularly inspect your awning for any signs of damage or wear. Look for tears, holes, or frayed edges, and if you find any, be sure to repair them as soon as possible.
Ignoring small issues can lead to bigger problems down the line. Another important maintenance tip is to always retract your awning when it’s not in use, especially in windy conditions. Strong winds can cause the awning to become damaged or even rip off completely.
It’s also a good idea to invest in an awning tie-down kit, which will help keep your awning secure during windy conditions. Lastly, be sure to properly store your awning when you’re not using it for an extended period of time. This will help protect it from the elements and prolong its lifespan.
Taking the time to care for and maintain your RV awning will ensure that it stays in great shape for years to come.
FAQs
Can I replace my RV awning myself?
Yes, you can replace your RV awning yourself with the right tools and instructions.
What tools do I need to replace an RV awning?
Some of the tools you may need to replace an RV awning include a screwdriver, drill, pliers, ladder, and a helper.
How long does it take to replace an RV awning?
The time it takes to replace an RV awning can vary depending on your experience and the complexity of the awning, but it can typically take a few hours to a full day.
How much does it cost to replace an RV awning?
The cost of replacing an RV awning can vary depending on the type of awning and the brand, but on average, it can range from $200 to $1000.
Do I need to remove the old awning fabric before replacing it?
In most cases, it is recommended to remove the old awning fabric before replacing it to ensure a proper installation of the new fabric.
Can I replace just the fabric on my RV awning?
Yes, you can replace just the fabric on your RV awning if the frame and hardware are still in good condition.
Are there any safety precautions I should take when replacing an RV awning?
Yes, some safety precautions to consider when replacing an RV awning include using proper ladder safety, wearing protective gear, and following all manufacturer instructions.