
Have you ever found yourself relaxing under the shade of your RV awning, only to notice that it’s starting to show signs of wear and tear? Well, fear not! Replacing an RV awning is easier than you think. Whether it’s damaged from a sudden gust of wind, faded from years of sun exposure, or simply in need of an upgrade, a new awning can transform your outdoor space and bring new life to your adventures on the road. Imagine having a brand new awning that not only provides shade and protection from the elements but also adds a touch of style and personality to your RV.
Just like changing the curtains in your living room or updating the paint on your walls, replacing your RV awning allows you to freshen up your outdoor space and make it feel like home. But where do you start? How do you choose the right awning for your RV? And perhaps most importantly, how do you actually replace it? Don’t worry, I’ve got you covered. In this blog post, we’ll explore everything you need to know about replacing an RV awning, from selecting the perfect replacement to the step-by-step process of installation.
So, whether you’re a seasoned RVer looking to spruce up your rig or a newbie ready to embark on your first adventure, join me as we dive into the world of RV awnings. Get ready to turn heads at the campsite with your new and improved outdoor oasis. Let’s get started!
Table of Contents
Section 1: Assessing the Damage
If you’ve found yourself in the unfortunate situation of having a damaged RV awning, don’t worry – it’s not the end of the world. Replacing an RV awning may seem like a daunting task, but with a little bit of knowledge and some basic tools, it can actually be a fairly simple DIY project. The first step in replacing an RV awning is assessing the damage.
Is the fabric torn or ripped? Is the frame bent or broken? Take a good look at the awning and determine exactly what needs to be replaced. Once you have a clear understanding of the damage, you can move on to the next steps of the replacement process.
1.1 Inspecting the RV Awning
RV awnings are a great addition to any recreational vehicle, as they provide shade and protection from the elements. However, they are not immune to damage, and it is important to regularly inspect your awning to ensure it is in good condition. A thorough inspection should include checking for any tears or rips in the fabric, as well as any bent or broken hardware.
It is also important to check the awning arms and make sure they are functioning properly. By properly assessing the damage and identifying any issues, you can take the necessary steps to repair or replace your awning, ensuring that it continues to provide the shade and protection you need on your outdoor adventures.
1.2 Determining the extent of the damage
When assessing the damage after a disaster, it is crucial to determine the extent of the damage to properly plan for recovery efforts. This involves a thorough examination of the affected areas, including buildings, infrastructure, and natural resources. One way to determine the extent of the damage is through visual inspections and documentation.
This can be done by taking photographs or videos of the affected areas from different angles and perspectives. It is also important to assess the structural integrity of buildings and infrastructure, including checking for any cracks, breaks, or collapse. Additionally, damage to natural resources such as vegetation, water bodies, and wildlife habitats should be assessed.
This can help in understanding the overall impact of the disaster on the environment and ecosystem. By accurately determining the extent of the damage, it becomes easier to prioritize and allocate resources for the recovery and restoration process.
1.3 Ordering the replacement parts
When assessing the damage to your equipment, it is important to order the replacement parts promptly to minimize any downtime. Once you have identified the damaged components, it is essential to find a reliable supplier that offers high-quality replacement parts. You can start by reaching out to the original equipment manufacturer (OEM) or authorized distributors to inquire about the availability and pricing.
Additionally, you can also explore other reputable suppliers that specialize in providing replacement parts for your specific equipment. It is crucial to consider factors such as the compatibility of the replacement parts with your equipment, the reputation of the supplier, and the warranty or guarantee offered. By ordering the replacement parts promptly and from a trusted supplier, you can ensure a swift and smooth repair process, allowing your equipment to get back up and running efficiently.
Section 2: Preparing for the Replacement
Replacing an RV awning may seem like a daunting task, but with the right preparation, it can be a smooth and straightforward process. Before you begin, make sure you have the necessary tools and replacement parts on hand. This includes a ladder, a screwdriver or drill, replacement fabric or awning, and any other specific parts that may be needed for your particular awning model.
It’s also important to measure the size of your existing awning so that you can purchase the correct replacement. Once you have everything you need, find a safe and level area to work on your RV. It’s a good idea to recruit a friend or family member to assist you, as the awning can be heavy and cumbersome to handle on your own.
With the right preparation, replacing your RV awning can be a manageable and rewarding DIY project.
2.1 Gathering the necessary tools and equipment
“tools and equipment for replacement of a car battery” When preparing to replace a car battery, it is important to gather the necessary tools and equipment to ensure a smooth process. The first tool you will need is a wrench or a socket set to loosen and remove the battery terminals. This is crucial in preventing any electrical shocks or short circuits during the replacement.
Additionally, it is recommended to have a battery terminal cleaner to remove any corrosion or buildup on the terminals for better conduction. A pair of safety goggles is also advisable to protect your eyes from any debris that may occur during the replacement. Another essential tool is a battery carrier or a sturdy strap to safely remove and transport the old battery without risk of dropping or damaging it.
Lastly, having a battery tester or a multimeter can be helpful to check the voltage and health of the new battery before installation. By gathering these tools and equipment, you can ensure a successful and hassle-free replacement of your car battery.
2.2 Clearing the area around the RV
clearing the area around the RV. Before starting the process of replacing an RV, it is important to clear the surrounding area to ensure a smooth and safe operation. This involves removing any obstacles that may hinder the process or cause damage to the RV.
This could include rocks, branches, or any other debris that may be in the immediate vicinity of the RV. By doing this, you not only create a safer environment for yourself and the RV, but also make it easier to maneuver the replacement RV into position. Think of it as clearing a path for the new RV to settle comfortably into its new home.
So, grab a broom or a shovel and get to work clearing the area!
2.3 Safety precautions to consider
safety precautions, replacing a car battery, potential hazards, protect yourself, safety goggles, gloves, proper ventilation, avoid sparks, battery acid, prevent short circuits, fire extinguisher, disconnect the negative terminal, recycling center Safety should be a top priority when replacing a car battery. There are a few potential hazards to be aware of, but with the right precautions, you can protect yourself and ensure a smooth replacement process. First and foremost, it’s important to wear safety goggles and gloves to protect your eyes and skin from any potential battery acid leaks.
Additionally, make sure you are working in a well-ventilated area to avoid inhaling any fumes from the battery. To avoid sparks and potential short circuits, it’s also crucial to disconnect the negative terminal first, followed by the positive terminal. Lastly, it’s always a good idea to have a fire extinguisher on hand, just in case.
And once you’ve successfully replaced the battery, don’t forget to dispose of the old one properly at a recycling center. By following these safety precautions, you can ensure a safe and successful car battery replacement.
Section 3: Removing the Old Awning
In this section, we will delve into the process of removing the old awning from your RV. Now that you have gathered all the necessary tools and materials, it is time to begin the actual replacement process. First, locate the awning arms on both sides of the RV.
These arms are typically attached to the sidewall of the RV with screws or bolts. Begin by removing these screws or bolts using a screwdriver or wrench, depending on the type of fastener used. Once the awning arms are detached, carefully lower them to the ground.
Ensure that there is someone to assist you in holding the awning arms as they can be quite heavy. Next, locate the fabric roll at the top of the awning. This roll is usually secured by a few screws or bolts as well.
Remove these fasteners and carefully unroll the fabric from the roller. If the fabric is too damaged or worn out, it may be necessary to cut it away using a sharp utility knife. Take your time during this step to avoid damaging the RV or injuring yourself.
Once the fabric is removed, inspect the roller and awning arms for any signs of damage or wear. If necessary, clean and lubricate the parts before installing the new awning. With the old awning completely removed, you are now ready to move on to the next section on how to install the new RV awning.
3.1 Opening the awning and securing it in place
When it comes time to remove your old awning, the first step is opening it up and securing it in place. This may seem like a simple task, but it’s important to do it properly to avoid any accidents or damage. Begin by locating the crank handle, which is usually found on one side of the awning.
Use the handle to slowly crank the awning open, being careful not to force it or go too fast. As the awning extends, you’ll want to lock it in place by engaging the awning locks. These locks are typically located at the end of the awning arms and can be easily turned to secure the awning in its open position.
Once the awning is secured, you’re ready to move on to the next steps of removing the old awning.
3.2 Removing the awning fabric
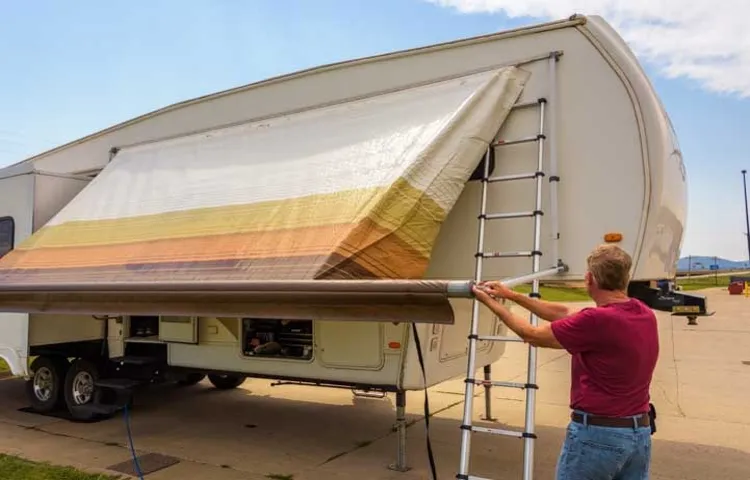
removing the awning fabric, old awning, replacing an awning Now that you’ve prepared your workspace and gathered the necessary tools, it’s time to start removing the old awning fabric. Before you begin, make sure you have a safe and sturdy ladder to reach the awning. Safety should always be your top priority! Start by carefully climbing up the ladder and locating the screws or bolts that are holding the fabric in place.
Use a screwdriver or wrench to loosen and remove these fasteners. Be extra cautious when removing the last few screws, as the fabric may become loose and fall. Once all the fasteners are removed, carefully lower the fabric to the ground.
If the fabric is still in good condition, you may want to save it for future use or as a spare. If the fabric is worn or damaged, it’s time to say goodbye and prepare for the next step of replacing your awning.
3.3 Releasing the tension from the awning arms
Releasing the tension from the awning arms is an important step when removing an old awning. This is necessary to ensure a safe and smooth removal process. To release the tension, you’ll first need to locate the awning arms, which are the metal rods that extend and retract the awning.
Once you’ve found them, look for the tension knobs or levers located on each arm. These are used to adjust the tension and lock the awning in place. By carefully loosening these knobs or levers, you can gradually release the tension in the arms.
It’s important to do this slowly and evenly to prevent sudden movements or accidents. Once the tension is fully released, you can proceed with the rest of the awning removal process.
3.4 Detaching the awning arms from the RV
awning arms, detach, RV Detaching the awning arms from your RV is an essential step in removing the old awning. This process requires a few tools and can be done by following a few simple steps. Firstly, locate the bolts or screws that are holding the awning arms in place on the RV.
These may be located on the sides or underneath the awning. Once you have located the fasteners, use the appropriate tool, such as a wrench or screwdriver, to loosen and remove them. Be sure to support the weight of the awning arms as you remove the fasteners to prevent any damage or accidents.
Once the fasteners are removed, gently lower the awning arms to the ground. It’s important to handle the arms with care and avoid any excessive force or sudden movements. By detaching the awning arms from the RV, you are one step closer to removing the old awning and preparing for the installation of a new one.
Section 4: Installing the New Awning
Are you thinking of replacing your RV awning but not sure where to start? Don’t worry, we’ve got you covered! In this section, we will walk you through the process of installing the new awning step by step. Whether you’re a first-time DIYer or have some experience with RV repairs, replacing an awning is a task that can be done with a little patience and the right tools. So, let’s get started and make your RV look brand new again!
4.1 Attaching the awning arms to the RV
attaching awning arms to RV, installing new awning, awning installation
4.2 Installing the new awning fabric
installing new awning fabric
4.3 Adjusting the tension in the awning arms
Installing a new awning can be a great way to add shade and style to your outdoor space. But once the awning is in place, you may find that the tension in the awning arms needs to be adjusted. This is an important step in ensuring that your awning operates smoothly and stays securely in place.
To adjust the tension, begin by locating the tension adjustment screws on the awning arms. These screws can typically be found near the joints of the arms. Using a screwdriver, slowly turn the adjustment screws to tighten or loosen the tension as needed.
Be sure to make small adjustments and test the awning after each adjustment until you find the desired tension. It’s important to note that the exact process for adjusting tension may vary depending on the specific awning model you have, so be sure to consult the manufacturer’s instructions for guidance.
4.4 Testing the functionality of the new awning
After the new awning has been installed, it is crucial to thoroughly test its functionality to ensure that everything is in working order. One way to do this is by retracting and extending the awning multiple times to check if it operates smoothly. It is important to pay attention to any noises or resistance that may indicate a problem.
Additionally, checking the stability of the awning is essential to ensure that it can withstand strong winds and other weather conditions. This can be done by gently pushing on the awning to see if it remains firmly in place. Inspecting the fabric for any tears or imperfections is also important to address any potential issues before they become more serious.
By taking the time to test the functionality of the new awning, you can have peace of mind knowing that it will provide shade and protection for years to come.
4.5 Cleaning up and securing the RV awning
cleaning RV awning, securing RV awning Cleaning up and securing your RV awning is an essential part of RV maintenance. Over time, your awning can accumulate dirt, debris, and even mold, which can not only make it look unsightly but also compromise its functionality. To clean your RV awning, start by removing any loose dirt or debris using a broom or a handheld vacuum.
Next, mix a solution of mild soap and warm water in a bucket. Using a soft-bristle brush, gently scrub the awning with the soapy water, paying extra attention to any stains or spots. Rinse off the soap with a hose or with clean water from a bucket, and allow the awning to air dry completely before retracting it.
Once your awning is clean, it’s important to secure it properly to prevent it from being damaged by wind or other weather conditions. Consider installing awning straps or tie-downs to provide extra stability and prevent the awning from unrolling unexpectedly. Additionally, make sure to retract the awning during high winds or storms to avoid any potential damage.
By regularly cleaning and securing your RV awning, you can extend its lifespan and enjoy a pleasant, worry-free camping experience.
Section 5: Maintenance and Care
Replacing an RV awning can be a bit daunting, but with the right steps and a little bit of patience, it’s definitely a task that can be done on your own. The first thing you’ll need to do is measure the size of your existing awning so you can purchase a replacement that fits properly. Once you have your new awning, you’ll want to start by removing the old one.
This typically involves loosening the tension on the arms and sliding the fabric out of the track. Next, you’ll want to make sure you have all the necessary tools and hardware for the installation. This may include items such as screws, brackets, and a drill.
Following the instructions provided with your new awning, you can begin the installation process. Start by attaching the mounting brackets to the side of your RV and then secure the awning arms to these brackets. Finally, you’ll want to slide the new awning fabric into the track and tighten the tension on the arms.
With a little bit of time and effort, you’ll have a brand new awning that will provide shade and protection for your RV.
5.1 Regular inspection and cleaning
In order to ensure the durability and efficiency of your equipment, regular inspection and cleaning are essential. Regularly inspecting your equipment allows you to identify any potential issues or signs of wear and tear before they escalate into larger problems. This can help prevent costly repairs and downtime in the long run.
Additionally, cleaning your equipment on a regular basis is crucial for maintaining its performance and extending its lifespan. Over time, dust, dirt, and debris can accumulate and affect the equipment’s functioning. By regularly cleaning your equipment, you can remove these contaminants and keep your equipment running at its best.
So, don’t forget to schedule regular inspections and cleaning sessions for your equipment to keep everything running smoothly.
5.2 Protecting the awning from the elements
awnings, protecting, elements. One of the key steps in maintaining your awning is protecting it from the elements. As we all know, Mother Nature can be quite unpredictable, but taking some simple precautions can go a long way in prolonging the life of your awning.
One important measure is to regularly check for any debris such as leaves, twigs, or dirt that may have accumulated on top of the awning. These may seem harmless, but over time they can cause damage to the material and affect its overall functionality. It’s also crucial to make sure that your awning is securely fastened and isn’t exposed to strong winds or heavy rain.
An awning that is not properly secured can become a safety hazard and may even tear or collapse under severe weather conditions. Additionally, consider using a waterproof cover or a fabric protector to shield your awning from rain, snow, or UV rays. By taking these simple steps, you can ensure that your awning remains in great condition and provides you with shade and protection for years to come.
5.3 How to handle minor repairs
“minor repairs” When it comes to maintaining and caring for your home, it’s important to be prepared for the occasional minor repair. Whether it’s a leaky faucet, a squeaky door, or a loose cabinet handle, these small issues can add up and become more troublesome if not addressed promptly. Luckily, there are some simple steps you can take to handle minor repairs on your own.
First, identify the problem and gather any necessary tools or materials. Sometimes all you need is a wrench, a screwdriver, or a bit of glue. Next, research the best approach to fixing the issue.
There are plenty of online resources and tutorials available that can guide you through the repair process. Finally, take your time and proceed with caution. Rushing through a repair can lead to more damage or an unsatisfactory result.
If you’re not confident in your abilities, don’t hesitate to call a professional for assistance. Remember, even minor repairs can make a big difference in the overall appearance and functionality of your home, so it’s worth taking the time to address them properly.
Conclusion
In conclusion, replacing an RV awning is a bit like giving your motorhome a make-over. It’s a chance to trade in that outdated fabric for a fresh, stylish new look. Plus, it’s a great way to show off your handyman skills to fellow campers – just make sure to wear your tool belt with pride.
But remember, it’s not just about the aesthetic upgrade – a new awning also provides vital shade and protection from the elements. So, whether you’re lounging under the canopy on a sunny day or huddled underneath during a sudden downpour, you’ll be grateful for your newly installed awning. So, grab your trusty toolkit and get ready to embark on this epic DIY adventure.
You’ll be feeling like an RV renovation superstar in no time. And who knows, your awning replacement prowess might even earn you the coveted title of “Awning Aficionado” among your camping crew. May your fabric be taught and your shade be plentiful – happy awning replacing!”
FAQs
How do I replace an RV awning?
To replace an RV awning, first, retract the awning fully. Then, unscrew the mounting brackets and carefully remove the old awning fabric. Next, attach the new awning fabric by aligning it with the roller tube and sliding it into the groove. Finally, reattach the mounting brackets and extend the awning to ensure it operates smoothly.
What tools do I need to replace an RV awning?
To replace an RV awning, you will need a few tools such as a screwdriver, wrench, pliers, drill, and ladder. These tools will help you with removing the old awning fabric, attaching the new fabric, and adjusting any necessary components during the replacement process.
How often should I replace my RV awning?
The lifespan of an RV awning can vary depending on factors such as usage, climate conditions, and maintenance. On average, RV awnings can last anywhere from 5 to 15 years. However, it is essential to inspect your awning regularly for signs of wear and tear, such as tears in the fabric or damage to the components. If your awning is showing significant signs of deterioration or is no longer functioning correctly, it may be time to consider replacing it.
Can I replace an RV awning by myself, or should I hire a professional?
While it is possible to replace an RV awning by yourself, it may be beneficial to hire a professional for more complex or extensive replacements. If you have experience with DIY projects and feel comfortable working at heights, you can attempt to replace the awning on your own. However, if you are unsure or have limited knowledge of RV awnings, it is advisable to seek the assistance of a professional to ensure a proper and safe installation.
How much does it cost to replace an RV awning?
The cost of replacing an RV awning can vary depending on factors such as the type of awning, size, quality, and whether you hire a professional or do it yourself. On average, the cost can range from $200 to $1,000 or more. It is recommended to obtain quotes from different suppliers or service providers to get a better idea of the specific costs for your RV awning replacement.
Can I upgrade my RV awning fabric without replacing the entire awning?
Yes, you can upgrade your RV awning fabric without replacing the entire awning. Many manufacturers offer replacement fabric options that are compatible with existing awning hardware. By selecting a new fabric with updated features or a different design, you can give your RV a fresh look without the need for a complete awning replacement.
Are there any maintenance tips to prolong the lifespan of an RV awning?
Yes, there are several maintenance tips you can follow to prolong the lifespan of your RV awning. Regularly clean the awning fabric and hardware to remove dirt, debris, and mildew. Avoid exposing the awning to harsh weather conditions such as heavy rain or strong winds when it is not necessary. Retract the awning during periods of non-use or when you are leaving the RV unattended for an extended period. Additionally, inspect the awning regularly for any signs of damage and address any issues promptly to prevent further deterioration.