
Hey there! Welcome to my blog, where today we’re diving into the fascinating topic of “Introduction.” An introduction is like the front door to a house, it’s the first thing that greets you and sets the tone for what lies ahead. In the world of writing, an introduction serves a similar purpose.
It captures the reader’s attention, provides a glimpse into what they can expect, and entices them to keep reading. Think of it as the opening act of a great concert. The band takes the stage, the lights dim, and the anticipation builds.
The introduction is that moment when the first chords are struck, and the crowd leans forward in anticipation. But why is the introduction so important? Well, it’s the hook that reels in the reader. It’s the make-or-break moment that determines whether someone will continue reading or move on to something else.
And in today’s fast-paced world where attention spans are shorter than ever, a captivating introduction is essential. So whether you’re writing a blog post, an essay, or even a novel, nailing the introduction is key. It’s your opportunity to make a strong first impression, to engage your audience, and to set the stage for the rest of your piece.
In this blog, we’ll explore different techniques for creating powerful introductions, discuss the dos and don’ts, and provide you with practical tips to enhance your own writing skills. Get ready to captivate your readers from the very first sentence!
Table of Contents
What is an RV Awning Roller Tube?
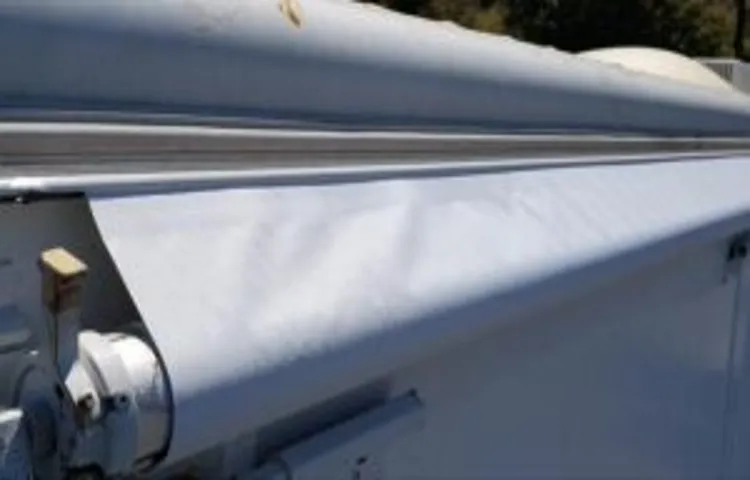
If you own an RV, you may be familiar with the term awning roller tube. But what exactly is it? Well, an RV awning roller tube is a component of the RV awning system that holds and supports the awning fabric. It is typically made of aluminum or steel and is attached to the side of the RV.
The roller tube allows the awning to be easily extended and retracted, providing shade and protection from the elements. Over time, the roller tube may become damaged or worn out and need to be replaced. So, if you’re wondering how to replace your RV awning roller tube, you’ve come to the right place.
Why Do You Need to Replace the Roller Tube?
Replacing the roller tube of your RV awning is necessary when it becomes worn out or damaged. Over time, the roller tube can start to show signs of wear and tear, such as cracks or bends, which can affect the functioning of the awning. A damaged roller tube can also lead to difficulties when retracting or extending the awning, making it a hassle to use.
By replacing the roller tube, you can ensure that your RV awning operates smoothly and efficiently. With the right tools and instructions, replacing the roller tube is a relatively straightforward process that can be done yourself. So, if you notice any damage or issues with your RV awning roller tube, it’s time to take action and replace it to keep your awning in top condition and to continue enjoying the shade and protection it provides.
Tools and Materials Needed
If you’re looking to replace your RV awning roller tube, you’ll need a few tools and materials to get the job done. First and foremost, you’ll need a new roller tube that is compatible with your RV’s awning system. Make sure to measure the length and diameter of your current roller tube to ensure you purchase the correct replacement.
You’ll also need a ladder or scaffolding to reach the awning, as well as a wrench or socket set to remove any bolts or brackets holding the old roller tube in place. Additionally, you may need a screwdriver or drill to remove any screws or fasteners securing the fabric to the roller tube. And don’t forget the sealant or adhesive, as you’ll want to secure the fabric to the new roller tube to prevent any water or wind damage.
With the right tools and materials, replacing your RV awning roller tube shouldn’t be a difficult task. So gather everything you need, follow the instructions for your specific awning system, and enjoy the benefits of a new roller tube for your RV awning.
Step-by-Step Guide to Replace RV Awning Roller Tube
Are you looking to replace the roller tube on your RV awning? Don’t worry, I’ve got you covered with a step-by-step guide that will make the process a breeze. First, gather your materials: a replacement roller tube, a ladder, a wrench, and a helper if needed. Start by retracting the awning all the way to its closed position.
Then, use the wrench to remove the bolts that are securing the roller tube to the RV. Once the bolts are removed, carefully slide the old roller tube out of the awning fabric. Now, it’s time to install the new roller tube.
Slide it into place, making sure it is lined up correctly with the fabric. Once in position, secure the roller tube by tightening the bolts with your wrench. Finally, give the awning a test run to ensure everything is working properly.
And there you have it, a brand new roller tube for your RV awning!
Step 1: Prepare the Area
RV awnings are a great addition to any recreational vehicle, providing shade and protection from the elements. However, over time, the roller tube of the awning may become damaged or worn out. In such cases, it is necessary to replace the roller tube to ensure that the awning functions properly.
Before starting the process, it is important to prepare the area where the awning is located. This involves retracting the awning completely and securing it to prevent it from accidentally opening while you work. You should also remove any dirt or debris from the awning and the surrounding area to ensure a clean and safe working environment.
By taking these precautionary steps, you can ensure a smooth and hassle-free replacement process for your RV awning roller tube.
Step 2: Remove the Fabric
In Step 2 of replacing your RV awning roller tube, you’ll need to remove the fabric. This is an important step because it allows you to access the roller tube and make any necessary repairs or replacements. To begin, you’ll need to extend the awning fully to its open position.
Next, locate the screws or bolts that attach the fabric to the roller tube. These may be located on the front or back of the awning, depending on the specific model. Use a screwdriver or wrench to carefully loosen and remove these screws or bolts.
Once they are removed, you can start to gently slide the fabric out of the groove on the roller tube. Take your time and be careful not to rip or tear the fabric in the process. It may be helpful to have a second person assisting you to ensure the fabric is removed smoothly.
Once the fabric is completely detached from the roller tube, you can set it aside for cleaning or replacement. With the fabric removed, you’ll now have clear access to the roller tube and can move on to the next step in the process.
Step 3: Detach the Awning Arms
Replacing the roller tube on an RV awning can seem like a daunting task, but with a little bit of know-how, it can be a relatively simple process. In this step-by-step guide, we’ll walk you through the process of replacing your RV awning roller tube so you can get back to enjoying the great outdoors in no time! Step 3 of the replacement process is to detach the awning arms from the roller tube. This step is important because it allows you to remove the old roller tube and replace it with a new one.
To detach the awning arms, you’ll first need to locate the tension springs on either side of the awning. These springs provide the necessary tension to keep the awning fabric taut. To detach the awning arms, start by securing the awning in the rolled-up position.
You can do this by using a strap or bungee cord to hold the arms together. Once the awning is secure, you can begin to loosen the tension springs. Using a tension rod or awning pull rod, insert it into the hole located on the end of the spring and rotate it counterclockwise to release the tension.
As you loosen the tension springs, be mindful of the potential for the springs to snap back into place. It’s important to take it slow and steady to avoid any injuries. Once both tension springs have been loosened, you can safely detach the awning arms from the roller tube.
To do this, locate the bolt or screw that secures the awning arm to the roller tube. Using a wrench or screwdriver, remove the bolt or screw and set it aside. Repeat this process for the other side of the awning as well.
With both bolts or screws removed, you can gently pull the awning arms away from the roller tube, detaching them completely. With the awning arms detached, you’re now ready to move on to the next step in the replacement process. Stay tuned for our next installment, where we’ll guide you through the process of removing the old roller tube from the RV awning.
Step 4: Remove the Roller Tube
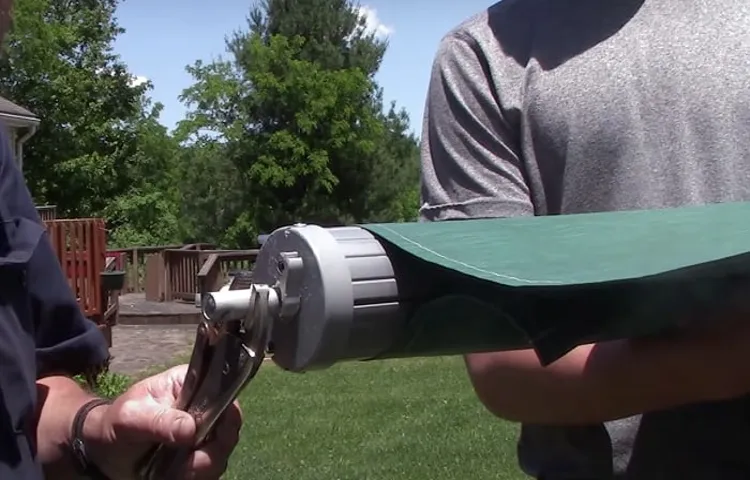
In the fourth step of our guide on how to replace an RV awning roller tube, we will show you how to remove the roller tube from your awning. This may sound like a daunting task, but with the right tools and a little patience, it can be done. To begin, you will first need to extend the awning fully and lock it in place.
Next, locate the end cap of the roller tube, usually found on the opposite end of the motor. Remove any screws or bolts that are holding the end cap in place. Once the end cap is removed, you should be able to slide the roller tube out of the awning housing.
Be cautious to not let the tube unwind too quickly, as it may be under tension. If necessary, you may need to enlist the help of a friend to hold the tube steady while you remove it. Once the roller tube is out, you can proceed to the next step in replacing your RV awning roller tube.
Step 5: Install the New Roller Tube
install the new roller tube
Step 6: Reattach the Awning Arms
Replacing the roller tube of an RV awning can be a challenging task, but with the right steps, it can be accomplished successfully. In this step-by-step guide, we will focus on reattaching the awning arms after replacing the roller tube. Once you have removed the old roller tube and installed the new one, the next step is to secure the awning arms back into place.
Start by positioning the arms onto the brackets located on the RV sidewall. Make sure they align properly and are level. Then, slide the arms into the brackets and secure them using the provided screws or bolts.
Tighten them properly to ensure a secure fit. Once the awning arms are reattached, give them a gentle tug to ensure they are firmly in place. Congratulations! You have successfully reattached the awning arms after replacing the roller tube of your RV awning.
Now you can move on to the next step in restoring your awning to its former glory.
Step 7: Replace the Fabric
If you’re looking to spruce up your RV awning roller tube, replacing the fabric is a straightforward task that can make a big difference in the appearance of your vehicle. With just a few easy steps, you can have a brand new awning that will give your RV a fresh and updated look. First, you’ll need to measure the length of your current fabric to determine the size you’ll need for the replacement.
Next, remove any screws or bolts that are holding the old fabric in place, taking care not to damage the roller tube. Once the old fabric is removed, you can begin installing the new fabric. Start by slipping one end of the new fabric onto the roller tube and secure it with the appropriate hardware.
Then, slowly unroll the fabric across the length of the roller tube, making sure it is centered and taut. Finally, attach the other end of the fabric to the roller tube and secure it in place. With the new fabric in place, you’ll be able to enjoy your RV awning with confidence, knowing that it not only looks great but will also provide you with shade and protection from the elements.
So why not replace your RV awning fabric today and give your vehicle the upgrade it deserves?
Tips and Considerations
If you own an RV, you know how important the awning is for providing shade and protection from the elements. Over time, the roller tube of the awning may become damaged or worn out, and it will need to be replaced. Fortunately, replacing the RV awning roller tube is a relatively straightforward process that can be done with a few simple tools and some patience.
First, you will need to make sure you have the proper replacement roller tube for your specific awning model. Once you have the new roller tube, you will need to extend the awning fully to relieve the tension on the springs. Next, you will need to remove the end caps and brackets that hold the roller tube in place.
Once the old roller tube is removed, you can slide the new one into place and reattach the end caps and brackets. Finally, you will need to tension the springs to ensure that the awning rolls up properly. Following these steps will help you replace your RV awning roller tube and get your awning back in working order.
Conclusion
So there you have it, a step-by-step guide on how to replace an RV awning roller tube. It may seem daunting at first, but with a little patience and the right tools, you’ll be able to tackle this project with ease. Now, I know what you’re thinking – why would I want to replace my RV awning roller tube? Well, let me explain with a little analogy.
Imagine your RV awning is like the superhero of your camping experience, swooping in to save the day and provide much-needed shade and protection from the elements. But like any superhero, even the mightiest awning can suffer wear and tear over time. The roller tube, in particular, is like the backbone of your awning.
It’s responsible for smoothly retracting and extending the fabric, ensuring that your awning is always there when you need it. But just like any backbone, it can become weak and in need of replacement. So, if your RV awning roller tube is showing signs of fatigue – maybe it’s gotten bent or cracked, or it’s just not rolling as smoothly as it used to – don’t fret! With this guide, you’ll be able to rejuvenate your awning and get it back to full superhero strength.
Remember, it’s always important to take your time and follow the instructions closely. And if you run into any difficulties, don’t hesitate to consult a professional or seek help from fellow RV enthusiasts. After all, every superhero needs a sidekick from time to time.
So go forth, my adventurous friends, and embark on this awning replacement journey. With a little DIY know-how and a touch of bravery, you’ll have your RV looking and performing its best in no time. Happy camping!”
FAQs
How does an RV awning roller tube get damaged?
An RV awning roller tube can get damaged due to age, exposure to extreme weather conditions, or improper use and maintenance.
Can I replace an RV awning roller tube myself?
Yes, it is possible to replace an RV awning roller tube yourself if you have the necessary tools and knowledge. However, it is recommended to consult a professional for a seamless and accurate replacement.
What are the signs that indicate a faulty RV awning roller tube?
Some signs of a faulty RV awning roller tube include difficulty in extending or retracting the awning, excessive noise while operating, uneven fabric tension, or visible damage to the roller tube itself.
How long does an RV awning roller tube last on average?
The lifespan of an RV awning roller tube can vary depending on factors such as usage, maintenance, and exposure to environmental conditions. However, on average, it can last for around 10-15 years.
Is it possible to repair a damaged RV awning roller tube instead of replacing it?
In some cases, minor damages to an RV awning roller tube can be repaired. However, if the damage is significant or the tube is old and worn out, it is usually more cost-effective to replace it with a new one.
Can I upgrade my RV awning roller tube to a better quality or stronger material?
Yes, it is possible to upgrade your RV awning roller tube to a better quality or stronger material, such as aluminum. This can provide additional durability and longevity to your awning.
Are there any specific precautions I should take while replacing an RV awning roller tube?
Yes, some precautions to take while replacing an RV awning roller tube include disconnecting any electrical connections, ensuring proper alignment and tension of the fabric, and exercising caution while handling heavy components.
Can I replace just the roller tube and keep the existing awning fabric? A8. Yes, it is possible to replace just the roller tube and keep the existing awning fabric, as long as it is in good condition and compatible with the new roller tube.
What tools and materials do I need to replace an RV awning roller tube?
Some common tools and materials required to replace an RV awning roller tube include a ladder, wrenches, screwdrivers, a new roller tube, fabric, and any necessary hardware or accessories.
How much does it cost to replace an RV awning roller tube?
The cost of replacing an RV awning roller tube can vary depending on factors such as the brand, size, and quality of the roller tube, as well as any additional accessories or professional installation required.
Can I prevent damage to my RV awning roller tube?
Yes, you can prevent damage to your RV awning roller tube by regularly inspecting and cleaning it, avoiding exposure to harsh weather conditions, properly retracting and securing the awning when not in use, and ensuring proper tension of the fabric.
Can I use my RV awning with a damaged roller tube?
It is not recommended to use an RV awning with a damaged roller tube, as it can lead to further damage and pose a safety risk. It is best to repair or replace the roller tube before using the awning again.