
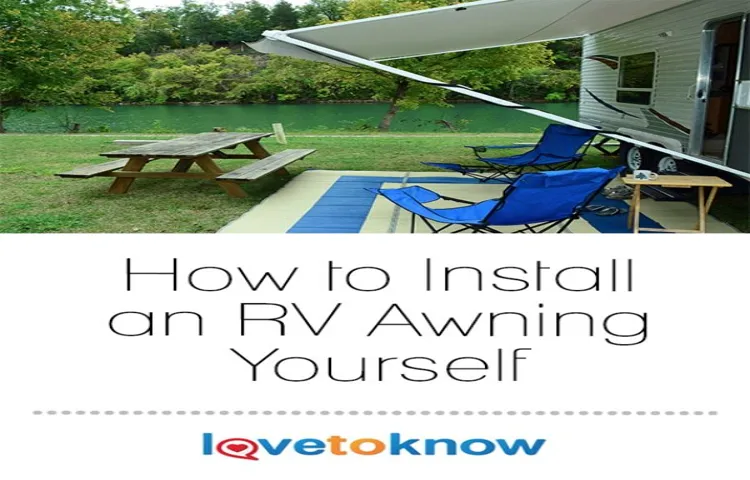
Have you ever found yourself sitting outside your RV on a sunny day, wishing you had some shade to relax in? If so, installing an RV awning could be the perfect solution for you. Not only does an awning provide much-needed shade, but it also adds to the overall aesthetic appeal of your RV. However, the installation process can be a bit daunting, especially if you’ve never done it before.
But fear not! In this step-by-step guide, I will walk you through the entire process, making it as easy as possible for you to install your very own RV awning. So let’s get started and have you enjoying the shade in no time!
Table of Contents
Introduction
Looking to install a new awning on your RV? It’s a great addition that can provide shade and protection from the elements. But how do you go about installing it? Don’t worry, it’s easier than you might think. First, you’ll need to gather the necessary tools and materials for the installation, such as a drill, screws, and the awning itself.
Then, you’ll want to measure and mark the spots where the brackets will go, making sure they’re evenly spaced and at the correct height. Next, attach the brackets to the RV using the screws and drill. Once the brackets are secure, carefully attach the awning to the brackets, following the manufacturer’s instructions.
Finally, extend the awning fully to make sure it’s working properly and adjust any tension settings as needed. With a little bit of time and effort, you’ll have your new RV awning installed and ready to enjoy!
What is an RV awning and why do you need one?
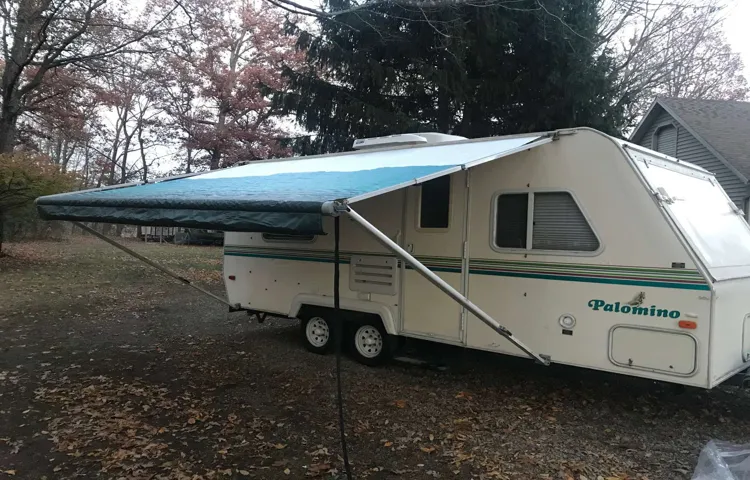
RV awnings are a valuable accessory for any recreational vehicle owner. An RV awning is a covering that is attached to the side of your RV, providing shade and protection from the elements. It is usually made of a durable fabric material that can withstand wind, rain, and sun exposure.
Having an RV awning is essential for a number of reasons. Firstly, it creates an additional living space outside of your RV, allowing you to enjoy the great outdoors while still being protected from the sun or rain. This is especially useful when you are camping and want to relax outside or entertain guests.
Additionally, an RV awning helps to keep the interior of your vehicle cooler by blocking out the sun’s rays. This can help to reduce energy costs and make your RV more comfortable during hot summer days. Overall, an RV awning is a must-have accessory for any RV owner who wants to maximize their outdoor living space and protect themselves from the elements.
Benefits of installing an RV awning
“RV awnings can be a game-changer for any road trip enthusiast. Whether you’re a seasoned traveler or someone looking to embark on your first adventure, installing an awning on your RV can provide a multitude of benefits. From protection against the elements to creating a comfortable outdoor living space, an RV awning adds both practicality and aesthetic appeal to your home on wheels.
So, let’s dive into the various advantages of having an RV awning and why it’s a must-have addition to your mobile getaway.”
Tools and Materials
Installing an RV awning can enhance your outdoor living space and provide shade and protection from the elements. To successfully install an RV awning, you will need a few tools and materials. First, you will need the awning itself, which usually comes with all the necessary hardware for installation.
You will also need a drill and drill bits to secure the brackets to your RV. Additionally, you will need a tape measure to ensure proper alignment and positioning of the awning. A level will help you make sure the awning is straight and balanced.
It’s also a good idea to have a ladder or step stool to help you reach the necessary areas for installation. Lastly, having another person to assist you can be helpful, especially when attaching the awning to the brackets. Gathering these tools and materials before you begin the installation process will ensure a smooth and successful RV awning installation.
List of tools needed for installation
tools needed for installation, installation tools, tools and materials, list of tools In order to successfully install something, it’s important to have the right tools and materials on hand. Whether you’re hanging a picture frame, installing a new light fixture, or even setting up a new piece of furniture, having the necessary tools can make the job much easier. Some common tools that are often needed for installation projects include a Phillips screwdriver, a flathead screwdriver, a hammer, a level, and a tape measure.
These basic tools can come in handy for a variety of tasks and are a good starting point for any installation project. Additionally, depending on the specific project you are working on, you may also need tools such as a drill, a wrench, or pliers. It’s always a good idea to have a well-stocked toolbox so that you are prepared for any installation job that comes your way.
By having the right tools and materials, you can ensure that your installation project goes smoothly and is completed successfully.
List of materials needed for installation
In order to properly install a new fixture or make repairs to your existing plumbing system, you will need to have the right tools and materials on hand. When it comes to tools, you will need a few basics such as a pipe wrench, adjustable pliers, an adjustable wrench, a hacksaw, a tape measure, and a level. These tools will help you loosen or tighten fittings, cut pipes to the proper length, and ensure that everything is level and aligned correctly.
In addition to the basic tools, you may also need specialized tools such as a tube cutter for copper pipes or a PVC cutter for plastic pipes. In terms of materials, it can vary depending on the specific project, but there are a few essentials that you will likely need. These include pipes, fittings, connectors, and joint compound.
The type of pipes and fittings you need will depend on the type of plumbing system you have and the specific needs of your project. If you are replacing a fixture, you may also need a new faucet, showerhead, or toilet, along with the necessary hardware to attach them to your plumbing system. Lastly, don’t forget to have some plumber’s tape on hand to ensure a watertight seal on threaded fittings.
By having these tools and materials ready, you will be well-prepared to tackle any plumbing project that comes your way.
Preparing Your RV
When it comes to getting your RV ready for your next adventure, installing an awning is a great way to add some extra comfort and shade. But how do you go about installing an RV awning? Well, the good news is that it’s not as difficult as you might think. First, you’ll need to determine which type of awning you want to install.
There are several options available, including manual and automatic awnings. Once you’ve chosen the right awning for your RV, you’ll need to gather all the necessary tools and materials for the installation process. This may include a ladder, a drill, screws, and a sealant.
Next, you’ll want to measure and mark the area where the awning will be installed. Make sure to double-check your measurements to ensure a proper fit. Then, following the manufacturer’s instructions, attach the awning brackets to your RV’s exterior.
Finally, carefully roll out the awning fabric and secure it to the awning arms. Voila! Your RV is now equipped with a brand new awning.
Cleaning the installation area
cleaning the installation area
Measuring and marking the installation area
When it comes to preparing your RV for installation, one of the first steps you’ll need to take is measuring and marking the installation area. This is an important step because it ensures that the RV will fit properly and be securely installed. To do this, you’ll need a tape measure and a pencil.
Start by measuring the length, width, and height of the RV. Be sure to take into account any protrusions such as air conditioning units or slide outs. Once you have your measurements, you can then mark the installation area using the pencil.
This will serve as a guide and make it easier to position the RV correctly during the installation process. By taking the time to properly measure and mark the installation area, you’ll ensure a smooth and successful installation of your RV.
Installing the Awning
If you’re looking to add some shade and protection to your RV, installing an awning is a great idea. Not only does it provide relief from the sun and rain, but it also creates another outdoor space for you to enjoy. So, how do you go about installing an RV awning? Well, the first step is to determine where you want to place it.
Take into consideration the size of your RV and any obstructions that may be in the way. Once you’ve found the perfect spot, measure it out and mark where the brackets will be placed. Next, you’ll want to assemble the awning and attach it to the brackets.
This may require drilling holes and using screws, so be sure to have the right tools on hand. Once the awning is securely in place, extend it out and make any necessary adjustments. Finally, test it out to make sure it opens and closes smoothly.
With a little bit of time and effort, you can have a functional and stylish awning for your RV.
Attaching the mounting brackets to the RV
Installing an awning on your RV can greatly enhance your outdoor living experience while on the road. One crucial step in the installation process is attaching the mounting brackets to the RV. These brackets will serve as the foundation for your awning, allowing it to be securely and sturdily attached to your vehicle.
To do this, you’ll need to first determine the ideal location for your awning. This will depend on factors such as the size and shape of your RV, as well as any existing structures or features on the vehicle. Once you’ve determined the location, you can start by carefully measuring and marking the spots where the brackets will be attached.
Make sure to double-check your measurements and level the brackets to ensure the awning will be properly aligned. Once the brackets are securely attached, you can then proceed to install the awning according to the manufacturer’s instructions. Remember, it’s important to carefully follow all steps and safety precautions to ensure a successful and safe installation.
Securing the awning fabric to the roller tube
Securing the awning fabric to the roller tube is an essential step in installing an awning. To ensure that the fabric stays in place and doesn’t come loose, there are a few steps you can follow. First, slide the awning fabric into the groove on the roller tube.
This groove is specifically designed to hold the fabric securely. Once the fabric is in place, use a tool like a screwdriver or an awning roller tube lock to tighten the fabric. This will help to prevent any slippage or movement of the fabric while the awning is in use.
It’s important to make sure that the fabric is evenly tensioned along the entire length of the roller tube to avoid any sagging or wrinkling. Additionally, you can use awning fabric clamps or bungee cords to further secure the fabric to the roller tube, especially in areas where there may be a lot of wind or movement. By taking the time to properly secure the awning fabric to the roller tube, you can ensure that your awning will stay in place and provide you with shade and protection for years to come.
Overall, securing the awning fabric to the roller tube is an important part of the installation process. It ensures that the fabric stays in place and doesn’t come loose, providing you with a durable and reliable awning. Remember to follow the steps outlined above, such as sliding the fabric into the groove on the roller tube and tightening it with an awning roller tube lock.
You can also use additional measures, like fabric clamps or bungee cords, for added security. By taking these steps, you can enjoy your awning without worrying about it coming loose or being damaged by wind or movement. So go ahead, install your awning and start enjoying the benefits of shade and protection in your outdoor space!
Mounting the roller tube to the brackets
awning installation
Testing the functionality of the awning
installing the awning. Once you have purchased your new awning, the next step is to install it. Installing an awning may seem like a daunting task, but with the right tools and a little patience, it is actually quite simple.
The first thing you will need to do is gather all of your tools. This includes a drill, a tape measure, a level, and a wrench. Once you have all of your tools ready, you can begin by measuring the area where you want to install your awning.
Make sure to measure the height and width of the space to ensure that the awning will fit properly. Once you have your measurements, you can use them to mark where the brackets for the awning will go. Use a level to ensure that the brackets are straight and then secure them to the wall with screws.
Once the brackets are securely in place, you can attach the awning to the brackets using a wrench. Make sure to tighten the bolts securely, but be careful not to overtighten and strip the screws. Once the awning is securely attached, give it a test run to make sure it opens and closes smoothly.
If everything is working properly, you can enjoy your new awning!
Maintenance and Care
Installing an RV awning may seem like a daunting task, but with a few simple steps, you’ll have your awning up in no time. Start by measuring the width of your RV and choose an awning that matches those dimensions. Next, gather your tools and materials, including a ladder, drill, screws, and a friend to help.
Begin by attaching the awning brackets to the side of your RV, making sure they are level and securely fastened. Then, carefully unroll the awning fabric, making sure it is aligned properly. Finally, secure the awning arms in place and adjust the tension as needed.
It’s important to follow the manufacturer’s instructions for your specific awning model to ensure a successful installation. Once your awning is installed, remember to regularly inspect and clean it to maintain its condition and longevity. So, why wait? Start enjoying the shade and comfort of your new RV awning today!
Regular cleaning and inspection
car maintenance, regular cleaning, inspection, care, car maintenance tips Regular cleaning and inspection are essential parts of car maintenance. By regularly cleaning your car, you not only keep it looking good, but you also prevent dirt and grime from causing damage. As you clean your car, you have the opportunity to inspect it for any signs of wear and tear or potential issues.
This allows you to catch any problems early on and take care of them before they become major and costly repairs. Additionally, regular cleaning helps to preserve the paint and keep your car’s exterior in good condition. By removing dirt, dust, and other debris, you prevent them from scratching or damaging the paint.
Inspection is also crucial for car maintenance as it allows you to check the various components of your vehicle for any signs of damage or wear. This includes inspecting the tires, brakes, lights, and fluid levels. By regularly inspecting these areas, you can address any issues promptly and ensure that your car is safe to drive.
Overall, regular cleaning and inspection are simple yet effective ways to take care of your car and keep it in optimum condition.
Proper storage during offseason
maintenance and care, storage during offseason, proper storage, maintenance during offseason, offseason storage
Conclusion
Congratulations! You have successfully reached the end of this guide on how to install an RV awning. By following these steps, you have proven yourself to be a master of awning installation, a true DIY champion. Now, with your new awning securely in place, you are ready to embark on endless adventures with the comfort and shade it provides.
Whether you’re lounging in the sun or seeking refuge from the rain, your awning will be there to save the day like a trusty sidekick. So go forth, intrepid camper, and bask in the envy of your fellow RV enthusiasts as they watch in awe of your stylish and functional awning. Just remember, with great shade comes great responsibility – don’t forget to secure it properly and unleash its full potential.
And should you encounter any unforeseen challenges along the way, just remember this guide’s final piece of wisdom: when life gives you lemons, pitch a tent and install an awning to make lemonade. Happy camping!”
Enjoy the benefits of your new RV awning
maintenance, care, new RV awning Congratulations on your new RV awning! Now that you have this amazing addition to your recreational vehicle, it’s important to ensure that you take proper care of it so that you can continue to enjoy its benefits for years to come. Taking the time to perform regular maintenance and care on your RV awning is essential in preventing any damage and extending its lifespan. First and foremost, it’s important to clean your RV awning regularly.
This can be done with a mild soap and water solution, using a soft brush or sponge to gently scrub away any dirt or grime. Avoid using harsh chemicals or abrasive brushes, as these can damage the fabric of the awning. After cleaning, make sure to thoroughly rinse away any soap residue to prevent any potential damage.
In addition to regular cleaning, it’s a good idea to inspect your RV awning for any signs of wear and tear. Look for any loose or frayed stitching, tears in the fabric, or any metal components that may be rusting or corroding. If you notice any issues, it’s best to address them as soon as possible to prevent further damage.
Another important aspect of RV awning maintenance is proper storage. When you’re not using your awning, make sure to retract it and secure it in its designated storage position. This will help protect it from the elements, such as strong winds or heavy rain, which can cause damage.
Additionally, consider investing in a quality awning cover to provide an extra layer of protection. By taking the time to perform regular maintenance and care on your new RV awning, you can ensure that it remains in excellent condition and continues to provide you with the benefits you were looking for. So, enjoy your adventures and make the most of your RV awning, knowing that you’ve taken the necessary steps to keep it in top shape!
FAQs
How do I install an RV awning?
Installing an RV awning can be done with a few simple steps. First, make sure you have all the necessary tools and materials, such as the awning itself, brackets, screws, and a drill. Next, measure and mark the desired location for the awning on your RV. Then, attach the brackets to the RV using the screws and drill. Once the brackets are securely attached, carefully slide the awning into the brackets and secure it in place. Finally, test the awning to ensure it opens and closes smoothly.
What are some common mistakes to avoid when installing an RV awning?
When installing an RV awning, it’s important to avoid common mistakes to ensure a successful installation. One common mistake is not properly measuring and marking the location for the awning, which can result in it being placed too high or too low. Another mistake is not using the correct size brackets or screws, which can lead to instability or damage to the awning. Additionally, not securely attaching the brackets to the RV can cause the awning to come loose while driving. It’s also crucial to follow the manufacturer’s instructions and guidelines to avoid any other potential mistakes.
Can I install an RV awning by myself, or do I need professional help?
Installing an RV awning can typically be done by yourself, as long as you have the necessary tools and basic DIY skills. However, if you’re not confident in your abilities or want to ensure a professional installation, it’s always recommended to seek help from a professional. They can provide expertise and guidance to ensure the awning is installed correctly and safely.
Do I need any special tools to install an RV awning?
Installing an RV awning usually requires basic tools that are commonly found in most households. These tools include a drill, screwdriver, measuring tape, level, wrench, and ladder. It’s important to check the manufacturer’s instructions for any specific tools or materials that may be required for your specific awning model.
How long does it take to install an RV awning?
The time it takes to install an RV awning can vary depending on the individual’s experience, the specific awning model, and the complexity of the installation. On average, it can take anywhere from 1 to 3 hours to complete the installation process. It’s important to allocate enough time and follow the installation instructions carefully to ensure a thorough and proper installation.
Can I install an RV awning on any type of RV?
RV awnings are designed to be compatible with various types of RVs, including motorhomes, fifth wheels, and travel trailers. However, it’s important to check the specific requirements and compatibility of the awning model with your RV before purchasing and installing. Some awnings may have size or weight restrictions, so it’s essential to ensure the awning will fit and function properly on your particular RV model.
Are there any maintenance steps I should take after installing an RV awning?
After installing an RV awning, it’s important to regularly inspect and maintain it to ensure its longevity and functionality. This includes cleaning the awning fabric periodically, removing any debris or dirt that may accumulate on it. Additionally, lubricating any moving parts, such as the retractable mechanism, can help keep the awning operating smoothly. It’s also recommended to check the awning’s hardware and brackets for any signs of wear or looseness and make any necessary repairs or adjustments.