
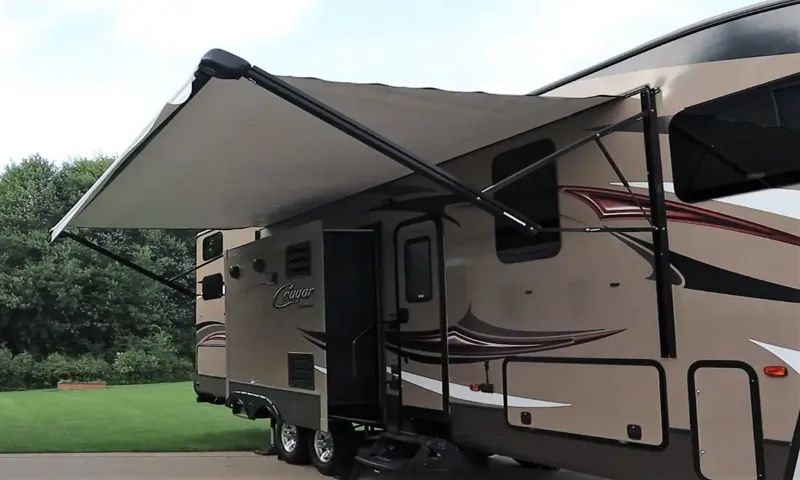
Have you ever experienced the frustration of a torn or damaged awning on your RV? It can put a damper on your outdoor plans and leave you scrambling for a solution. But fear not! In this blog post, we will walk you through the process of replacing the awning on your RV, so you can get back to enjoying the great outdoors in no time. Think of your RV awning as a protective shield against the elements.
It shields you from the scorching heat of the sun, provides a cozy space to relax in the shade, and even keeps you dry during a sudden downpour. But just like any other part of your RV, the awning is susceptible to wear and tear over time. Replacing your RV awning may seem like a daunting task, but with the right tools and a little bit of patience, it can be a relatively simple DIY project.
Just imagine the satisfaction of knowing that you conquered this challenge on your own, saving yourself time and money in the process. Now, before we dive into the nitty-gritty details, let’s start with the basics. First, you’ll want to assess the damage and determine whether you need to replace the entire awning or just a specific part.
This will depend on the extent of the damage and the availability of replacement parts. Next, gather all the necessary tools and materials for the job. This may include a ladder, screwdriver, pliers, replacement fabric or awning, and any other specific tools recommended by the manufacturer.
It’s always a good idea to consult your RV’s owner’s manual for guidance and to ensure you have everything you need. Once you’re ready, it’s time to roll up your sleeves and get to work. Start by removing the old awning fabric, taking care to follow any specific instructions provided by the manufacturer.
This may involve loosening screws, removing the weather guard, and carefully detaching the fabric from the awning roller and support arms. With the old fabric removed, it’s now time to install the new awning. Begin by sliding the replacement fabric onto the awning roller, ensuring that it is properly aligned and centered.
Table of Contents
Introduction
If you’re an RV owner, you may eventually find yourself needing to replace the awning on your vehicle. Whether it’s due to wear and tear or accidental damage, it’s important to know how to tackle this task. How to replace an awning on an RV involves a step-by-step process that can be quite straightforward with a little know-how.
First, you’ll need to gather the necessary tools and materials, which may include a ladder, awning fabric, awning rail, screws, a drill, and a helper. Then, you’ll need to remove the old awning by loosening the screws or bolts that hold it in place. Once the old awning is removed, you can measure the space to ensure the new awning fits properly.
Next, you’ll attach the new awning fabric to the awning rail, making sure it is securely fastened. Finally, you can install the new awning on the RV, securing it with screws and making any necessary adjustments. With a little patience and careful attention to detail, you’ll have a brand new awning for your RV in no time.
Overview of the awning replacement process
awning replacement process
Step 1: Gather the necessary tools and materials
If you’re looking to replace the awning on your RV, the first step is to gather all the necessary tools and materials. This will ensure that you have everything you need before starting the project. Some common tools you may need include a ladder, screwdriver, pliers, and a drill.
You’ll also need to purchase a new awning, which can be found at most RV supply stores. Make sure you measure the dimensions of your current awning before purchasing a replacement to ensure it will fit properly. It’s important to have all the necessary tools and materials on hand before you begin the replacement process to avoid any delays or frustrations.
List of tools and materials needed for the replacement
When it comes to replacing a broken or outdated faucet, having the right tools and materials is essential. Before you start the replacement process, gather the following items: a wrench or pliers to loosen and tighten connections, a bucket to catch any water that may spill, Teflon tape to create a watertight seal, a new faucet of the appropriate size and style, and any additional parts or accessories that may be required. Having these tools and materials on hand will ensure a smooth and efficient replacement process.
Step 2: Prepare the RV for awning replacement
Now that you’ve gathered all the necessary tools and materials, it’s time to prepare your RV for the awning replacement. Start by safely parking and stabilizing your RV in a flat and level area. Make sure to turn off any power sources to avoid electrocution.
Next, carefully remove any existing awning fabric, making sure to avoid tearing or damaging it further. You may need to use a ladder or step stool to reach higher areas. Once the fabric is removed, inspect the awning hardware for any signs of damage or wear.
Replace any damaged or worn-out parts as needed. Thoroughly clean the awning rail and hardware using a mild detergent and a soft scrub brush. Rinse off any soap residue and allow the awning to dry completely before proceeding.
By taking these preparatory steps, you’ll ensure that your RV is ready for a successful awning replacement.
Instructions on how to properly prepare the RV
As you continue to prepare your RV for awning replacement, the next step is to make sure the RV is properly prepped. This includes cleaning the area where the new awning will be installed. Begin by removing any dirt, debris, or adhesive residue from the surface.
You can use a mild soapy water solution or a specific cleaner recommended by the awning manufacturer. Take care not to use any abrasive materials that could scratch or damage the RV’s exterior. Once the area is clean, allow it to dry completely before moving on to the next step.
Making sure the surface is clean and dry will help ensure a smooth and secure installation of your new awning.
Step 3: Remove the old awning
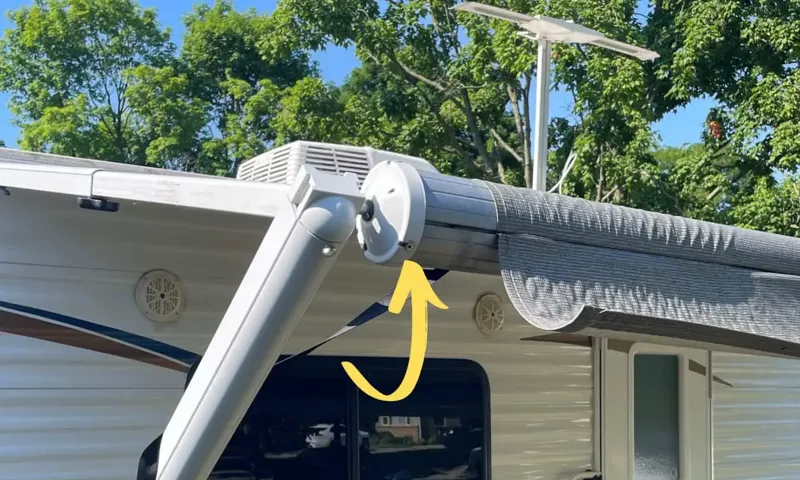
When it comes to replacing an awning on an RV, the first step is to remove the old one. This may seem like a daunting task, but with the right tools and a little know-how, it can be done relatively easily. Start by retracting the awning fully, and then locate the main arm bracket.
This is usually attached to the RV with screws or bolts. Use a wrench or drill to remove these fasteners and detach the awning from the bracket. Once the awning is free from the bracket, carefully slide it out of the RV’s awning rail.
Be sure to have someone help you with this step, as the awning can be heavy and unwieldy. Once the old awning is removed, you can move on to the next step in the process of replacing it with a new one.
Step-by-step guide on how to remove the existing awning
awning removal, remove old awning, step-by-step guide
Step 4: Install the new awning
Now that you have removed the old awning from your RV, it’s time to install the new one. Before you begin, make sure you have all the necessary tools and equipment. First, carefully unroll the new awning and place it in the desired position.
Start by attaching the awning rail to the RV using screws or bolts. Make sure it is securely fastened and level. Next, attach the awning fabric to the roller tube.
Slide the fabric into the slot on the tube and secure it using the provided hardware. Once the fabric is attached, roll up the awning to the desired height and secure it in place with the awning arms. Finally, test the awning to make sure it opens and closes smoothly.
Congratulations, you have successfully replaced the awning on your RV and are ready to enjoy the outdoors in style.
Step-by-step guide on how to properly install the new awning
awning installation, install new awning, step-by-step guide, proper awning installation, installing an awning. Are you ready to add some shade and style to your outdoor space? Installing a new awning is a great way to accomplish both of these goals. In this step-by-step guide, we will walk you through the process of properly installing your new awning.
By following these instructions, you can ensure a successful installation and enjoy your new shade in no time. Step 4: Install the new awning Now that you have prepared the area and gathered all the necessary tools and materials, it’s time to install your new awning. Follow these steps to ensure a proper installation:
Start by attaching the mounting brackets to the wall or ceiling. Make sure to use a level to ensure they are straight. Use a drill and appropriate screws to secure the brackets in place.
Once the brackets are securely attached, it’s time to hang the awning. Carefully lift the awning and slide the arms into the brackets.
Make sure the awning is centered and level before proceeding. With the awning in place, use a wrench to tighten the bolts on the brackets.
This will ensure that the awning is securely fastened and won’t wobble or fall. Next, extend the awning to its fully open position.
Step 5: Test the new awning
Now that you’ve successfully replaced the awning on your RV, it’s time to put it to the test. Step 5: Test the new awning to ensure it’s functioning properly and securely in place. First, extend the awning fully to check for any misalignment or issues with the extension mechanism.
Make sure it extends smoothly without any resistance or jerking movements. Next, retract the awning back into its stored position and ensure it folds up neatly and securely. Check that all the locking mechanisms are engaged and that the awning is tightly secured to the RV.
Finally, open and close the awning a few times to ensure it operates smoothly and that there are no lingering issues. You can also test the awning in different weather conditions, such as light rain or wind, to see how it holds up. By thoroughly testing your new awning, you can have peace of mind knowing that it’s installed correctly and will provide you with shade and protection on your future camping adventures.
Instructions on how to check if the new awning is functioning properly
awning, functioning, test, new awning So, you’ve installed a new awning and you want to make sure it’s functioning properly? Well, you’re in the right place! Testing your new awning is an important step to ensure that it will provide the protection and shade that you desire. To start, make sure the awning is fully extended. This will allow you to check for any issues with the mechanism and ensure that it smoothly opens and closes without any hitches.
Next, take a close look at the fabric of the awning. You want to make sure there are no tears or loose threads that could potentially lead to further damage. Give it a gentle tug to ensure it’s securely fastened to the frame.
Finally, test the awning’s ability to withstand wind. Open it up on a slightly windy day and see how well it holds up. Does it sway too much or does it stay firmly in place? By following these steps, you can rest assured that your new awning is functioning properly and ready to provide you with the shade and protection you need.
Step 6: Maintenance tips
If it’s time to replace the awning on your RV, there are a few maintenance tips you should keep in mind to ensure the process goes smoothly. First, it’s important to regularly inspect your awning for any signs of wear and tear, such as holes or fading. By catching these issues early on, you can prevent them from getting worse and potentially causing further damage.
Additionally, be sure to clean your awning regularly to remove any dirt or debris that may accumulate over time. This will help to prolong its lifespan and keep it looking its best. When it comes to actually replacing the awning, make sure to follow the manufacturer’s instructions carefully and enlist the help of a friend or family member if needed.
Remember, safety first! By taking these maintenance tips into consideration, you can ensure that your new awning is installed correctly and will last for many more adventures to come.
Tips for maintaining and prolonging the lifespan of your new RV awning
To keep your new RV awning in top condition and prolong its lifespan, regular maintenance is essential. Here are some maintenance tips to help you keep your awning looking and functioning its best. First, make sure to clean your awning regularly.
Remove any debris, dirt, or bird droppings using a soft brush or cloth and a mild detergent. Be sure to rinse it thoroughly with water afterwards. Additionally, inspect your awning for any signs of wear or damage, such as tears or loose stitching.
If you notice any issues, address them promptly to prevent further damage. Finally, when not in use, try to store your awning in a dry, well-ventilated area to prevent mold and mildew growth. By following these maintenance tips, you can extend the life of your RV awning and continue to enjoy its shade and protection for years to come.
Conclusion
So, you’ve made it to the end of this guide on how to replace an awning on your RV. Hopefully, by now you’ve gained some helpful tips and insights to tackle this project with ease. Just like giving your RV a fresh makeover, installing a new awning can make a world of difference in both aesthetics and functionality.
Whether you’re a seasoned DIY-er or just starting out, with the right tools and a dash of determination, you can easily swap out that tired old awning with a brand new one. Just remember, safety first! Double-check your instructions, enlist a helping hand if needed, and always make sure to take proper precautions when working with ladders or using power tools. And if you find yourself feeling overwhelmed or in unfamiliar territory, don’t be afraid to reach out to a professional for assistance.
After all, it’s better to be safe than sorry! So go ahead, take the plunge (or perhaps I should say, secure the ropes) and embark on this awning replacement adventure. You’ll not only have a great story to tell around the campfire, but you’ll also have a snazzy new awning that will make all your neighbor campers green with envy. Happy RVing, and may your awning always provide you with ample shade and protection from the elements!”
Summary of the awning replacement process and final thoughts
awning replacement, maintenance tips
FAQs
How often should awning on an RV be replaced?
The frequency of replacing the awning on an RV depends on factors such as usage, maintenance, and weather conditions. However, on average, it is recommended to replace the awning every 5-7 years.
What are the signs that indicate the need to replace the awning on an RV?
Some signs that indicate the need to replace the awning on an RV include excessive wear and tear, tears or holes in the fabric, difficulty in retracting or extending the awning, and fading or discoloration of the material.
Can I replace the awning on my RV myself, or should I hire a professional?
Whether you can replace the awning on your RV yourself or need to hire a professional depends on your level of expertise and comfort with DIY projects. While it is possible to replace the awning yourself, hiring a professional ensures proper installation and reduces the risk of potential damage.
How much does it cost to replace the awning on an RV?
The cost of replacing the awning on an RV can vary depending on factors such as the size of the awning, type of fabric chosen, and whether you are hiring a professional or doing it yourself. On average, you can expect to spend between $500 to $1500 for a complete awning replacement.
Are there different types of awning materials available for RVs?
Yes, there are different types of awning materials available for RVs, including vinyl, acrylic, and polyester. Each material has its own set of advantages and disadvantages, so it is important to consider factors such as durability, weather resistance, and maintenance requirements before choosing the right material for your RV awning replacement.
Can I replace just the fabric of the awning on my RV, or do I need to replace the entire unit?
In most cases, it is possible to replace just the fabric of the awning on your RV without needing to replace the entire unit. However, it is important to assess the condition of the frame, arms, and mechanisms to ensure they are in good working order before replacing just the fabric.
How can I maintain the awning on my RV to prolong its lifespan?
To prolong the lifespan of the awning on your RV, it is important to regularly clean the fabric, inspect for any signs of wear or damage, lubricate moving parts, and take appropriate measures to protect it from harsh weather conditions such as heavy rain, snow, or prolonged exposure to direct sunlight.