
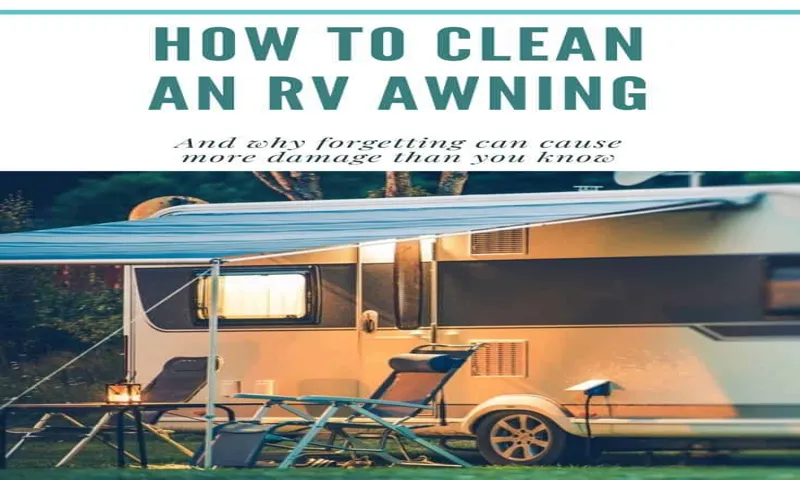
Are you an RV owner who loves hitting the open road and exploring new destinations? If so, you probably know that maintaining your RV is essential to ensuring a smooth and enjoyable trip. One area that often gets overlooked is the underside of your RV awning. Over time, dirt, debris, and even mildew can accumulate on the fabric, making it look dull and dingy.
But fear not! Cleaning the underside of your RV awning is easier than you might think. In this blog post, we will walk you through the steps to effectively clean your awning and restore its original beauty. So grab your cleaning supplies and let’s get started!
Table of Contents
- 1 Why Clean the Underside of Your RV Awning
- 2 Materials Needed
- 3 Safety Precautions
- 4 Step-by-Step Guide
- 4.1 Step 1: Retract the Awning Completely
- 4.2 Step 2: Inspect the Awning for Damage
- 4.3 Step 3: Prepare the Cleaning Solution
- 4.4 Step 4: Wet the Underside of the Awning
- 4.5 Step 5: Apply the RV Awning Cleaner
- 4.6 Step 6: Scrub Away the Dirt and Stains
- 4.7 Step 7: Rinse Off the Cleaning Solution
- 4.8 Step 8: Dry the Awning Thoroughly
- 5 Tips and Tricks
- 6 Conclusion
- 7 FAQs
Why Clean the Underside of Your RV Awning
If you’re an avid RV enthusiast, you know the importance of keeping your vehicle in top shape. One often overlooked area that requires regular cleaning is the underside of your RV awning. While it may not be the most glamorous task, cleaning the underside of your RV awning is essential for maintaining its longevity and functionality.
Over time, dirt, dust, and debris can accumulate on the underside of your awning, leading to mold and mildew growth. This not only looks unsightly but can also cause unpleasant odors and potential health hazards. Additionally, a dirty awning can become less effective at providing shade and protection from the elements.
By regularly cleaning the underside of your RV awning, you can ensure its durability and keep it looking its best. So, grab a bucket, some mild detergent, and a soft brush, and give your awning the attention it deserves!
Prevent Mold and Mildew Growth
RV awnings are a great addition to any recreational vehicle. They provide shade and shelter from the elements, allowing you to enjoy the great outdoors in comfort. However, it’s not just the top of the awning that needs to be cleaned regularly – the underside is just as important.
Cleaning the underside of your RV awning may not be at the top of your to-do list, but it’s an essential task that can prevent mold and mildew growth. When you leave your awning rolled up for an extended period of time, moisture can get trapped between the fabric layers. This creates the perfect environment for mold and mildew to thrive.
Mold and mildew not only look unsightly, but they can also cause health problems, such as allergies and respiratory issues. By regularly cleaning the underside of your RV awning, you can prevent mold and mildew from taking hold and ensure that your outdoor space remains clean and healthy.
Extend the Lifespan of Your Awning
RV awnings are not just a decorative feature; they serve an important purpose in providing shade and protection from the elements. However, many RV owners often neglect to clean the underside of their awnings, focusing only on the top surface. But why is it important to clean the underside of your RV awning? The underside of the awning is constantly exposed to dirt, dust, and outdoor pollutants.
Over time, this accumulation can lead to mold, mildew, and even rust. Cleaning the underside of your awning not only helps to maintain its appearance but also extends its lifespan. Regular cleaning removes these harmful substances, preventing them from causing damage and deterioration to the fabric.
By taking the time to clean the underside of your RV awning, you can ensure that it not only looks great but also lasts for years to come. So, what are you waiting for? Grab a bucket and some mild detergent, and give your awning the TLC it deserves. Your awning will thank you by providing you with shade and protection for many more adventures on the road.
Improve the Appearance of Your RV
clean the underside of your RV awning
Materials Needed
When it comes to cleaning the underside of your RV awning, there are a few materials that you’ll need to gather before getting started. First and foremost, you’ll want to make sure you have a ladder or step stool that will allow you to safely reach the underside of the awning. Additionally, you’ll need a long-handled brush or broom with soft bristles to gently scrub away any dirt or debris that may have accumulated.
It’s also a good idea to have a bucket filled with a mixture of warm water and mild detergent to use as a cleaning solution. Finally, having a hose or pressure washer on hand will be helpful for rinsing off the cleaning solution and ensuring that all dirt and grime is thoroughly removed. With these materials in tow, you’ll be well-equipped to give your RV awning’s underside a thorough and effective cleaning.
RV Awning Cleaner
RV awning cleaner When it comes to cleaning your RV awning, having the right materials is essential. You don’t want to use harsh chemicals or abrasive tools that could damage the fabric or frame. Instead, opt for a gentle yet effective cleaner that can remove dirt, stains, and mildew without causing any harm.
Here are the materials you’ll need to clean your RV awning: Mild detergent: Look for a mild detergent that is safe for use on fabrics. Avoid using strong soaps or detergents that could strip the awning’s protective coating.
Soft brush or sponge: Choose a soft-bristled brush or sponge that won’t scratch or tear the awning material. This will help you gently scrub away any dirt or stains.
Water hose: You’ll need a water hose with a nozzle attachment to rinse off the cleaner and dirt from the awning. Make sure you have enough water pressure to effectively remove all the grime.
Bucket: Fill a bucket with water and mix in the detergent according to the manufacturer’s instructions. This will create a soapy solution that you can apply to the awning.
Ladder or step stool: Depending on the height of your RV, you may need a ladder or step stool to reach the awning. Make sure you have a stable and secure way to access the awning safely.
Soft-Bristled Brush
For the best results, it is recommended to use a soft-bristled brush when brushing your hair. This type of brush is gentle on your hair and scalp, reducing the risk of damage and irritation. The soft bristles are designed to detangle and smooth your hair without causing pulling or snagging.
This is especially beneficial for those with delicate or sensitive hair. When using a soft-bristled brush, it is important to use it with care. Start by brushing from the ends of your hair and work your way up, gently removing any tangles or knots.
Avoid brushing too forcefully or vigorously, as this can cause breakage. Additionally, make sure to clean your brush regularly to remove any product build-up or debris. By using a soft-bristled brush, you can achieve smooth, tangle-free hair while also taking care of your scalp and strands.
Garden Hose
When it comes to keeping your garden hydrated, a garden hose is an essential tool. To ensure that you have everything you need to set up your garden hose system, here are the materials you’ll need. First and foremost, you’ll need the garden hose itself.
Look for a hose that is durable and made from high-quality materials, as this will ensure that it lasts for years to come. Next, you’ll need a nozzle or sprayer attachment to control the water flow. These attachments come in a variety of styles, so choose one that suits your watering needs.
Additionally, you’ll need connectors to attach the hose to your outdoor faucet and any other accessories. These connectors come in different sizes, so make sure to choose ones that are compatible with your hose and other equipment. Finally, don’t forget to pick up a hose reel or hanger to keep your hose neatly stored when not in use.
With these materials in hand, you’ll be ready to set up your garden hose system and keep your plants happy and hydrated all season long.
Bucket
bucket
Microfiber Cloth or Sponge
Microfiber cloth or sponge? Deciding on the best cleaning tool for your household chores can be a bit overwhelming. Both microfiber cloths and sponges have their own advantages and disadvantages, and the choice ultimately depends on the task at hand. Microfiber cloths are made from synthetic fibers that are incredibly soft and gentle, making them perfect for delicate surfaces like glass or electronics.
They are also great at trapping dust and dirt, thanks to their unique texture and absorbency. On the other hand, sponges are more versatile and can be used for a wide range of cleaning tasks. Their porous nature allows them to hold more cleaning solution, making them ideal for tackling stubborn stains and heavy-duty cleaning.
However, sponges can harbor bacteria if not properly cleaned and dried after each use. So, if you’re looking for a gentle and efficient cleaning tool for your everyday needs, a microfiber cloth might be the way to go. But if you’re dealing with tough messes and need something more heavy-duty, a sponge would be the better choice.
Ultimately, it’s a matter of personal preference and the specific cleaning task at hand. Whatever you choose, be sure to properly care for your cleaning tools to ensure their longevity and effectiveness.
Rubber Gloves
If you’re like me, you probably use rubber gloves for a variety of tasks around the house. Whether it’s doing the dishes, cleaning the bathroom, or working in the garden, rubber gloves can be a lifesaver. But have you ever wondered what materials are used to make these gloves? Well, I did some research and found out that there are a few primary materials that go into making rubber gloves.
The first material is, of course, rubber. Rubber gloves are typically made from either natural rubber latex or synthetic rubber materials. Natural rubber latex is derived from the sap of rubber trees, while synthetic rubber is made from petroleum byproducts.
Both materials have their pros and cons, but they both provide the elasticity and flexibility needed in a good pair of gloves. In addition to rubber, other materials such as fillers and stabilizers are added to the mix. Fillers, like calcium carbonate or silica, help improve the strength and durability of the gloves.
Stabilizers, on the other hand, help prevent the gloves from degrading over time and protect against chemicals and other substances. To make the gloves, these materials are mixed together and then formed into the desired shape using molds. The mixture is then vulcanized, which involves heating it to a high temperature and applying pressure.
This process helps to strengthen the rubber and give it its elastic properties. So, the next time you put on a pair of rubber gloves, take a moment to appreciate the materials that go into making them. From natural rubber latex or synthetic rubber to fillers and stabilizers, all these components work together to provide you with the protection and comfort you need for your cleaning and gardening tasks.
Safety Precautions
Cleaning the underside of an RV awning is an essential part of maintaining a clean and comfortable outdoor space. However, it’s important to take safety precautions to prevent any accidents or injuries while cleaning. Before you begin, make sure you have a sturdy ladder or step stool that can support your weight.
Always place it on a flat and stable surface, and never stand on the top two rungs. Additionally, wear protective gear such as gloves and safety goggles to protect yourself from any potentially harmful substances. It’s also a good idea to have someone nearby to hold the ladder or assist you if needed.
By taking these safety precautions, you can ensure a safe and effective cleaning process for your RV awning.
Make Sure the Awning is Securely Retracted
awnings, retractable awnings, safety precautions, secure, awning structure, strong winds, damage, injuries, precautionary measures, secure retraction. Retractable awnings are a great addition to any outdoor space, providing shade and protection from the sun’s rays. However, it’s important to remember that these awnings are not invincible and can be susceptible to damage if not used properly.
One important safety precaution to keep in mind is to make sure that the awning is securely retracted when not in use. This is especially important during strong winds, as gusts of wind can not only damage the awning structure but also pose a risk of injuries to anyone in the vicinity. By taking the necessary precautionary measures to ensure a secure retraction, you can help prevent any potential damage or accidents.
So, before leaving your outdoor area or when the weather takes a turn, always make it a habit to double-check that your awning is securely retracted. This simple step can go a long way in ensuring the safety and longevity of your awning.
Use a Sturdy Ladder or Step Stool
When it comes to reaching high places, it’s important to prioritize safety. One of the key precautions to keep in mind is to use a sturdy ladder or step stool. These tools are designed to provide stability and support while you’re working at elevated heights.
However, not all ladders and step stools are created equal. It’s crucial to choose one that is sturdy and reliable, so you can focus on the task at hand without worrying about potential accidents or falls. Look for ladders and step stools that are made of durable materials, such as aluminum or fiberglass, and have non-slip feet to prevent slipping.
Additionally, make sure to follow the weight limit guidelines provided by the manufacturer. By using a sturdy ladder or step stool, you can ensure your safety and complete your tasks efficiently and effectively.
Wear Protective Clothing and Eyewear
“protective clothing and eyewear” When it comes to safety precautions, one of the most important things you can do is wear protective clothing and eyewear. Whether you’re working on a construction site, doing DIY projects at home, or even just doing some gardening, wearing the right gear can make all the difference in keeping you safe. Protective clothing, such as coveralls or safety vests, can help protect you from hazards like chemicals, sharp objects, or even extreme temperatures.
It acts as a barrier between you and potential harm. And don’t forget about your eyes! Wearing protective eyewear, such as safety goggles or glasses, can shield your eyes from dust, debris, or flying objects. It’s like wearing a shield to protect your vision.
So the next time you’re about to embark on a task that requires some level of risk, make sure you gear up with the right protective clothing and eyewear. Your safety is worth it!
Step-by-Step Guide
Cleaning the underside of your RV awning may seem like a daunting task, but with a step-by-step guide, it can be easier than you think. First, start by extending your awning fully and securing it in place. This will give you better access to the underside.
Next, grab a long-handled brush with soft bristles to avoid damaging the fabric. Mix a solution of warm water and mild dish soap in a bucket. Dip the brush in the soapy water and gently scrub the underside of the awning, paying extra attention to any areas with noticeable dirt or stains.
Rinse the brush frequently to remove dirt buildup. Once you have thoroughly cleaned the underside, rinse it off with a hose or pressure washer, making sure to remove all soap residue. Lastly, allow the awning to fully dry before retracting it.
Following these simple steps will help you keep your RV awning clean and in good condition, ensuring it lasts for many camping adventures to come.
Step 1: Retract the Awning Completely
retract the awning
Step 2: Inspect the Awning for Damage
Inspecting the awning for damage is an important step in maintaining its functionality and longevity. So, let’s dive into a step-by-step guide on how to inspect your awning for any potential issues. First, start by examining the fabric of the awning.
Look for any signs of wear, such as fading, fraying, or holes. These can be indicators of damage that might need to be repaired. Next, check the framework of the awning.
Look for any bent or broken components, such as the arms or brackets. These can affect the stability of the awning and may need to be replaced. Additionally, inspect the awning for any signs of rust or corrosion, particularly on the metal parts.
This can compromise the awning’s structural integrity and should be addressed immediately. Lastly, test the awning’s operation. Open and close it a few times to ensure smooth movement and check for any sticking or grinding noises, which may indicate a problem.
By thoroughly inspecting your awning, you can catch any issues early on and prevent further damage.
Step 3: Prepare the Cleaning Solution
To prepare the cleaning solution for your home, follow these step-by-step instructions. First, gather all the necessary supplies including a bucket, a cleaning agent such as dish soap or a multi-purpose cleaner, and warm water. Fill the bucket with warm water, making sure to leave enough space for the cleaning agent.
Next, add the recommended amount of cleaning agent to the water. Be sure to read the instructions on the bottle for specific dilution ratios. Mix the solution thoroughly using a mop or a brush to ensure that the cleaning agent is evenly distributed.
Now your cleaning solution is ready to be used on any surface in your home. Remember to check the manufacturer’s instructions for any special cleaning requirements for specific surfaces or materials. With this simple step, you are well on your way to a cleaner and more hygienic home.
Happy cleaning!
Step 4: Wet the Underside of the Awning
Step 4 in our comprehensive guide to cleaning a awning is wetting the underside. Once you’ve thoroughly cleaned the top side of the awning, it’s time to tackle the underside. This step is important because the underside of your awning can easily accumulate dirt, dust, and other debris.
To wet the underside, simply direct a steady stream of water from your hose or pressure washer at a downward angle. This will help to flush away any loose dirt or grime that may have built up. Be sure to pay extra attention to areas that are particularly dirty or stained.
You may need to use a soft brush or sponge to scrub away stubborn marks. Once you’ve finished wetting the underside, give it another rinse to ensure that all the dirt and cleaning solution has been washed away. Wetting the underside of your awning is an essential step in the cleaning process and will ensure that your awning is thoroughly clean and looking its best.
Step 5: Apply the RV Awning Cleaner
RV awnings are exposed to various elements like dust, dirt, bird droppings, and even mildew. For this reason, it’s essential to clean and maintain them regularly. Now that you have prepared the awning and gathered the necessary tools, it’s time to apply the RV awning cleaner.
Start by spraying the cleaner evenly onto the awning fabric. Make sure to cover all areas, paying extra attention to any stains or soiled spots. Allow the cleaner to sit on the awning for a few minutes.
This will give it time to break down any dirt or grime and make it easier to remove. After the cleaner has had a chance to work its magic, use a soft brush or sponge to scrub the fabric gently. Work in small circular motions and be careful not to apply too much pressure, as this could damage the fabric.
Focus on any stubborn stains or areas that need extra attention. Once you have scrubbed the entire awning, rinse it thoroughly with clean water. This will remove any remaining cleaner and leave your awning looking fresh and clean.
You can use a hose or a bucket of water for rinsing, whichever is more convenient for you. After rinsing, it’s important to let the awning dry completely before retracting it. This will prevent any mold or mildew from forming and ensure that your awning stays in good condition.
Follow these steps, and your RV awning will be sparkling clean and ready to use in no time.
Step 6: Scrub Away the Dirt and Stains
In this step-by-step guide on how to clean your carpets, we have reached an important step: scrubbing away the dirt and stains. Now that you have presprayed and let the solution sit on your carpet, it’s time to get rid of those stubborn marks and grime. First, you’ll need a scrub brush or a carpet brush.
Begin by using the brush to agitate the carpet fibers and work the cleaning solution deeper into the carpet. This will help to break down any remaining dirt or stains. Remember to work in a circular motion and be gentle to avoid damaging the carpet.
If you encounter any particularly stubborn stains, you may need to apply a bit of extra pressure and scrub in a back-and-forth motion. Once you have worked on the entire carpet, let the cleaning solution sit for a few more minutes to allow for further penetration. After that, it’s time to rinse! Use a clean cloth or sponge and warm water to go over the carpet once more, removing any traces of the cleaning solution and dirt.
Rinse out the cloth or sponge as needed to avoid spreading dirt around. Finally, use clean, dry towels or a wet/dry vacuum to remove as much moisture from the carpet as possible. This step will help prevent mold and mildew growth.
And there you have it – your carpet is now clean and ready to be enjoyed!
Step 7: Rinse Off the Cleaning Solution
“rinse off the cleaning solution” After letting the cleaning solution sit on the surface and do its magic, it’s time to give it a good rinse. This step is crucial to ensure that all the dirt, grime, and cleaning solution are completely removed from the surface. Start by grabbing a clean bucket of water and a clean sponge or cloth.
Dip the sponge or cloth into the water and squeeze out any excess. Then, gently wipe down the surface, making sure to remove all traces of the cleaning solution. Depending on the size of the surface, you may need to rinse the sponge or cloth multiple times in clean water to ensure a thorough rinse.
Once you’re satisfied that the surface is clean and free of any cleaning solution residue, take a clean, dry cloth and wipe down the surface to remove any excess water. And there you have it – a beautifully clean surface, ready to shine!
Step 8: Dry the Awning Thoroughly
When it comes to cleaning your awning, the last step is just as important as the rest. After you have thoroughly scrubbed and rinsed the awning, it is crucial to dry it properly to prevent any potential damage or mold growth. The best way to do this is to allow the awning to air dry completely.
You can do this by leaving it open in a sunny and well-ventilated area for a few hours. Make sure to extend the awning fully so that all parts are exposed to the air. If it is not a sunny day, you can also use a fan or a hairdryer on a low heat setting to speed up the drying process.
Just remember to keep the fan or hairdryer a safe distance away from the awning to prevent any accidental damage. Once the awning is completely dry, you can retract it back in and enjoy a clean and well-maintained outdoor space.
Tips and Tricks
Cleaning the underside of your RV awning is an essential part of RV maintenance. Over time, dust, dirt, and debris can accumulate on the underside of the awning, making it look dirty and grimy. Not only does this affect the appearance of your RV, but it can also lead to mold and mildew growth if left unattended.
Luckily, cleaning the underside of your RV awning is a relatively straightforward process. Start by retracting the awning fully and securing it in place. Then, mix a solution of mild detergent and water in a bucket.
Using a soft-bristle brush or a sponge, gently scrub the underside of the awning, paying special attention to any heavily soiled areas. Rinse thoroughly with clean water and allow the awning to air dry completely before retracting it back into position. Remember to always follow the manufacturer’s instructions for cleaning your specific RV awning to avoid causing any damage.
By regularly cleaning the underside of your RV awning, you can keep it looking great and prolong its lifespan.
Clean the Awning Regularly
cleaning the awning, tips and tricks
Avoid Harsh Chemicals
“harsh chemicals” Sub_keywords used organically: – avoid – tips and tricks – harmful effects – natural alternatives – safe cleaning products – non-toxic ingredients In today’s world, we’re constantly bombarded with chemical-filled products and cleaning solutions promising to make our lives easier. However, these harsh chemicals can have harmful effects on our health and the environment. That’s why it’s essential to avoid using them whenever possible.
So, here are some tips and tricks to help you steer clear of these toxins and opt for natural alternatives instead. Firstly, when it comes to cleaning products, always check the labels and ingredient lists. Look for safe cleaning products that use non-toxic ingredients and avoid those with chemicals like ammonia, chlorine, and phthalates.
These chemicals can irritate our skin, lungs, and even lead to long-term health issues. Secondly, consider making your own cleaning solutions using simple, natural ingredients. For example, vinegar and baking soda can be combined to create a powerful all-purpose cleaner.
Lemon juice is great for cutting through grease, and essential oils like tea tree oil have antibacterial properties. By using these natural ingredients, not only are you avoiding harsh chemicals but also reducing your carbon footprint. Another tip is to be mindful of the personal care products you use.
Many conventional products contain harmful chemicals like parabens, sulfates, and synthetic fragrances. These can disrupt our hormone balance and cause skin irritation. Opt for natural alternatives such as organic, plant-based products that are free from these chemicals.
Your skin and body will thank you for it! Lastly, try to minimize the use of pesticides and insecticides in and around your home. These chemicals can not only harm beneficial insects but also have negative effects on our health when we come into contact with them. Instead, explore natural pest control methods like using essential oils, diatomaceous earth, or even introducing beneficial insects like ladybugs to your garden.
Remove Tough Stains with Spot Treatment
Removing tough stains can be a real challenge, especially when regular cleaning methods just don’t seem to do the trick. That’s where spot treatment comes in. Spot treatment is a targeted approach to removing stubborn stains, and it can be incredibly effective.
Whether you’re dealing with a red wine spill on your white carpet or a stubborn grease stain on your favorite shirt, spot treatment can help save the day. So, how does spot treatment work? Well, it’s all about using the right products and techniques to break down the stain and lift it from the fabric or surface. The first step is to identify the type of stain you’re dealing with.
Is it a protein-based stain like blood or coffee? Or is it an oil-based stain like grease or lipstick? Once you know what you’re up against, you can choose the appropriate spot treatment product. There are a wide variety of spot treatment products available on the market, from pre-made sprays to homemade solutions. Some common ingredients you might find in these products include hydrogen peroxide, baking soda, vinegar, and dish soap.
Each of these ingredients has its own stain-fighting properties, so it’s important to use the right one for the job. To use spot treatment effectively, apply the product directly to the stain and let it sit for a few minutes. This allows the product to penetrate the stain and start breaking it down.
After letting it sit, gently blot the stain with a clean cloth or sponge. Avoid rubbing or scrubbing, as this can spread the stain or damage the fabric. Repeat this process until the stain is gone or significantly reduced.
Spot treatment can be a game-changer when it comes to dealing with tough stains. It allows you to address the problem directly and gives you better control over the cleaning process. So, the next time you’re faced with a stubborn stain, don’t panic.
Inspect the Awning for Tears or Loose Parts
awning, tears, loose parts
Conclusion
And there you have it, a sparkling clean underside of your RV awning! With these simple steps and a little bit of elbow grease, you can ensure that your awning is not only functional but also looks fabulous. So, the next time you’re out on the road, confident and carefree, you can proudly say that your RV awning is as clean as a whistle. Now, go forth and enjoy your adventures without the worry of a dirty awning hanging over you.
Happy cleaning, my fellow travelers!
FAQs
How often should I clean the underside of my RV awning and why?
It is recommended to clean the underside of your RV awning at least once a year to remove dirt, debris, and mold or mildew buildup. Regular cleaning helps to maintain the awning’s appearance and prolong its lifespan.
What is the best way to clean the underside of an RV awning?
To clean the underside of an RV awning, mix a solution of mild soap and warm water. Use a soft bristle brush or sponge to gently scrub the fabric, paying attention to any stained or heavily soiled areas. Rinse thoroughly with clean water and allow the awning to air dry completely before retracting or storing.
Can I use a pressure washer to clean the underside of my RV awning?
It is not recommended to use a pressure washer on the underside of an RV awning as the high-pressure water can damage the fabric or cause it to detach from the frame. Stick to gentle scrubbing with mild soap and water for best results.
How do I remove mold or mildew from the underside of my RV awning?
To remove mold or mildew from the underside of your RV awning, mix a solution of equal parts vinegar and water. Apply the solution to the affected areas using a spray bottle or sponge. Let it sit for a few minutes, then scrub with a brush or sponge. Rinse thoroughly with clean water and allow the awning to dry completely.
Are there any specific products or cleaners I should use to clean the underside of my RV awning?
It is best to use mild soap or a specialized awning cleaner that is formulated to clean fabric surfaces without causing damage. Avoid using harsh chemicals, bleach, or abrasive cleaners as they can cause discoloration or deterioration of the awning fabric.
What precautions should I take when cleaning the underside of my RV awning?
When cleaning the underside of your RV awning, always follow safety guidelines and take necessary precautions. Make sure the awning is properly secured before starting the cleaning process. Do not use excessive force or scrubbing, as it can damage the fabric or frame. Avoid stepping on the awning or placing any sharp objects on it.
Can I prevent the buildup of dirt and debris on the underside of my RV awning?
Yes, you can minimize the buildup of dirt and debris on the underside of your RV awning by regularly brushing off loose debris and keeping the awning rolled up when not in use. Additionally, consider installing awning covers or adding an additional layer of protection, such as a bead of sealant, to minimize dirt and water penetration.