
Are you ready to hit the open road and embark on a thrilling adventure in your RV? If so, then you definitely need to consider getting an RV awning. Not only does it provide shade and protection from the elements, but it also adds an extra living space to your mobile home. Imagine lounging under the awning on a sunny day, sipping on a cool drink, and enjoying the breathtaking views around you.
It’s like having your own private oasis wherever you go. RV awnings come in a variety of sizes, styles, and materials to suit different needs and preferences. From manual awnings that require some effort to open and close, to motorized awnings that can be operated with the push of a button, there’s an option for everyone.
Some awnings even come with built-in LED lights, allowing you to continue enjoying your outdoor space even after the sun goes down. But why exactly do you need an RV awning? Well, let’s think about it for a moment. When you’re camping or traveling in your RV, it’s important to have a comfortable and functional outdoor space.
Whether you want to relax, entertain guests, or simply enjoy the fresh air, having a sheltered area can make all the difference. Plus, it’s a great way to extend your living space without sacrificing the convenience of your RV. Think of your RV awning as a portable patio.
It provides shade on hot days, protects you from rain showers, and even offers a bit of privacy when you need it. It’s like having a versatile outdoor room that can be set up anywhere you go. So, if you want to make the most of your RV adventure and create unforgettable memories along the way, investing in an RV awning is a no-brainer.
In this blog series, we’ll take a closer look at RV awnings – from the different types available to the benefits they offer. We’ll also share some tips on how to choose the right awning for your RV and how to properly maintain it. So, stay tuned for more information and get ready to enhance your RV experience with the perfect awning!
Table of Contents
What is an RV awning?
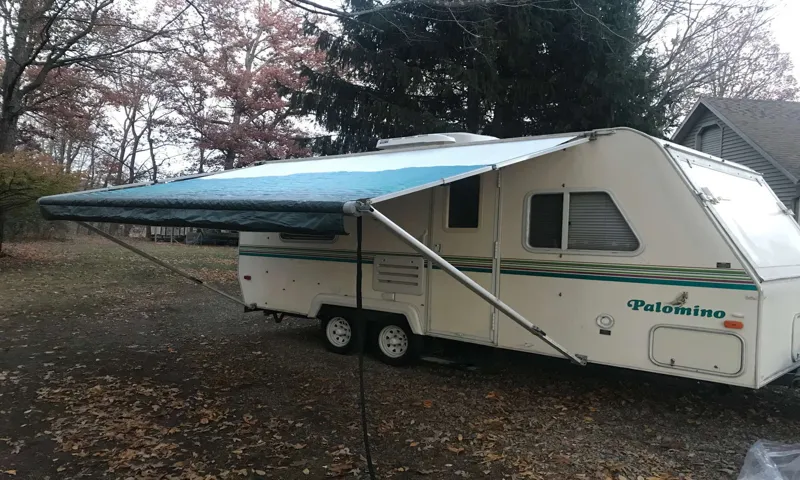
Installing an awning on your RV can greatly enhance your outdoor experience by providing shade and protection from the elements. But what exactly is an RV awning? Well, simply put, it is a retractable cover that extends out from the side of your RV to create a shaded area. It is typically made of a durable fabric material that can withstand various weather conditions.
Installing an awning on your RV may seem like a daunting task, but it can actually be quite simple and straightforward. Most RV awnings come with mounting brackets that attach to the side of your RV. All you need to do is secure the brackets in place and then slide the awning into them.
Once the awning is in place, you can extend it out and secure it with the provided support arms. Some awnings even come with built-in motors that make extending and retracting the awning even easier. So why not invest in an RV awning and make your outdoor adventures that much more enjoyable?
Benefits of having an RV awning
If you’re wondering how to install an awning on your RV, you’re in luck because it’s actually a fairly simple process. Having an RV awning comes with many benefits that make it worth the effort to install. Firstly, an RV awning provides shade and protection from the elements, allowing you to enjoy the outdoors even on hot sunny days or during light rain showers.
It also adds an additional living space to your RV, giving you a comfortable area to relax, eat, or entertain guests. Additionally, an awning helps to keep your RV cooler by blocking out the sun’s rays, which can help to reduce your energy costs. It also helps to prevent the interior of your RV from fading due to sunlight exposure.
Overall, installing an awning on your RV is a great investment that will enhance your camping experience and provide you with more comfort and convenience.
Choosing the right awning for your RV
Are you ready to add some shade and protection to your RV with an awning? Installing an awning on your RV can greatly enhance your outdoor camping experience. However, choosing the right awning and installing it correctly is essential. When selecting an awning for your RV, consider factors such as size, material, and ease of installation.
You’ll want to choose an awning that fits the dimensions of your RV and is made from durable materials that can withstand the elements. Additionally, look for an awning that is easy to install, so you can get it set up quickly and easily when you arrive at your campsite. With the right awning, you can enjoy the outdoors while staying protected from the sun and rain.
So, why wait? Get started on installing your awning today and start enjoying the benefits it brings to your RV adventures.
Preparing your RV for awning installation
If you’re thinking about installing an awning on your RV, there are a few important steps you should take to ensure that it goes smoothly. First, make sure you have the necessary tools on hand. You’ll need a drill, screws, and a measuring tape.
Next, you’ll want to find the ideal location for your awning. Consider factors such as the size of your RV, the height of the awning, and the amount of shade you want to create. Once you’ve chosen the perfect spot, measure and mark where the brackets will be installed.
Make sure they are level and secure before moving on to the next step. Then, carefully follow the manufacturer’s instructions for attaching the awning fabric to the brackets. Take your time to ensure it is installed correctly and securely.
Once everything is in place, give your awning a test run by extending and retracting it a few times. This will help you make any necessary adjustments and ensure that it is working properly. With these steps, you’ll be able to enjoy the shade and comfort of your new RV awning in no time.
Checking for the appropriate mounting space
RV awnings are a great addition to any camper or motorhome, providing shade and protection from the sun and rain. However, before you can install an awning on your RV, it’s important to ensure that you have the appropriate mounting space. This means checking the exterior of your RV to make sure that there is enough room for the awning to be securely attached.
Look for a flat, sturdy surface that is free from obstructions such as vents or windows. You’ll also need to consider the height of the awning, making sure that it won’t interfere with any roof-mounted accessories like air conditioners or satellite dishes. Taking the time to properly prepare your RV for awning installation will ensure that you have a safe and secure setup that will provide you with years of shade and comfort on your outdoor adventures.
Gathering necessary tools and materials
Preparing your RV for awning installation can be a straightforward process if you gather all the necessary tools and materials beforehand. One of the first things you’ll need is a measuring tape to determine the dimensions of your awning and ensure a proper fit. You’ll also need a drill with various drill bits for securing the awning brackets to your RV.
Additionally, having a level will help ensure that your awning is installed evenly and doesn’t cause any gaps or alignment issues. It’s also a good idea to have a ladder or step stool on hand to make installation easier, as well as a screwdriver or wrench for any necessary adjustments. Lastly, make sure you have all the screws, bolts, and brackets that come with your awning kit, as well as any additional sealants or adhesives that may be required for a secure installation.
By gathering all these tools and materials, you’ll be well-prepared to install your awning and enjoy the benefits of additional shade and outdoor living space on your RV adventures.
Removing any existing awning or accessories
If you’re planning to install a new awning on your RV, one of the first steps you’ll need to take is to remove any existing awning or accessories. This ensures a clean slate and allows for a smooth installation process. Depending on the type of awning you currently have, this may involve unscrewing bolts, removing brackets, or detaching any additional accessories such as lights or wind deflectors.
Taking the time to properly remove these items will not only make the installation easier but also prevent any damage to your RV’s exterior. Once everything is cleared, you’ll be ready to move on to the next step of preparing your RV for the new awning.
Step-by-step guide to installing an RV awning
Installing an awning on your RV is a great way to add some shade and comfort to your outdoor living space. If you’re a beginner, it might seem daunting, but with a step-by-step guide, it can be a relatively straightforward process. First, measure the length of your RV and purchase an awning that fits your specifications.
Once you have the awning, gather all the tools you’ll need, such as a drill, screws, and a ladder. Start by locating the mounting brackets on your RV and attaching them securely. Then, carefully unroll the awning fabric and slide it into the awning rail.
Make sure it is aligned properly and secure it in place with screws. Finally, extend the awning arms and adjust the tension to ensure it is properly balanced. It’s essential to follow the manufacturer’s instructions carefully and double-check your work to ensure a safe and secure installation.
With some patience and the right tools, you’ll be enjoying your new RV awning in no time!
Measuring and marking the desired awning location
RV awning installation Installing an awning on your RV can greatly enhance your outdoor living experience while on the road. One of the first steps in this process is measuring and marking the desired location for the awning. This is crucial to ensure that the awning fits properly and is installed in a spot that provides the desired amount of shade and protection.
To start, you’ll need a measuring tape and a marker. Begin by deciding where you want the awning to be placed. Consider factors such as the layout of your RV and the direction of the sun.
You’ll want to choose a location that offers maximum shade and convenience. Next, measure the width and height of the area where you plan to install the awning. Use the measuring tape to get accurate measurements, and write down the dimensions so you can refer to them later.
Once you have the measurements, it’s time to mark the desired location on your RV. Use a marker or chalk to make clear, visible marks indicating the width and height of the awning. This will serve as a guide when it’s time to install the actual awning.
Take your time during this step and double-check your measurements and markings to ensure accuracy. It’s better to spend a little extra time upfront getting everything right than to have to make adjustments later on. By properly measuring and marking the desired location for your RV awning, you’ll be on your way to a successful installation.
This step is crucial for ensuring that the awning fits correctly and provides the shade and protection you desire. So grab your measuring tape and marker, and start planning your outdoor oasis on wheels!
Attaching the mounting brackets to the RV
RV awning installation, Are you ready to take your RV adventures to the next level? Installing an awning on your recreational vehicle can provide you with much-needed shade and protection from the elements. In this step-by-step guide, we’ll walk you through the process of attaching the mounting brackets to your RV. First, gather all the necessary tools and materials for the installation.
You’ll need a drill, a wrench, a tape measure, and the mounting brackets that came with your awning kit. Make sure to read the manufacturer’s instructions thoroughly before starting the installation. Before you begin, it’s important to find the perfect spot on your RV to install the awning.
Look for a flat and sturdy area that can support the weight of the awning. Once you’ve found the ideal location, use a tape measure to mark where the mounting brackets will be placed. Next, take one of the mounting brackets and place it against the designated spot on your RV.
Use the drill to create pilot holes for the screws. Once the pilot holes are drilled, attach the bracket to the RV using the provided screws. Repeat this process for the remaining mounting brackets.
After all the mounting brackets are securely attached to your RV, you’re ready to install the awning. Following the manufacturer’s instructions, carefully align the awning with the brackets. Once the awning is in position, use a wrench to tighten the bolts and ensure a secure fit.
Once the awning is properly installed, give it a test run. Extend and retract the awning to make sure it operates smoothly and without any issues. If you encounter any problems, consult the manufacturer’s instructions or contact customer support for assistance.
Installing the awning roller and fabric
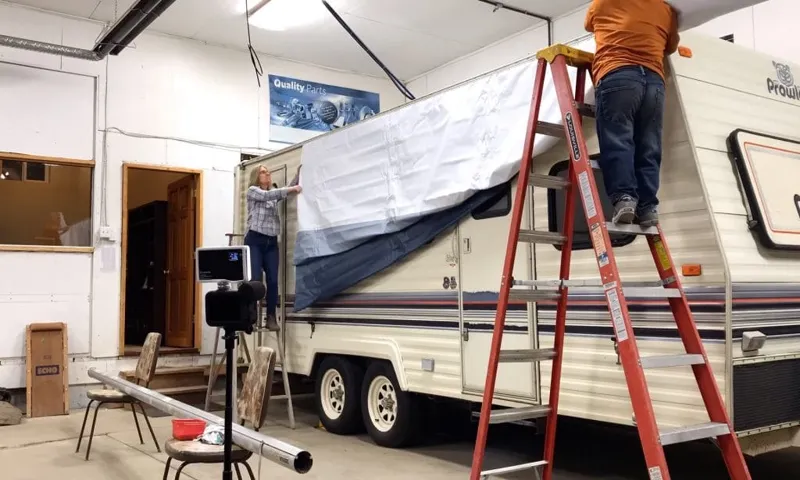
One of the best ways to enhance your RV camping experience is by adding an awning to your vehicle. Not only does it provide shade and protection from the elements, but it also extends your living space and allows you to enjoy the outdoors even more. Installing an RV awning may seem like a daunting task, but with a few simple steps, you can have it up and running in no time.
One of the essential parts of an awning is the roller and fabric. The roller is the mechanism that allows you to extend and retract the awning, while the fabric is what provides the shade and protection. To install the roller and fabric, you’ll first need to measure the width of your RV and purchase the appropriate size awning.
Once you have the awning, you can begin by attaching the roller to the side of your RV. Make sure to secure it with screws or brackets, following the manufacturer’s instructions. Next, you’ll need to slide the fabric onto the roller, making sure it is centered and straight.
Again, refer to the instructions for your specific awning to ensure proper installation. Once the fabric is in place, you can extend the awning and adjust the tension as needed. It’s important to take your time and follow the instructions carefully to ensure a secure and functional awning.
So why wait? Install an awning on your RV today and start enjoying the great outdoors in style and comfort.
Securing the awning arms and adjusting tension
RV awnings are a great addition to any recreational vehicle, providing shade and protection from the elements. However, installing and securing the awning properly is crucial to ensure it stays in place and functions effectively. One important step is securing the awning arms to the side of the RV.
This can be done by attaching the arm brackets to the RV’s sidewall using screws or bolts. It’s important to ensure that the brackets are securely fastened to prevent any movement or instability. Additionally, adjusting the tension of the awning is necessary to ensure it rolls in and out smoothly.
This can be done by turning the tension knobs or using a retractable awning tool. Adjusting the tension allows for easy operation and prevents the awning from being too loose or too tight. By properly securing the awning arms and adjusting the tension, you can enjoy the benefits of your RV awning without any worries.
Additional tips and considerations
When it comes to installing an awning on your RV, there are a few additional tips and considerations to keep in mind to ensure a successful installation. First, it’s important to carefully measure the area where you plan to install the awning to ensure it will fit properly. You’ll also want to consider the type of awning that will work best for your RV, whether it be a manual or automatic awning.
Additionally, it’s essential to properly secure the awning to your RV to ensure it stays in place while driving and during inclement weather. This can be done through the use of brackets and hardware specifically designed for awning installation. Taking the time to properly install your awning will not only enhance the functionality of your RV, but it will also provide you with a comfortable and enjoyable outdoor space while on your travels.
So why not take the leap and install an awning on your RV today?
Using awning tie-downs for added stability
awning tie-downs, added stability, tips and considerations, burstiness
Proper maintenance and care for your RV awning
One additional tip to consider when maintaining and caring for your RV awning is to inspect it regularly for any signs of damage or wear and tear. This includes checking for tears or holes in the fabric, loose or broken hardware, and any signs of mold or mildew. It’s important to address any issues promptly to prevent further damage and ensure the longevity of your awning.
Additionally, be sure to clean your RV awning regularly using a mild soap and water solution to remove dirt and debris. This will help prevent stains and keep your awning looking its best. By keeping an eye on your awning and taking proper care of it, you can extend its lifespan and enjoy many more camping adventures in the shade.
Troubleshooting common awning installation issues
One important factor to consider when installing an awning is the height at which it should be mounted. If the awning is mounted too low, it may obstruct windows or doors, making it difficult to open and close them. On the other hand, if the awning is mounted too high, it may not provide adequate coverage and may not be effective at blocking sunlight or providing shade.
To ensure the proper height, it is recommended to follow the manufacturer’s guidelines and consult with a professional installer if needed. Additionally, it is important to consider the pitch or angle of the awning. A pitch that is too steep may cause water to pool and potentially damage the fabric, while a pitch that is too shallow may not provide sufficient drainage.
It is important to find the right balance to ensure the awning functions properly and lasts for a long time. Overall, taking the time to carefully consider the height and pitch of the awning during installation will help avoid common issues and ensure a successful installation.
Conclusion
And there you have it, folks! Installing an awning on your RV is a breeze, just like catching the wind in your sails. With these simple steps and a little bit of DIY enthusiasm, you’ll be able to turn heads at the campground and protect yourself from the harsh rays of the sun. So go ahead and raise your awning, it’s time to make shade and memories with your trusty RV.
Happy adventures!”
FAQs
How do I install an awning on my RV?
To install an awning on your RV, first, measure where you want the awning to be installed. Then, mount the awning brackets on the RV using screws or bolts. Attach the awning roller to the brackets, making sure it is level. Finally, extend and secure the awning fabric, and you’re all set!
Can I install an awning on any type of RV?
Yes, most RVs can accommodate awnings. However, it’s important to verify that your RV has the necessary mounting points and enough space for the awning to extend fully.
What tools do I need to install an awning on my RV?
The tools required for installing an awning on your RV may include a tape measure, drill, screwdriver or socket wrench, level, and appropriate screws or bolts. Additionally, you may need a ladder or step stool to reach the installation area.
Are there different types of awnings available for RVs?
Yes, there are various types of awnings available for RVs, including manual crank awnings, electric awnings, and retractable awnings. Choose the one that suits your needs and preferences.
Can I install an awning on my RV by myself, or should I hire a professional?
While it is possible to install an awning on your RV by yourself, it is recommended to hire a professional if you are not confident in your handyman skills. Professional installation ensures the awning is properly mounted and reduces the risk of damage or improper installation.
How long does it take to install an awning on an RV?
The installation time for an awning on an RV can vary depending on the type of awning and the complexity of the installation process. On average, it may take a few hours to complete the installation.
Can I install an awning on a pop-up camper?
Yes, it is possible to install an awning on a pop-up camper. However, pop-up campers may have different mounting requirements compared to other RVs. It is recommended to consult the manufacturer or a professional to ensure proper installation on a pop-up camper.