
Welcome to our blog on how to clean the awning on your RV! If you’re a proud owner of an RV, you know how important it is to keep it in good condition. One area that often gets overlooked during maintenance is the awning. The awning not only provides shade and protection from the elements, but it also adds to the overall aesthetics of your RV.
However, it can quickly accumulate dirt, dust, bird droppings, and other debris, making it look dull and unappealing. Cleaning your RV’s awning not only enhances its appearance but also prolongs its lifespan. But where do you start? Don’t worry, we’ve got you covered.
In this blog, we’ll walk you through step-by-step instructions on how to clean your RV awning effectively and safely. We’ll also provide you with some useful tips and tricks to make the process easier. Think of your RV awning as a giant canvas that needs a little TLC.
Over time, it can become a breeding ground for mold and algae, especially if it’s constantly exposed to moisture. Just like a painter cleans their canvas before starting a new masterpiece, it’s important to clean your awning regularly to ensure it’s in optimal condition. But before we delve into the cleaning process, let’s address a common question – why is cleaning your RV awning necessary? Apart from the aesthetic aspect, a clean awning also prevents the growth of mold and mildew, which can cause health issues and damage the awning material.
Additionally, a dirty awning can attract insects and critters, which nobody wants while camping. So, are you ready to give your RV awning some much-needed attention? Great! Let’s get started on transforming your dull and dirty awning into a shining and vibrant feature of your RV.
Table of Contents
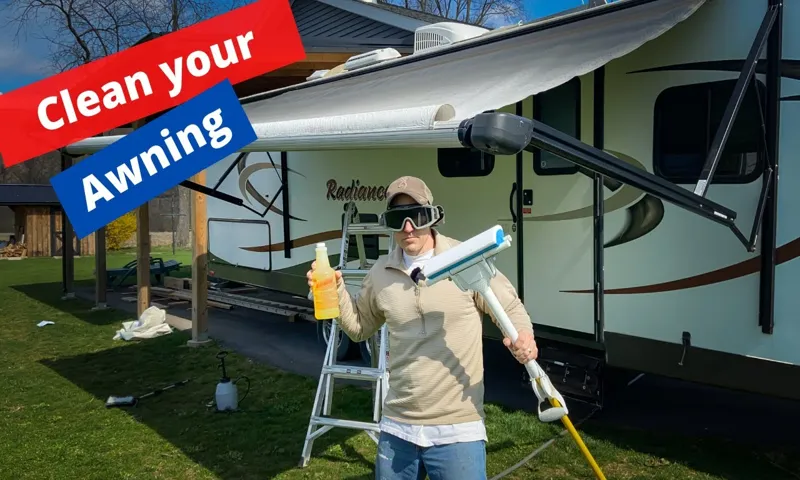
1. Gather Supplies
One of the most important steps in cleaning the awning on your RV is gathering the necessary supplies. Before you start, make sure you have a bucket, mild detergent, a soft bristle brush, and a hose. It’s also a good idea to have a ladder or step stool available if you need to reach higher areas of the awning.
Having these supplies on hand will make the cleaning process much smoother and more efficient. So, whether you’re preparing for a road trip or just want to spruce up your RV, make sure you have everything you need before getting started.
a. Bucket
A bucket is a versatile tool that can be used for a multitude of tasks. Whether you need to carry water, store items, or gather materials, having a bucket on hand is essential. But before you can start using your bucket, you’ll need to gather a few supplies.
First, you’ll need the bucket itself. Look for one that is sturdy and durable, as you’ll want it to withstand heavy use. Consider the size of the bucket as well, as this will determine how much you can carry or store.
Once you have your bucket, you’ll also want to gather some cleaning supplies. This could include a sponge or brush for scrubbing, as well as soap or detergent for cleaning. If you plan on using your bucket for gardening or outdoor tasks, you may also want to invest in some gardening gloves or hand tools.
These supplies will help ensure that your bucket is clean and ready for use whenever you need it. So now that you know what supplies you’ll need, it’s time to start gathering them and get ready to put your bucket to good use!
b. Mild detergent
As we dive into the world of laundry, it’s important to have a collection of supplies at the ready. One such item that is essential is mild detergent. What exactly does this mean? Well, it’s a cleaning agent that is gentle yet effective in removing dirt and stains from your clothes.
Unlike harsh chemicals, mild detergents are formulated to be less abrasive on fabrics, making them ideal for delicate materials and sensitive skin. So, whether you’re tackling a load of delicate lace or washing your baby’s onesies, using a mild detergent will ensure that your clothes come out clean and fresh without any damage or irritation. It’s like using a gentle touch to get the job done right!
c. Soft sponge
When it comes to washing dishes, having the right tools can make all the difference. And one tool that should definitely be in your arsenal is a soft sponge. A soft sponge is great for gently scrubbing away food residue and grime without scratching or damaging your dishes.
It’s also perfect for cleaning delicate items like glassware and non-stick pans. With its gentle yet effective cleaning power, a soft sponge will leave your dishes sparkling clean and looking like new. So, make sure to gather supplies and grab a soft sponge the next time you tackle that sink full of dirty dishes.
d. Soft-bristled brush
When it comes to taking care of your teeth, choosing the right toothbrush is crucial. While there are many options available, a soft-bristled brush is often recommended by dentists. So why is a soft-bristled brush the best choice for your oral health? Well, let’s break it down.
First of all, the bristles on a soft-bristled brush are gentle on your gums, reducing the risk of irritation. They are also effective at removing plaque and food particles from your teeth without causing any damage. In addition, a soft-bristled brush is less likely to wear down your tooth enamel, keeping your teeth strong and healthy.
So, the next time you’re in the dental care aisle, opt for a soft-bristled brush to keep your smile shining bright.
e. Hose
When it comes to maintaining your garden or lawn, having a good quality hose is essential. Whether you’re watering your plants or cleaning off outdoor surfaces, a reliable hose can make the task much easier. So, before you get started, gather the necessary supplies to ensure you have everything you need.
Firstly, make sure you have a good quality hose that is long enough to reach all areas of your garden. Look for a hose that is resistant to kinking and bursting, as this will ensure its durability. Additionally, you’ll need a nozzle attachment to control the water flow and pressure.
It’s also a good idea to have a hose reel or holder to keep your hose neatly stored when not in use. Finally, don’t forget to check for any other necessary accessories, such as connectors or adapters, to ensure your hose can be easily attached to your water source. By having all the necessary supplies on hand, you can get started on your gardening or cleaning tasks without any delays or interruptions.
2. Prepare the Awning
Cleaning the awning on your RV is an important task that should be done regularly to keep it looking great and functioning properly. Before you begin cleaning, make sure you prepare the awning properly. First, extend the awning fully to make it easier to clean.
Remove any loose dirt, leaves, or debris by using a soft-bristled brush or broom. This will help prevent any scratching or damage to the fabric. Next, mix a solution of mild soap and water in a bucket.
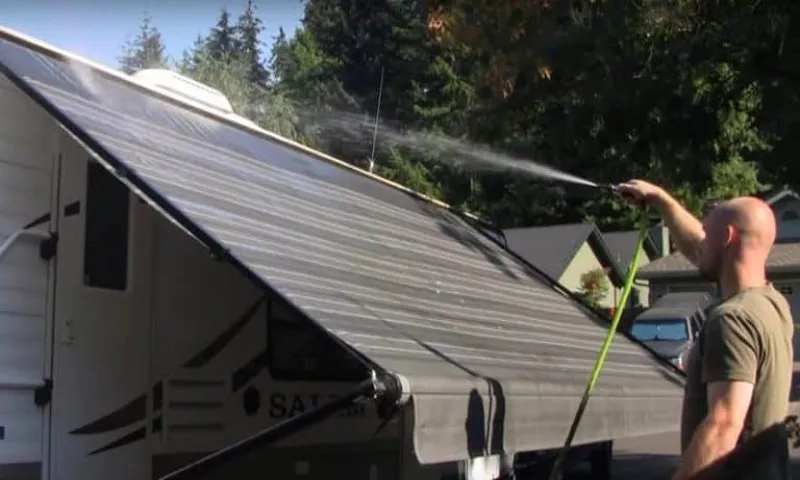
Dip a soft sponge or cloth into the soapy water and gently scrub the awning, starting at the top and working your way down. Pay special attention to any stains or heavily soiled areas. Rinse the awning thoroughly with a hose, making sure to remove all soap residue.
You can use a ladder or step stool to reach the top if needed. Finally, allow the awning to air dry completely before retracting it. By properly preparing the awning before cleaning, you can ensure that it is cleaned effectively and safely, prolonging its lifespan and maintaining its appearance.
So, take the time to prepare the awning before starting the cleaning process, and you’ll have a beautiful and functional awning on your RV.
a. Extend the awning fully
extend the awning fully, prepare the awning
b. Remove any loose debris
When it comes to preparing your awning for the next season or just giving it a good clean, one important step is to remove any loose debris. Whether it’s leaves, dirt, or other outdoor debris, clearing it away will ensure that your awning is ready for use and looking its best. Not only does this help to improve the overall appearance of your awning, but it also prevents any potential damage that debris can cause.
Loose debris can get stuck in the fabric or clog up the mechanism, making it difficult to extend and retract. By taking the time to remove any loose debris, you’re setting yourself up for a hassle-free and enjoyable awning experience. And don’t forget about safety – clearing away debris helps to prevent any slips or falls, especially if it has rained and the surface becomes slippery.
So grab a broom or a brush, and give your awning a good sweep to start off the preparation process right.
3. Clean the Awning Fabric
If you’re an RV owner, you know how important it is to keep your awning clean. Over time, dirt, grime, and mold can accumulate on the fabric, making it look dull and dingy. Cleaning your awning is a simple process that can help prolong its lifespan and improve the overall appearance of your RV.
Start by using a soft brush or broom to remove any loose dirt or debris from the fabric. Then, mix a solution of mild detergent and water and use a sponge or cloth to gently scrub the awning. Rinse thoroughly with a hose and allow it to air dry before retracting.
Regularly cleaning your awning will not only keep it looking its best but also prevent any potential damage from occurring. So, take some time to give your awning a good cleaning and enjoy the benefits of a fresh and vibrant outdoor space for years to come.
a. Fill a bucket with warm water and mild detergent
When it comes to cleaning your awning fabric, there are a few steps you can take to ensure it stays looking fresh and vibrant. First, fill a bucket with warm water and mild detergent. This combination will effectively lift dirt and stains from the fabric, without causing any damage.
Next, gently scrub the fabric with a soft brush or cloth, making sure to get into all the nooks and crannies. You may need to apply a bit of pressure to remove stubborn stains, but be careful not to scrub too hard and risk tearing the fabric. Once you’ve thoroughly cleaned the fabric, rinse it off with a hose or bucket of clean water.
This will help to remove any remaining soap residue. Finally, allow the fabric to air dry completely before retracting your awning. By following these simple steps, you can keep your awning fabric looking its best for years to come.
b. Dip the sponge in the soapy water and gently scrub the fabric
When it comes to cleaning your awning fabric, it’s important to use the right techniques to ensure it stays in top condition. One of the best ways to clean your awning fabric is to use a sponge dipped in soapy water. By gently scrubbing the fabric with the sponge, you can remove dirt and stains without causing any damage.
This method is especially effective for removing grime that has built up over time. The soapy water helps to break down the dirt, making it easier to remove. Just be sure to rinse the fabric thoroughly after cleaning to remove any residue.
Taking the time to clean your awning fabric regularly will not only keep it looking great, but it will also extend its lifespan. So why not grab a sponge and give it a try? Your awning will thank you.
c. Rinse the fabric thoroughly with a hose
When it comes to cleaning the fabric on your awning, it’s important to follow a specific process to ensure that it is done correctly. One important step in this process is rinsing the fabric thoroughly with a hose. This step is crucial because it helps to remove any dirt, dust, or debris that may have accumulated on the fabric.
By using a hose, you can easily spray water onto the fabric and remove any loose particles that may be stuck to it. This will help to prevent any damage to the fabric and ensure that it is properly cleaned. So, make sure to take the time to thoroughly rinse the fabric with a hose before moving on to the next step in the cleaning process.
Your awning will thank you for it!
d. Allow the fabric to air dry
To clean your awning fabric, you’ll want to start by removing any loose debris. This can be done by using a broom or a brush to sweep away leaves, dirt, and other debris that may have accumulated on the surface of the fabric. Next, you’ll want to prepare a cleaning solution.
A mixture of mild soap or detergent and warm water should do the trick. Use a sponge or a soft cloth to gently scrub the fabric with the cleaning solution, paying special attention to any areas that may be stained or heavily soiled. Once you’ve finished cleaning, make sure to rinse the fabric thoroughly with clean water to remove any soap residue.
Finally, you’ll need to allow the fabric to air dry completely before retracting or folding up your awning. This will help to prevent any mold or mildew from forming. Remember to always consult the manufacturer’s instructions for specific cleaning recommendations for your awning fabric.
4. Clean the Awning Hardware
If you want to learn how to clean the awning on your RV, one important step is to clean the awning hardware as well. Over time, dirt, dust, and debris can accumulate on the hardware, making it look worn and dull. To clean the awning hardware, start by removing any loose debris with a soft brush or cloth.
Then, mix a mild detergent with water and use a sponge or soft brush to scrub the hardware, paying attention to any stubborn stains. Rinse thoroughly with water and allow the hardware to dry completely before reattaching the awning. By regularly cleaning the awning hardware, you can help extend its lifespan and keep your RV looking its best.
So why not give it a try and give your awning a little TLC?
a. Mix warm water and mild detergent in a bucket
When it comes to cleaning your awning hardware, there are a few simple steps you can follow to ensure it stays in great condition. First, start by mixing warm water and mild detergent in a bucket. This gentle solution will effectively clean the hardware without causing any damage.
Once you have your cleaning solution ready, grab a soft brush or sponge and dip it into the mixture. Use this to gently scrub the hardware, being careful not to apply too much pressure. This will help remove any dirt or grime that has built up over time.
After you’ve thoroughly cleaned the hardware, rinse it off with clean water to remove any soap residue. Finally, allow the hardware to dry completely before using your awning again. Following these simple steps will help keep your awning hardware looking and functioning its best.
b. Use a soft-bristled brush to scrub the hardware
When it comes to cleaning your awning, don’t forget about the hardware! Over time, dirt, dust, and grime can build up on the hinges, brackets, and screws that hold your awning in place. To keep your awning looking its best, it’s important to regularly clean the hardware. To start, gather a soft-bristled brush and some warm, soapy water.
Dip the brush into the soapy water and gently scrub the hardware, paying close attention to any areas that are particularly dirty. Be sure to use a brush with bristles that won’t scratch or damage the hardware. As you scrub, you’ll likely notice that the grime begins to lift off, revealing the clean metal underneath.
Use a little bit of elbow grease if needed, but be careful not to put too much pressure on the hardware to avoid any damage. After scrubbing, rinse off the hardware with clean water to remove any remaining soap residue. Then, use a clean cloth to dry the hardware thoroughly.
This step is important to prevent any water spots or streaks from forming as the hardware dries. By regularly cleaning the awning hardware, you can help prolong its lifespan and keep it looking its best. So the next time you’re cleaning your awning, don’t forget about the hardware! Give it a gentle scrub to keep it shining and in top shape.
c. Rinse the hardware with a hose
Cleaning the hardware of your awning is an essential part of maintaining its longevity and functionality. As the hardware is constantly exposed to the elements, it can accumulate dirt, debris, and grime over time. To effectively clean the hardware, start by rinsing it with a hose.
This will help remove any loose dirt and dust that may be stuck on the surface. Make sure to use a low-pressure setting on the hose to avoid damaging the hardware. Once the hardware is thoroughly rinsed, you can move on to the next step in the cleaning process.
By regularly cleaning the awning hardware, you can ensure that it stays in optimal condition and lasts for many years to come. So, don’t neglect this important maintenance task and give your awning the care it deserves.
5. Retract the Awning
Cleaning the awning on your RV is an important part of maintenance to ensure it stays in good condition and lasts for a long time. One of the first steps in cleaning the awning is to retract it. This helps to make it easier to access and clean all areas of the awning.
To retract the awning, start by releasing the awning arms from their locked position. This is usually done by pulling on a release lever or knob located on each arm. Once the arms are released, slowly and carefully roll up the awning using the crank or motorized mechanism.
Make sure to roll it up evenly and avoid any wrinkles or creases. Once the awning is fully retracted, it is ready to be cleaned.
a. Make sure the awning is completely dry before retracting
“retract the awning” When it comes time to retract your awning, there are a few important steps to keep in mind. First and foremost, it’s crucial to make sure that the awning is completely dry before retracting it. This is because if any moisture or water is left on the awning, it can lead to mold or mildew growth, as well as damage to the fabric.
So take a few moments to thoroughly inspect the awning and ensure that it is dry before proceeding. Once you’ve confirmed that the awning is dry, it’s time to start retracting it. Begin by operating the retracting mechanism, which is usually located on one side of the awning.
How this mechanism works can vary depending on the type of awning you have, so refer to the manufacturer’s instructions if needed. In general, you’ll either need to turn a crank or press a button to retract the awning. As you’re retracting the awning, it’s important to do so slowly and evenly.
This will help to prevent any unnecessary tugging or strain on the awning, which can lead to damage over time. Take your time and make sure that the awning is retracting smoothly and evenly across its entire length. Once the awning is fully retracted, take a moment to double-check that it is secured in place.
Some awnings may have a locking mechanism to keep them in the retracted position, while others may require you to use straps or ties to secure them. Make sure that the awning is properly locked or secured before leaving it unattended. By following these steps, you can ensure that retracting your awning is a smooth and damage-free process.
Remember to always check for dryness before retracting, retract the awning slowly and evenly, and secure it properly once fully retracted. With these precautions in mind, you’ll be able to enjoy your awning for years to come.
b. Follow the manufacturer’s instructions for retracting the awning
“retract the awning” Retracting the awning is an essential step in properly maintaining and protecting it. It’s important to follow the manufacturer’s instructions carefully to avoid any potential damage or malfunctions. Start by locating the awning control switch or handle, which is typically found near the awning itself or inside your RV.
Gently and gradually retract the awning by either pushing the switch or turning the handle in the designated direction. Remember to take your time and avoid forcing the awning, as this could cause it to jam or become stuck. Once fully retracted, ensure that it is securely locked in place by checking for any signs of movement or instability.
By following these simple steps, you can ensure that your awning is safely and securely stored, ready for your next adventure.
6. Regular Maintenance Tips
Cleaning the awning on your RV is an essential part of regular maintenance to ensure it stays in good condition for years to come. To begin, start by giving the awning a thorough sweep with a broom or brush to remove any loose dirt, dust, or debris. Next, prepare a solution of mild soap and warm water.
Using a soft bristle brush, gently scrub the awning, paying close attention to any stains or stubborn dirt. Avoid using harsh chemicals or abrasive brushes, as these can damage the fabric. Rinse the awning thoroughly with clean water and allow it to air dry completely before retracting it.
Regularly cleaning your RV awning not only keeps it looking its best, but also prevents the buildup of mold, mildew, and other potential damage-causing substances.
a. Clean the awning at least twice a year
Regular maintenance is crucial to keep your awning in top condition and extend its lifespan. One important maintenance task is cleaning the awning at least twice a year. Over time, dirt, dust, bird droppings, and other debris can accumulate on the awning fabric, leaving it looking dirty and dull.
Cleaning the awning not only improves its appearance but also helps to prevent mold and mildew growth, as well as damage to the fabric. To clean the awning, start by removing any loose debris with a soft brush or broom. Then, mix a solution of mild soap and warm water and use a soft brush or sponge to gently scrub the fabric.
Rinse thoroughly with clean water and allow the awning to air dry completely before retracting it. Regular cleaning will keep your awning looking its best and ensure it continues to provide shade and protection for years to come. So, make sure to schedule regular cleaning sessions to keep your awning well-maintained and looking great.
b. Avoid using harsh chemicals or abrasive cleaners
To keep your appliances functioning well and looking their best, it’s important to perform regular maintenance. One important tip is to avoid using harsh chemicals or abrasive cleaners when cleaning your appliances. This is because these products can damage the surfaces of your appliances, causing them to deteriorate over time.
Instead, opt for gentle cleaning agents or natural alternatives like vinegar and baking soda. Not only will this help to maintain the appearance of your appliances, but it will also help to ensure that they continue to perform at their best for years to come. So, the next time you’re cleaning your appliances, remember to choose cleaning products that are safe and gentle to protect your investment.
c. Inspect the awning for any damage or wear
“awning maintenance tips” Maintaining your awning is crucial for ensuring its longevity and functionality. One important aspect of regular maintenance is inspecting the awning for any damage or wear. Over time, the awning may be exposed to harsh weather conditions, UV rays, and general wear and tear.
By inspecting it regularly, you can catch any potential issues early on and prevent further damage. Look out for any signs of tears, rips, or fraying in the fabric. Additionally, check the frame and joints for any signs of corrosion or looseness.
By addressing these issues promptly, you can save yourself from more costly repairs down the line. Remember, prevention is key when it comes to maintaining your awning’s performance and extending its lifespan.
d. Treat any stains or mildew promptly
Regular maintenance includes treating any stains or mildew promptly to prevent further damage to your furniture or surfaces. Stains can happen from spills or accidents, and if left untreated, they can become difficult to remove. Whether it’s a glass of red wine on your favorite couch or a coffee spill on your dining table, acting quickly can make a big difference in preventing staining.
Mildew, on the other hand, can be a result of moisture buildup in damp areas, such as bathrooms or basements. Not only can it leave unsightly marks, but it can also cause health issues if left unchecked. By promptly addressing stains and mildew, you can keep your home looking fresh and clean.
Remember, prevention is key, so be sure to use protective measures such as coasters or tablecloths to minimize the chances of stains occurring in the first place.
Conclusion
So there you have it – the foolproof guide to cleaning your RV awning. With just a little bit of time and effort, you can have your awning looking as good as new and ready to accompany you on all your future adventures. Remember to always start with a good sweep to get rid of any loose debris, then give it a thorough wash with a mild soap and water mixture.
Use a soft brush or sponge to scrub away any stubborn stains, and don’t forget to rinse it off thoroughly and let it dry completely before retracting it. And if you’re feeling ambitious, why not invite your neighbor’s pet parrot to join in on the fun? After all, a clean awning is a true cause for celebration! Happy cleaning, and may your awning always bring you shade and joy on your RV travels.”
FAQs
How often should I clean the awning on my RV?
It is recommended to clean the awning on your RV at least once every three months to prevent dirt, debris, and mildew buildup.
What is the best method to clean an RV awning?
The best method to clean an RV awning is to mix a solution of gentle soap and water. Use a soft bristle brush or sponge to gently scrub the awning, and then rinse thoroughly with clean water.
Can I use bleach to clean my RV awning?
It is not recommended to use bleach on an RV awning as it can damage the fabric. Instead, opt for a mild soap or specialized awning cleaner.
How do I remove stubborn stains from my RV awning?
For stubborn stains, you can try using a mixture of warm water and mild dish soap. Apply the solution to the stain and gently scrub with a soft brush or sponge. Rinse thoroughly with clean water.
Should I retract my RV awning before cleaning it?
It is not necessary to retract your RV awning before cleaning it, but make sure it is secure and stable. If you are concerned about water pooling on the awning, you can tilt it slightly to allow water to run off.
Can I pressure wash my RV awning?
It is not recommended to use a pressure washer on an RV awning as it can damage the fabric. Stick to a gentle cleaning method using soap and water.
How can I prevent mold and mildew from forming on my RV awning?
To prevent mold and mildew, make sure to clean and dry your RV awning thoroughly before retracting it. Additionally, consider using a mildew-resistant fabric spray or treating the awning with a specialized awning protectant.