
RV awnings may not be the most glamorous part of your recreational vehicle, but their importance cannot be overstated. These retractable shades serve as a pleasant extension to your living space, protecting you from the harsh sun or unexpected rain showers. Imagine sitting outside your RV, enjoying a cup of coffee and a book, while being shielded from the scorching heat or drizzling rain.
Sounds like the perfect setup, right? But what happens when your RV awning malfunctions or fails to work altogether? Suddenly, that idyllic scene becomes a lot less appealing. That’s why having a functioning RV awning is crucial for any camping or RV enthusiast. It provides shade and protection, making outdoor living more comfortable and enjoyable.
Whether you’re parked at a campground, a beach, or in the middle of nowhere, having a properly working awning gives you the flexibility to relax and unwind outdoors, no matter the weather. Think of your RV awning as a safety net or an extra room that you can easily set up and take down. It’s like having your own portable gazebo that you can bring wherever your adventures take you.
Not only does it provide shade, but it also adds an element of privacy and coziness to your outdoor space. You can set up chairs, a table, and even hang fairy lights or lanterns to create a serene and inviting ambiance. But what if you encounter a strong wind or a sudden storm? A functioning awning is designed to withstand the elements.
It can provide you with shelter and protect you and your belongings from unexpected gusts of wind or heavy precipitation. By having a reliable RV awning, you can continue enjoying the great outdoors while staying dry and comfortable. So, next time you’re planning your camping trip or hitting the road in your RV, make sure to check the condition of your awning.
If it’s worn, torn, or not functioning as it should, consider getting it repaired or replaced. Investing in a functional and durable awning is not just about aesthetics; it’s about enhancing your outdoor experience and ensuring your comfort and convenience. After all, a well-functioning RV awning can make all the difference between a memorable camping trip and a frustrating one.
Table of Contents
Understanding Your RV Awning
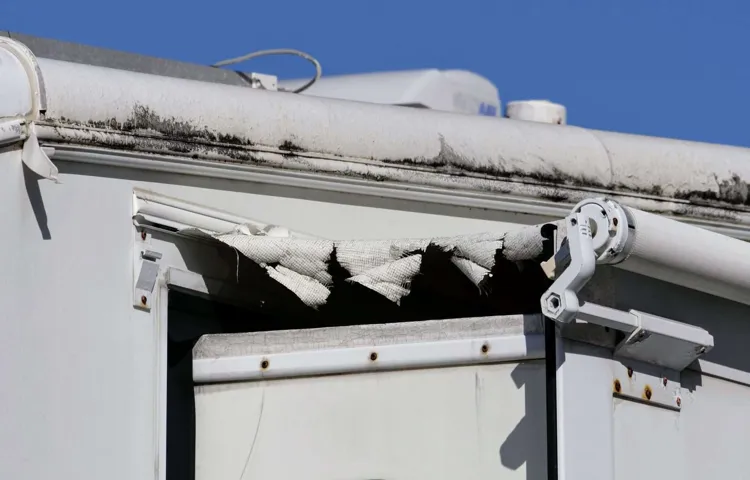
If you’re an RV owner, you probably know just how important the awning is for adding shade and protection to your outdoor living space. However, awnings can sometimes be susceptible to damage from wind, rain, or accidental rips. So, what do you do when your RV awning needs repairing? Well, the good news is that many minor repairs can be done by yourself, saving you time and money.
First, assess the damage. Is it a small tear, or is the entire awning fabric ripped? For small tears, you can use an adhesive patch kit designed specifically for awning repairs. Simply clean the area, apply the adhesive, and press the patch onto the tear.
For larger tears, you may need to replace the entire fabric. This can be a bit more involved, but with some patience and the right tools, it can be done. There are plenty of online tutorials and resources available to guide you through the process step by step.
By taking the time to repair your RV awning, you can ensure that it will continue to provide you with shade and comfort for many more adventures to come. So don’t let a damaged awning put a damper on your camping trip – get out there and make those repairs!
Types of RV Awnings
rv awnings, types of awnings, understanding your awning
Common Issues with RV Awnings
RV awnings are a valuable feature of any camper or motorhome, providing shade and protection from the elements while extending your outdoor living space. However, understanding how to properly use and maintain your RV awning can save you from common issues such as tears, jams, and other mishaps. One important thing to keep in mind is to always retract your awning during high winds or storms to prevent damage.
Additionally, regularly inspecting your awning for any tears, loose screws, or worn-out parts can help identify potential problems early on and prevent them from worsening. Taking the time to understand your RV awning and taking the necessary precautions can help ensure a smooth and enjoyable camping experience.
Tools and Materials You Will Need
When it comes to repairing an RV awning, having the right tools and materials is essential. Here’s a list of what you’ll need to get started. First, you’ll need a ladder to reach the awning and safely perform the repairs.
Next, you’ll need a screwdriver or drill to remove any screws or bolts that may be holding the awning in place. It’s also a good idea to have a rubber mallet or hammer to help with any stubborn parts that may need some persuasion. Additionally, you’ll need a replacement fabric or patch kit, depending on the extent of the damage to the awning.
Finally, it’s important to have some cleaning supplies on hand, such as mild soap and water, to clean the awning before and after the repair. With these tools and materials, you’ll be well-equipped to tackle any RV awning repair job.
Basic Tools
When it comes to tackling any DIY project, having the right tools and materials is essential. Whether you’re a seasoned handyman or just starting out, there are a few basic tools that you’ll need to have on hand. First and foremost, you’ll need a good set of screwdrivers.
These come in handy for a variety of tasks, from assembling furniture to fixing loose cabinet handles. A set that includes both flathead and Phillips screwdrivers is a must. Next, you’ll need a few different types of pliers.
Needle-nose pliers are great for reaching into tight spaces, while slip-joint pliers can be used for gripping and manipulating objects. A pair of adjustable wrenches will also be useful for tightening or loosening nuts and bolts. Finally, don’t forget a tape measure and a level.
These tools are crucial for ensuring accurate measurements and straight lines. As for materials, it’s always a good idea to have a variety of screws, nails, and wall anchors on hand. Having a well-stocked toolbox will save you time and frustration in the long run.
Replacement Parts
tools and materials, replacement parts
Step-by-Step Guide to Repairing Your RV Awning
Repairing an RV awning may seem like a daunting task, but with the right tools and a step-by-step guide, it can be easily done. The first step is to assess the damage. Look for any tears, holes, or broken parts that may need to be addressed.
Once you’ve identified the issue, gather the necessary materials such as a patch kit or replacement parts. Next, remove the awning from the RV and lay it flat on a clean surface. Clean the area around the damaged spot with soap and water to ensure a smooth repair.
If there is a tear or hole, apply a patch using adhesive or stitching. For broken parts, consult the manufacturer’s instructions to find the appropriate replacement. Finally, reattach the awning to the RV using the proper hardware and test it to ensure it is functioning properly.
By following these steps, you can easily repair your RV awning and get back to enjoying your outdoor adventures in no time.
1. Assess the Damage
RV awnings are a great addition to any recreational vehicle, providing shade and protection from the elements. However, accidents can happen, and your awning may get damaged. The first step in repairing your RV awning is to assess the damage.
Take a close look at the awning fabric, checking for tears, holes, or any other signs of damage. If the fabric is only slightly damaged, you may be able to patch it up yourself using a patch kit. However, if the damage is more significant, you may need to replace the entire awning fabric.
Next, inspect the awning frame for any bent or broken parts. If you notice any, you may need to replace those as well. It’s essential to assess the damage thoroughly before proceeding with any repairs to ensure that you have all the necessary materials and tools.
It’s also a good idea to take pictures of the damage for documentation purposes and to show to an RV repair specialist if needed.
2. Clean the Awning
In order to keep your RV awning in tip-top shape, it’s important to regularly clean and maintain it. Cleaning your awning not only helps to keep it looking its best, but it also prevents dirt and debris from building up and causing damage. Plus, a clean awning is much more pleasant to look at and relax under! So, how exactly do you go about cleaning your RV awning? Well, let me break it down for you in this step-by-step guide.
First, start by giving the awning a good spray down with a hose to remove any loose dirt and debris. Next, mix a solution of mild soap and warm water and use a soft brush or sponge to gently scrub the awning. Be sure to pay extra attention to any areas that are particularly dirty or stained.
Rinse the awning thoroughly with clean water and allow it to air dry completely before retracting it. And, voila, your awning will be clean, fresh, and ready for your next adventure!
3. Patch Small Holes or Tears
RV awnings are a great addition to any motorhome or camping setup, providing much-needed shade and protection from the elements. However, over time, these awnings can become damaged, whether it be from small tears or holes. While it may seem like a daunting task, repairing your RV awning is actually quite straightforward.
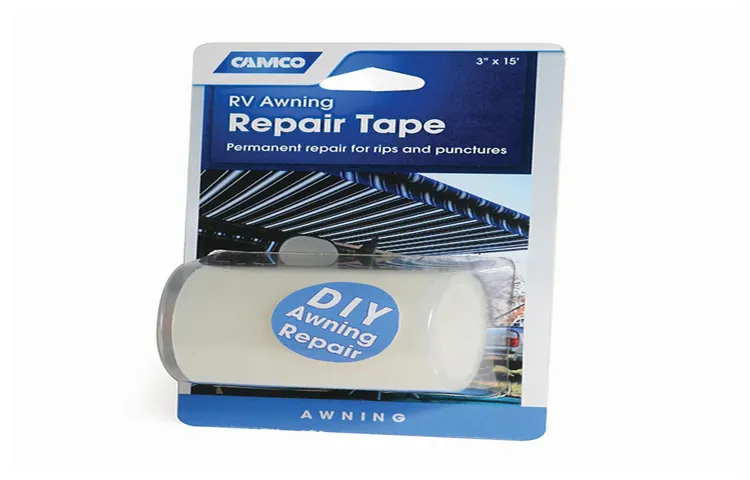
One of the first steps you’ll want to take is to patch up those small holes or tears. This can be done using a patch kit specifically designed for awnings. Simply cut a piece of the patch material to fit over the damaged area and adhere it using the adhesive provided.
Make sure to smooth out any wrinkles or bubbles, ensuring a secure and watertight seal. By taking the time to patch up any small holes or tears, you’ll be able to extend the lifespan of your RV awning and continue to enjoy the comfort and shade it provides.
4. Replace Damaged Hardware
RV awnings are a great addition to any recreational vehicle, providing shade and protection from the sun and rain. However, over time, these awnings can become damaged and need repair. One common issue that RV owners face is a torn or frayed awning fabric.
In this step-by-step guide, we will walk you through the process of repairing your RV awning. The first step is to inspect the damage and determine what needs to be replaced. If the fabric is torn or frayed, you will need to replace it.
Start by removing the old fabric from the awning hardware. Once the old fabric is removed, measure the length and width of the awning to ensure you purchase the correct size replacement fabric. Next, attach the new fabric to the awning hardware using the included hardware or a staple gun.
Finally, test the awning to make sure it is functioning properly. Taking the time to replace damaged awning hardware will ensure that your RV awning continues to provide shade and protection for years to come.
5. Reinstall the Awning
RV awnings provide shade and protection from the elements, but over time they can become worn or damaged. If your RV awning is in need of repair, one of the steps you may need to take is reinstalling the awning. This can seem daunting, but with a few simple tools and some patience, it can be a fairly straightforward process.
First, you will need to remove the old awning fabric, which may involve removing screws or rivets that hold it in place. Next, you will need to carefully measure the new fabric and attach it to the awning frame. This may require the use of a ladder or step stool, so be sure to take the necessary safety precautions.
Once the fabric is securely attached, you can reattach the awning to your RV, making sure it is properly aligned and tightened. Finally, test the awning to ensure it opens and closes smoothly. With a little bit of time and effort, you can have your RV awning looking and functioning like new again.
Tips for Preventing Future Damage
Repairing an RV awning can be a frustrating task, but taking steps to prevent future damage can save you time and money in the long run. One of the best ways to protect your awning is by regularly inspecting it for any signs of wear and tear. Look for loose or frayed threads, holes, or tears in the fabric.
If you notice any issues, it’s important to address them right away to prevent further damage. Another way to prevent damage is by properly storing your awning when it’s not in use. This means making sure it’s dry before rolling it up and storing it in a clean, dry area.
Additionally, be mindful of how you use your awning. Avoid placing excessive weight on it, and make sure it’s properly secured during windy conditions. By following these tips, you can help extend the life of your RV awning and minimize the need for future repairs.
Conclusion: Enjoying a Well-Maintained RV Awning
In conclusion, repairing an RV awning is a task that requires equal parts patience, skill, and a touch of cleverness. Just like a master puzzle solver, you must carefully examine the pieces, analyze the problem, and devise an ingenious solution. Whether it’s fixing a tear with duct tape and a bit of ingenuity or replacing a broken arm with a repurposed broomstick, the key is to think outside the box and embrace your inner MacGyver.
So remember, the next time your RV awning is in need of repair, channel your inner handyperson and get ready to amaze your fellow campers with your resourcefulness. Happy repairing!
FAQs
How do I repair a torn RV awning?
To repair a torn RV awning, start by cleaning the affected area with soap and water. Then, apply a patch or use awning repair tape to cover the tear. Make sure to smooth out any air bubbles and press firmly to ensure a secure bond. Allow the patch or tape to dry completely before using the awning again.
What should I do if my RV awning won’t retract?
If your RV awning won’t retract, you can try a few troubleshooting steps. First, check if the awning is locked in the open position and release the lock if necessary. Next, inspect the tension adjustment knobs and make sure they are properly adjusted. If these steps don’t solve the issue, you may need to inspect and potentially replace the awning motor or spring assembly.
How often should I clean and maintain my RV awning?
It is recommended to clean and maintain your RV awning at least once every three months, or more frequently if you regularly camp in dusty or dirty environments. Regularly brushing off debris, using a mild detergent to remove stains, and inspecting for any signs of damage can help prolong the lifespan of your awning.
Can I repair a sagging RV awning by myself?
Yes, you can repair a sagging RV awning by yourself. First, inspect the tension adjustment knobs and tighten them if necessary. If the sagging continues, you may need to replace the awning fabric or seek professional assistance to repair or replace the tension springs.
Are there any protective covers available for RV awnings?
Yes, there are protective covers available for RV awnings. These covers are designed to shield the awning fabric from UV rays, dirt, and debris, which can help extend its lifespan. It is recommended to install the cover when the awning is retracted and remove it before extending the awning.
How can I prevent mold and mildew from forming on my RV awning?
To prevent mold and mildew from forming on your RV awning, it is essential to keep it clean and dry. After each use, make sure to roll up the awning properly to allow for proper airflow and drying. If you notice any signs of mold or mildew, clean the awning with a mixture of bleach and water, making sure to rinse thoroughly afterwards.
Is it possible to replace just a section of the RV awning fabric?
Yes, it is possible to replace just a section of the RV awning fabric. If a specific section is damaged or worn out, you can purchase a replacement fabric and follow the manufacturer’s instructions for installation. Make sure to measure the awning properly and choose the correct size fabric for an accurate fit.