
Are you tired of looking at a dirty and grimy RV awning every time you go on a camping trip? Cleaning your RV awning doesn’t have to be a daunting task. With the help of a magic eraser, you can easily restore your awning to its former glory in no time. In this blog post, we will show you how to clean your RV awning with a magic eraser, so you can enjoy a fresh and clean outdoor space during your next adventure.
So let’s dive in and discover the magic of the magic eraser!
Table of Contents
Introduction
Cleaning your RV awning doesn’t have to be a daunting task. With a little bit of elbow grease and the help of a magic eraser, you can have your awning looking brand new in no time. Magic erasers are a versatile cleaning tool that can be used on a variety of surfaces, including fabric.
To begin, start by wetting the magic eraser and squeezing out any excess water. Then, gently scrub the surface of the awning in a circular motion, applying enough pressure to remove dirt and grime but not so much that you damage the fabric. Rinse the eraser frequently to remove any dirt buildup and continue until the entire awning has been cleaned.
Once you’re finished, rinse the awning with water to remove any residue and allow it to air dry completely before retracting it. By following these simple steps and using a magic eraser, you can easily clean your RV awning and have it looking as good as new.
Benefits of Using a Magic Eraser
Magic Eraser, remove stains, cleaning tool Paragraph: Hey there! Are you tired of scrubbing away at tough stains and marks on your walls, furniture, or appliances? Well, I’ve got just the solution for you – the Magic Eraser! This incredible cleaning tool is a game-changer when it comes to tackling stubborn dirt and grime. Whether you have crayon marks on your walls or scuff marks on your floors, the Magic Eraser can work its magic and make them disappear in no time. It’s like having a little wizard in your cleaning arsenal! But what exactly is a Magic Eraser, and what makes it so special? Let’s dive in and explore the amazing benefits of using this miracle cleaning tool.

What You’ll Need
If you’re looking to clean your RV awning and want a quick and efficient solution, a magic eraser may be just what you need. These handy little sponges can work wonders on a variety of surfaces, including awnings. To get started, you’ll need a few things.
First, make sure you have a magic eraser on hand. You should be able to find these at most grocery or hardware stores. Next, gather a bucket of warm, soapy water and a soft bristle brush.
You may also want to have a hose or pressure washer handy for rinsing off the awning once you’re done cleaning. With these supplies in hand, you’ll be ready to tackle your dirty RV awning and have it looking like new in no time.
Materials
“Materials” When it comes to DIY projects, having the right materials is key to success. So, what will you need for your next project? Let’s dive in! First and foremost, make sure you have the right tools. Whether it’s a set of screwdrivers, a power drill, or a pair of pliers, having the necessary tools will make your project go much more smoothly.
Don’t forget the safety equipment too – goggles, gloves, and a dust mask are all must-haves to protect yourself while working. Next up, consider the materials specific to your project. Are you painting a room? You’ll need paint, brushes or rollers, and possibly some painter’s tape.
Building a bookshelf? You’ll need wood, screws, and a saw. It’s important to have a clear understanding of what materials are needed before you start, so you can gather everything in advance. In addition to tools and project-specific materials, it’s always a good idea to have some basic supplies on hand.
This might include items like measuring tape, a level, sandpaper, and a utility knife. These are the types of things that often come in handy, regardless of the project at hand. Finally, don’t forget about the little things.
Having a well-stocked toolbox with items like nails, screws, and picture hangers can save you a trip to the store when you need them most. And let’s not forget about the importance of having a storage solution for all of your materials – a toolbox, bins, or even a pegboard can help keep everything organized and easily accessible. So there you have it – the materials you’ll need for your next DIY project.
From tools to project-specific materials to basic supplies, having everything on hand will make your project go much more smoothly. Happy crafting!
Safety Precautions
safety precautions, safety gear, protective equipment, safety measures, safety procedures What You’ll Need: When it comes to ensuring safety in any activity, the right gear and equipment are essential. Whether you’re engaged in a high-risk sport or simply taking on a DIY project at home, it’s important to have the necessary protective gear. The specific tools and equipment you’ll need will depend on the nature of the activity, but here are some general safety precautions to consider:
Safety Glasses: These are vital for protecting your eyes from debris, chemicals, or any potential impact. Whether you’re working with power tools or handling corrosive substances, safety glasses should always be worn.
Gloves: Different types of gloves are available for various tasks. For example, when working with sharp objects or chemicals, wearing cut-resistant or chemical-resistant gloves can prevent injuries. For heavy lifting or construction work, sturdy gloves with a good grip are essential.
Hard Hat: If you’re working in construction or any environment where falling objects are a risk, wearing a hard hat is crucial. It provides protection for your head against potential impact.
Ear Protection: Loud noises can cause hearing damage, so wearing ear protection such as earmuffs or earplugs is important in noisy environments, including construction sites or when using power tools.
Safety Shoes: When working in areas where there is a risk of foot injuries, such as construction sites or workshops, sturdy safety shoes with reinforced toecaps help protect your feet from falling objects or sharp items. Safety Harness and Fall Arrest System: For tasks that involve working at heights, such as roofing or tree trimming, a safety harness and fall arrest system are necessary to prevent falls and ensure you are secured to a structure.
Preparation
If you’re looking to clean your RV awning, using a magic eraser is a great option. Not only is it versatile and effective, but it’s also very easy to use. Before you start, make sure you have a clean bucket of water, a soft bristle brush, and a magic eraser.
Start by wetting your awning with water to remove any loose dirt or debris. Then, use the soft bristle brush to gently scrub the awning, working in small sections at a time. Once you’ve thoroughly scrubbed the awning, it’s time to bring out the magic eraser.
Wet the eraser, squeeze out any excess water, and begin scrubbing the awning with gentle circular motions. The magic eraser will help to remove any stubborn stains or dirt, leaving your awning looking fresh and clean. When you’re finished, rinse the awning with clean water to remove any residue from the magic eraser.
With just a few simple steps, you can easily clean your RV awning using a magic eraser.
Choose a Suitable Location
suitable location, preparation The location you choose for your business is critically important and can greatly impact your success. As you prepare to decide on a suitable location, there are a few key factors to consider. First and foremost, think about your target market.
Who are your customers and where are they located? Understanding their demographics and preferences will help you narrow down potential locations that are accessible to them. It’s also important to consider the competition in the area. Are there similar businesses nearby? If so, is there enough consumer demand to support multiple businesses of the same type? Additionally, think about the infrastructure and resources available in the area.
Is there easy access to transportation, parking, and utilities? Lastly, consider the overall atmosphere and vibe of the location. Is it a place that aligns with your brand and will attract your target audience? By carefully considering these factors during the preparation phase, you can increase the chances of finding a suitable location that sets your business up for success.
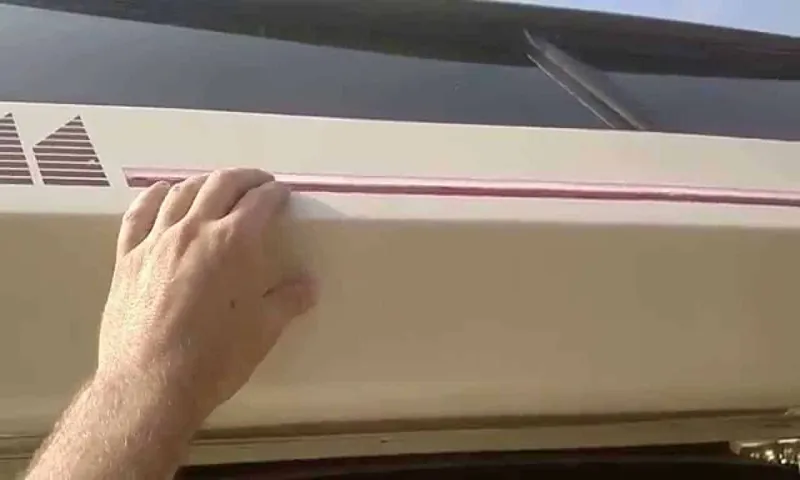
Secure the Awning
Secure the awning
Cleaning Process
Are you looking for a simple and effective way to clean your RV awning? Look no further than the magic eraser! This versatile cleaning tool can work wonders on your awning, removing dirt, grime, and stains with ease. To clean your awning with a magic eraser, simply wet the sponge and gently scrub the surface of the awning. The magic eraser’s unique microabrasive material acts like little scrubbing pads, lifting away dirt and restoring the awning’s original look.
Whether your awning is made of fabric, vinyl, or another material, the magic eraser can handle the job. Just be sure to test a small, inconspicuous area first to ensure that it doesn’t cause any damage. So why spend hours scrubbing and using harsh chemicals when you can clean your RV awning with a magic eraser? Give it a try and see the amazing results for yourself!
Wet the Magic Eraser
Magic Eraser, cleaning process
Gently Scrub the Awning
Cleaning Process Now that you have assessed the condition of your awning and gathered the necessary tools, it’s time to dive into the cleaning process. Gently scrubbing the awning is a crucial step to remove dirt, grime, and any stubborn stains that may have accumulated over time. Start by wetting the entire surface of the awning with a hose or bucket of water.
This will help loosen any loose debris and make the scrubbing process easier. Next, mix a mild detergent or an awning-specific cleaner with water in a bucket. Dip a soft-bristle brush into the soapy solution and begin scrubbing the awning in circular motions.
Be sure to apply enough pressure to remove dirt, but be gentle to avoid damaging the fabric or causing any tears. Pay extra attention to areas with visible stains or spots. Rinse the awning thoroughly with clean water to remove any soap residue.
It’s important not to leave any traces of detergent as it can attract dirt and cause discoloration. Finally, allow the awning to air dry completely before retracting it. This will prevent the mold or mildew from forming and ensure a clean and fresh-looking awning.
Remember to take your time and be thorough in the cleaning process to achieve the best results.
Rinse the Awning
cleaning process, rinse the awning, awning maintenance
Dry the Awning
Cleaning Process Once you have thoroughly scrubbed and rinsed your awning, the next step is to make sure it is completely dry before storing it away. Drying the awning is an important part of the cleaning process, as any residual moisture can lead to mold or mildew growth over time. To properly dry your awning, start by ensuring that it is fully extended.
This will allow for maximum air circulation and facilitate quicker drying. Use a dry towel or a microfiber cloth to gently pat down the surface of the awning, absorbing any excess water. If the weather permits, you can leave the awning in the sun to air dry.
The warmth of the sun will help to evaporate any remaining moisture. Alternatively, you can use a fan to speed up the drying process. Position the fan in front of the awning and set it to a high speed.
The airflow created by the fan will help to remove any moisture and leave your awning completely dry. Once the awning is dry, you can proceed to fold it and store it away until it is needed again. Keeping your awning clean and dry will not only prolong its lifespan but also ensure that it looks its best and performs optimally whenever you decide to use it.
So take the time to properly dry your awning after cleaning, and you will be rewarded with a fresh, mold-free outdoor space.
Additional Tips and Suggestions
Cleaning your RV awning can be a tedious task, but with the help of a magic eraser, it can become much easier. Magic erasers are a versatile cleaning tool that can tackle a variety of stains and dirt. To clean your RV awning with a magic eraser, start by wetting the eraser and gently scrubbing the surface of the awning.
The magic eraser will effectively remove dirt, grime, and even stubborn stains without causing any damage to the awning fabric. Make sure to rinse the awning thoroughly after cleaning to remove any residue left by the magic eraser. Additionally, you can use a mild cleaning solution or soap to enhance the cleaning power of the magic eraser.
Remember to always test a small, inconspicuous area first to ensure that the magic eraser does not cause any discoloration or damage to the awning fabric. With a little bit of time and effort, your RV awning will be clean and looking as good as new.
Dealing with Stubborn Stains
“In addition to the previous tips on removing stubborn stains, there are a few more tricks you can try to tackle those persistent marks. One method is to use vinegar and baking soda. Mix equal parts of vinegar and baking soda to create a paste, then apply it to the stained area.
Let it sit for about 15 minutes before scrubbing it with a brush or sponge. This combination works well on tough stains like coffee, wine, or even ink. Another option is to use hydrogen peroxide.
Apply a small amount directly onto the stain and let it sit for a few minutes before blotting it with a clean cloth. This method is particularly effective on stubborn stains such as blood or grass. If you’re dealing with grease stains, try using dish soap.
Apply a small amount of dish soap directly onto the stain and use a brush or sponge to gently scrub the area. Rinse with water and repeat if necessary. Remember, it’s always best to test any cleaning solution on a small, inconspicuous area before applying it to the entire stain.
By incorporating these additional tips and suggestions, you’ll be well-equipped to tackle even the most stubborn stains.”
Regular Maintenance
Regular maintenance is essential to ensure your vehicle stays in optimal condition and continues to perform efficiently. In addition to the basic maintenance tasks we discussed in the previous section, there are a few other tips and suggestions that can help prolong the life of your vehicle. Firstly, it’s important to keep an eye on the fluids in your car, including oil, coolant, and transmission fluid.
Regularly checking and topping up these fluids will help prevent damage and ensure your car runs smoothly. Secondly, pay attention to your tires. Check the tread depth regularly and make sure they are properly inflated.
This will not only improve the safety of your vehicle but also enhance fuel efficiency. Lastly, don’t neglect the small things. Keep your car clean, both inside and out, and regularly inspect the lights and wipers.
By taking these additional steps, you can ensure your vehicle stays in great shape for years to come.
Protecting Your Awning
awning protection, tips for protecting your awning, awning care When it comes to protecting your awning, there are a few additional tips and suggestions that can help prolong its lifespan and keep it looking great. One important tip is to regularly inspect your awning for any signs of damage or wear. Look for tears, loose stitching, or any areas that may need to be repaired.
By catching these issues early on, you can prevent further damage and ensure that your awning stays in good condition. Another tip is to clean your awning regularly. This can help remove dirt, debris, and any stains that may have accumulated over time.
Using a mild detergent and a soft brush, gently scrub the surface of the awning. Be sure to rinse it thoroughly and allow it to dry completely before retracting it. Additionally, consider using a protective cover when your awning is not in use.
This can shield it from the elements and prevent any damage caused by harsh weather conditions. Finally, it’s important to be mindful of how you operate your awning. Avoid retracting it when it’s wet and be careful when opening and closing it to prevent any unnecessary strain or damage.
By following these additional tips and suggestions, you can enjoy your awning for years to come.
Conclusion
So there you have it, folks! Cleaning your RV awning with a magic eraser is like brushing away the dirt and grime with a little touch of wizardry. Just like a magician who makes things disappear, the magic eraser magically wipes away all the stains and leaves your awning looking brand new. But remember, don’t be fooled by its seemingly simple appearance.
This eraser is much more than meets the eye. It’s like having a cleaning genie in a little rectangular sponge. It effortlessly removes stubborn marks and leaves behind a sparkling clean surface.
So next time you’re faced with a dirty RV awning, don’t stress. Just grab your trusty magic eraser and let the cleaning magic begin. Wave your cleaning wand, scrub away the stains, and watch as your awning transforms like in a captivating illusion.
And as always, be sure to follow the manufacturer’s instructions and test a small, inconspicuous area before tackling the entire awning. After all, even the most skilled magicians practice caution! So go ahead, unleash the magic and bring a little enchantment to your RV adventures. Clean your awning with a magic eraser, and let the sparkle and shine inspire awe and wonder wherever you go.
Happy cleaning, RV wizards!”
FAQs
Can I use a magic eraser to clean my RV awning?
Yes, a magic eraser can be effective in cleaning an RV awning. Simply wet the magic eraser and gently scrub the surface of the awning to remove dirt and stains. Rinse thoroughly afterwards.
What other cleaning products can I use to clean my RV awning?
In addition to a magic eraser, you can also use mild soap and water, a specialized awning cleaner, or a mixture of vinegar and water to clean your RV awning. It is important to check the manufacturer’s instructions before using any cleaning product.
Are there any specific techniques to follow when cleaning a RV awning with a magic eraser?
When using a magic eraser, it is recommended to apply gentle pressure and avoid scrubbing too vigorously to prevent any potential damage to the awning fabric. Always start with a small area to test if the magic eraser is suitable for your specific awning material.
How often should I clean my RV awning using a magic eraser?
The frequency of cleaning your RV awning depends on the level of dirt and stains it accumulates. As a general guideline, it is recommended to inspect and clean your awning at least once every season or as needed. Regular maintenance and occasional spot cleaning can help prevent the buildup of stubborn stains.
Can I use a magic eraser to remove mold or mildew from my RV awning?
While a magic eraser can be effective in removing certain stains and dirt, it may not be the best option for mold or mildew removal. It is advisable to use a specialized mildew remover or a mixture of bleach and water for such situations. Always read and follow the instructions provided by the product manufacturer.
Can using a magic eraser damage the fabric of my RV awning?
When used correctly, a magic eraser should not damage the fabric of your RV awning. However, it is important to follow the instructions, start with a small test area, and avoid scrubbing too aggressively. If you notice any signs of damage or discoloration, stop using the magic eraser and try alternative cleaning methods.
Are there any precautions I should take when using a magic eraser to clean my RV awning?
It is advisable to wear gloves and appropriate eye protection when cleaning your RV awning with a magic eraser or any cleaning product. Additionally, ensure that your awning is fully extended and secured to prevent accidents or damages. Always follow safety guidelines provided by the manufacturer.