
Hey there! If you’re an avid traveler or a fan of the great outdoors, you’ve probably come across a popular accessory for recreational vehicles (RVs) known as awnings. But what exactly are these awnings and why are they such a beloved addition to many RVs? Let’s dive in and uncover the mystery behind RV awnings! Picture this: you’re out on a camping trip, enjoying the fresh air and beautiful scenery. However, the scorching sun or unexpected rain showers might put a damper on your outdoor bliss.
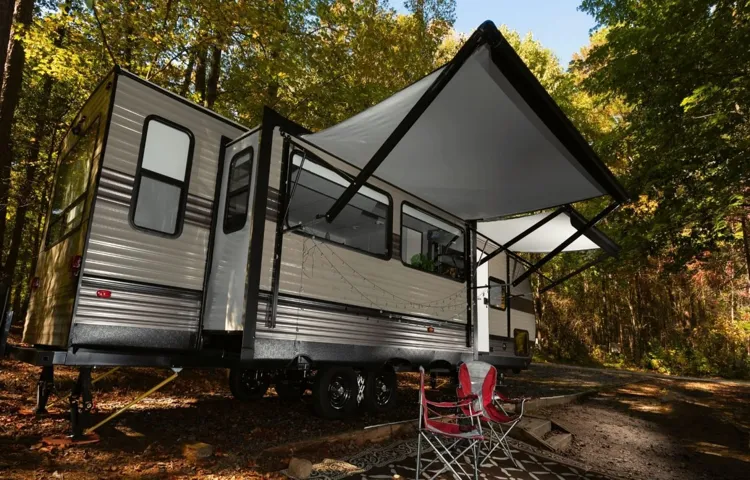
This is where RV awnings come to the rescue! These retractable shade structures are installed on the side of your RV and provide a comfortable space for you to relax under, shielding you from the elements. Not only do RV awnings offer protection from the sun and rain, but they also expand your living space. Imagine setting up a cozy outdoor lounge area under the shade of the awning, complete with chairs, a table, and maybe even a portable barbecue grill.
It’s like having your own private oasis wherever you go! But it doesn’t end there. RV awnings also offer other practical benefits that make them a must-have for RV enthusiasts. They can help keep the interior of your RV cooler by blocking out the direct sunlight, saving you from relying heavily on your air conditioning unit.
Additionally, they can protect your RV’s windows and doors from rain, which can prevent leaks and potential water damage. RV awnings come in a variety of styles, sizes, and materials to suit different preferences and needs. From manual awnings that require a little muscle power to extend and retract, to automatic ones that can be effortlessly controlled with just the push of a button, there’s an option out there for everyone.
So, whether you’re planning a cross-country road trip or simply want to make your camping experience more comfortable, RV awnings are definitely a worthy investment. They provide shade, expand your living space, protect your RV, and add a touch of luxury to your outdoor adventures. In our upcoming blog posts, we’ll be delving into more details about the different types of RV awnings, their installation process, maintenance tips, and much more.
Stay tuned as we embark on this exciting journey of understanding and appreciating all there is to know about RV awnings!
Table of Contents
- 1 What is an RV Awning?
- 2 Importance of Opening Your RV Awning Properly
- 3 Tools and Materials Needed
- 4 Step-by-Step Guide: Opening Your RV Awning
- 4.1 Step 1: Inspect Your RV Awning
- 4.2 Step 2: Gather the Necessary Tools and Materials
- 4.3 Step 3: Prepare Your RV and Clear the Workspace
- 4.4 Step 4: Detach Any Awning Straps or Supports
- 4.5 Step 5: Unlock the Awning Arm Locks
- 4.6 Step 6: Extend the Awning Arms
- 4.7 Step 7: Uncover the Awning Fabric
- 4.8 Step 8: Secure the Awning Arms in Place
- 4.9 Step 9: Adjust the Awning Height and Tension
- 4.10 Step 10: Finish the Opening Process
- 5 Maintenance and Care Tips
- 6 Conclusion
- 7 FAQs
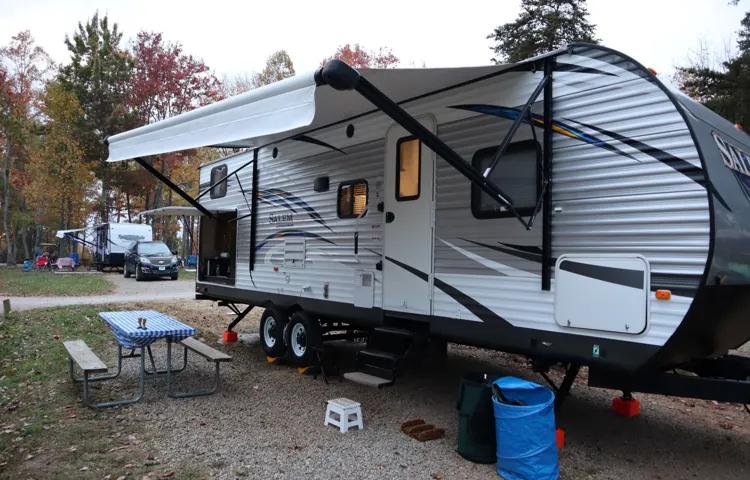
What is an RV Awning?
If you’re new to the world of RVs, you may be wondering what exactly an RV awning is and how to open one. Well, an RV awning is a retractable shade that is attached to the side of an RV. It can be made of fabric or vinyl and is used to provide shade and protection from the elements when you’re camping or parked at a campground.
Opening an RV awning is a relatively simple process, but it does require a bit of strength and coordination. First, locate the awning handle and release the lock mechanism. Then, slowly and evenly pull the awning out until it is fully extended.
Finally, use the support arms to lock the awning in place. And just like that, you’ve got yourself some shade!
Importance of Opening Your RV Awning Properly
Opening your RV awning properly is essential for ensuring a smooth and enjoyable outdoor experience. When done correctly, it provides shade, protection from the elements, and an extended living area for you and your family. So, how do you go about opening your RV awning? First, make sure you have the right tools on hand, such as a ladder and a helper.
Then, check the weather conditions to ensure it’s safe to open the awning. Next, locate the awning controls, usually located near the entrance of your RV. Use the controls to slowly extend the awning, making sure it’s fully extended and secure before locking it in place.
Finally, check for any obstructions or damage before enjoying your newfound outdoor space. Remember, taking the time to open your RV awning properly will not only enhance your camping experience but also prolong the lifespan of your awning.
Tools and Materials Needed
If you’re looking to open your RV awning, you’ll need a few tools and materials to get started. First and foremost, you’ll need a ladder that’s tall enough to reach the awning. This will ensure that you can safely access and manipulate the awning without risking injury.
Additionally, you’ll need a power drill or manual crank to operate the awning mechanism. Depending on the type of awning you have, you may also need a can of lubricant to ensure smooth operation. Lastly, it’s always a good idea to have a friend or family member nearby to provide assistance and support while you open the awning.
By having the right tools and materials on hand, you’ll be able to easily open your RV awning and enjoy the shade and protection it provides.
Step-by-Step Guide: Opening Your RV Awning
So you’re ready to hit the road in your RV and enjoy the great outdoors, but before you go, you need to know how to open your RV awning. Opening your awning is an essential step in creating a comfortable outdoor living space at your campsite. Fortunately, it’s a relatively simple process that can be done in just a few easy steps.
First, locate the awning’s release lever or switch, which is usually located near the main arm of the awning. Next, use your hand or a tool to release the latch and unlock the awning. Once the latch is released, you can start extending the awning by either using a crank handle or an electric motor, depending on the type of awning you have.
Keep extending the awning until it is fully deployed, and then secure it in place with the tension adjusters. It’s important to make sure the awning is properly secured to prevent any damage from wind or rain. Finally, take a step back and admire your new outdoor living space.
Your RV awning is now open and ready for you to relax and enjoy your camping trip.
Step 1: Inspect Your RV Awning
RV awnings can be a great addition to your outdoor living space, providing shade and protection from the sun and rain. But before you can enjoy all the benefits of your awning, you need to know how to open it properly. In this step-by-step guide, we’ll walk you through the process from start to finish.
The first step is to inspect your awning. Take a close look at the fabric, making sure there are no tears or holes. Check the hardware to ensure it is in good working order and that there are no loose or missing parts.
If you spot any issues, it’s best to address them before attempting to open the awning. By taking the time to properly inspect your awning, you can ensure that it opens smoothly and functions properly when you’re ready to use it. So grab your ladder and head outside to give your RV awning a thorough inspection.
Step 2: Gather the Necessary Tools and Materials
In this step-by-step guide, we will walk you through the process of opening your RV awning. The first thing you need to do is gather all the necessary tools and materials. To open your RV awning, you will need a few basic tools such as a ladder, a screwdriver, and a wrench.
These tools will help you access the awning and make any necessary adjustments. Additionally, you may also need some cleaning supplies like a brush and soap to remove any dirt or debris that may have accumulated on the awning. Once you have gathered all the tools and materials, you will be ready to move on to the next step of the process.
Step 3: Prepare Your RV and Clear the Workspace
opening your RV awning
Step 4: Detach Any Awning Straps or Supports
When it’s time to open your RV awning, one of the first steps is to detach any awning straps or supports. These straps or supports are designed to keep the awning secure during transit or storage, but they need to be removed before you can fully open the awning. Start by locating the straps or supports on each side of the awning and unfastening them.
This may involve releasing a buckle, untying a knot, or unhooking a latch. Once the straps or supports are detached, you can move on to the next step in the process of opening your awning.
Step 5: Unlock the Awning Arm Locks
RV awnings provide shade and protection from the elements, making them a valuable addition to any camping or road trip adventure. However, opening an RV awning for the first time can be confusing if you’re not familiar with the process. In this step-by-step guide, we will walk you through the process of unlocking the awning arm locks, a crucial step in opening your RV awning.
Once you have extended the awning fabric and ensured that it is properly tensioned, the next step is to unlock the awning arm locks. These locks secure the awning arms in place and prevent them from unintentionally retracting. To unlock the awning arm locks, locate the lock mechanism on each arm.
This is usually a lever or a latch that you can easily spot. To unlock the awning arm locks, simply push or pull the lever or latch, depending on the type of lock mechanism you have. You may need to use a bit of force, but be gentle to avoid damaging the lock or the awning arm.
Once you have unlocked both arm locks, you will be able to freely adjust the height and angle of the awning. It’s important to note that unlocking the awning arm locks is a critical step in the process, as attempting to open or close the awning without unlocking the locks can cause damage to the awning or the RV. Always make sure to inspect the locks before opening the awning to ensure they are in proper working order.
In conclusion, unlocking the awning arm locks is a simple yet crucial step in opening your RV awning. By following this step-by-step guide, you can successfully unlock the locks and adjust the height and angle of your awning to provide the desired shade and protection. Remember to always double-check the locks before opening or closing the awning to prevent any potential damage.
So go ahead, unlock those arm locks and enjoy the comfort and convenience of your RV awning on your next adventure!
Step 6: Extend the Awning Arms
One important step in opening your RV awning is extending the awning arms. The awning arms are what hold the fabric of the awning in place and allow it to be fully extended. To extend the awning arms, start by releasing the travel locks that keep the arms closed during travel.
These locks are typically located near the top of the arms and can be released by pulling on them or pressing a button. Once the locks are released, gently pull the awning arms apart, allowing them to extend fully. It’s important to be careful when extending the arms, as they can be heavy and may require some strength to fully extend.
Once the arms are extended, you can then begin the process of extending the awning fabric. By following these steps, you’ll be on your way to enjoying the shade and protection that your RV awning provides.
Step 7: Uncover the Awning Fabric
uncover the awning fabric When it comes to opening your RV awning, there are a few steps you need to follow. One of these steps is uncovering the awning fabric. This is an important part of the process, as it allows you to fully extend and secure the awning in place.
To uncover the awning fabric, start by releasing the tension on the awning arms. This can usually be done by loosening the knobs or levers that hold the arms in place. Once the tension is released, you can begin to extend the awning by gently pulling on the fabric.
As you do this, be careful not to let the fabric get caught or tangled on anything. Slowly and steadily extend the awning until it is fully open. Once the awning is fully extended, you can then secure the fabric in place using the provided straps or clips.
This will ensure that your awning stays in place and provides shade and protection from the elements. It’s important to note that if you encounter any difficulties or resistance during this process, it’s best to stop and consult the manufacturer’s instructions or seek professional assistance. Properly uncovering the awning fabric is essential for safely and effectively using your RV awning.
Step 8: Secure the Awning Arms in Place
RV awnings are a great addition to any camping or road trip adventure. They provide shade and protection from the elements, making your outdoor experience much more enjoyable. However, opening an RV awning can be a bit tricky if you’re not familiar with the process.
In this step-by-step guide, we’ll walk you through the process of securing the awning arms in place to ensure your awning stays securely in place. Once you’ve extended the awning fabric, you’ll notice two arms on each side of the awning. These arms are responsible for holding the fabric up and keeping it stable.
To secure the awning arms in place, start by releasing the locking mechanism on each arm. This will allow you to extend the arms fully. Once the arms are extended, you’ll want to position them at a 90-degree angle from the side of your RV.
To do this, simply adjust the arms until they are perpendicular to the ground. Once the arms are in the correct position, you can use the locking mechanism to secure them in place. Simply pull down on the locking mechanism until it clicks into place.
Repeat this process for the other arm, and your awning arms will be securely locked in place.
Step 9: Adjust the Awning Height and Tension
One of the final steps in opening your RV awning is adjusting the height and tension. This is important to ensure that your awning is properly set up and secure. To adjust the height, start by extending the awning fully.
Then, locate the adjustable arms on either side of the awning and loosen the locking knobs. Raise or lower the awning to your desired height, making sure it is level. Once you have adjusted the height, tighten the locking knobs to secure the awning in place.
Next, you will need to adjust the tension of the awning fabric. This is important to prevent sagging or flapping in windy conditions. To adjust the tension, locate the tension knobs on each side of the awning.
Loosen these knobs and then use the ratchet mechanism to tighten or loosen the tension. You can tighten the tension to make the fabric taut or loosen it for a more relaxed fit. Find the right balance that works for you and your awning.
It’s worth noting that the tension of the awning may need to be adjusted from time to time, especially if you are experiencing strong winds or heavy rain. Regularly check the tension and make any necessary adjustments to ensure your awning stays in good condition and provides the shade and protection you need. Remember, adjusting the height and tension of your RV awning is important for its proper function and longevity.
Taking the time to get it just right will ensure that you can enjoy your outdoor space comfortably and without any worries. So, go ahead and give your awning the attention it deserves to make the most of your RV adventures.
Step 10: Finish the Opening Process
RV Awning Opening Process In our step-by-step guide on opening your RV awning, we have reached the final step: finishing the opening process. After carefully following the previous steps, which included unlocking the awning arms and extending the support arms, it’s time to complete the process. To finish the opening process, you’ll need to check and secure the awning fabric.
This ensures that it is properly tensioned and won’t sag or flap in the wind. First, inspect the fabric for any tears, holes, or worn areas. If you notice any damage, it’s important to address it before continuing.
Next, verify that the fabric is straight and centered on the roller tube. This can be done by standing back and visually aligning it, or by using a measuring tape to ensure it is evenly extended on both sides. Adjustments can be made by rolling the awning back in and realigning the fabric as needed.
Once the fabric is straight and centered, secure it in place using the awning locks. These locks are located near the awning arms and will prevent the fabric from unrolling during travel or strong winds. Simply flip the locks down to engage them, and make sure they are secure.
After securing the awning fabric, take a moment to inspect the entire awning system for any loose or missing parts. Check the awning arms, support arms, and roller tube for any signs of wear or damage. Replace any broken or worn components before using the awning.
Now that the opening process is complete and everything is secured, take a step back and admire your RV awning. It’s ready to provide shade and protection from the elements, allowing you to fully enjoy your outdoor space. Remember to always take care of your awning by retracting it during inclement weather or when you’re away from your RV for extended periods.
Maintenance and Care Tips
So, you’re ready to enjoy some outdoor relaxation under your RV awning, but you’re not sure how to open it. Don’t worry, it’s easier than you think! To open your RV awning, start by locating the awning control switch. This switch is typically located inside the RV near the entrance door, or sometimes outside near the awning itself.
Once you’ve found the switch, simply press or slide it to the “Open” position. Be sure to hold on to the awning fabric as it begins to unroll to prevent it from unfurling too quickly. Once the awning is fully extended, you can lock it into place using the locking mechanism on the arm.
Now you can sit back, relax, and enjoy the shade and protection provided by your RV awning. Remember, if you ever need to close the awning, simply follow the same steps but press or slide the control switch to the “Close” position instead. With these simple steps, you’ll be able to open and close your RV awning with ease.
Happy camping!
Protecting Your RV Awning from Damages
Are you a proud RV owner? If so, you know how important it is to protect your investment. One vital part of your RV that often goes overlooked when it comes to maintenance and care is the awning. Your awning is not only a great source of shade and protection from the elements, but it also adds to the overall aesthetic of your RV.
To keep your awning in pristine condition, there are a few key things you can do. Regular cleaning is essential to prevent dirt and debris from building up and causing damage. Additionally, make sure to inspect the awning for any signs of wear or tear, such as holes or loose seams.
By catching these issues early on, you can avoid more extensive damage down the road. Another important aspect of awning care is proper storage. When not in use, it’s crucial to retract your awning and secure it tightly.
This will prevent it from being exposed to harsh weather conditions that could cause damage. With these simple maintenance and care tips, you can ensure that your RV awning stays in great shape for years to come.
Cleaning and Storing Your RV Awning
RV awnings are a great addition to any recreational vehicle. They provide shade and protection from the elements, allowing you to enjoy the outdoors in comfort. However, like any part of your RV, awnings require regular maintenance and care to keep them in good condition.
Cleaning your RV awning is an important part of this maintenance routine. Over time, awnings can accumulate dirt, grime, and even mildew. To clean your awning, start by removing any loose debris with a broom or brush.
Then, mix a solution of water and mild soap and use a soft brush or sponge to scrub the awning. Rinse thoroughly with clean water and allow it to dry completely before retracting it. Storing your awning properly is also crucial.
Before retracting the awning, make sure it is completely clean and dry to prevent mold and mildew from forming. It is also a good idea to use an RV awning cover to protect it from the elements when not in use. By following these maintenance and care tips, you can extend the life of your RV awning and enjoy it for years to come.
Conclusion
And there you have it, a step-by-step guide on how to open a RV awning. Now, you may be thinking, “Why would I ever need to know how to do this?” Well, let me enlighten you with a few clever reasons. Firstly, imagine you’re on a road trip, parked at a beautiful campsite, and the sun is beaming down on you relentlessly.
Sure, you could sit inside your RV and sulk, or you could whip out your newly acquired RV awning opening skills and create some instant shade to enjoy the great outdoors. Secondly, picture yourself at a campground with your friends or family, sitting around a campfire, when an unexpected rain shower pours down. Instead of darting for cover and huddling under the nearest tree, you can simply open your RV awning and provide everyone with a dry gathering spot.
Lastly, let’s not forget the potential for impressing your fellow campers with your awning-opening expertise. Who needs fancy gadgets or expensive RV accessories when you can show off your practical skills and save the day? Your friends will marvel at your resourcefulness, and perhaps even be inspired to explore the world of RV awning opening themselves. So, whether you’re seeking shade, shelter from the rain, or just want to be the hero of the campground, mastering the art of RV awning opening is a clever and witty way to enhance your camping experience.
Remember, with great power comes great responsibility, so go forth and open those awnings with confidence and style!”
FAQs
Keyword: how to open a RV awning
How do I open my RV awning?
To open your RV awning, first locate the awning control switch or crank. Depending on the type of awning you have, use the switch to extend the awning or use the crank to manually open it. Follow any specific instructions provided by the manufacturer for your particular RV awning model.
Can I open my RV awning by myself?
Yes, you can open your RV awning by yourself. Most RV awnings are designed to be user-friendly and can be easily operated by one person. However, if you are unsure or have limited physical strength, it is always a good idea to ask for assistance to avoid any potential accidents.
How long does it take to open an RV awning?
The time it takes to open an RV awning can vary depending on factors such as the type of awning and your familiarity with the process. On average, it may take around 5-10 minutes to fully extend an RV awning. With practice, you can become more efficient and reduce the time it takes.
What should I do if my RV awning is stuck and won’t open?
If your RV awning is stuck and won’t open, there are a few troubleshooting steps you can try. First, check if there is any debris or obstruction preventing the awning from extending. Clear any blockage carefully. If that doesn’t work, check the awning’s control mechanism or motor for any faults or malfunctions. It may be necessary to consult a professional RV technician for further assistance.
Are there any safety precautions I should take when opening an RV awning?
Yes, it is important to follow some safety precautions when opening an RV awning. Before extending the awning, make sure the area around it is clear of any obstacles or people. Be cautious of overhead clearance, especially if there are trees or structures nearby. Additionally, always ensure that the awning is securely locked in place to prevent accidental closures.
Can I open my RV awning in windy conditions?
It is generally not recommended to open an RV awning in windy conditions. Strong winds can cause damage to the awning fabric or even the entire structure. If the wind is gusty or exceeds the manufacturer’s recommended wind speed, it is best to keep the awning retracted for safety reasons.
How often should I open and close my RV awning?
The frequency of opening and closing your RV awning depends on your personal preference and the weather conditions. Some RV owners prefer to keep their awnings open all the time, while others retract them when not in use or during adverse weather. It is a good practice to inspect and clean your awning regularly, regardless of how often you open or close it.