
Are you experiencing issues with your RV awning? Maybe it’s sagging or not opening or closing properly. If so, you’re not alone. It’s a common problem that many RV owners face.
But don’t worry, there’s a solution! In this blog post, I’m going to show you how to retension your RV awning, so you can enjoy a properly functioning awning and make the most of your outdoor living space. Just like a well-tuned instrument, your RV awning needs regular maintenance to keep it in top shape. So let’s dive in and learn how to retension your RV awning for a worry-free camping experience!
Table of Contents
Introduction
If you own an RV, you know how important it is to properly maintain and care for it. One essential aspect of RV maintenance is to ensure that your awning is properly tensioned. Over time, the tension in the awning can loosen, which can lead to sagging or flapping in the wind.
Luckily, retensioning your RV awning is relatively easy to do. One method is to use a ratchet strap. Simply attach one end of the strap to the awning’s roller tube and the other end to a secure anchor point, such as a tree or pole.
Then, slowly tighten the ratchet strap until the awning is taut. Another option is to use bungee cords. Attach the bungee cords to the awning’s roller tube, stretching them to the desired tension, and secure them to the RV’s frame.
Finally, be sure to periodically check the tension of your awning and make any necessary adjustments to ensure that it stays in optimal condition.
Understanding the Importance of Retensioning
Retensioning is an incredibly important process in many industries, particularly in construction and engineering. It refers to the act of readjusting or tightening fasteners, cables, or other components that may have become loose over time. This is crucial because without proper retensioning, these components can lose their effectiveness and potentially lead to failures or accidents.
Imagine if the bolts holding a bridge together were not retensioned regularly. The consequences could be disastrous. Just like how a guitar string needs to be tightened periodically to stay in tune, various components in machinery, structures, and systems also require regular retensioning to ensure their stability and functionality.
In this blog post, we will explore the importance of retensioning and how it helps maintain the integrity and safety of various applications.
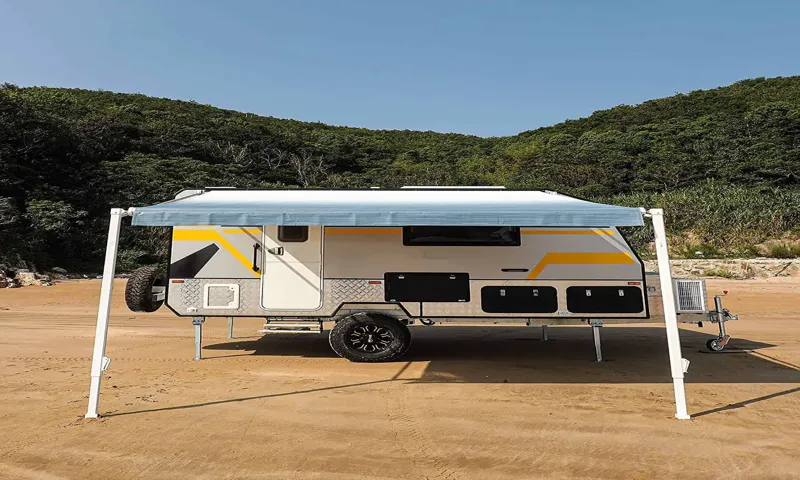
Identifying the Signs of a Loose Awning
loose awning Introduction: Have you noticed any changes in your awning lately? Perhaps it’s not hanging as securely as before or seems to be sagging in certain areas. These could be signs that your awning is loose, and it’s important to address this issue promptly to avoid any potential damage or accidents. In this blog post, we will discuss the signs that indicate a loose awning and what you can do to fix the problem.
So, let’s get started and ensure that your awning remains safe and secure.
Tools and Materials Needed
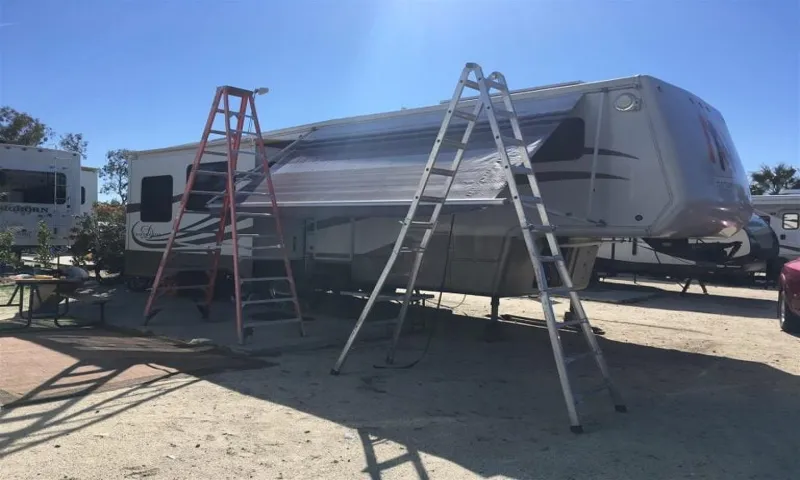
When it comes to retensioning your RV awning, there are a few tools and materials that you will need to have on hand. The first thing you will need is a ladder or step stool to help you reach the top of the RV where the awning is located. You will also need a tape measure to ensure that you are retensioning the awning properly.
In addition, you will need an awning rod or crank to help you adjust the tension on the awning. This tool will allow you to turn the tension knobs or adjust the springs, depending on the type of awning you have. Finally, you may also need some lubricant or spray to help with any rust or sticking that may occur.
With these tools and materials, you will be able to easily retension your RV awning and ensure that it is securely in place.
List of Required Tools
“List of Required Tools for Your Next Project” When starting a new DIY project, having the right tools and materials is essential. Not only can it make the job easier and more efficient, but it can also ensure the end result is of high quality. So, what tools and materials do you need for your next project? Let’s take a look! First and foremost, a reliable set of hand tools is a must.
This includes a hammer, screwdrivers in different sizes, pliers, and a tape measure. These tools will come in handy for a variety of tasks, from hanging pictures to assembling furniture. Next, consider investing in power tools.
While they may be a bit pricier, power tools can make your DIY projects much faster and more manageable. A cordless drill, a circular saw, and a jigsaw are all versatile and essential power tools that will make your next project a breeze. In addition to tools, it’s important to have the right materials on hand.
This will vary depending on the specific project, but some common materials include screws, nails, wood glue, sandpaper, and paint. It’s always a good idea to have a variety of sizes and types on hand to ensure you have what you need when you need it. Finally, don’t forget about safety equipment.
Safety goggles, gloves, and a dust mask are all crucial for protecting yourself while working on your project. It’s always better to be safe than sorry! In conclusion, having the right tools and materials is essential for any DIY project. From hand tools to power tools and safety equipment, ensuring you have everything you need will not only make the job easier but also ensure a successful end result.
So, gather your tools and let your creativity shine!
Available Retensioning Kits
“retensioning kit” In order to properly retension a screen or cable system, you will need to have the right tools and materials on hand. One of the most important tools you’ll need is a tensioning tool, which is designed specifically for the job. This tool allows you to adjust the tension of the cables or screen with precision, ensuring a tight and secure fit.
Additionally, you may also need a set of pliers or wrenches to help with the installation process. These tools will allow you to remove and replace any hardware that is necessary for the retensioning process. In terms of materials, you will likely need new cables or screen material to replace any that are damaged or worn out.
It’s important to choose high-quality materials that are durable and long-lasting, ensuring that your retensioned system will remain in optimal condition for years to come. With the right tools and materials, you’ll have everything you need to successfully retension your system and keep it performing at its best.
Step-by-Step Guide to Retensioning
Are you experiencing issues with your RV awning becoming loose and saggy? Don’t worry, retensioning your RV awning is a straightforward process that you can easily do yourself. Here’s a step-by-step guide to help you retension your RV awning and get it back to its proper position. First, start by extending the awning fully.
This will allow you to gain access to the springs and adjust the tension. Locate the spring assembly, which is typically located on either end of the awning roller. Next, find the tension adjustment knobs or screws on the spring assembly.
These knobs or screws are used to increase or decrease the tension on the springs. Turn the knobs or screws clockwise to increase the tension, or counterclockwise to decrease the tension. Start by retensioning one side of the awning at a time.
Begin by turning the tension adjustment knob or screw a quarter turn in the desired direction. Keep an eye on the awning fabric as you make adjustments. You’ll notice that as you increase the tension, the fabric will become tighter and the sag will disappear.
Continue making small adjustments, a quarter turn at a time, until the awning fabric is taut and there is no sagging. Remember to retension both sides evenly to ensure a balanced and properly tensioned awning. Once you have achieved the desired tension, retract the awning partially and test it by extending it again.
Check for any remaining sag or looseness. If necessary, make further adjustments until the awning is fully tensioned and there is no sagging. It’s important to regularly check and retension your RV awning to prevent further sagging and to ensure its longevity.
Preparing Your RV
In order to ensure a safe and smooth journey in your RV, it’s important to properly retension your vehicle. Retensioning is the process of checking and adjusting the tension on various components of your RV, such as the brakes and suspension. This step-by-step guide will walk you through the process of retensioning your RV to ensure that everything is secure and functioning properly.
First, start by checking the tension on your RV’s brakes. This is important as the brakes are crucial for safely slowing down and stopping your vehicle. You can check the tension by applying the brakes and feeling for any looseness or excessive play.
If you notice any issues, you may need to adjust the tension by tightening the brake pads or replacing any worn-out components. Next, move on to the suspension of your RV. The suspension is responsible for supporting the weight of your vehicle and absorbing any bumps or shocks on the road.
Start by checking the tension on the springs and shock absorbers. Look for any signs of sagging or unevenness, as this can indicate a problem. If necessary, you may need to adjust the tension by tightening or replacing the springs.
Another important component to check is the tension on your RV’s tires. Properly inflated tires are essential for maintaining control and stability while driving. Use a tire pressure gauge to check the pressure of each tire, and adjust it as needed.
It’s also a good idea to visually inspect the tires for any signs of wear or damage, such as cracks or bulges. If you notice any issues, be sure to replace the tires before setting off on your journey. Lastly, don’t forget to retension the bolts and fasteners on your RV.
Measuring the Awning
“awning” When it comes to measuring your awning for retensioning, it’s important to take your time and be as precise as possible. This step-by-step guide will walk you through the process to ensure that your awning is properly tensioned and able to withstand the elements. First, start by measuring the width of your awning from end to end.
Use a tape measure to get an accurate measurement, making sure to account for any obstructions such as brackets or fittings. Next, measure the drop of your awning from the top to the bottom. Again, use a tape measure to get an exact measurement, taking into consideration any obstructions such as overhanging eaves or gutters.
Once you have these measurements, you can use them to determine the correct tensioning for your awning. This may vary depending on the type and style of your awning, so be sure to consult the manufacturer’s instructions for specific guidelines. By following these simple steps, you can ensure that your awning is properly tensioned and ready to provide shade and protection for years to come.
So grab that tape measure and get started on giving your awning the attention it deserves!
Loosening the Awning Fabric
awning fabric, retensioning, step-by-step guide
Adjusting the Tension
In this step-by-step guide, I’ll walk you through the process of retensioning the tension on your equipment. It’s important to regularly check and adjust the tension on your equipment to ensure optimal performance and prolong its lifespan. To get started, you’ll need to locate the tension adjustment mechanism on your equipment.
This could be a screw, knob, or lever. Once you’ve found it, loosen the tension slightly to allow for adjustment. Next, carefully increase the tension by turning the adjustment mechanism in the appropriate direction.
You’ll want to do this gradually to avoid over-tightening. As you increase the tension, pay attention to how it feels. You want the tension to be firm but not overly tight.
Finally, test the equipment to see if the tension feels right. If it feels too loose or too tight, make further adjustments as needed. By following this step-by-step guide, you’ll be able to easily retension your equipment for optimal performance.
Securing the Awning
Securing the awning is an important task to ensure its stability and longevity. One effective way to do this is by retensioning the awning. Retensioning involves adjusting the tension in the fabric of the awning to keep it taut and prevent it from sagging or flapping in the wind.
If you notice any looseness or wrinkles in your awning, it’s a sign that it needs to be retensioned. Now, let’s go through a step-by-step guide on how to retension your awning. First, start by extending the awning fully to its maximum length.
This will give you better access to the tensioning mechanisms. Next, locate the tensioning screws or knobs on both sides of the awning. These are usually found near the roller tube at the top of the awning.
Using a screwdriver or the appropriate tool, begin by turning the tensioning screws clockwise to tighten the awning fabric. Be sure to do this gradually and carefully, as overtightening can damage the fabric or the mechanisms. Use your other hand to check the tension as you go along.
Gently tug on the fabric to ensure that it remains taut and doesn’t have any wrinkles or sagging. If your awning uses knobs instead of screws, turn them in the same direction to increase tension. Keep adjusting the tension until you achieve the desired tightness.
It’s important to note that the amount of tension needed can vary depending on different factors, such as the size and type of awning, as well as the prevailing weather conditions. Once you’ve retensioned the awning on one side, repeat the process on the other side to ensure even tensioning. After completing both sides, check the awning again to make sure it is secure.
Additional Tips and Safety Precautions
When it comes to retensioning your RV awning, there are a few additional tips and safety precautions to keep in mind. First, always make sure to wear protective gloves and eyewear when working with the awning’s hardware. This will help prevent any injuries or accidents.
Secondly, before attempting to retension the awning, it’s important to inspect it for any damage or wear and tear. Look for any loose or frayed fabric, as well as any bent or broken hardware. If you notice any issues, it’s best to replace the damaged parts before proceeding.
Additionally, it’s a good idea to have a friend or family member help you during the retensioning process to ensure that everything is done safely and correctly. Lastly, take your time and follow the manufacturer’s instructions carefully. Each RV awning may have slightly different retensioning methods, so make sure to read and understand the specific instructions for your awning model.
By following these additional tips and safety precautions, you can ensure a safe and successful retensioning of your RV awning.
Maintenance Recommendations
maintenance recommendations, additional tips, safety precautions Now that you have learned about some essential maintenance recommendations for keeping your appliances running smoothly, let’s delve into some additional tips and safety precautions. First and foremost, always make sure to unplug your appliances before performing any maintenance or cleaning tasks. This not only ensures your safety but also prevents accidental damage to the appliance.
Another important safety precaution is to avoid using any sharp or abrasive cleaning tools that could scratch or damage the appliance’s surface. Instead, opt for soft cloths or sponges paired with gentle cleaning solutions. Additionally, it is crucial to read and follow the manufacturer’s instructions and guidelines for maintenance and usage.
This will help prevent any mishaps or problems caused by improper maintenance. Lastly, regularly inspect and replace any worn-out or damaged parts to ensure your appliance continues to function optimally. By following these additional tips and safety precautions, you can extend the lifespan of your appliances and ensure a safe and efficient performance.
Common Mistakes to Avoid
additional tips and safety precautions When it comes to dealing with common mistakes in everyday life, it’s always good to have some additional tips and safety precautions in mind. One important tip is to always double-check your work before submitting anything important, whether it’s a report for work or a school assignment. It’s easy to overlook small errors, but taking the time to review your work can save you from potential embarrassment or negative consequences down the line.
Another tip is to practice good hygiene and cleanliness, especially in public spaces. Washing your hands regularly, using hand sanitizer, and keeping your living space clean can help prevent the spread of germs and keep you and those around you healthy. It’s also important to be cautious when it comes to sharing personal information online.
Avoid sharing sensitive information, such as your address or financial details, on social media platforms or with strangers. Additionally, be mindful of your surroundings and take necessary safety precautions when you’re out and about. This can include avoiding dimly lit areas, staying alert and aware of your surroundings, and using locks and security systems to protect your home.
By following these additional tips and safety precautions, you can minimize the chances of common mistakes and ensure a safe and smooth everyday life.
Safety Precautions while Retensioning
In addition to the basic safety precautions when retensioning, there are some additional tips and precautions you should keep in mind to ensure a safe and effective process. One important tip is to always wear the appropriate protective gear, such as safety goggles and gloves, to protect yourself from potential injuries. It is also crucial to carefully read and follow the manufacturer’s instructions for the specific retensioning process you are performing.
Additionally, make sure to inspect the equipment and tools you are using to ensure they are in good working condition and free from any defects. It is also a good idea to have a clear understanding of the potential risks and hazards associated with retensioning and how to mitigate them. This includes knowing what to do in the event of an emergency and having access to first aid supplies.
By following these additional tips and precautions, you can ensure that you are retensioning safely and effectively.
Conclusion
In conclusion, retensioning an RV awning is like giving it a much-needed facelift. Just like we need to tighten our grip on reality every now and then, our awnings need a little tightening too. By following these simple steps, you can prevent your awning from flapping around like a rogue flag in the wind and instead, have it standing tall and proud.
So, how do you retension your RV awning? Well, it’s all about finding that perfect balance between tight and too tight. You don’t want your awning to be so snug that it resembles your grandmother’s corset, but you also don’t want it so loose that it becomes the neighborhood trampoline. Start by locating the tension knobs on your awning and give them a good twist, just like you would with a Rubik’s Cube.
Be careful not to overdo it though, as we don’t want your awning to become a victim of a Herculean strength. Next, grab a ladder and climb up to your awning like a graceful acrobat. This is where it gets fun – yes, even more fun than a trip to the dentist! Simply extend your arms like a majestic bald eagle, grab hold of the awning fabric, and give it a firm tug.
Not too hard, though, or you might end up in a game of tug-of-war with your awning. Once you’ve achieved the perfect tension, step back and admire your handiwork. Your awning will now be as taut as a tightrope walker’s rope, ready to withstand whatever Mother Nature throws its way.
No more flapping in the wind or sagging like a deflated balloon – your awning will be the envy of the RV park. In the grand scheme of things, retensioning your RV awning may seem like a small task. But remember, the devil is in the details, and having a properly tensioned awning can make all the difference in the world of RVing.
So, take the time, put in the effort, and give your awning the love and attention it deserves. You’ll be rewarded with a happy awning, and maybe even a newfound sense of accomplishment. With a tight awning, you’ll be ready for any adventure that comes your way – and you’ll look darn good doing it.
FAQs
How often should I retension my RV awning?
It is recommended to retension your RV awning every six months to ensure it remains secure and in good condition.
What tools do I need to retension my RV awning?
To retension your RV awning, you will need a ratchet, socket set, ladder, and possibly a helper.
Can I retension my RV awning on my own, or do I need professional help?
You can retension your RV awning on your own, but if you are unsure or uncomfortable doing so, it is advisable to seek professional help.
What are the signs that my RV awning needs to be retensioned?
Some signs that your RV awning needs to be retensioned include sagging, flapping in the wind, or difficulty in retracting or extending the awning.
How do I retension my RV awning if it’s already sagging?
If your RV awning is sagging, you can retension it by loosening the rafter knobs, extending the awning fully, and then tightening the rafter knobs again.
Are there any safety precautions I should take when retensioning my RV awning?
Yes, it is important to take safety precautions when retensioning your RV awning. Make sure the ladder is stable, wear appropriate protective gear, and avoid working in adverse weather conditions.
Can I retension my RV awning in the rain?
It is not recommended to retension your RV awning in the rain, as wet fabric can stretch and affect the tensioning process. Wait for dry weather before attempting to retension.
How long does it take to retension an RV awning? A8. The time it takes to retension an RV awning can vary depending on your experience and the condition of the awning. It can take anywhere from 30 minutes to an hour.
What are the benefits of retensioning my RV awning?
Retensioning your RV awning helps to maintain its integrity, prevent damage from wind gusts, and prolong its lifespan.
Can I retension my RV awning without a ladder?
It is recommended to use a ladder when retensioning your RV awning to ensure safe and proper adjustment. If you do not have a ladder, consider borrowing one or hiring a professional.
Should I retension my RV awning before or after a road trip?
It is advisable to retension your RV awning before a road trip to ensure it is secure and ready for travel. This will help avoid any issues on the road.
How can I maintain the proper tension in my RV awning over time?
To maintain the proper tension in your RV awning, regularly inspect it for any signs of sagging or damage, and retension as needed. Additionally, avoid leaving your awning extended for extended periods when not in use to prevent unnecessary stretching.