
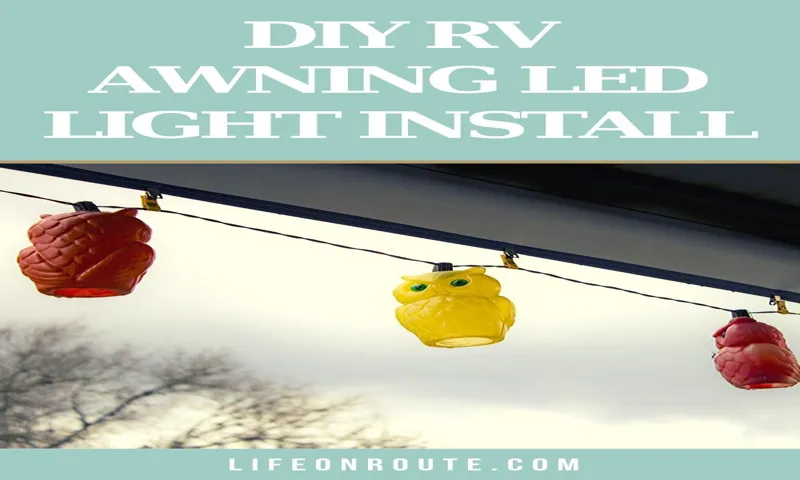
Ready to add some excitement and ambiance to your RV awning? Look no further than LED rope lights! These versatile and energy-efficient lights are a popular choice for RV owners who want to enhance their outdoor living space. Whether you’re hosting a party, enjoying a quiet evening under the stars, or simply want to add some personality to your RV, installing LED rope lights in your awning roller tube groove is a great DIY project that can easily be accomplished in just a few simple steps.
Table of Contents
What You’ll Need
If you’re looking to add some extra flair to your RV and create a cozy atmosphere for those outdoor evenings, installing LED rope lights in your awning roller tube groove is a great idea. Not only do these lights add a touch of ambiance, but they also provide functional lighting for your outdoor space. So, what do you need to get started? First and foremost, you’ll need LED rope lights specifically designed for outdoor use.
These lights are weatherproof and can withstand the elements, making them perfect for RVing. Additionally, you’ll need a power source for the lights, such as a 12-volt battery or a connection to your RV’s electrical system. In order to install the lights, you’ll also need clips or adhesive strips to secure the rope to the roller tube groove.
Finally, having a ladder or stepstool on hand will make reaching the roller tube groove much easier. With these items, you’ll be ready to bring some extra brightness and charm to your RV awning!
LED rope lights
LED rope lights are a great way to add ambiance and style to any space. Whether you want to create a cozy atmosphere in your living room or add a touch of magic to your outdoor patio, these lights are a versatile option. But before you can start transforming your space with LED rope lights, you’ll need a few things.
First and foremost, you’ll need the rope lights themselves. These can be purchased online or at a home improvement store. Look for lights that are specifically labeled as LED, as these will be more energy-efficient and long-lasting.
Next, you’ll need some type of mounting hardware. This could be adhesive clips, zip ties, or even hooks depending on where you plan on installing the lights. Finally, you’ll need a power source.
LED rope lights can usually be plugged into a standard electrical outlet, but if you want to have more flexibility in where you install them, you may want to consider battery-powered options. With these three key components, you’ll be well on your way to creating a beautiful and inviting space with LED rope lights.
RV awning roller tube groove
RV awning roller tube groove
Double-sided adhesive tape
double-sided adhesive tape, adhesive tape, DIY projects, crafts, home improvement Do you ever find yourself in need of a quick and easy way to stick things together? Whether you’re working on a DIY project, crafting, or doing some home improvement, double-sided adhesive tape can be a lifesaver. It’s a versatile and convenient tool that allows you to adhere objects together without the mess of traditional glue or the hassle of nails and screws. With double-sided adhesive tape, you can say goodbye to sticky fingers and hello to seamless bonding.
So, what do you need to get started with this handy adhesive tape? First and foremost, you’ll need the tape itself. Double-sided adhesive tape comes in various widths and lengths, so choose one that suits the size of your project. You can find it at your local craft store, hardware store, or online.
Make sure to select a high-quality tape that is strong and durable to ensure a long-lasting bond. Next, you may want to have a pair of scissors or a utility knife on hand. Double-sided adhesive tape typically comes on a roll, so having a cutting tool will allow you to customize the length of the tape to fit your specific needs.
It’s also useful for trimming any excess tape after you’ve adhered your objects together. Lastly, it’s important to have a clean surface before applying the double-sided adhesive tape. Any dust, dirt, or debris on the surface can prevent the tape from sticking properly.
So, take a moment to wipe down the surfaces you plan to adhere together with a damp cloth or a mild cleaning solution. This will ensure that the tape adheres securely and doesn’t peel off over time. Now that you have all the necessary supplies, you’re ready to start using double-sided adhesive tape for your projects.
Whether you’re bonding paper, fabric, plastic, or even metal, this versatile tape will come in handy time and time again. Its strong adhesive properties make it suitable for a wide range of applications, from card-making to wall-mounted decorations. So, get creative and discover all the possibilities that double-sided adhesive tape has to offer!
Wire connectors
Wire connectors are essential components in electrical systems as they provide a secure and reliable means of joining wires together. When it comes to choosing the right wire connectors, there are a few things you’ll need to consider. Firstly, you’ll need to determine the type and size of wire you’ll be working with.
This will help you select the appropriate connector size and style. Secondly, you’ll need to consider the application or environment in which the connectors will be used. For example, if you’re working with outdoor wiring, you’ll need connectors that are weatherproof and resistant to moisture.
Lastly, you’ll need to think about the number of wires you’ll be connecting. Some connectors are designed to accommodate multiple wires, while others are meant for single wire connections. By considering these factors, you’ll be able to choose wire connectors that meet your specific needs and ensure a safe and reliable electrical connection.
Step 1: Measure and Plan
Installing LED rope lights in the roller tube groove of your RV awning may seem like a daunting task, but with the right measurements and a solid plan, it can be done easily. The first step is to carefully measure the length of your awning roller tube groove. You’ll need to know the exact dimensions so that you can purchase the appropriate length of LED rope lights.
Once you’ve measured the roller tube groove, make a plan for how you want the lights to be installed. Consider where you want the lights to start and end, and any specific patterns or designs you want to create. This will help you determine how much LED rope light you’ll need and where to make any necessary cuts.
Remember to also take into account access to power sources and any potential obstacles that may need to be worked around. With proper measurement and planning, you’ll be well on your way to installing LED rope lights in your RV awning roller tube groove.
Measure the length of your RV awning roller tube groove
“RV awning roller tube groove”
Decide how many LED rope lights you’ll need
When it comes to adding some ambiance and style to your space, LED rope lights can be a great option. But before you rush out to buy them, it’s important to determine how many LED rope lights you’ll actually need. This will ensure that you have enough to cover the area you want to light up and create the desired effect.
The first step in this process is to measure and plan. Take out your measuring tape and determine the length of the area where you want to install the rope lights. This could be along a wall, around a window, or even along a staircase.
Once you have the measurements, you can then consider the spacing and layout of the lights. Do you want them close together for a continuous stream of light, or do you prefer them to be spaced out for a more subtle effect? By taking the time to measure and plan, you’ll be able to determine the exact number of LED rope lights you’ll need to achieve the look you want.
Plan the placement of the lights along the roller tube groove
When it comes to installing lights along the roller tube groove, proper measurement and planning are key. Before you start placing the lights, take the time to measure the length of the roller tube groove. This will help you determine how many lights you will need and how far apart they should be placed.
Once you have the measurements, you can create a plan for the placement of the lights. Consider factors such as the size and shape of the roller tube groove, as well as any special features or obstacles that may need to be taken into account. By carefully planning the placement of the lights, you can ensure that they will be evenly spaced and provide optimal illumination for your roller tube.
Step 2: Prep the Roller Tube Groove
When it comes to installing LED rope lights in the roller tube groove of your RV awning, the second step is to prep the groove itself. This step is important because it ensures that the lights will fit securely and properly in the groove, preventing them from falling out or getting damaged. To prep the groove, start by cleaning it thoroughly to remove any dirt or debris that may be present.
Use a soft cloth or brush to gently scrub the groove, making sure to reach all the nooks and crannies. Once the groove is clean, dry it thoroughly to prevent any moisture from affecting the adhesive on the rope lights. Finally, check the groove for any signs of damage or wear that may need to be addressed before proceeding with the installation.
By properly prepping the roller tube groove, you’ll create a solid foundation for securing your LED rope lights and ensuring they stay in place for years to come.
Clean the groove to ensure proper adhesion
clean groove, adhesion In order to ensure proper adhesion of the roller tube, it’s essential to thoroughly clean the groove before applying any adhesive. The groove is the area where the roller fabric attaches to the tube, and any dirt, dust, or debris in this area can prevent the fabric from sticking securely. So, before you start applying adhesive, take the time to clean the groove carefully.
You can use a cloth or a small brush to remove any particles and make sure the surface is clean and dry. This step may seem small, but it’s crucial in ensuring that the roller fabric stays in place and doesn’t come loose over time. By cleaning the groove, you’re creating a smooth and clean surface that allows the adhesive to bond effectively.
So, don’t skip this step and take the time to prep the roller tube groove properly for best results.
Apply double-sided adhesive tape along the length of the groove
When it comes to prepping the roller tube groove, one essential step is to apply double-sided adhesive tape along its length. This tape serves as a crucial component in securing the fabric onto the roller tube. By placing the tape along the groove, you ensure that the fabric stays firmly in place while rolling up and down.
The double-sided adhesive tape acts like a trustworthy partner, preventing any slips or mishaps during use. Much like how tape keeps things securely in place, the adhesive tape keeps the fabric securely attached to the roller tube, allowing for smooth and trouble-free operation. So, don’t forget to apply the double-sided adhesive tape along the entire length of the groove for a seamless and reliable roller blind experience.
Step 3: Install the LED Rope Lights
So, you’ve decided to amp up your RV game by adding some stylish LED rope lights to your awning roller tube groove. Great choice! Installing LED rope lights in this area can create a beautiful and inviting atmosphere for outdoor gatherings or simply relaxing under the stars. Plus, it adds a touch of personalization to your RV.
Now, let’s get to the installation process. First, gather all the necessary tools and materials, including the LED rope lights, a ladder or step stool, electrical tape, and zip ties. Then, carefully climb up to the awning roller tube groove and make sure it’s clean and free of any debris.
Begin by attaching the end of the LED rope light to the groove using zip ties or electrical tape. Make sure it’s securely fastened and won’t come loose in windy conditions. Then, carefully unroll the rope light along the groove, making sure to keep it straight and centered.
Use zip ties or electrical tape at regular intervals to secure the rope light in place. Once you’ve reached the end of the groove, cut off any excess rope light and attach the end using zip ties or electrical tape. Finally, plug in the lights and enjoy the beautiful ambiance they create.
Happy camping!
Attach wire connectors to the ends of the LED rope lights
LED rope lights are a great way to add ambiance and decorative lighting to any space. In order to install them, you will first need to attach wire connectors to the ends of the lights. This will allow you to easily connect them to a power source.
To do this, start by cutting the rope lights to the desired length. Then, strip the plastic insulation off the wires at each end. Next, insert the stripped wires into the corresponding slots in the wire connectors and tighten the screws to secure them in place.
Make sure to match the positive and negative ends correctly to ensure the lights work properly. Once the wire connectors are attached, you can then plug in the rope lights to a power source and enjoy the beautiful glow they provide. So, why not add some LED rope lights to your space and create a warm and inviting atmosphere?
Press the LED rope lights onto the adhesive tape in the roller tube groove
In the third step of installing LED rope lights, it’s time to attach them to the roller tube. This step is crucial because it ensures that the lights stay securely in place and won’t come loose over time. To do this, you’ll need to press the LED rope lights onto the adhesive tape that’s already applied in the roller tube groove.
The adhesive tape is specially designed to hold the lights in place and provide a strong bond. It’s important to apply pressure when pressing the lights onto the tape to ensure a secure attachment. Once they’re in place, you can rest easy knowing that your LED rope lights are installed securely and will provide a beautiful and well-lit space.
So go ahead and get those lights attached, and prepare to enjoy the enchanting glow they’ll bring to your surroundings!
Secure the lights in place by pressing them firmly against the tape
In this step, we’ll be installing the LED rope lights onto your chosen surface. Once you have your surface prepped and the tape securely in place, it’s time to bring out the LED rope lights. These lights are flexible and can be easily manipulated to fit your desired shape and design.
Start by unrolling the LED rope lights and positioning them on the tape. Be careful not to bend or twist the lights too much, as this can cause damage. Once you have the lights in place, press them firmly against the tape to ensure they are securely fastened.
This will prevent any accidental slippage or movement later on. Take your time with this step to get the lights positioned just right. You don’t want them to be crooked or uneven.
If necessary, use your fingers to guide the lights and make any adjustments. Once you’re satisfied with the placement, move on to the next step.
Step 4: Connect the Lights
Now that you have your LED rope lights and the roller tube groove prepared, it’s time to connect the lights. Start by carefully feeding the LED rope lights into the groove of the RV awning roller tube. Make sure to leave a bit of extra length at the end of the groove for easy connection.
Next, take the end of the LED rope lights and locate the designated power wire and ground wire. These wires will usually be marked with red and black color coding or have a different texture to help you identify them. Once you have identified the power and ground wires, it’s time to make the connection.
Strip a small portion of the plastic coating off the power and ground wires. Then, connect the power wire to the positive terminal of the power source and the ground wire to the negative terminal. You can use electrical connectors or wiring nuts to secure the connections.
Finally, test the lights by turning on the power source. If the lights illuminate, congrats, you’ve successfully connected the LED rope lights! If they don’t, double-check your connections and make sure everything is secure. With the lights connected, your RV awning will now shine brightly and create a festive atmosphere wherever you go.
Connect the wire connectors from the LED rope lights to a power source
In order to illuminate your space with LED rope lights, it is essential to connect them to a power source. This step is crucial in ensuring that your lights are ready to brighten up your surroundings. To connect the lights, you will need wire connectors specifically designed for LED rope lights.
These connectors are easy to use and will securely join the wires from the lights to the power source. Start by identifying the positive and negative wires on the rope lights and the power source. Then, insert each wire into the corresponding slots on the wire connectors and tighten the screws to secure them in place.
Once all the wires are connected, double-check that everything is tightly secured. Finally, plug the power source into an electrical outlet and watch as your LED rope lights come to life. This simple yet important step will bring your space to life in a beautiful and vibrant way, ensuring that you can enjoy the ambiance and mood-enhancing effects of your LED rope lights.
Test the lights to ensure they are working properly
To make sure your lights are working properly before hanging them up, it’s important to test them first. This step is crucial to ensure that there are no faulty bulbs or wiring issues that could cause problems once the lights are connected. Testing the lights is easy and only takes a few minutes.
Simply plug them in and turn them on. Take a close look at each bulb to make sure they are all lit up and functioning correctly. Sometimes, there may be a few bulbs that are not working, and this is the perfect time to replace them before hanging the lights.
By testing the lights beforehand, you can avoid any headaches or disappointment when it’s time to show off your beautifully lit display.
Step 5: Tidy Up the Wiring
Once you have installed the LED rope lights in the groove of your RV awning roller tube, it’s time to tidy up the wiring to ensure a clean and professional-looking installation. Start by securing any loose wires with zip ties or cable clips to prevent them from hanging down and getting tangled. Next, carefully tuck the excess wire into the groove alongside the LED lights.
This will help to hide the wires and prevent them from being visible when the awning is rolled up. Be sure to leave enough slack in the wire to allow for the movement of the awning. Finally, use adhesive-backed cable clips or hooks to secure the wire along the side of the RV where it connects to a power source.
This will keep the wire neatly in place and prevent it from moving around while you are driving. By taking the time to tidy up the wiring, you can ensure that your LED rope lights look great and function properly for years to come.
Secure any loose wiring with zip ties or clips
In this step, we’ll tackle the daunting task of tidying up all those loose wires. If you’ve ever looked behind a TV or computer, you probably know how messy the wiring can get. But fear not, with a few simple tools and tricks, you can have those wires looking neat and organized in no time.
One of the easiest ways to secure loose wiring is by using zip ties or clips. These handy little tools can be found at any hardware store and are a great way to keep your wires in place. Simply gather the wires together and fasten them with a zip tie or clip.
This not only keeps them from getting tangled up, but also prevents them from hanging down and becoming a tripping hazard. Zip ties are especially useful for securing longer lengths of wire, such as those connected to a power strip or surge protector. You can use multiple zip ties to create bundles of wires, making it easier to keep track of where each one goes.
Plus, they can be easily adjusted or cut off if you need to add or remove a wire in the future. Clips are another option for securing loose wiring. These small plastic or metal devices can be attached to the back of a desk or entertainment center, and then used to hold the wires in place.
They come in a variety of sizes and styles, so you can find the perfect clip to fit your needs. Just slide the wire into the clip and press to secure it in place. By using zip ties or clips, you can transform a mess of wires into a clean and organized space.
Not only will this make it easier to troubleshoot any issues that may arise, but it will also give your setup a more professional and polished look. So don’t let those loose wires get the best of you – take a few minutes to tidy them up and enjoy a clutter-free space.
Hide the wiring behind trim or in a protective channel
“tidy up the wiring” Once you have all your wiring connected and secured, it’s time to tidy it up so it’s not an eyesore. One way to do this is by hiding the wiring behind trim or in a protective channel. This not only makes the wiring less visible but also helps to protect it from damage.
If you’re working with trim, such as baseboards or crown molding, you can carefully tuck the wiring behind it. This will keep it out of sight while still allowing easy access if you need to make any changes or additions in the future. Make sure to use tacks or clips to hold the wiring in place so it doesn’t become loose and visible.
Another option is to use a protective channel, which is a plastic or metal covering that you can affix to the wall or ceiling. This channel acts as a conduit for the wiring, keeping it contained and hidden from view. It’s important to choose a channel that is the appropriate size for your wiring and that blends in with your decor.
By taking the time to tidy up the wiring, you can create a more polished and professional look for your space. Not only will this make your home or office more visually appealing, but it can also help to prevent tripping hazards and protect your wiring from damage. So don’t forget this final step in your wiring project!
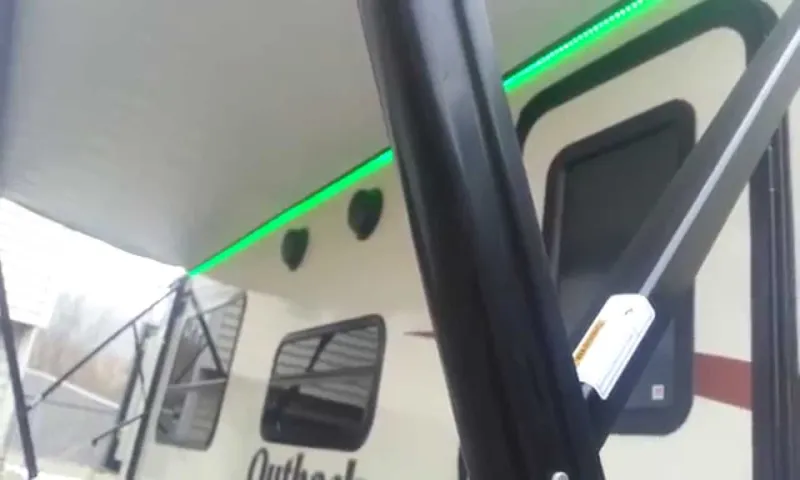
Step 6: Enjoy Your Lighted Awning
So, you’ve successfully installed LED rope lights in your RV awning roller tube groove! Congratulations, you’re now ready to enjoy the stunning ambiance they’ll bring to your outdoor space. Whether you’re having a cozy evening with loved ones or hosting a lively gathering, the soft glow of the rope lights will create a warm and inviting atmosphere. Picture yourself sitting under your awning, basking in the gentle radiance of the LED lights as you sip on your favorite drink and chat with friends and family.
It’s a truly magical experience that will make every moment spent outside in your RV feel even more special. So go ahead, turn on those lights, and let the enchantment begin!
Turn on your LED rope lights and enjoy the ambiance they create on your RV awning
LED rope lights can add a touch of ambiance and style to your RV awning. Once you have installed them properly, it’s time to step back and enjoy the beautiful glow they create. Picture yourself sitting outside on a warm summer evening, the gentle glow of the LED lights casting a warm and inviting glow on your awning.
The soft, diffused light creates a cozy atmosphere, perfect for entertaining guests or simply unwinding after a long day of exploration. You can even customize the lighting to match your mood or the occasion. Want a festive feel? Choose bright and vibrant colors.
Looking for a more relaxed vibe? Opt for softer, warmer colors. The possibilities are endless when it comes to creating the perfect ambiance with your LED rope lights. So go ahead, flip the switch, and bask in the cozy glow of your lighted awning.
Conclusion
And there you have it, folks! The ultimate guide to installing LED rope lights in your RV awning roller tube groove. With a little bit of patience, some trusty zip ties, and a whole lot of creativity, you can transform your outdoor space into a dazzling light show that will have your neighbors green with envy. So grab your tools and get ready to turn heads on your next camping trip.
Remember, the only limit is your imagination – and maybe the length of your rope lights. Happy illuminating!”
FAQs
Can LED rope lights be installed in the RV awning roller tube groove?
Yes, LED rope lights can be installed in the RV awning roller tube groove by following a few simple steps.
What are the benefits of installing LED rope lights in the RV awning roller tube groove?
Installing LED rope lights in the RV awning roller tube groove can provide additional lighting, enhance the ambience of the outdoor living space, and improve safety during nighttime activities.
Do I need any special tools or equipment to install LED rope lights in the RV awning roller tube groove?
Installing LED rope lights in the RV awning roller tube groove typically requires basic tools such as a screwdriver, drill, and wire cutters.
Are LED rope lights weatherproof for outdoor installation in the RV awning roller tube groove?
Yes, many LED rope lights are designed to be weatherproof and can withstand outdoor conditions, making them suitable for installation in the RV awning roller tube groove.
How do I secure the LED rope lights in the RV awning roller tube groove to prevent them from falling out?
One common method to secure LED rope lights in the RV awning roller tube groove is by using adhesive clips or brackets specifically designed for this purpose.
Can I connect multiple lengths of LED rope lights to cover a longer distance in the RV awning roller tube groove?
Yes, most LED rope lights can be connected end-to-end to cover a longer distance in the RV awning roller tube groove. However, it is important to check the manufacturer’s instructions for the specific product you are using.
Are there different color options available for LED rope lights in the RV awning roller tube groove?
Yes, LED rope lights are available in a variety of colors, allowing you to choose the one that best suits your preferences and desired ambience for the outdoor space.