
If you’re an avid adventurer who loves hitting the road in your RV, then you know just how important it is to have a reliable awning. Not only does it provide shade and protection from the elements, but it also adds an extra level of comfort and enjoyment to your outdoor experience. However, like all things, awnings can wear down over time and may require some repairs.
But don’t worry, because in this blog post, we’re going to show you step-by-step how to repair the awning on your RV. So grab your tools and let’s get started!
Table of Contents
Introduction to RV Awnings
If you are an RV owner, you know how important it is to have a functioning awning. Not only does it provide shade and protection from the elements, but it also adds a touch of luxury to your outdoor experience. But what happens when your awning gets damaged? Don’t worry, repairing an awning on an RV is easier than you might think.
First, you’ll need to identify the problem. Is it a tear in the fabric? A broken arm? Once you know what needs fixing, you can gather the necessary materials and get to work. In most cases, patching up a tear or replacing a broken arm can be done with simple tools and a little bit of patience.
However, if the damage is extensive or you’re not comfortable doing the repairs yourself, it’s always a good idea to seek professional help. With proper care and maintenance, your RV awning will last for many years to come. So don’t let a little damage ruin your outdoor adventures – get your awning fixed and get back to camping in style.
What is an RV awning?
RV awnings are an essential accessory for any recreational vehicle. They are designed to provide shade and protection from the elements, allowing you to enjoy the outdoors while still being able to relax in comfort. Awnings can be attached to the side of the RV and can be extended and retracted as needed.
They typically consist of a fabric panel that is supported by a metal frame. Some awnings also come with additional features, such as built-in LED lights or wind sensors that automatically retract the awning in high winds. Awnings are available in a variety of sizes and styles to suit different RVs and personal preferences.
They are easy to install and can greatly enhance the functionality and enjoyment of your RV. So, if you’re looking to upgrade your RV and make it even more comfortable, consider adding an awning. It’s the perfect way to create a cozy outdoor living space wherever you go.
Benefits of having an awning on your RV
RV awnings are a popular addition to recreational vehicles for a variety of reasons. These awnings provide numerous benefits to RV owners, making them an essential accessory for any camping adventure. First and foremost, RV awnings provide much-needed shade and protection from the sun.
They create a comfortable outdoor living space and can help to keep the interior of the RV cool during hot summer days. Secondly, awnings offer protection from the elements, including rain and wind. They act as a shield, preventing rainwater from seeping into the RV and creating a cozy area to relax, even when it’s wet outside.
Additionally, awnings increase the usable space of an RV. They create an extension to the living area and provide an outdoor space for cooking, dining, or simply enjoying the surrounding nature. Lastly, RV awnings add aesthetic appeal to the vehicle.
They come in various styles, colors, and designs, allowing RV owners to personalize their vehicle and make it stand out from the crowd. Overall, having an awning on your RV enhances the camping experience by providing shade, protection, additional space, and a touch of style.
Common Issues with RV Awnings
If you’re an RV owner, you know the joy of having an awning to provide shade and protection from the elements. But like any other outdoor equipment, awnings can experience issues that require repair. One common problem is tears or rips in the fabric.
Fortunately, repairing an awning on an RV is not as difficult as it may seem. First, assess the damage and determine if a patch or a full replacement is needed. If it’s just a small tear, you can use a patch kit specifically designed for awnings to fix it.
Simply clean the area, apply the patch, and let it dry. If the damage is more extensive, you may need to replace the entire fabric. This can be done by removing the old fabric and attaching the new one using the awning’s roller tube and hardware.
With some patience and the right tools, you can have your RV awning looking as good as new in no time.
Typical problems encountered with RV awnings
RV awnings provide shade and protection from the elements, but like any other component of an RV, they can encounter problems. One common issue with RV awnings is fabric tears or holes. These can be caused by sharp branches, gusty winds, or even the weight of accumulated water.
Another common problem is difficulty in retracting or extending the awning. This can be due to a faulty motor or spring mechanism, or it could be a result of debris or dirt buildup. Leaking or sagging awnings are also frequent issues, often caused by worn-out seals or a lack of tension in the fabric.
Lastly, some RV owners may experience issues with the awning arms becoming misaligned or damaged. This can happen if the arms are not properly secured or if they are subjected to excessive force. Overall, it’s important for RV owners to regularly inspect and maintain their awnings to prevent these common issues from occurring.
Causes of awning damage
awnings, damage, RV awnings
Assessing the Damage
If you’re dealing with a damaged awning on your RV, don’t worry, as there are several steps you can take to repair it. First, assess the extent of the damage by carefully inspecting the awning for any tears or holes. If you find any small holes, you can patch them up using a repair kit specifically designed for awnings.
These kits usually include adhesive patches that you can apply to the damaged area. For larger tears, you may need to replace the entire awning fabric. This can be done by purchasing a replacement fabric and carefully following the instructions for installation.
Finally, it’s always a good idea to consult the owner’s manual or reach out to a professional for guidance if you’re unsure about the repair process. Remember, with a little time and effort, you can have your awning back in prime condition and ready for your next adventure.
Inspecting the awning for damage
awning damage, inspecting awning, assessing awning damage, determining awning damage, awning repair, signs of awning damage. Paragraph: So, you’ve noticed that something might be not quite right with your awning. Maybe it’s a small tear or a loose seam, or perhaps it’s something more substantial, like a bent frame or broken hardware.
Whatever the case may be, it’s important to take the time to properly assess the damage before moving forward with any repairs. Start by thoroughly inspecting the entire awning, looking for any signs of wear and tear. Check for any obvious holes, tears, or frayed edges.
Pay close attention to the seams, as they can be a common area for damage to occur. Look for any signs of rust or corrosion on the metal components, as this can indicate a more serious problem. Take note of any bent or twisted sections of the frame, as this can affect the overall stability of the awning.
Carefully examine the operating mechanisms, such as the pulleys and springs, to ensure they are functioning properly. By taking the time to thoroughly inspect the awning, you’ll have a better understanding of the extent of the damage and be able to determine the best course of action for repair.
Determining the extent of the damage
Determining the extent of the damage caused by a natural disaster is crucial in order to effectively respond and allocate resources. Assessing the damage involves evaluating the impact on infrastructure, homes, and the environment. Experts use various methods to gather information, such as surveying affected areas, conducting aerial assessments, and analyzing satellite imagery.
By examining the severity of structural damage, the extent of flooding or erosion, and the level of contamination, they can determine the scope of the destruction. This information is essential for emergency responders and aid organizations to prioritize their efforts and provide assistance to those most in need. Furthermore, assessing the damage also helps in estimating the financial costs of the disaster and planning for future mitigation measures.
Ultimately, understanding the extent of the damage allows for a more efficient and effective response in the aftermath of a natural disaster.
Repairing Minor Damage
If your RV’s awning has sustained minor damage, there’s no need to panic. With a few simple steps, you can easily repair it yourself. First, assess the damage and determine the best course of action.
If the fabric is torn or ripped, you can patch it up using a repair kit specifically designed for awnings. These kits usually include adhesive patches that you can apply to the damaged area. Be sure to clean the area thoroughly before applying the patch to ensure proper adhesion.
If the damage is more extensive, such as a bent or broken frame, you may need to replace the affected parts. Contact your RV manufacturer or a professional repair service to obtain the necessary replacement parts and instructions. With a little bit of DIY know-how and some patience, you can have your awning looking as good as new in no time.
Small tears or holes in the awning fabric
“Small tears or holes in the awning fabric can be a common problem, but the good news is that they are usually easy to fix. If you notice any damage to your awning, don’t panic. You can easily repair minor tears or holes with a few simple steps.
First, clean the area around the damaged spot to remove any dirt or debris. Next, apply a patch or adhesive specifically designed for awning repair. These products are often waterproof and durable, ensuring a long-lasting fix.
Simply follow the instructions on the packaging to apply the patch or adhesive to the damaged area. Press down firmly to ensure a strong bond. Once the repair is complete, allow it to dry fully before using your awning again.
With the right tools and a little bit of time, you can easily fix small tears or holes in your awning fabric and enjoy a perfectly functioning awning once more.”
Patch repair techniques
patch repair techniques, repairing minor damage If you have a minor damage on your wall, there are a few patch repair techniques that you can use to fix it. One common method is to use spackling compound. This compound is easy to use and can fill in small holes or cracks in the wall.
Simply apply the compound to the damaged area and smooth it out with a putty knife. Once it dries, you can sand it down to create a smooth surface. Another technique is to use a patch kit.
These kits typically include a patch, adhesive, and a putty knife. You can cut the patch to fit the size of the damage and then apply adhesive to the back of the patch. Press the patch onto the damaged area and use the putty knife to smooth it out.
Lastly, for larger damages, you might need to use a wall repair compound. This compound is specifically designed to fill in bigger holes or cracks. Apply the compound to the damaged area, making sure to spread it out evenly.
Once it dries, you can sand it down and paint over it to match the rest of the wall. With these patch repair techniques, you can easily take care of minor damages on your walls and keep them looking pristine.
Replacing a damaged rivet or grommet
Replacing a damaged rivet or grommet may seem like a daunting task, but with a little know-how and some basic tools, it can be a simple and cost-effective way to repair minor damage. First, you’ll want to assess the extent of the damage to determine if the rivet or grommet needs to be completely replaced or just repaired. If it’s a small tear or hole, you may be able to fix it by simply replacing the damaged part.
However, if the damage is more severe, you might need to replace the entire rivet or grommet. Once you’ve determined the scope of the repair, you’ll want to gather the necessary tools and materials. This may include a rivet gun, replacement rivets or grommets, a hammer, and pliers.
To remove the damaged rivet or grommet, you’ll use the pliers to pull or pry it out. Then, simply insert the new rivet or grommet into the hole, using the rivet gun or hammer to secure it in place. Voila! Your damaged rivet or grommet is now replaced, and your item can be used again without any worry of further damage.
Replacing the Awning Fabric
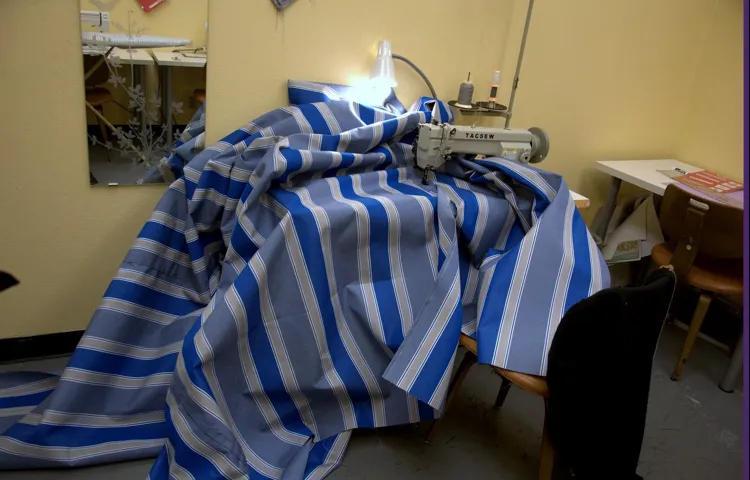
Are you wondering how to repair the awning on your RV? One common issue that RV owners face is a damaged or worn-out fabric on their awning. Luckily, replacing the awning fabric is a relatively straightforward process that can be done with a few basic tools and some patience. First, you’ll need to measure the size of your awning fabric to ensure you purchase the correct replacement.
Once you have the new fabric, start by removing the old fabric from the roller tube. This can be done by carefully unscrewing any screws or bolts that are holding it in place. Next, attach the new fabric to the roller tube using adhesive or screws, depending on the specific instructions provided with your replacement fabric.
Make sure the fabric is aligned correctly and taut before securing it in place. Finally, reattach any support arms or springs that were removed during the process. Take your time to ensure everything is in place and functioning properly before testing out your newly replaced awning.
With a little bit of effort, you can have your RV looking as good as new with a fresh awning fabric.
When to replace the entire awning fabric
“replacing the entire awning fabric” When it comes to your awning, there may come a time when you need to replace the entire fabric. Over the years, awning fabric can become worn, torn, or faded due to various weather conditions and constant exposure to the elements. While small repairs can be made, there are instances where it is more cost-effective and practical to replace the entire fabric.
One of the signs that it may be time to replace the entire awning fabric is if there are multiple tears or holes throughout. Small tears can be repaired, but if there are several or they are large and significant, it may be time for a replacement. Additionally, if the fabric has become faded and worn out, replacing it can give your awning a fresh and vibrant look.
Another factor to consider is the age of the fabric. Awning fabric has a lifespan, and if yours is approaching or past its expiration date, it is likely time for a replacement. Older fabric may be more prone to tearing and may not be as durable as newer options on the market.
Lastly, if you are looking to change the overall look of your awning or upgrade to a more modern and high-quality fabric, replacing the entire fabric is the way to go. You can choose from a wide variety of colors and patterns to match your aesthetic preferences and enhance the curb appeal of your home or business. In conclusion, there are several signs that indicate it may be time to replace the entire awning fabric.
Multiple tears or holes, faded or worn-out fabric, an outdated look, or simply wanting to upgrade are all valid reasons to consider a replacement. By investing in new fabric, you can ensure your awning remains in top condition and continues to provide shade and protection for years to come.
Step-by-step guide to replacing the awning fabric
Replacing the awning fabric on your outdoor canopy can give it a fresh new look and extend its lifespan. It may seem like a daunting task, but with the right tools and a step-by-step guide, you can easily replace the fabric yourself. First, gather all the necessary tools such as a ladder, screwdriver, pliers, and a replacement fabric specific to your awning model.
Start by dismantling the old fabric, carefully removing any screws or fasteners that are holding it in place. Once the old fabric is removed, inspect the frame for any damages and repair them if needed. Next, lay out the new fabric and align it with the frame, ensuring that it is centered and taut.
Use the screws or fasteners to secure the new fabric to the frame, making sure it is evenly distributed. Finally, test the awning by opening and closing it to ensure that the fabric moves smoothly. By following these simple steps, you can easily replace the awning fabric and enjoy a fresh, clean look for your outdoor space.
Repairing Mechanical Issues
If you own an RV, then you know how important it is to have a working awning. It provides shade and protection from the elements, making your outdoor experience much more enjoyable. However, just like any mechanical device, awnings can sometimes break or become damaged.
So, what do you do when your RV awning is in need of repair? Well, the first step is to assess the damage and determine the extent of the problem. Is it a simple tear in the fabric, or is the entire mechanism broken? Once you have an idea of what needs fixing, you can start looking for solutions. One common issue with RV awnings is that the fabric can become worn or torn over time.
In this case, you may be able to simply replace the fabric. There are plenty of tutorials and videos available online that can guide you through the process. Another common problem is that the awning doesn’t retract or extend properly.
This could be due to a broken spring or a misalignment of the arms. Again, there are resources available that can help you troubleshoot and address these issues. The key is to take your time, do your research, and approach the repair with a patient and methodical mindset.
With a little effort and the right tools, you can have your RV awning back in working order in no time.
Fixing a broken or stuck awning motor
awnings, motor, repairs
Repairing a bent or damaged awning arm
awning arm, repair, mechanical issues, damaged awning arm, fixing a bent awning arm, awning arm repair, awning arm replacement, broken awning arm, fixing a damaged awning arm, repairing a bent awning arm. Have you noticed that your awning arm is bent or damaged? Don’t worry, it’s a common issue that can easily be fixed. The awning arm, which is responsible for supporting and extending your awning, can sometimes become twisted, bent, or even broken due to various reasons like harsh weather conditions or accidental damage.
However, the good news is that repairing a bent or damaged awning arm is a relatively straightforward task that you can handle yourself with some basic tools and a little bit of know-how. The first step in repairing a damaged awning arm is to assess the extent of the damage. Is the arm completely broken or just slightly bent? If it’s only bent, you might be able to fix it by applying some force in the opposite direction to straighten it out.
However, if the arm is broken or severely damaged, you may need to consider replacing it altogether. If you determine that the awning arm can be fixed, you can start by removing it from the awning housing. This can typically be done by loosening a few screws or bolts that hold the arm in place.
Once the arm is detached, you can carefully examine it for any signs of cracks, dents, or other forms of damage. To fix a bent awning arm, you can use a pipe or a long bar as a lever to apply pressure and straighten it. Make sure to apply gradual force and check for any signs of improvement along the way.
It’s crucial not to exert too much force, as you don’t want to risk damaging the arm further. If the arm doesn’t straighten out completely, you may need to consider a replacement. In the case of a broken or heavily damaged awning arm, it’s best to opt for a replacement.
You can purchase a new awning arm from a hardware store or online retailer that specializes in awning parts. When selecting a replacement, make sure to choose one that is compatible with your specific awning model and measurements. Once you have the new awning arm, you can install it by following the manufacturer’s instructions.
Preventing Future Damage
If you’re looking to repair the awning on your RV, you’ll want to make sure you take the right steps to prevent future damage. One important factor to consider is the type of material your awning is made of. Different materials require different methods of repair and maintenance.
For example, if you have a fabric awning, you’ll want to check for any tears or holes and patch them up promptly to prevent further damage. You can use a patch kit specifically designed for awnings or even a strong adhesive tape. It’s also a good idea to regularly clean your awning to remove any dirt or debris that could cause damage over time.
In addition to keeping your awning clean, you should also take care to properly retract it when not in use. By following these simple tips, you can help ensure that your RV awning stays in good shape for years to come.
Maintenance tips to keep your awning in good condition
Keeping your awning in good condition is essential for its longevity and overall performance. One of the best ways to prevent future damage is to regularly inspect and clean your awning. Inspecting your awning allows you to catch any small issues before they become big problems.
Look for signs of wear and tear, such as loose seams, tears, or rusted hardware. By addressing these issues early on, you can avoid more extensive damage down the line. Additionally, keeping your awning clean is crucial for preventing damage.
Regularly remove any debris, dirt, or leaves that may have accumulated on the fabric. This will help prevent staining and deterioration. Simple measures like these can go a long way in ensuring that your awning remains in optimal condition for years to come.
Storing the awning properly when not in use
When it comes to storing your awning properly, it’s essential to take the necessary precautions to prevent future damage. One of the first steps you can take is to clean the awning thoroughly before storing it. This will help remove any dirt or debris that could potentially cause damage if left on the fabric for an extended period.
Additionally, make sure the awning is completely dry before putting it away. Moisture can lead to mold and mildew growth, which can ruin the fabric and make it unusable. Once the awning is clean and dry, fold it carefully, following the manufacturer’s instructions.
Avoid any sharp creases or folds, as these can weaken the fabric over time. It’s also a good idea to store the awning in a dry, well-ventilated area to prevent moisture buildup. By taking these steps, you can ensure that your awning stays in good condition and is ready for use when you need it.
So, next time you’re ready to store your awning, remember these simple tips to prevent any future damage.
Conclusion
In conclusion, repairing an awning on an RV is like untangling a complicated knot – it may seem impossible at first, but with a little bit of patience, ingenuity, and caffeine (because let’s be honest, caffeine is fuel for DIY miracles), you can conquer this task and have your awning looking like new. First, gather the necessary tools: a positive mindset, a can-do attitude, a few YouTube tutorials (because let’s face it, everyone needs a little guidance sometimes), and of course, a trusty tool kit. Next, assess the damage.
Is it a tear? A broken mechanism? Or perhaps a case of a stubborn fungus that has decided to set up camp on your outdoor sanctuary? Whatever the issue may be, don’t panic – you’ve got this. Once you’ve identified the problem, it’s time to dive into the world of problem-solving. Get your creative juices flowing and brainstorm possible solutions.
Think outside the box and don’t be afraid to try unconventional methods – after all, necessity is the mother of invention. Now that you have a plan, it’s time to put your DIY skills to the test. Roll up your sleeves, grab your tools, and get to work.
Remember, this is a journey of trial and error, so don’t get discouraged if your first attempt doesn’t yield perfect results. Learning from mistakes is all part of the process. As you navigate the repair journey, don’t forget to have a sense of humor.
Embrace the unexpected twists and turns, and bring along a friend or family member who can provide moral support or be on standby with a camera to capture those hilarious “oops” moments. Finally, step back and admire your handiwork. You did it! You’ve successfully repaired your awning, saving yourself from the clutches of expensive repairs or the sadness of a barren patio.
You can now enjoy summer nights under the stars, lounging comfortably in the shade of your awning, all thanks to your DIY prowess. So, next time you find yourself faced with a broken awning on your RV, remember this guide. Approach the task with confidence and a splash of wit, knowing that with a little determination and a lot of coffee, you’ll triumph over any awning catastrophe.
FAQs
How do I repair an awning on my RV?
To repair an awning on your RV, start by inspecting the awning fabric for any tears or holes. If you find any, you can patch them up using an awning repair tape. If the awning is not retracting properly, check the tension springs and replace them if necessary. Additionally, make sure the awning arms are properly aligned and lubricated. If you’re not confident in your repair abilities, it’s best to consult a professional for assistance.
What tools do I need to repair an RV awning?
The tools you’ll need to repair an RV awning include a ladder, awning repair tape, a screwdriver or drill, replacement tension springs (if needed), and lubricant for the awning arms. Depending on the specific repair required, additional tools may be necessary. It’s always a good idea to have a variety of tools on hand for any unexpected repairs.
Can I repair a tear in my RV awning myself?
Yes, you can repair a tear in your RV awning yourself. If the tear is small, you can use awning repair tape to patch it up. Simply clean the area around the tear, cut a piece of the repair tape to cover the tear, and apply it to the damaged area. If the tear is larger, you may need to sew a patch onto the fabric or replace the entire awning.
How often should I inspect and repair my RV awning?
It’s recommended to inspect and repair your RV awning at least once a year or before each camping season. Regular inspections can help identify any potential issues before they become more serious. It’s also important to check the awning after any significant weather events, such as storms or high winds, as these can cause damage to the awning fabric or mechanism.
Can I replace the fabric on my RV awning myself?
Yes, you can replace the fabric on your RV awning yourself, although it can be a challenging task. Start by removing the old fabric, making note of how it was attached. Measure the dimensions of the old fabric and purchase a replacement fabric of the same size. Attach the new fabric by following the manufacturer’s instructions or using the same method as the previous fabric. It may be beneficial to have another person assist you during this process.
How much does it cost to repair an RV awning?
The cost to repair an RV awning can vary depending on the extent of the damage and whether you choose to do it yourself or hire a professional. Simple repairs, such as patching up small tears, can be done relatively inexpensively with awning repair tape. However, more complex repairs or replacements can range from a few hundred to a few thousand dollars, depending on the type and size of the awning.
Are there any preventive measures I can take to avoid RV awning repairs?
Yes, there are several preventive measures you can take to avoid RV awning repairs. First, always retract the awning during high winds or storms to prevent damage. Regularly clean the awning fabric to remove any debris that can cause tears. Lubricate the awning arms to ensure smooth operation. Lastly, consider investing in an awning cover or storage bag to protect the awning from the elements when it’s not in use.