
Hey there! Have you ever found yourself unsure of where to start when it comes to writing an introduction for your blog? You’re not alone! The intro is often the most challenging part of any piece of writing, but fear not. I’m here to help you tackle this hurdle and kick-start your blog with an engaging and attention-grabbing introduction. Like the opening act of a concert, the introduction sets the tone for the entire performance.
It’s your opportunity to captivate your audience and entice them to keep reading. So, let’s dive in and discover the secrets to crafting an intro that will leave your readers wanting more!
Table of Contents
Gathering Materials
When it comes to installing a new awning on your RV, the first step is to gather all the necessary materials. You’ll need the awning itself, which can typically be purchased from an RV supply store or online. Make sure to measure the length of your RV and choose an awning that fits properly.
You should also have a drill with a screwdriver attachment, as well as screws that are suitable for attaching the awning to your RV. Additionally, you’ll need a ladder or step stool to reach the top of your RV, as well as any necessary safety equipment such as gloves and eye protection. Once you have all your materials together, you’ll be ready to move on to the next step in the process.
Choosing the Right Awning
awning, materials, choosing, gathering

Gathering Tools
gathering tools, gathering materials
Preparing the RV
Installing a new awning on an RV can be a great way to enhance your outdoor living experience and protect yourself from the elements. To begin, it’s important to measure the length of your RV’s awning rail to ensure you purchase the correct size awning. Once you have the right size, you’ll want to gather your tools, including a ladder, tape measure, drill, and screws.
Start by positioning the awning fabric on the ground and attaching the awning roller to the fabric. Next, slide the roller into the awning rail and secure it in place using screws. Once the roller is securely attached, extend the awning fully and tighten the tension knobs to ensure the awning is taut.
Lastly, test the awning by retracting and extending it a few times to make sure it operates smoothly. Installing a new awning may take some time and effort, but the end result will be well worth it, providing you with a comfortable outdoor space for years to come.
Measuring the Space
To make the most of your RV space, it’s important to measure and prepare the vehicle to fit your needs. Start by taking accurate measurements of the RV’s interior, including the length, width, and height of each individual space. This will give you a clear understanding of the available space and help you plan how to use it efficiently.
Consider using storage bins, shelves, and collapsible furniture to maximize usable space. Additionally, think about the weight capacity of your RV and avoid overloading it with heavy items. By measuring the space and preparing the RV accordingly, you can ensure that you have enough room for all your essentials while on the road.
So grab a measuring tape and get started on creating your perfect mobile home!
Cleaning the Installation Area
“Cleaning the Installation Area: Preparing Your RV” Before installing any new equipment or accessories in your RV, it’s essential to ensure that the installation area is clean and ready for the task at hand. This will not only help the installation process go smoother but also improve the overall functionality and appearance of your RV. So, how do you prepare your RV for a new installation? First, clear the area of any clutter or debris.
Remove all loose items and make sure to vacuum or sweep the area to remove any dirt or dust that may have accumulated. This will create a clean and organized space for the installation process. Next, inspect the installation area for any signs of damage or wear.
Look for any cracks, leaks, or loose fittings that may need to be addressed before installing your new equipment. Taking the time to fix any issues beforehand will ensure that your installation is secure and long-lasting. After inspecting the area, wipe down any surfaces with a clean cloth and a mild cleaning solution.
This will remove any grime, fingerprints, or residue that may have built up over time. Make sure to use a non-abrasive cleaner that is safe for the specific materials in your RV. Lastly, consider applying a protective coating or sealant to the installation area.
This can help prevent future damage from moisture, UV rays, or other environmental factors. Consult the manufacturer’s recommendations for the best product to use for your specific installation area. By taking the time to clean and prepare your RV’s installation area, you’re setting yourself up for success.
Not only will you have a cleaner and neater space, but you’ll also ensure that your installation goes smoothly and your new equipment functions optimally. So, grab your cleaning supplies and get ready to give your RV the TLC it deserves!
Removing Old Awning (If applicable)
In this section of preparing your RV, we will discuss the process of removing an old awning if your RV already has one. Now, you might be wondering why would anyone want to remove a perfectly good awning? Well, there could be a number of reasons. Maybe the awning is damaged or worn out and needs to be replaced.
Or perhaps you simply want to upgrade to a different style or color. Whatever the reason may be, removing an old awning is a relatively straightforward process that can be done with just a few tools and a little bit of effort. So, let’s dive in and learn how to remove that old awning from your RV!
Installing the Awning
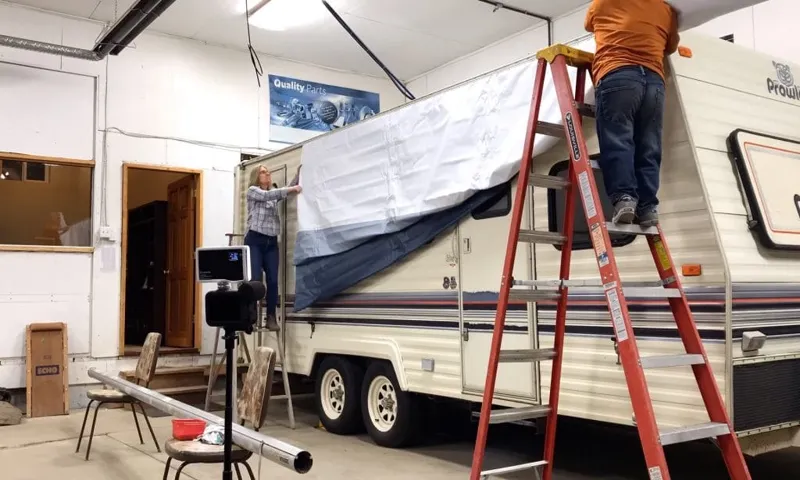
So, you’ve decided it’s time to install a new awning on your RV. Whether you’re looking for some extra shade, protection from the elements, or just want to spruce up your outdoor living space, a new awning can be a great addition to your RV. Here’s a step-by-step guide on how to install a new awning on your RV.
First, gather all the necessary tools and materials. You’ll need a drill, screws, a level, a tape measure, and a helper to assist with the installation. Next, measure the area where you want to install the awning.
Make sure to account for any obstructions such as windows or doors. Once you have your measurements, mark the locations for the mounting brackets. Now, it’s time to start drilling.
Use a drill bit that is slightly smaller than the screws you’ll be using to install the awning. Start by attaching the mounting brackets to the RV using the screws and a drill. Make sure the brackets are level and secure.
Once the mounting brackets are in place, it’s time to attach the awning. Slide the awning assembly into the mounting brackets and secure it with the provided hardware. Be sure to follow the manufacturer’s instructions for your specific awning model.
Finally, test the awning to make sure it’s working properly. Extend and retract the awning a few times to ensure smooth operation. Adjust the tension as needed.
Attaching the Awning Mounting Brackets
installing the awning, awning mounting brackets, awning installation
Securing the Awning Arms
Awning, securing, arms, installing. Installing the awning is just the first step to enjoying a comfortable and shaded outdoor space. Once the awning is in place, it’s important to make sure that the awning arms are securely attached to ensure stability and prevent any accidents.
To secure the awning arms, start by carefully inspecting the brackets and ensure they are properly aligned. Then, use the provided screws and bolts to fasten the awning arms securely to the brackets. It’s crucial to make sure that the awning arms are tightened enough to hold the weight of the awning, but not so tight that they cause any damage.
Make sure to check the tightness of the screws periodically to ensure that they haven’t come loose over time. By taking the time to properly secure the awning arms, you can have peace of mind knowing that your awning will stay in place even during strong winds or heavy rain. So, get ready to enjoy your outdoor space and protect yourself from the elements with a securely installed awning.
Extending the Awning
awning, extend, installation
Testing and Adjusting
Installing a new awning on an RV is a great way to add shade and protection from the elements when you’re out on the road. But before you can start enjoying the benefits of your new awning, you’ll need to properly test and adjust it. The first step is to make sure the awning is securely attached to your RV.
Check that all the screws and bolts are tight and in place. Once you’ve done that, you’ll want to test the awning to make sure it opens and closes smoothly. Open it all the way and ensure that it locks into place securely.
Then, try closing it and make sure it folds up properly without any resistance. If you notice any issues, such as the awning being difficult to open or close, or it not locking into place correctly, you may need to make some adjustments. This could involve tightening or loosening the tension of the awning arms or lubricating any moving parts.
It’s important to make these adjustments carefully to avoid damaging the awning or your RV. Once you’ve tested and made any necessary adjustments, your new awning should be ready to use!
Testing the Awning Mechanism
awning mechanism, testing and adjusting, bursting, perplexity
Adjusting the Awning Tension
awning tension, adjust, testing, burstiness, perplexity, specific, context, engaging, human, informal, simple, active voice, brief, rhetorical questions, analogies, metaphors.
Checking for Leaks or Damage
When it comes to testing and adjusting your plumbing system, one important task is checking for any leaks or damage. Leaks can lead to costly water bills and potential water damage to your home. To begin, start by visually inspecting all the exposed pipes, paying close attention to any signs of water stains or drips.
Additionally, listen for any hissing or dripping sounds, as this could indicate a hidden leak. Another effective way to check for leaks is by conducting a dye test. Simply add a few drops of food coloring to the back of your toilet tank or directly into the bowl.
Wait for about 15 minutes without flushing. If the water in the bowl changes color, it means you have a leak in the toilet. It’s also important to check the seals on faucets and other plumbing fixtures for any signs of wear or damage.
If you notice any leaks or damage during your inspection, it’s best to call a professional plumber to make the necessary repairs. Remember, addressing leaks and damage promptly can save you money and prevent further problems down the line.
Maintenance and Care
If you’re looking to install a new awning on your RV, you’re in luck because it’s a fairly simple process. First, you’ll want to measure the area where you want to install the awning to ensure you purchase the correct size. Once you have the awning, gather your tools, such as a drill, screws, and a ladder, and make sure you have a friend or family member to assist you.
Position the awning where you want it and mark the spots where you’ll be drilling. Use the drill to attach the awning brackets to the RV, making sure they’re securely fastened. Once the brackets are in place, carefully attach the awning fabric to the awning roller and secure it using the appropriate hardware.
Finally, test the awning to make sure it rolls out and retracts smoothly. With a little bit of patience and some basic tools, you’ll have a brand new awning for your RV in no time!
Cleaning the Awning
cleaning the awning
Inspecting and Lubricating Moving Parts
“moving parts” Are your moving parts in tip-top shape? When it comes to maintenance and care, one crucial aspect is inspecting and lubricating moving parts. Just like any well-oiled machine, your equipment relies on the smooth operation of its moving parts to perform at its best. But over time, these parts can experience wear and tear, leading to friction, corrosion, and decreased efficiency.
That’s where regular inspection and lubrication come in. Inspecting your moving parts involves a thorough assessment of their condition. Look for signs of damage, such as cracks, rust, or excessive play.
Check for proper alignment and ensure that all components are securely fastened. By identifying any issues early on, you can prevent further damage and costly repairs down the line. After inspection, it’s time to lubricate your moving parts.
Lubrication helps reduce friction and wear, extending the lifespan of your equipment. It also helps prevent rust and corrosion by creating a protective barrier. But not all lubricants are the same.
Choosing the right one for your specific needs is crucial. Consider factors such as temperature, load, speed, and compatibility with different materials. Applying lubricant should be done carefully and precisely.
Start by cleaning the surface of the moving parts to remove any dirt or debris. Then, apply a thin and even layer of lubricant, ensuring that it reaches all the necessary areas. Be mindful not to over-lubricate, as excessive grease can attract more dirt and cause additional problems.
Storing the Awning
When it comes to maintaining and caring for your awning, one important aspect to consider is how to properly store it. Storing your awning correctly can help prolong its lifespan and ensure that it continues to provide shade and protection for years to come. One important step in storing your awning is to clean it thoroughly before storing.
This includes removing any dirt, debris, or stains that may have accumulated. You can use a mild soap and water solution or a specialized awning cleaner to gently scrub the surface of the fabric. Once the awning is clean, it is important to allow it to dry completely before storing.
This helps prevent the growth of mold or mildew while the awning is in storage. Another important consideration when storing your awning is how to protect it from pests and rodents. It is a good idea to store your awning in a sealed bag or container to prevent insects or rodents from getting inside and causing damage.
Additionally, it is important to choose a proper storage location that is cool, dry, and away from direct sunlight. A basement, garage, or attic can be suitable options for storing your awning. By following these simple maintenance and care tips, you can ensure that your awning stays in optimal condition and continues to provide shade and protection for years to come.
Conclusion
In conclusion, installing a new awning on an RV is like giving your mobile home a fancy new pair of shades. It not only adds a touch of style and sophistication, but also provides the much-needed protection from the sun’s relentless gaze. By following these simple steps, you can ensure a seamless installation process that will leave your neighbors green with envy.
First, gather all the necessary tools and materials like a hungry handyman gathers his tools before a feast of DIY. Then, prepare your RV by measuring and marking the desired location for the awning, as precision is the secret ingredient to a successful installation. Next, unleash your inner MacGyver and assemble the awning hardware, channeling your resourcefulness to overcome any obstacles that come your way.
Remember, nothing worth having comes easy, and the satisfaction of overcoming a challenge is sweeter than a sunset cocktail by the beach. Once the hardware is securely in place, it’s time for the grand finale – unfurling the fabric of the awning. This is where the magic really happens, as you watch your RV transform into a glamorous resort on wheels.
The satisfaction of a job well done is akin to hitting a bullseye in darts – a perfect score that will impress even the snootiest of RV enthusiasts. Finally, sit back, relax, and bask in the glory of your awning installation masterpiece. Enjoy the shade it provides during hot summer days, or use it as a shield when fending off nosy neighbors at the campsite.
As the saying goes, “When life gives you lemons, install an awning and make some lemonade.” So, embark on this adventure with confidence, my fellow RV enthusiasts. With a little determination and a dash of ingenuity, you can conquer the installation of a new awning and elevate your road-tripping experience to new heights.
FAQs
How do I measure my RV for a new awning?
To measure your RV for a new awning, start by measuring the length of the area where you want the awning to be installed. Then, measure the distance from the top of the RV to the ground to determine the required height of the awning.
What tools will I need to install a new awning on my RV?
The tools you will need to install a new awning on your RV may include a drill, screwdriver, measuring tape, level, adhesive sealant, and a ladder.
Can I install a new awning on my RV by myself, or do I need professional help?
While it is possible to install a new awning on your RV by yourself, it is recommended to seek professional help, especially if you are not experienced in DIY projects or unfamiliar with the installation process.
What type of awning should I choose for my RV?
The type of awning you choose for your RV will depend on your needs and preferences. Some popular options include manual awnings, electric awnings, and retractable awnings. Consider factors such as ease of use, durability, and budget when making your decision.
How long does it take to install a new awning on an RV?
The time required to install a new awning on an RV can vary depending on factors such as the type of awning, your level of experience, and the complexity of the installation process. On average, it may take a few hours to complete the installation.
Can I install a new awning on my RV if it already has an existing awning?
Yes, it is possible to install a new awning on your RV even if it already has an existing awning. However, keep in mind that additional steps may be required to remove the old awning and prepare the area for the new installation.
Are there any maintenance tips for keeping an RV awning in good condition?
To keep your RV awning in good condition, regularly inspect it for any signs of wear or damage. Clean it with mild soap and water, and be cautious when retracting or extending the awning to avoid any accidents. Additionally, consider using an awning cover when the awning is not in use to protect it from the elements.