
Hey there! Have you ever wondered what it’s like to be introduced to something new? It’s like stepping into a bright, unknown world filled with endless possibilities. Well, today, we’re going to embark on a journey of discovery together as we dive into the topic of “Introduction.” Introduction – it’s a word that holds so much power.
It’s the gateway to new experiences, new people, and new knowledge. Whether it’s the first chapter of a captivating book or the opening scene of a thrilling movie, introductions have the remarkable ability to captivate our attention and draw us in. Think about it – when you meet someone for the first time, what do you do? You introduce yourself, and in that moment, you have the chance to make a lasting impression.
It’s like a blank canvas waiting to be painted with colors and strokes that represent who you are and what you stand for. But introductions aren’t just limited to people. They extend to concepts, ideas, and even entire fields of study.
Have you ever been introduced to a new hobby or interest that completely changed your perspective on life? It’s like stumbling upon a hidden treasure chest full of wonders and surprises. Introductions have the power to ignite our curiosity, spark our imagination, and ignite a fire within us to explore the unknown. They create a sense of anticipation and excitement, like the first few drops of rain before a storm or the first few chords of a mesmerizing melody.
So, fasten your seatbelts and get ready for an incredible journey of discovery. We’re about to dive deep into the world of introductions and uncover the secrets they hold. Together, we’ll explore the art of crafting captivating introductions, the impact they have on our lives, and the endless possibilities they offer.
So, are you ready to embark on this adventure with me? Let’s get started and unravel the mysteries of introductions together.
Table of Contents
What is an RV slide-out awning?
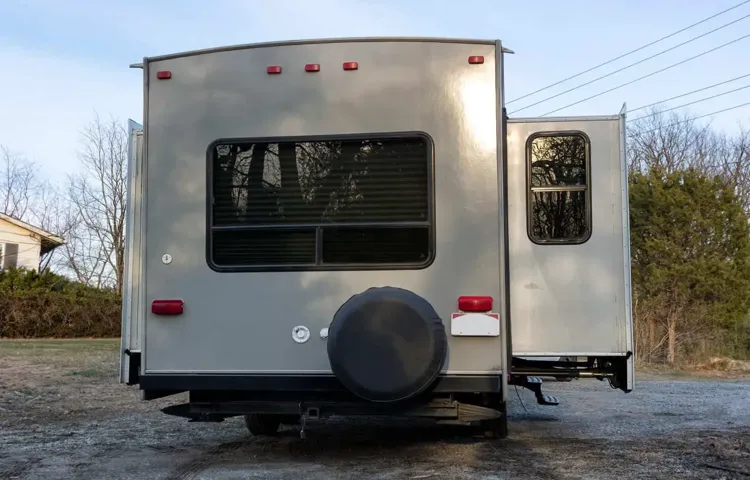
When it comes to RV accessories, a slide-out awning is a must-have for outdoor enthusiasts. But before you rush out to purchase one, you need to know how to measure for an RV slide-out awning to ensure a perfect fit. First, start by measuring the width of your slide-out when it is fully extended.
This will give you the measurement for the awning fabric you will need. Next, measure the height of the slide-out from the top of the roof to the bottom of the slide-out. This will determine the length of the awning roller tube needed.
It’s important to get accurate measurements to ensure a snug and secure fit for your awning. So grab your measuring tape and get ready to make your RV even more enjoyable with a slide-out awning tailored specifically for your vehicle.
Importance of measuring for a slide-out awning
When it comes to adding an awning to your RV slide-out, it’s important to measure properly to ensure a perfect fit. Taking accurate measurements is crucial because slide-out awnings are designed to provide shade and protection from the elements, and an ill-fitting awning can be not only ineffective but also unsightly. So, how do you measure for an RV slide-out awning? Well, it’s actually quite simple.
Start by measuring the width of the slide-out, making sure to include any trim or molding that may be present. Then, measure the distance from the top of the slide-out to the desired drop of the awning. Lastly, measure the depth of the slide-out, again including any trim or molding.
By taking these measurements, you’ll be able to order a slide-out awning that fits perfectly and provides the optimal amount of shade and protection for your RV.
Tools needed for measuring
When it comes to measuring for an RV slide-out awning, having the right tools is essential. You’ll want to make sure you have a measuring tape, a level, and a pen and paper to record your measurements. Start by measuring the width of your slide-out from edge to edge.
Be sure to measure from the furthest point on one side to the furthest point on the other side. Next, measure the height of your slide-out from top to bottom. Again, measure from the highest point to the lowest point.
Lastly, use your level to ensure that your slide-out is straight and level. This is important for proper installation and functionality of your awning. By using these simple tools and following these steps, you can ensure that you get the correct measurements for your RV slide-out awning.
Measuring the width of the RV slide-out
If you’re looking to add an awning to your RV slide-out, it’s essential to measure the width correctly. Measuring for an RV slide-out awning is a relatively simple process that only requires a few tools. Start by extending the slide-out fully so that you can accurately measure its width.
Then, measure the distance from one end of the slide-out to the other, making sure to measure from the outer edge of the slide-out rather than the inner edge. Once you have the measurement, add a few inches to allow for proper fitting and ensure that the awning will cover the entire slide-out. Remember to take into account any obstructions, such as handles or latches, that may affect the positioning of the awning.
By following these steps and taking accurate measurements, you can ensure that your RV slide-out awning fits perfectly and provides the shade and protection you need on your next camping trip.
Step 1: Locate the metal roller tube
When it comes to measuring the width of your RV slide-out, the first step is to locate the metal roller tube. This tube is usually located near the top of the slide-out and is responsible for guiding the slide-out in and out. Once you have found the roller tube, you can use a tape measure to measure its width.
To do this, extend the tape measure across the roller tube and make sure it is level. Take note of the measurement displayed on the tape measure. This measurement will give you an accurate idea of the width of your RV slide-out.
Remember to measure from the inside edge of the roller tube to the inside edge of the roller tube on the opposite side. This will ensure you are getting an accurate measurement of the width of the slide-out. Knowing the width of your RV slide-out is important for a variety of reasons.
It allows you to properly plan where to park your RV to ensure the slide-out can be fully extended without any obstructions. It also helps when purchasing accessories or furniture for your RV, as you will need to know the dimensions of the slide-out to ensure a proper fit. So, if you’re ready to measure the width of your RV slide-out, start by locating the metal roller tube and grab your trusty tape measure.
With this simple measurement, you’ll be better equipped to enjoy all the comforts and convenience that your RV slide-out has to offer.
Step 2: Measure the length of the roller tube
Measuring the width of your RV slide-out is an important step in ensuring a proper fit for your roller tube. To begin, you’ll need a measuring tape or ruler that can reach across the width of the slide-out. Start by extending the slide-out fully and locking it into place.
Stand on one side of the slide-out and measure the distance from the outer edge of the wall to the outer edge of the extended slide-out. Repeat this measurement on the other side of the slide-out to ensure accuracy. Add these two measurements together to determine the total width of your slide-out.
It’s important to be precise with your measurements, as an incorrect width measurement can lead to a roller tube that is either too long or too short. With the right measurements in hand, you’ll be ready to move on to the next step in replacing your roller tube for your RV slide-out.
Measuring the length of the RV slide-out
So, you’ve decided it’s time to add an RV slide-out awning to your home on wheels. One important step in the process is knowing how to measure for the awning. The length of your RV slide-out is crucial in ensuring you purchase the correct size awning.
So, how do you measure it? Well, it’s actually quite simple. Start by extending your slide-out fully, making sure it’s completely open. Then, measure from one end of the slide-out to the other, taking note of the length in feet or inches.
It’s important to measure precisely, as even a small measurement error can result in an ill-fitting awning. Once you have the correct measurement, you can then purchase an awning specifically designed to fit your RV slide-out. By following these steps, you’ll be able to enjoy the benefits of an RV slide-out awning, such as increased shade and protection from the elements, in no time.
Step 1: Extend the slide-out fully
measuring the length of the RV slide-out. So, you’ve just purchased an RV and you’re ready to hit the road for some adventures. But before you take off, it’s important to know the dimensions of your RV slide-out.
This information will not only help you plan your campsites and parking spots, but it will also ensure that you have enough space for everything you need inside your RV. The first step in measuring the length of your RV slide-out is to extend it fully. This may seem like an obvious step, but it’s crucial to get an accurate measurement.
Some slide-outs can extend up to 3 or 4 feet, so you want to make sure you account for the full length. Once you have the slide-out fully extended, you’re ready to move on to the next step in measuring its length.
Step 2: Measure the length from end to end
When it comes to measuring the length of your RV slide-out, it’s important to be precise. The length of your slide-out will determine the size of the room you have inside your RV, so getting an accurate measurement is crucial. To measure the length, start by extending the slide-out completely.
Use a measuring tape to measure from one end of the slide-out to the other. Make sure to measure the full length, including any areas that may be rounded or curved. It’s also a good idea to measure both the interior and exterior length of the slide-out, as they may differ slightly.
By taking the time to measure the length of your RV slide-out correctly, you’ll be able to make informed decisions when it comes to choosing furniture and decor for your RV. Plus, you’ll avoid any surprises when it comes time to park in tight spaces. So grab that measuring tape and get started on measuring the length of your RV slide-out today!
Calculating the size of the slide-out awning
When it comes to outfitting your RV with a slide-out awning, it’s essential to get the measurements right. So, how do you measure for an RV slide-out awning? Well, the first step is to determine the length of your slide-out. To do this, extend the slide-out all the way and measure from the outer edge of the trim on one side to the outer edge of the trim on the other side.
Next, you’ll need to measure the width of your slide-out. Measure from the top of the slide-out to the bottom, ensuring you account for any molding or trim. These measurements will give you the size of the slide-out awning you need.
Remember, it’s always better to err on the side of caution and choose a slightly larger size if you’re unsure. Happy camping!
Step 1: Add a few inches to the width measurement
Calculating the size of the slide-out awning can be a bit tricky, but with the right measurements and a few simple calculations, you can ensure a perfect fit. The first step is to add a few inches to the width measurement of your slide-out. This is important because you want the awning to extend past the edges of the slide-out to provide optimal coverage.
By adding a few extra inches, you can account for any potential gaps or areas that may be exposed to the elements. Additionally, it allows for easy installation and removal of the awning. So, grab your measuring tape and be sure to add a little extra width to ensure a snug and effective awning for your slide-out.
Step 2: Add a few inches to the length measurement
To calculate the size of a slide-out awning, the next step after measuring the length of your RV’s slide-out is to add a few inches to that measurement. This is an important step because it allows for proper coverage and ensures that the awning will fully extend over the slide-out to provide adequate shade and protection. By adding a few inches to the length measurement, you are accounting for any potential gaps or overlaps that may occur when the awning is extended.
This extra space also allows for easy installation and maintenance of the awning. Think of it like adding a little extra fabric to a shirt so that it fits just right – by adding a few inches to the length measurement, you are ensuring that your slide-out awning will be the perfect fit for your RV.
Choosing the right slide-out awning
When it comes to choosing the right slide-out awning for your RV, one of the most important steps is to accurately measure the space where the awning will be installed. Proper measurements ensure that the awning will fit correctly and provide the desired amount of shade and protection. To measure for an RV slide-out awning, you’ll need to measure the width and projection of the slide-out area.
The width measurement is taken from the outer edge of the slide-out box, while the projection measurement is taken from the outer edge of the RV sidewall to the end of the slide-out box. It’s also important to consider the amount of fabric overhang you want on each side of the slide-out area. Taking accurate measurements will help ensure that you choose an awning that fits your RV perfectly and provides the shade and protection you need while on the road.
Step 1: Consider the material
slide-out awning, material, choosing, burstiness, perplexity, specific, context
Step 2: Check for UV protection and weather resistance
When it comes to choosing the right slide-out awning, it’s important to consider UV protection and weather resistance. These features are crucial in ensuring the longevity and durability of your awning. UV rays from the sun can cause fading and deterioration of the fabric over time, so it’s essential to have an awning that offers adequate UV protection.
Look for awnings that are made with UV-resistant materials and have a high UPF (Ultraviolet Protection Factor) rating. Additionally, your awning should be able to withstand various weather conditions, such as rain, wind, and snow. Look for awnings that are made with weather-resistant materials and have reinforced construction for added durability.
By choosing an awning with the right UV protection and weather resistance, you can enjoy the shade and protection it provides for years to come.
Step 3: Look for easy installation and maintenance
When choosing a slide-out awning for your RV, it’s important to consider the ease of installation and maintenance. Look for a slide-out awning that is designed for easy and hassle-free installation. Some awnings come with pre-installed hardware and mounting brackets, making the installation process a breeze.
Additionally, choose an awning that requires minimal maintenance. Look for materials that are durable and resistant to weathering, such as UV-resistant fabric and rust-resistant hardware. This will ensure that your slide-out awning stays in good condition and requires minimal upkeep.
With an awning that is easy to install and maintain, you can spend less time on maintenance and more time enjoying your RV adventures.
Conclusion
In conclusion, measuring for an RV slide-out awning is like acquiring the perfect accessory for your miniature home on wheels. It’s a delicate dance between precision and practicality, a delicate waltz of tape measures and adventurous spirits. Much like the art of shopping for the trendiest hat, it involves careful calculations and a keen eye for style.
But instead of measuring the circumference of one’s head, we measure the length, width, and depth of our beloved sliding rooms. It’s a journey of numbers, unfolding like a delightful puzzle as we navigate the intricacies of our nomadic abodes. But fear not, fearless traveler! Armed with a trusty tape measure and a dose of determination, you can easily embark on this measurement quest.
It’s a simple yet satisfying task, one that allows you to unleash your inner mathematician while channeling your aesthetic sense. Step by step, you’ll conquer this mission, reveling in the knowledge that you possess the power to protect your slide-out retreat from the elements. After all, who said measurements were boring? Not us! We say they’re the secret ingredient to unleashing your RV’s full potential.
And so, dear adventurers, embrace the opportunity to measure for an RV slide-out awning with zest and zeal. It’s an act of love for your noble abode, a way to safeguard your mobile haven from wind, rain, and pesky critters. So, let us raise our tape measures in celebration of this noble endeavor, recognizing that we are not just measuring for an awning but paving the way for a more delightful and functional RV experience.
Happy measuring, dear nomads, and may the awning odds forever be in your favor!”
FAQs
How do I measure for an RV slide-out awning?
To measure for an RV slide-out awning, start by measuring the width of the slide-out area. Then, measure the height from the top of the slide-out to the bottom edge. These measurements will help you choose the correct size awning for your RV.
Can I install an RV slide-out awning on my own?
Yes, many RV owners choose to install their slide-out awnings themselves. However, it does require some DIY skills and tools. If you’re not comfortable doing it yourself, you can always hire a professional to do the installation for you.
What are the benefits of installing an RV slide-out awning?
Installing an RV slide-out awning can provide several benefits. It helps to keep debris like leaves, twigs, and rainwater from accumulating on the slide-out roof. It also provides shade and protection from the sun, preventing the slide-out area from getting too hot. Additionally, it can help to extend the lifespan of the slide-out components by reducing exposure to the elements.
How often should I replace my RV slide-out awning?
The lifespan of an RV slide-out awning can vary depending on factors such as usage, climate, and maintenance. However, on average, it is recommended to replace the awning fabric every 5-7 years. If you notice signs of wear and tear such as tears, holes, or fading, it may be time to replace it sooner.
Can I use a regular awning fabric for my RV slide-out awning?
It is not recommended to use a regular awning fabric for your RV slide-out awning. Regular awning fabrics are typically not designed to withstand the unique conditions and requirements of an RV slide-out awning. It’s best to purchase a specifically designed RV slide-out awning fabric that is made to fit and handle the demands of RV use.
How do I clean and maintain my RV slide-out awning?
To clean your RV slide-out awning, start by brushing off any loose debris with a soft brush or broom. Then, mix a solution of water and mild soap and use a soft brush or sponge to gently scrub the awning fabric. Rinse thoroughly with water and allow the awning to air dry before retracting it. Regular maintenance includes inspecting for any damage or signs of wear, lubricating moving parts, and tightening any loose screws or brackets.
Can I leave my RV slide-out awning extended during rainstorms?
It is generally not recommended to leave your RV slide-out awning extended during heavy rainstorms or high winds. While the awning fabric is designed to be water-resistant, heavy rain and strong winds can put too much stress on the awning and potentially cause damage. It’s best to retract the awning during inclement weather to prevent any issues.