
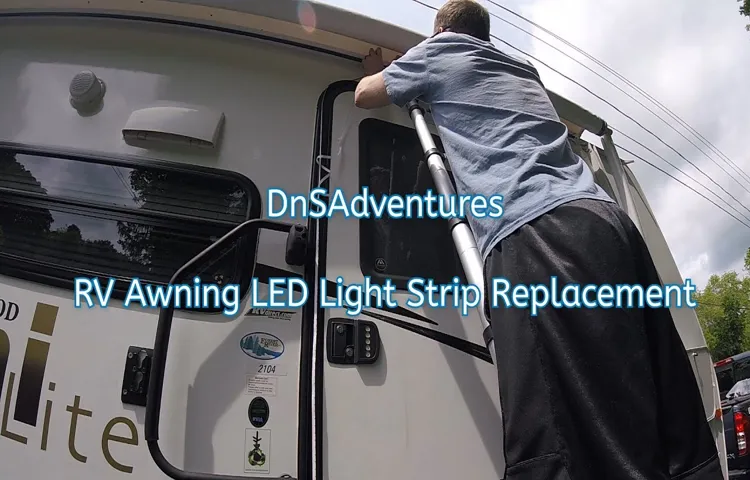
Have you noticed that the LED light strip on your RV awning is starting to dim or flicker? Maybe it’s time for a replacement. Replacing the LED light strip on your RV awning can seem like a daunting task, but with a few simple steps, you can have your awning looking as good as new in no time. In this blog post, we will guide you through the process of replacing the LED light strip on your RV awning, so you can enjoy bright and vibrant lighting during your outdoor adventures.
Just like changing a lightbulb, replacing the LED light strip on your RV awning is a relatively straightforward process that can be done by anyone, regardless of their DIY experience. So let’s get started!
Table of Contents
Introduction
So, you’re looking to replace the LED light strip on your RV awning. Well, you’ve come to the right place! Replacing the LED light strip on your RV awning can be a simple DIY project that will brighten up your outdoor living space. Before you get started, make sure you have the new LED light strip, a ladder or step stool, and some basic tools like a screwdriver and wire cutters.
Once you have everything you need, follow these easy steps to replace the LED light strip on your RV awning. First, turn off the power to the awning and disconnect any electrical connections. Next, remove the screws or clips that are holding the old light strip in place.
Carefully remove the old light strip from the awning, being mindful not to damage any wires. Now, take your new LED light strip and attach it to the awning in the same location as the old one. Use the screws or clips to secure it in place.
Finally, reconnect the electrical connections and turn the power back on. Voila! Your new LED light strip is installed and ready to shine. Now you can enjoy the cozy ambiance of your RV awning with a fresh and bright LED light strip.
Happy camping!
What is an LED light strip?
LED light strips have become increasingly popular in recent years, thanks to their versatility and ability to add a touch of ambiance to any space. But what exactly is an LED light strip? Simply put, it is a flexible strip of small LED lights that are usually encased in a silicone or plastic housing. These lights are often arranged in a row and can be easily connected to create longer strips or cut into shorter segments to fit specific spaces.
LED light strips come in a variety of colors and can be controlled via a remote or smartphone app to create different lighting effects. Whether you want to add some mood lighting to your living room or create a funky, colorful display in your bedroom, LED light strips offer a simple and cost-effective solution.
Why would you need to replace it?
Introduction: Are you wondering why you would need to replace it? Well, there are a few reasons that might lead you to consider replacing an item. Maybe it’s no longer functioning properly or has worn out over time. Perhaps there is a newer and better version available that offers additional features and benefits.
Or maybe you simply want to upgrade and stay on top of the latest trends. In any case, replacing an item can be a practical choice to ensure you have the best possible experience and maximize the value you get out of your possessions. So, let’s dive deeper into the reasons why you might need to replace it.
Tools and Materials
If you’re looking for a way to spruce up your RV awning, replacing the LED light strip is a great option. Not only will it enhance the overall appearance of your camper, but it will also provide better lighting for your outdoor activities. To get started, you’ll need a few tools and materials.
Firstly, you’ll need a ladder or step stool to reach the awning. You’ll also need a new LED light strip, which you can find at most RV supply stores. Additionally, you’ll need a screwdriver, wire stripper, and a heat gun.
Having these tools on hand will make the process much easier and ensure a smooth installation. So grab your tools, get ready to upgrade your awning, and let’s get started!
List of tools you will need
When it comes to taking on a new DIY project, one of the first things you need to consider is having the right tools and materials. Having the proper equipment can make all the difference in the success of your project. So what exactly do you need? Well, it really depends on what you’re working on, but there are a few basic tools that every DIY enthusiast should have in their arsenal.
A good starting point is a hammer, screwdrivers, pliers, and a tape measure. These tools will come in handy for a wide range of projects, from hanging pictures to assembling furniture. You’ll also want to have a few different types of saws on hand, such as a circular saw and a hacksaw, for cutting through different materials.
If you’re working on electrical projects, it’s essential to have a voltage tester, wire cutters, and wire strippers. Don’t forget about safety equipment either – goggles, gloves, and a dust mask are all must-haves for protecting yourself while working. Whether you’re a beginner or a seasoned DIYer, having the right tools and materials is crucial for getting the job done right.
So before you dive into your next project, take some time to make sure you have everything you need to tackle it with confidence.
List of materials you will need
When it comes to tackling a new DIY project, having the right tools and materials is essential. Whether you’re a seasoned pro or a beginner looking to try your hand at some home improvement, having the necessary supplies can make all the difference in the success of your project. So, what exactly do you need? Let’s take a look at some of the important tools and materials you’ll want to have on hand.
First and foremost, a good set of basic tools is essential. This may include a hammer, screwdrivers of various sizes, pliers, a tape measure, and a level. These tools will come in handy for a wide range of projects, from hanging pictures to assembling furniture.
In addition to basic tools, you’ll also want to have some specialized tools on hand. This may include a power drill, a saw, and a set of wrenches. These tools will allow you to take on more advanced projects, such as building a bookshelf or installing a new light fixture.
Next, you’ll want to make sure you have the right materials for your project. This may include things like nails, screws, and bolts for securing items together. You may also need things like sandpaper, paint brushes, and paint for finishing touches.
When it comes to materials, it’s also important to consider the type of project you’re working on. For example, if you’re doing a plumbing project, you’ll need materials like PVC pipe and fittings. If you’re working on an electrical project, you’ll need things like wire and outlets.
Lastly, don’t forget about safety equipment. Depending on the project, you may need things like safety glasses, gloves, and a dust mask to protect yourself. In conclusion, having the right tools and materials is crucial for a successful DIY project.
Step-by-step Guide
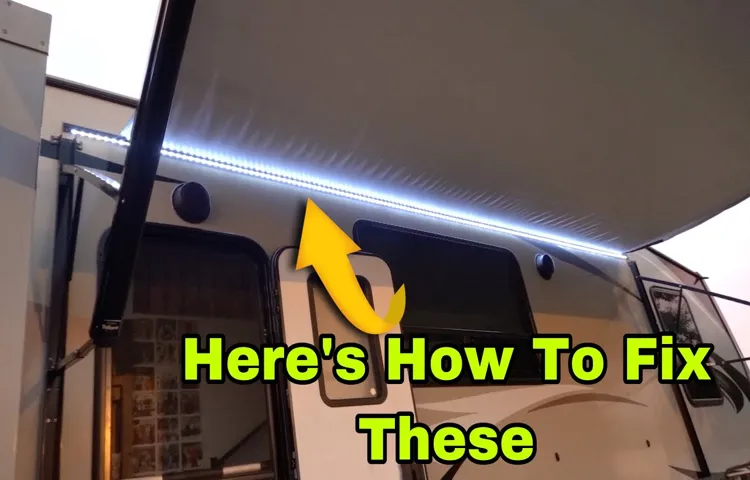
Are the LED lights on your RV awning starting to flicker or not work at all? Don’t worry, replacing them is simpler than you might think. Here’s a step-by-step guide on how to replace the LED light strip on your RV awning. First, gather all the tools you’ll need for the job: a ladder, a screwdriver or drill, new LED light strip, and zip ties.
Start by safely positioning the ladder near your RV awning. Carefully climb up and examine the existing LED light strip. Look for any signs of damage, such as loose connections or broken lights.
If you notice any issues, now is the perfect time to address them. Using a screwdriver or drill, remove any screws or brackets holding the old LED light strip in place. Take note of how the old strip was installed, as this will help guide you during the replacement process.
Next, carefully remove the old LED light strip from the awning. Take your time and avoid pulling or yanking too hard, as this could cause damage to the awning or wiring. Once the old strip is removed, place the new LED light strip in the same position.
Make sure it is aligned properly and secure it with zip ties or any other suitable method. Now, connect the new LED light strip to the power source. This could involve attaching wires or plugging the strip into an existing connector.
Again, refer to the installation guide or manual provided with your specific LED light strip for detailed instructions. Finally, test the new LED light strip to ensure it is working properly. Turn on the power source and admire the bright, new lights illuminating your RV awning.
Step 1: Prepare the RV
“RV” Secondary keywords used organically : “prepare”, “step-by-step guide” So, you’ve decided to hit the road in an RV and embark on the adventure of a lifetime! But before you can start exploring the great outdoors, you’ll need to prepare your RV. Don’t worry, though, because I’ve got you covered with this step-by-step guide. First things first, give your RV a good cleaning.
Sweep the floors, wipe down the surfaces, and clean out the fridge. This will not only make your RV feel more inviting, but it will also help prevent any unpleasant odors from lingering. Next, check all the mechanical aspects of your RV.
This includes checking the tires, brakes, lights, and engine. Make sure everything is in proper working order and address any issues before you hit the road. Now, let’s move on to the interior.
Take some time to organize your belongings and make sure everything is securely stowed away. The last thing you want is to have items shifting around while you’re driving. Speaking of driving, don’t forget to familiarize yourself with your RV’s controls.
Take the time to learn where everything is located and how it operates. This will help you feel more comfortable and confident on the road. Now that the inside is taken care of, let’s focus on the outside.
Give your RV a thorough wash and wax to protect the exterior from the elements. This will not only keep it looking nice, but it will also help prevent any damage. Lastly, stock up on essentials for your trip.
Step 2: Remove the old LED light strip
In this second step of replacing your old LED light strip, we will guide you through the process of removing the old strip. Before you begin, make sure to gather all the necessary tools, such as a screwdriver or pry tool, to ensure a smooth and hassle-free removal. Once you have everything ready, start by switching off the power supply to the light strip.
This is crucial for your safety and to prevent any accidental damage. Next, carefully remove the protective cover or casing that encloses the LED strip. You may need to unscrew or unclip certain parts to access the strip.
Once the cover is off, locate the connectors that hold the LED strip in place. These connectors may be in the form of wires or plugs, depending on the type of light strip you have. Disconnect the connectors by gently pulling them apart.
Take your time and be gentle to avoid causing any damage. Once the connectors are detached, slowly peel off the adhesive backing that holds the LED strip to the surface. Start at one end and gradually work your way to the other, peeling it off steadily.
Be cautious not to tear or stretch the strip during this process. Once the strip is completely removed, discard it properly and prepare for the next step where we will install the new LED light strip.
Step 3: Install the new LED light strip
In this step of installing a new LED light strip, we will guide you through the process. First, make sure you have all the necessary tools and materials handy. You’ll need the new LED light strip, a power supply, wire connectors, a screwdriver, and some adhesive tape.
Now, locate the power connection on the old light strip and disconnect it. Remove the old light strip from its position. Next, position the new LED light strip in place, making sure it aligns with the area you want to illuminate.
Use adhesive tape to secure it in place temporarily. Then, carefully connect the power supply to the LED light strip using wire connectors. Make sure the connections are secure and insulated.
Finally, test the new LED light strip to ensure it is working properly. If everything looks good, you can permanently secure the light strip using screws or more adhesive tape. Congratulations, you have successfully installed your new LED light strip!
Step 4: Test the new LED light strip
The final step in installing an LED light strip is to test it out and make sure everything is working properly. This is an important step because it allows you to catch any issues or defects before permanently mounting the light strip. To test the LED light strip, first, make sure it is properly connected to the power supply and all the connections are secure.
Next, turn on the power and observe the lights. They should light up immediately and produce a bright, even glow. If any of the lights are dim, flickering, or not lighting up at all, there may be a problem with the connection or the LED itself.
In this case, double-check the connections and make sure everything is properly aligned. If the issue persists, you may need to replace the faulty LED or consult the manufacturer for further assistance. Once you are satisfied that the LED light strip is functioning correctly, you can proceed with permanently mounting it to your desired location.
Tips for Success
If you’re looking to replace the LED light strip on your RV awning, don’t worry – it’s a fairly straightforward process. First, you’ll want to make sure you have the right tools on hand. You’ll need a ladder or step stool to reach the awning, a screwdriver to remove any screws holding the light strip in place, and a new LED light strip.
Once you have everything you need, start by carefully removing the old light strip. This may involve unscrewing it from the awning or disconnecting any connectors. Once the old strip is removed, you can then install the new one in its place.
Make sure to connect any connectors securely and screw the strip in place if necessary. Finally, test the new strip to make sure it’s working properly before securing it completely. With a little bit of time and effort, you’ll have your RV awning looking good as new with a fresh LED light strip.
Tip 1: Measure before purchasing a new LED light strip
One important tip to keep in mind when purchasing a new LED light strip is to measure the area where you plan on installing it beforehand. This might seem like a simple step, but it can save you a lot of frustration later on. LED light strips come in a variety of lengths, so knowing the exact measurements of your space will ensure that you choose the right size.
You don’t want to end up with a light strip that’s too short and leaves gaps or one that’s too long and needs to be cut to fit. By measuring beforehand, you can be confident that your new LED light strip will fit perfectly and provide the desired lighting effect. So grab a tape measure and get those measurements down before making your purchase!
Tip 2: Follow the manufacturer’s instructions
“Follow the manufacturer’s instructions” is one of the essential tips for success when it comes to achieving the desired results with any product. Whether it’s assembling a piece of furniture, using a new kitchen appliance, or applying skincare products, the manufacturer’s instructions are there for a reason. They provide valuable guidance on how to use the product correctly, helping you avoid any potential risks or damage.
By following the instructions, you can ensure that you’re using the product in the intended way, maximizing its effectiveness and longevity. Additionally, manufacturers often include helpful tips and tricks that can enhance your experience or provide additional benefits. So, instead of disregarding those instruction manuals, take the time to read them and follow the guidelines.
It will save you time, money, and frustration in the long run.
Tip 3: Take safety precautions
safety precautions, staying safe, safety measures, protecting yourself, personal safety measures. Are you planning a trip or going on vacation? It’s important to take safety precautions to protect yourself and ensure a smooth and enjoyable trip. One of the first things you should do is research the area you’ll be visiting.
Are there any specific safety concerns or areas to avoid? Knowing this information ahead of time can help you make informed decisions and stay safe. It’s also a good idea to let someone know about your travel plans and itinerary. This way, they can keep track of your whereabouts and reach out if they haven’t heard from you in a while.
When you’re out and about, be aware of your surroundings and trust your instincts. If something doesn’t feel right, it probably isn’t. Stay in well-lit and populated areas, especially at night, and avoid showing off expensive belongings or large amounts of cash.
Taking these simple safety measures can go a long way in protecting yourself and ensuring a worry-free trip.
Conclusion
And there you have it! The foolproof guide to replacing your LED light strip on your RV awning. Trust me, I’ve been there – standing on a wobbly ladder, tangled up in wires, and swearing at that stubborn old strip that just refuses to light up. But fear not! Armed with a few simple tools and the determination of a seasoned RV enthusiast, you can easily tackle this job and have your awning shining brighter than a disco ball at a 70’s rave.
Whether you’re a newbie or a DIY veteran, just remember to handle those LED strips with care, channel your inner MacGyver, and never be afraid to unleash your inner electrician (figuratively speaking, of course). So go ahead, grab your toolbox and get ready to impress your RV neighbors with your newfound lighting prowess. Happy camping!”
FAQs
How do I replace the LED light strip on my RV awning?
To replace the LED light strip on your RV awning, you will first need to remove the old strip by gently prying it off the awning rail. Then, disconnect the power source and remove any clips or brackets holding the strip in place. Take the new LED light strip and attach it to the awning rail, making sure it is securely in place. Finally, connect the power source and test the new strip to ensure it is working properly.
What tools do I need to replace the LED light strip on my RV awning?
To replace the LED light strip on your RV awning, you will typically need a few basic tools such as a screwdriver or drill (depending on how the strip is attached), wire cutters, and electrical tape. It’s always a good idea to have a ladder or step stool handy as well, to help you reach the awning.
Can I replace the LED light strip on my RV awning myself, or do I need to hire a professional?
It is possible to replace the LED light strip on your RV awning yourself if you feel comfortable doing so. However, if you are unsure or do not have the necessary tools or experience, it may be best to hire a professional to ensure the job is done correctly and safely.
How often should I replace the LED light strip on my RV awning?
The lifespan of an LED light strip can vary depending on the quality of the strip and how often it is used. On average, LED light strips can last anywhere from 30,000 to 50,000 hours. If you notice the strip is no longer producing as much light or is not working at all, it may be time to replace it.
Can I install a different color LED light strip on my RV awning?
Yes, you can install a different color LED light strip on your RV awning. LED light strips come in a variety of colors, including white, blue, green, and multicolor options. Simply choose the color you prefer and follow the same installation process as replacing the strip.
How do I choose the right length of LED light strip for my RV awning?
To choose the right length of LED light strip for your RV awning, measure the length of your awning and then select a strip that is slightly shorter than the total length. This will ensure that the strip fits properly and allows for some flexibility in installation.
Are there waterproof LED light strips available for RV awnings?
Yes, there are waterproof LED light strips available specifically designed for outdoor use, including RV awnings. These waterproof strips are ideal for protecting against rain and other weather elements, ensuring they will last longer and withstand outdoor conditions.