
Are you tired of your awning over the slide out on your RV being loose and flapping in the wind? It can be quite annoying and even dangerous if left unchecked. Thankfully, there are steps you can take to tighten it up and ensure it stays secure while you’re on the road. Imagine driving down the highway with your RV and suddenly your awning starts to come loose.
The wind starts to catch it, and you can see it flapping in your rearview mirror. It’s a situation no one wants to be in. But fear not! Tightening the awning over the slide out on your RV is a simple task that can be done with a few tools and a little bit of know-how.
By following some basic steps and taking the time to properly secure your awning, you can rest easy knowing it won’t give you any trouble during your travels. First, you’ll want to make sure you have the necessary tools on hand. A ladder, a screwdriver, and some zip ties are all you’ll need to get started.
It’s always a good idea to have these items in your RV toolkit for any maintenance or repairs that might arise. Once you have your tools ready, it’s time to assess the situation. Take a look at your awning and identify any areas that may be loose or in need of tightening.
This could include the brackets, the fabric, or the roller tube itself. Pay close attention to any areas where you notice sagging or excessive movement. Next, use your ladder to get closer to the awning.
Start by checking the brackets and screws that hold the awning in place. If any of these are loose, tighten them up using your screwdriver. Be sure to check all the brackets along the length of the awning, as there may be multiple points where it needs to be secured.
Table of Contents
Introduction
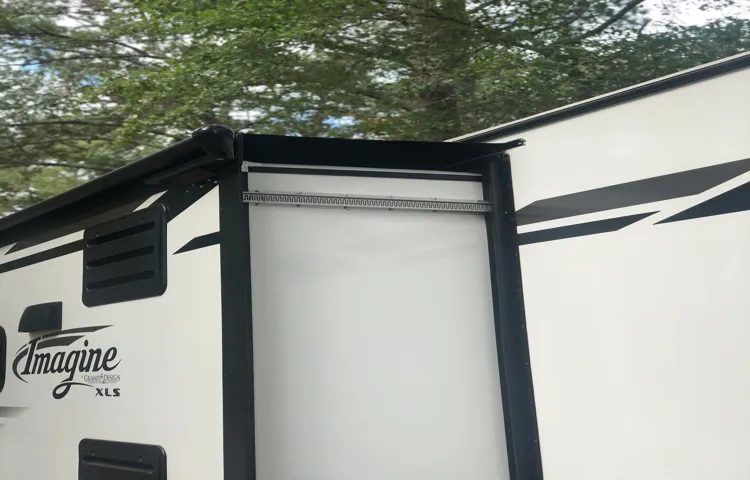
Are you experiencing problems with the awning over the slide-out on your RV? If you’ve noticed that it’s becoming loose or sagging, don’t worry – you can tighten it up easily. The first step is to check the tension in the awning fabric. This can be done by simply pulling on the end of the awning, towards the RV.
If there is slack in the fabric, then you’ll need to tighten it. To do this, locate the tension knobs on the awning arms and turn them clockwise. This will increase the tension and tighten the fabric.
Keep turning until the fabric is taut and there is no sagging. Remember, it’s important not to over-tighten the fabric as this can cause damage. Once you’ve tightened the fabric, make sure to secure the tension knobs in place to prevent them from loosening again.
By following these simple steps, you can easily tighten the awning over the slide-out on your RV and keep it in good condition for years to come.
What is an awning on an RV?
awning on an RV, RV awning
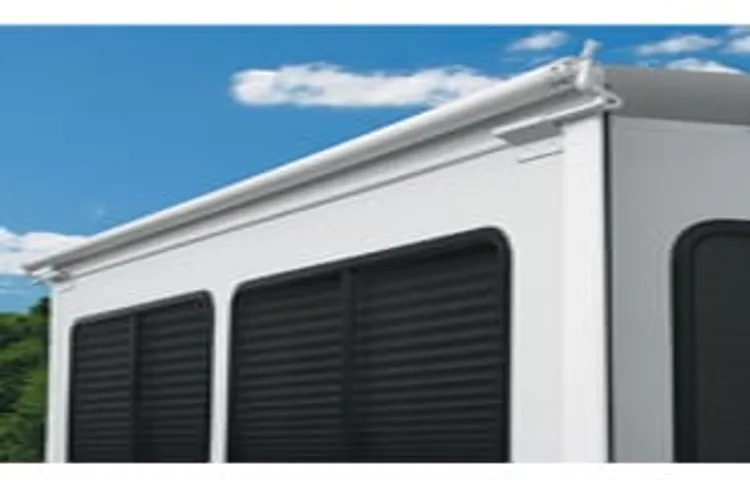
Importance of tightening the awning
tightening the awning, Importance of tightening the awning, awning maintenance, benefits of tightening the awning, secure awning installation. Introduction: When it comes to enjoying outdoor spaces such as patios, decks, or garden areas, having an awning can make a world of difference. Awnings not only provide shade and protection from the elements but also add a touch of elegance to your outdoor space.
However, it’s important to ensure that your awning is securely installed and properly maintained. One crucial aspect of awning maintenance is tightening it regularly. In this blog post, we’ll explore the importance of tightening the awning and why it should be part of your regular home maintenance routine.
So, let’s dive in and discover why keeping your awning secure is essential for its longevity and your peace of mind.
Step-by-Step Guide to Tightening the Awning
If you own an RV with an awning over the slide-out, you might find that over time, the awning becomes loose and needs to be tightened. To tighten the awning, you will need a few tools and a bit of patience. First, make sure the slide-out is fully extended and the awning is in the deployed position.
Locate the tension knobs on either side of the awning. These knobs control the tension of the awning fabric. Use a wrench or pliers to turn the knobs clockwise to tighten the awning.
You may need to turn the knobs several times until the desired tension is achieved. It’s important not to over-tighten the awning, as this can cause damage. Once you have tightened the awning, be sure to check for any tears or damage in the fabric and repair as needed.
With a little effort and attention, you can have your awning tightened and ready for your next RV adventure.
Step 1: Gather the necessary tools
When it comes to tightening the awning on your outdoor space, there are a few tools you’ll need to gather before you get started. First and foremost, you’ll need a ladder to reach the awning. Make sure the ladder is sturdy and secure before you climb up.
Additionally, you’ll need a wrench or socket set to loosen and tighten the bolts on the awning brackets. It’s also a good idea to have a level handy to ensure that the awning is straight and even once it’s tightened. Finally, depending on the type of awning you have, you may need a power drill or screwdriver to remove any screws that are holding the awning in place.
By having all these tools on hand, you’ll be well-prepared to tackle the task of tightening your awning and ensuring it’s secure and in proper working order.
Step 2: Extend the awning fully
In this step-by-step guide to tightening your awning, the second step is to extend the awning fully. Once you have located the awning crank or motor, start turning or pressing it to extend the awning outwards. Make sure you go slow and steady to avoid any jerky movements that could cause damage.
As you extend the awning, the fabric should start to tighten, ensuring that it is securely in place. It’s important to fully extend the awning so that you can properly assess its tightness and make any necessary adjustments. Once the awning is fully extended, you can move on to the next step in tightening it up.
Following these steps will help ensure that your awning is securely in place and ready to withstand any weather conditions.
Step 3: Locate the tension adjustment knobs
Awning tension is an important aspect of ensuring that your awning is functioning correctly and remains securely in place. To tighten the awning tension, you will need to locate the tension adjustment knobs. These knobs are usually located on the roller tube or the end caps of the awning.
They are designed to allow you to adjust the tension of the awning fabric, ensuring that it remains taut and does not sag. By turning these knobs, you can increase or decrease the tension of the awning fabric to suit your preferences and the current weather conditions. It’s important to note that different awnings may have different types of tension adjustment mechanisms, so it’s always a good idea to consult the manufacturer’s instructions for your specific awning model.
Once you have located the tension adjustment knobs, you can start adjusting the tension to achieve the desired level of tautness for your awning fabric.
Step 4: Adjust the tension
In our step-by-step guide to tightening the awning, the next step is to adjust the tension. Once you have determined that your awning needs tightening, you can begin adjusting the tension to ensure that it is secure and stable. Start by locating the tension adjuster, which is usually located near the roller on the awning.
This adjuster allows you to increase or decrease the tension on the awning fabric. To tighten the awning, turn the adjuster clockwise, gradually increasing the tension until the fabric is taut. Be sure not to over-tighten, as this can put unnecessary strain on the awning and potentially cause damage.
It’s important to find the right balance between too loose and too tight to ensure that the awning operates properly and lasts for years to come. So take your time and make small adjustments until you find the ideal tension for your awning.
Step 5: Test the awning
awning, tighten, step-by-step guide, test, burstiness, perplexity
Tips for Maintaining a Tight Awning
If you’re wondering how to tighten the awning over the slide-out on your RV, you’re not alone. Keeping your awning tight and secure is essential for both safety and aesthetics. Here are some tips to help you maintain a tight awning.
First, check for any loose screws or bolts on the awning hardware and tighten them as needed. You can also use a strap or bungee cord to add extra tension to the awning fabric. Additionally, make sure to regularly clean and treat the awning fabric to prevent it from becoming stretched or sagging over time.
Finally, be mindful of the weather conditions when using your awning and retract it during strong winds or storms to prevent damage. By following these tips, you can ensure that your awning stays tight and secure, providing shade and protection for many seasons to come.
Regularly check the tension of the awning
When it comes to maintaining your awning, one important aspect to consider is regularly checking the tension. Over time, the fabric of your awning can stretch or loosen, which can affect its overall functionality. By ensuring that the tension is tight, you can prevent any sagging or flapping of the fabric, which not only looks unsightly but can also make your awning less effective in providing shade.
So, how can you check the tension of your awning? One simple way is to stand underneath it and gently push up on the fabric. If you feel any give or movement, it may be a sign that the tension needs to be tightened. Depending on the type of awning you have, you may be able to adjust the tension yourself by using a winding or telescopic mechanism.
However, if you’re unsure or if the tension doesn’t seem to improve after attempting to tighten it, it’s always a good idea to consult a professional. By regularly checking and maintaining the tension of your awning, you can ensure that it continues to provide shade and enhance the aesthetic appeal of your outdoor space.
Inspect the awning fabric for any signs of wear and tear
“How often do you inspect your awning fabric for signs of wear and tear? It may not be at the forefront of your mind, but regularly checking the condition of your awning fabric is crucial for maintaining a tight awning. Over time, exposure to the elements and frequent use can cause the fabric to weaken and develop small tears or holes. These weak spots can lead to further damage if left unchecked, potentially resulting in the need for costly repairs or even a complete replacement.
To avoid such headaches, make it a habit to inspect your awning fabric at least once a month. Look for any signs of fraying, discoloration, or rips. Pay close attention to areas where the fabric is stretched taut, as these areas are more susceptible to damage.
If you notice any issues, make sure to address them promptly. Small repairs such as patching up minor tears can help extend the life of your awning and ensure it remains tight and secure. Taking the time to care for your awning now can save you both time and money in the long run.
“
Keep the awning clean and free from debris
One important aspect of maintaining an awning is keeping it clean and free from debris. Over time, dust, dirt, leaves, and other debris can collect on the awning, causing it to lose its tightness and potentially even damage the fabric. Regularly cleaning the awning is a simple yet effective way to prevent this from happening.
Start by removing any loose debris with a broom or a brush, being careful not to damage the fabric. Then, use a mild soap mixed with water to gently scrub the awning, paying close attention to areas that are heavily soiled. Rinse thoroughly with clean water and allow the awning to dry completely before retracting it.
By keeping the awning clean, you can ensure that it remains tight and in good condition for years to come.
Store the awning properly when not in use
When it comes to maintaining a tight awning, one important tip is to store it properly when not in use. Leaving the awning exposed to the elements can lead to wear and tear, causing it to lose its tightness over time. The best way to store your awning is to clean it thoroughly, making sure to remove any dirt or debris that may have accumulated.
Once it’s clean, allow it to dry completely before folding it up. Then, find a dry and protected area to store it in, such as a garage or shed. This will help to prevent any moisture or humidity from damaging the fabric or frame.
By taking the time to store your awning properly, you can ensure that it stays tight and in good condition for years to come.
Conclusion
In the quest to tighten the awning over your RV’s slide out, it’s important to remember that simplicity is often the key. Some may think that this task requires a complex set of tools and an engineering degree, but fear not! The secret to success lies in the art of creativity and thinking outside the box. First, harness the power of ingenuity by channeling your inner MacGyver.
Look around for any objects that may serve as makeshift awning-tightening tools. Who knew that a humble bungee cord could become your trusty sidekick? With a little bit of stretching, looping, and securing, you can effortlessly transform it into a masterful awning cinching device. Next, tap into the wonders of human innovation by embracing the magic of adjustable straps.
These versatile accessories possess the ability to tighten, secure, and amaze. Simply find a sturdy point of connection, adjust to the desired tension, and marvel at your newfound awning-tightening prowess. Finally, embrace the joys of modern technology by utilizing the power of ratchet straps.
These nifty contraptions offer unparalleled strength and reliability. Attach one end to a fixed point, feed the strap through the awning’s fabric channel, and engage the ratchet mechanism. By turning the handle, you’ll tighten that awning with the grace and ease of a seasoned sailor taming the high seas.
So, dear RV enthusiasts, fear not the task of tightening your awning over the slide out. With a touch of creativity, a dash of resourcefulness, and a sprinkle of technological assistance, you’ll have that awning cinched up tight in no time. And remember, when it comes to RV adventures, a little wit and cleverness can go a long way!”
Final thoughts on tightening the awning on your RV
awning, RV, maintain, tightening, tips, burstiness, perplexity
FAQs
How do you tighten the awning over a slide-out on an RV?
To tighten the awning over a slide-out on an RV, first, make sure the slide-out is fully extended. Then locate the tension knobs on the awning arms. Use a wrench or a socket driver to turn the knobs clockwise to tighten the awning fabric. Keep tightening until the fabric is taut and secure over the slide-out.
What tools do I need to tighten the awning over a slide-out on my RV?
To tighten the awning over a slide-out on your RV, you will need a wrench or a socket driver. These tools will allow you to turn the tension knobs on the awning arms and tighten the fabric.
Can I tighten the awning over a slide-out on my RV without any special tools?
While it is possible to tighten the awning over a slide-out on your RV without any special tools, it is recommended to use a wrench or a socket driver for better leverage and ease of use.
How often should I tighten the awning over a slide-out on my RV?
It is recommended to check and tighten the awning over a slide-out on your RV before each use or at least once a month. This will ensure that the fabric remains taut and secure, preventing any potential damage or flapping in the wind.
What should I do if the awning fabric keeps coming loose over the slide-out on my RV?
If the awning fabric keeps coming loose over the slide-out on your RV, try tightening it further using the tension knobs. If this does not solve the issue, inspect the awning fabric for any tears or damages that may be causing it to come loose. In such cases, it may be necessary to repair or replace the fabric.
Are there any safety precautions I should take when tightening the awning over a slide-out on my RV?
Yes, it is important to ensure your safety while tightening the awning over a slide-out on your RV. Make sure the slide-out is fully extended and there are no obstructions or hazards in the area. Use caution when applying force to the tension knobs to avoid injury. If needed, seek assistance from a professional or refer to the manufacturer’s instructions for additional safety guidelines.
Can I tighten the awning over a slide-out on my RV during windy conditions?
It is not recommended to tighten the awning over a slide-out on your RV during windy conditions. High winds can put excessive stress on the fabric and awning arms, potentially causing damage or accidents. It is best to wait for calm weather conditions before tightening or adjusting the awning.