
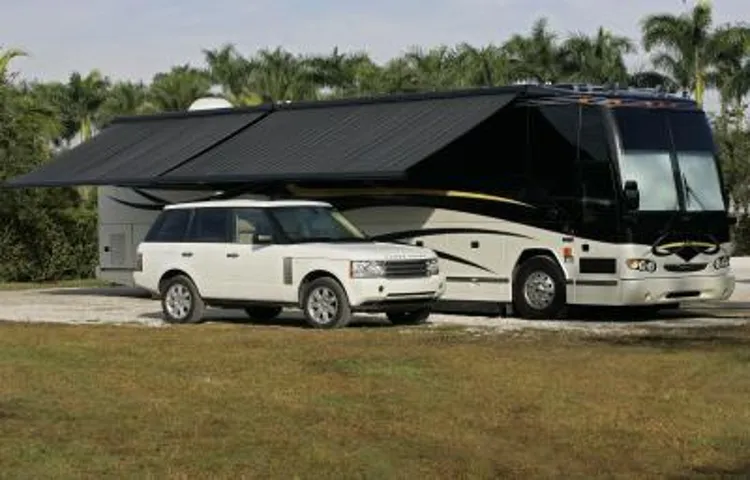
Are you a proud owner of an RV? If so, then you know the importance of having an awning to provide shade and protection from the elements. But how do you adjust your RV awning to ensure it functions properly? Adjusting your RV awning may seem like a complicated task, but with the right approach, it can be a breeze. In this complete guide, we will walk you through the steps of adjusting your RV awning, so you can enjoy the great outdoors without any hassle.
So, grab your toolkit and let’s get started on making your RV awning the ultimate shelter on your adventures.
Table of Contents
Introduction
If you’re new to RV life, you might find yourself needing to adjust your RV awning at some point. Whether it’s due to strong winds, uneven ground, or simply wanting to get the perfect amount of shade, knowing how to adjust your RV awning can come in handy. Thankfully, it’s a relatively simple process that just takes a few steps.
First, start by extending your awning fully so you can see it and access all the necessary components. Next, locate the tension knobs or levers on both sides of the awning. These are what you’ll use to adjust the tension of the awning.
To increase tension, turn the knobs or levers clockwise. If you need to decrease tension, turn them counterclockwise. Finally, make any necessary adjustments to level the awning by adjusting the height of the front or rear arms.
This can be done by either tightening or loosening the knobs or levers located on the arms. And there you have it! With just a few simple steps, you can adjust your RV awning to fit your needs.
Understanding the Importance of Proper Awning Adjustment
awning adjustment, importance of proper awning adjustment, benefits of adjusting awnings
Why You Should Regularly Check and Adjust Your RV Awning
RV awnings are a convenient and valuable addition to any recreational vehicle. They provide shade and protection from the elements, allowing you to enjoy the outdoors comfortably. However, like any other piece of equipment, RV awnings require regular maintenance and adjustments to ensure they are functioning properly.
In this blog section, we will discuss the importance of regularly checking and adjusting your RV awning, and why it is essential for the longevity and functionality of your outdoor living space.
Tools and Equipment You’ll Need
If you’re a new RV owner, you might find yourself wondering how to adjust your RV awning. Just like any other piece of equipment, it’s important to know how to properly maintain and adjust your awning to ensure it works correctly and lasts a long time. To adjust your RV awning, you’ll need a few tools and equipment.
First, you’ll need a step ladder or something sturdy to reach the awning. You’ll also need a tape measure to ensure the awning is adjusted to the correct height and length. A wrench or screwdriver may also be necessary to make any adjustments to the brackets or arms that hold the awning in place.
Additionally, having an extra set of hands can be helpful when making adjustments to the awning, so consider having a friend or family member lend a hand. With the right tools and equipment, adjusting your RV awning will be a breeze.
List of Tools for Adjusting Your RV Awning
RV awning, adjusting, tools and equipment.
Step-by-Step Guide to Adjusting Your RV Awning
Adjusting your RV awning can seem daunting at first, but with a step-by-step guide, it can be a breeze. First, make sure your awning is fully extended and secure. Locate the adjustable arms, usually found on both sides of the awning.
Take note of the locking mechanisms on these arms, as they will be used to adjust the height and angle of the awning. To adjust the height, release the locking mechanisms and slide the arm up or down as needed. Once you have achieved the desired height, lock the arm into place.
To adjust the angle, release the locking mechanisms and rotate the arm either clockwise or counterclockwise. This will tilt the awning towards or away from the RV. Experiment with different angles until you find the optimal position for shade and protection.
Don’t forget to secure the locking mechanisms once you are satisfied with the adjustments. With a little practice, you’ll be able to adjust your RV awning easily and confidently.
Step 1: Positioning Your RV Correctly
RV, awning, adjust, step-by-step guide, positioning, burstiness, perplexity
Step 2: Identifying the Type of RV Awning
RV awnings come in various types, and it’s important to identify the specific type you have before attempting any adjustments. One common type is the manual awning, which requires manual labor to extend and retract. These awnings are usually operated by a hand-crank or a pull strap.
Another type is the electric awning, which utilizes an electric motor to extend and retract with the push of a button. Electric awnings often come with additional features such as integrated LED lights or wind sensors for automatic retracting in windy conditions. Additionally, there are also slide-out awnings that are designed to cover the slide-out sections of your RV.
These awnings can be either manual or electric. Once you have identified the type of awning on your RV, you can proceed with adjusting it to your desired position.
Step 3: Extending and Retracting the Awning
RV awnings are a great way to enhance your outdoor living space while on the road. However, it’s important to know how to properly adjust and use your awning to avoid any potential issues. In this step-by-step guide, we will walk you through the process of extending and retracting your RV awning.
To extend your awning, start by unlocking the awning arms from the side of your RV. Most awnings will have a lever or knob that you need to twist or turn to unlock the arms. Once the arms are unlocked, gently pull on the awning fabric to extend it.
As the awning extends, you may need to adjust the angle of the arms to ensure proper tension and alignment. This can usually be done by adjusting the knobs or levers on the arms. Make sure the awning is level and secure before moving on to the next step.
Next, secure the awning arms in place by locking them into position. This is typically done by sliding a locking mechanism into place on the arms. Double-check that the arms are securely locked before continuing.
To retract the awning, unlock the arms by removing the locking mechanism. Again, gently pull on the awning fabric to retract it. As the awning retracts, you may need to adjust the angle of the arms to ensure a smooth and even retraction.
Once the awning is fully retracted, secure the arms back into place by reapplying the locking mechanism. Take a moment to check that everything is secure before you hit the road. Remember, it’s important to always follow the manufacturer’s instructions when adjusting and using your RV awning.
Step 4: Adjusting the Pitch of the Awning
Adjusting the pitch of your RV awning is an important step to ensure optimal shade and protection from the elements. The pitch refers to the angle at which the awning slopes downward from the RV. Adjusting the pitch can help prevent water from pooling on the awning and causing damage.
To adjust the pitch, first locate the awning arms on either side of the awning. Then, find the pitch adjustment knobs or buttons. These can usually be found near the bottom of the awning arms.
Use these knobs or buttons to adjust the pitch as desired. It’s important to note that different awning models may have different methods of adjusting the pitch, so consult your user manual for specific instructions. Once you’ve adjusted the pitch, take a step back and evaluate the angle.
Does it provide enough shade? Is it slanted enough to allow water to properly drain off? Adjust as necessary until you achieve the desired angle. With a properly adjusted pitch, your RV awning will provide the perfect amount of shade and protection for all your outdoor adventures.
Step 5: Tightening or Loosening Tension
One important step in adjusting your RV awning is tightening or loosening the tension. This ensures that your awning is properly secured and able to withstand wind and other weather conditions. To tighten the tension, you can use a ratchet strap or your hands to turn the tension knob in the direction indicated on the awning arm.
This will pull the fabric taut and prevent it from sagging. Conversely, if the tension is too tight and the awning is difficult to extend or retract, you can loosen it by turning the tension knob in the opposite direction. It’s important to find the right balance of tension so that your awning is secure but still easy to use.
So, take the time to adjust the tension to your liking and enjoy the shade and protection that your RV awning provides.
Step 6: Properly Storing the Awning
One important step in adjusting your RV awning is properly storing it when not in use. This helps protect the awning from damage due to weather conditions, as well as preventing it from becoming a safety hazard. There are a few key steps to follow when storing your awning.
First, make sure it is clean and dry before rolling it up. Use a soft brush or sponge to remove any dirt or debris, and allow it to air dry completely. Next, retract the awning and secure it in the closed position.
Use the straps or clips provided to keep it securely in place. Finally, cover the awning with a protective cover to shield it from the elements. This will help extend the lifespan of your awning and ensure it is ready to use when you need it again.
Common Mistakes to Avoid
Adjusting an RV awning may seem like a simple task, but there are some common mistakes that people make that can lead to frustration and potential damage. One of the biggest mistakes is not properly supporting the awning when adjusting it. This can put strain on the awning arms and cause them to warp or break over time.
Another mistake is not properly tightening the awning arms after making adjustments. This can cause the awning to sag or even collapse in windy conditions. It is also important to make sure that the awning is properly aligned with the RV before making any adjustments.
This will ensure that it opens and closes smoothly without any issues. By avoiding these common mistakes, you can ensure that your RV awning stays in great shape and provides shade and protection for many camping trips to come. So, next time you’re adjusting your RV awning, make sure to take the time to do it right and avoid these common mistakes.
Over-Tightening the Awning
awning, over-tightening, common mistakes, avoid
Not Checking for Tears or Damage
When it comes to taking care of our clothing, one common mistake that many people make is not checking for tears or damage. This is a crucial step in ensuring the longevity of your clothes, as even small tears or damage can worsen if not addressed early on. To avoid this mistake, take the time to thoroughly inspect each item of clothing before and after wearing it.
Look for any signs of wear and tear, such as loose threads or seams coming undone. If you notice any damage, take immediate action to repair it, whether that means sewing up a small tear or bringing it to a professional for more extensive repairs. By being proactive and checking for tears or damage, you can extend the lifespan of your clothing and save yourself from having to replace items prematurely.
So the next time you’re getting dressed, remember to give your clothes a quick once-over to ensure they are in good condition and ready to wear.
Ignoring Proper Cleaning and Maintenance
In our busy lives, keeping our homes clean and maintained can often take a backseat. But neglecting proper cleaning and maintenance can lead to costly consequences down the road. One common mistake people make is not giving enough attention to regular cleaning tasks.
Dust, dirt, and grime can build up over time and not only make your home look unkempt, but also contribute to health issues such as allergies. It’s important to set aside time for regular dusting, vacuuming, and mopping to maintain a clean and healthy living environment. Another mistake is ignoring maintenance tasks, such as changing air filters or checking for leaks.
Neglecting these tasks can lead to bigger problems like HVAC system breakdowns or water damage. By staying on top of these tasks, you can prevent costly repairs and keep your home running smoothly. So take the time to clean and maintain your home properly – it will save you time, money, and stress in the long run.
Conclusion
In conclusion, adjusting a RV awning is like finding the perfect balance between shade and sunshine – a delicate dance between comfort and adventure. It’s a skill that requires a keen eye, steady hands, and a touch of finesse. Much like taming a wild stallion, adjusting a RV awning is about taking control and asserting your dominance over the elements.
It’s about telling the wind, “I am the captain of this domain, and I shall have shade when I damn well please!” But it’s not just about shade, dear camper. It’s about creating your own little oasis on wheels, a haven of relaxation amidst the chaos of the open road. It’s about seeking refuge from the scorching sun, while keeping an eagle eye on the breathtaking views that lie just beyond the awning’s reach.
Adjusting a RV awning is an art form, a delicate balance between form and function. It’s about fusing style and practicality, creating a space that screams, “I am fabulous, and I’m not afraid to show it!” So, grab your trusty awning adjusting tools – your extendable pole, your nerve of steel – and get ready to take on the world, one adjustment at a time. With a little patience, a pinch of determination, and a dash of wit, you’ll have that awning adjusted to perfection in no time.
Remember, fellow adventurers, adjusting a RV awning is not just about the destination. It’s about the journey – the joy of conquering the elements, the satisfaction of finding that sweet spot of shade, and the triumph of making your little home on wheels truly your own. So, go forth, dear campers, and may your awnings always be perfectly adjusted and your adventures always be unforgettable.
Happy adjusting and happy camping!
Taking the Time to Properly Adjust Your RV Awning
RV awnings are a great addition to any camping trip or outdoor adventure. Not only do they provide shade and protection from the elements, but they also add a touch of comfort to your outdoor living space. However, in order to fully enjoy the benefits of your RV awning, it is important to take the time to properly adjust and set it up.
There are a few common mistakes that people often make when it comes to adjusting their RV awning, but with a little bit of knowledge and practice, you can avoid these pitfalls and ensure that your awning is set up correctly. One common mistake is not properly tightening the awning arms. This can result in a loose and unstable awning that is susceptible to damage from wind or other weather conditions.
Another mistake is not properly aligning the awning fabric. This can cause the fabric to sag or wrinkle, which not only looks unsightly but can also compromise the durability of the fabric. Additionally, it is important to make sure that the awning is properly secured to your RV.
Failing to do so can result in the awning collapsing or flying away, posing a safety risk to both you and others nearby. By taking the time to properly adjust your RV awning and avoiding these common mistakes, you can ensure that your awning provides you with the shade and protection you need for a comfortable outdoor experience.
FAQs
How do I adjust the height of my RV awning?
To adjust the height of your RV awning, locate the adjustable arms on the sides of the awning and loosen the knobs or screws. Then, raise or lower the arms to the desired height and tighten the knobs or screws to secure the awning in place.
Can I adjust the pitch of my RV awning?
Yes, you can adjust the pitch of your RV awning. Most awnings have a lever or mechanism that allows you to change the angle of the awning. Simply loosen the lever or adjust the mechanism, and then raise or lower one side of the awning to achieve the desired pitch. Finally, secure the awning in place by tightening the lever or mechanism.
What should I do if my RV awning is not retracting properly?
If your RV awning is not retracting properly, check for any obstructions or debris that may be blocking the awning’s movement. Clear away any debris and ensure that the awning fabric is properly aligned and not caught on anything. If the issue persists, inspect the awning’s retracting mechanism for any damage or wear. If necessary, consult a professional RV technician for further assistance.
How do I adjust the tension of my RV awning?
To adjust the tension of your RV awning, locate the tension knobs or screws on the arms of the awning. Loosen these knobs or screws and then either extend or retract the awning until the desired tension is achieved. Once the desired tension is reached, tighten the knobs or screws to secure the awning in place.
What should I do if my RV awning is sagging in the middle?
If your RV awning is sagging in the middle, it may be due to excessive moisture or a weakened support arm. First, check for any pooling water on the awning fabric and use a long pole or brush to gently push the fabric upward to remove any excess water. If the sagging persists, inspect the support arms for any damage or signs of weakness. If necessary, consult a professional RV technician for further evaluation and potential repairs.
How often should I adjust the tension of my RV awning?
The frequency of adjusting the tension of your RV awning may depend on various factors such as weather conditions and usage. It is recommended to inspect and adjust the tension of your awning at the beginning of each camping season and periodically throughout the season as needed. Additionally, if you notice any sagging, looseness, or difficulty in retracting or extending the awning, it may be a sign that the tension needs to be adjusted.
Can I adjust the width of my RV awning?
The width of your RV awning is typically fixed and cannot be adjusted. However, you may be able to install additional shade panels or accessories to extend the coverage area of your awning and provide extra width. Make sure to check with your RV manufacturer or consult a professional for guidance on adding additional shade panels or accessories to your specific awning model.