
RV awnings are a wonderful feature of any recreational vehicle, providing shade and protection from the elements. However, over time, the awning arms may become misaligned and need adjustment. If you’re wondering how to adjust RV awning arms, you’re in the right place.
In this blog, we’ll walk you through the steps to properly adjust your awning arms, ensuring that your RV awning functions smoothly and efficiently. So, let’s dive in and get your awning back in tip-top shape!
Table of Contents
Understanding the Basics of RV Awning Arms
Adjusting RV awning arms is an important task to ensure that your awning is properly set up and stable. The awning arms are responsible for supporting the awning and keeping it in place. To adjust the awning arms, start by loosening the tension knobs on both arms.
This will allow you to extend or retract the arms as needed. Once the arms are in the desired position, tighten the tension knobs to secure them in place. It is important to make sure that both arms are adjusted evenly to maintain balance and stability.
Adjusting the awning arms may require some trial and error to find the perfect position, but with practice, it becomes an easy and quick task. So, the next time you set up your RV awning, don’t forget to adjust the arms for a secure and stable setup.
What are RV awning arms and why do they need to be adjusted?
RV awning arms play a vital role in the functionality and stability of an RV’s awning. These arms are the mechanical components that allow the awning fabric to extend and retract, providing shade and protection from the elements. To adjust them, you must first understand how they work.
Typically, RV awnings have two arms that are connected to the RV and the awning fabric. These arms can be adjusted to control the angle and height of the awning, allowing you to customize the amount of shade you want. Adjusting the awning arms is important for several reasons.
First, it ensures that the awning is properly secured and won’t be damaged by strong winds or heavy rain. Second, it allows you to maximize your shade coverage and create a more comfortable outdoor space. Lastly, adjusting the awning arms can help prevent wear and tear on the awning fabric, extending its lifespan.
Overall, understanding how to adjust RV awning arms is essential for any RV owner looking to make the most of their outdoor living space.
Types of RV awning arms and their features
RV awning arms are an essential component of any RV awning setup, as they provide support and stability to the awning fabric. Understanding the basics of these arms is important when it comes to choosing the right type for your RV. There are several types of RV awning arms available in the market, each with its own unique features and advantages.
One type is the standard manual awning arm, which requires you to manually extend and retract the arms to set up or stow away the awning. These arms are relatively simple to use and are a popular choice among RV owners. Another type of awning arm is the powered or automatic arm.
These arms are motorized and can be extended and retracted with the push of a button. They are a convenient option for RVers who prefer a hands-free operation and want to save time and effort when setting up or stowing away their awning. In addition to manual and powered arms, there are also adjustable arms available.
These arms allow you to adjust the angle of the awning, giving you more control over the shade and protection it provides. This is especially useful in scenarios where the sun or wind direction changes throughout the day. When choosing RV awning arms, it is important to consider factors such as ease of use, durability, and compatibility with your RV.
Additionally, look for arms that have features like integrated LED lights or built-in wind sensors for added convenience and functionality. Ultimately, the type of awning arms you choose will depend on your personal preferences and specific needs.
Important safety precautions to keep in mind
RV awnings are a great addition to any camping trip or outdoor gathering, providing shade and protection from the elements. However, it’s important to understand the basics of RV awning arms in order to use them safely. One of the most important safety precautions to keep in mind is ensuring that the awning arms are properly secured to the RV.
This can be done by using the provided brackets and screws to firmly attach the arms to the side of the vehicle. It’s also important to regularly check and tighten any loose screws or brackets to prevent the awning arms from becoming unstable. Another important safety precaution is to always lower and secure the awning arms before driving the RV.
This will prevent any accidental damage to the awning or RV, as well as ensure that the awning does not come loose while on the road. It’s also a good idea to regularly inspect the awning arms for any signs of wear or damage, such as rust or cracks. If any issues are found, it’s important to address them promptly to prevent further damage and ensure the safety of everyone using the awning.
By following these important safety precautions and understanding the basics of RV awning arms, you can enjoy a worry-free outdoor experience.
Step-by-Step Guide to Adjusting RV Awning Arms
Adjusting the arms of your RV awning may seem like a daunting task, but with a step-by-step guide, it can be a breeze. First, make sure to extend your awning fully to get a clear view of the arms. Then, locate the tension knobs on both arms and loosen them to allow for adjustment.
Next, determine how you want to adjust the arms. If you want to raise the height of the awning, simply lift the outer arm while holding the inner arm steady. If you want to lower the height, do the opposite by lowering the outer arm.
Once you have adjusted the height to your liking, tighten the tension knobs to secure the arms in place. When adjusting the arms, it’s important to ensure that both arms are at an equal height to keep the awning balanced. Lastly, test the functionality of the awning by retracting and extending it a few times.
If it moves smoothly and locks into place, then congratulations, you have successfully adjusted your RV awning arms!
1. Park your RV on a level surface
adjusting RV awning arms
2. Locate the adjustment knobs or levers
When it comes to adjusting your RV awning arms, one of the first steps is locating the adjustment knobs or levers. These are the mechanisms that allow you to extend or retract the awning and adjust the angle. The adjustment knobs or levers are usually found near the top of the arms, close to where they connect to the RV.
They can vary in design depending on the type of awning you have, but they are typically easy to identify. Once you have located the adjustment knobs or levers, you can start making the necessary adjustments to ensure your awning is properly positioned and providing the desired amount of shade. So, before you head out on your next camping trip, take a few minutes to familiarize yourself with the location and operation of the adjustment knobs or levers on your RV awning arms.
It will make setting up and enjoying your awning much easier and more enjoyable.
3. Loosen the knobs or levers
RV awnings are a great addition to any camping trip, providing much-needed shade and protection from the elements. However, over time, the awning arms may begin to sag or become misaligned, which can affect their functionality. Thankfully, adjusting RV awning arms is a relatively simple process that can be done with just a few tools and a little bit of patience.
One of the first steps in the adjustment process is to loosen the knobs or levers on the awning arms. This will allow you to move the arms more easily and make the necessary adjustments. By loosening the knobs or levers, you can ensure that the arms are properly aligned and secure, enhancing the stability and functionality of your RV awning.
So, the next time you notice your RV awning arms are not sitting quite right, don’t fret. With a few simple adjustments, you can have your awning looking and functioning like new again.
4. Extend or retract the awning arms
RV awnings are a great feature to have on your recreational vehicle, providing shade and protection from the sun. However, sometimes you may need to adjust the awning arms to ensure the best coverage or to fit into a tight space. Whether you need to extend or retract the awning arms, it’s a fairly simple process that can be done with just a few steps.
Firstly, locate the release lever on the awning arm. This lever allows you to extend or retract the arm as needed. To extend the arm, simply pull the lever and slide the arm out to the desired length.
If you need to retract the arm, push the lever in and slide the arm back towards the RV. It’s important to note that you should always be cautious when adjusting the awning arms, as they can be quite heavy. Take your time and make sure you have a firm grip on the arm before attempting to move it.
Additionally, it’s a good idea to have someone assist you in case you need an extra pair of hands. By following these steps, you can easily adjust the awning arms on your RV to ensure the perfect amount of shade and protection.
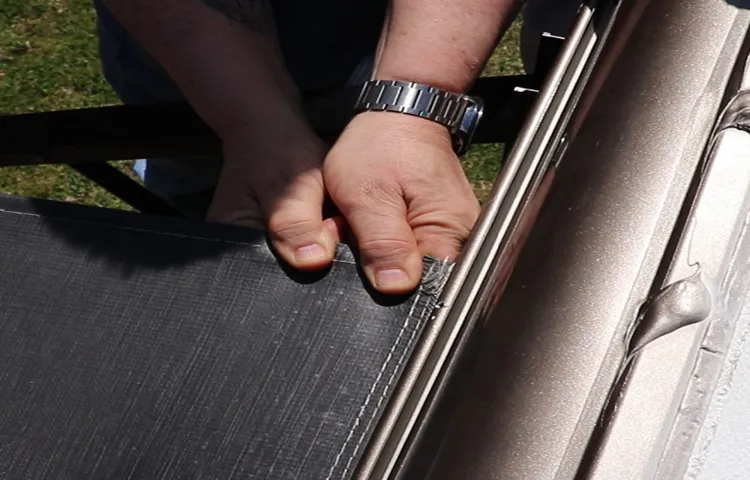
5. Align the awning fabric
RV awnings are a great feature to have on your vehicle, providing shade and protection from the elements. However, over time, the awning arms may become misaligned, causing the fabric to sag or not retract properly. Fortunately, adjusting the awning arms is a fairly simple process that can be done with just a few tools.
The first step in adjusting the awning arms is to extend the awning fully. This will allow you to see if the arms are properly aligned or if they need to be adjusted. Once the awning is fully extended, take a look at the fabric.
If it is sagging or not taut, this is a sign that the arms need to be adjusted. To align the arms, you will need to locate the knobs or screws that hold the arms in place. These are usually located near the top of the arms.
Loosen these knobs or screws so that you can move the arms freely. Once they are loosened, you can move the arms up or down to align them properly. To align the awning fabric, you will need to adjust the tension on the arms.
Near the top of each arm, there should be a tension knob or screw. Loop the awning fabric through these knobs or screws and tighten them until the fabric is taut. Be careful not to over-tighten, as this can cause damage to the fabric.
Once the arms and fabric are aligned, you can test the awning by retracting and extending it a few times. This will help to ensure that everything is properly adjusted and working correctly. If you notice any issues, such as the fabric not retracting smoothly or the arms not locking into place, you may need to make further adjustments.
6. Tighten the knobs or levers
adjusting RV awning arms
Tips and Tricks for Adjusting RV Awning Arms
Adjusting the arms of your RV awning can make a big difference in how effectively it provides shade and protection from the sun. If your awning arms are not properly adjusted, you may find that the awning is sagging or not extending fully, leaving you with less usable space outside your RV. To adjust the awning arms, start by locating the tension knobs on each arm.
These knobs can usually be found near the top of the arm. Loosen the knobs by turning them counterclockwise, and then push the awning arm out to the desired position. Once the arm is in the correct position, tighten the tension knob by turning it clockwise.
Repeat this process for the other awning arm. It’s a good idea to test the awning by extending it fully and making sure it is secure before using it. With a little bit of adjustment, you can make sure your RV awning provides the shade and protection you need for a comfortable outdoor experience.
Avoid adjusting the awning arms in strong winds
One important tip for adjusting RV awning arms is to avoid doing so in strong winds. While it may be tempting to try and adjust the awning while it’s flapping in the wind, this can be dangerous and potentially cause damage to the awning and the RV itself. Strong winds can put a lot of stress on the awning arms, and attempting to adjust them in these conditions can lead to them becoming bent or even breaking.
It’s best to wait for calmer weather before attempting to make any adjustments. Your RV and your awning will thank you for it!
Check for any damage or wear on the awning arms
RV awning arms are an essential component of your RV awning system. They provide support and stability to the awning fabric, ensuring that it stays in place and provides the shade and protection you need. However, over time, the awning arms can become damaged or worn out, which can affect their functionality.
That’s why it’s important to regularly check for any signs of damage or wear on the awning arms. One tip for adjusting RV awning arms is to thoroughly inspect them for any visible signs of damage. Look for cracks, dents, or bends in the arms, as well as any loose or missing screws or bolts.
These can indicate that the awning arms are not in optimal condition and may need to be repaired or replaced. Additionally, check the joints and hinges of the awning arms to ensure that they are secure and functioning correctly. Another tip is to check the tension of the awning arms.
This can be done by extending the awning fully and applying gentle pressure to the arms. They should feel sturdy and secure, without any wobbling or movement. If the arms feel loose or unstable, you may need to adjust the tension by tightening or loosening the nuts or bolts that hold the arms in place.
Be careful not to over-tighten them, as this can cause damage or bending. It’s also important to check the position of the awning arms. They should be level and parallel to the ground, ensuring that the awning fabric is properly supported and evenly stretched.
If you notice any misalignment or unevenness, you may need to adjust the position of the arms by loosening the screws that hold them in place and repositioning them as needed. Once they are aligned correctly, tighten the screws to secure the arms in place. In summary, regularly inspecting and adjusting your RV awning arms is essential for maintaining their functionality and ensuring that your awning provides the shade and protection you need.
Consider using awning arm braces for added stability
awning arm braces, adjusting RV awning arms Awning arm braces are a great addition to your RV awning setup, providing added stability and peace of mind. When it comes to adjusting RV awning arms, there are a few tips and tricks to keep in mind. Firstly, make sure to check the tension on the awning fabric before attempting any adjustments.
This can be done by gently pulling down on the fabric and feeling for resistance. Adjusting the tension screws on the arms can help to ensure a snug fit and prevent the fabric from sagging or flapping in the wind. Additionally, consider using awning arm braces for added stability.
These braces attach to the arms and provide extra support, especially in windy conditions. They can help to prevent the arms from bending or the fabric from becoming damaged. Lastly, don’t forget to regularly inspect and maintain your awning arms.
Check for any signs of wear or damage, and make sure to lubricate any moving parts to ensure smooth operation. By following these tips and tricks, you can ensure that your RV awning arms are properly adjusted and provide a sturdy and reliable shelter for all your outdoor adventures.
Conclusion
In conclusion, adjusting RV awning arms is a bit like taming a mechanical beast. It requires patience, a keen eye for detail, and a sense of adventure. Much like a skilled tightrope walker, you must delicately balance the tension in the arms, ensuring they are perfectly aligned for maximum shade and stability.
But fear not! With a little practice and a few choice curse words (best muttered under your breath so as not to offend any nearby campers), you’ll soon be dancing with your awning like Fred Astaire in a stylishly striped camp shirt. Remember, this process may seem daunting at first, but it’s all part of the RVing experience. Embrace the challenge, embrace the grumbles and groans, and embrace that moment of triumph when your awning finally stands tall and proud, shielding you from the blazing sun or unexpected summer rain.
So pack up your patience, bring along a good set of tools, and tackle those awning arms like the DIY champion you were born to be. And if you need a little extra motivation, just imagine the envy that will wash over your fellow campers as they admire your perfectly adjusted awning, perfectly positioned for prime relaxation and outdoor enjoyment. Go forth, intrepid RVers, and conquer those awning arms with wit, cleverness, and a dash of stubborn determination.
Your shade-seeking adventures await!”
Regularly adjusting your RV awning arms is essential for proper functioning and longevity. By following these steps and taking necessary precautions, you can ensure a smooth and hassle-free camping experience.
RV awnings are a great addition to any camping adventure, providing shade and protection from the elements. However, it’s important to regularly adjust the awning arms to ensure proper functioning and longevity. One of the first things to consider is the tension of the awning.
Over time, the fabric can stretch and loosen, causing the awning to sag or flap in the wind. By tightening the arms, you can restore the tension and keep the fabric taut. Another important adjustment to make is the angle of the arms.
This will depend on the position of the sun and the direction of the wind. By adjusting the angle, you can maximize shade and reduce the risk of the awning getting damaged in strong gusts. Additionally, be sure to inspect the awning arms for any signs of wear or damage.
This includes checking the brackets, hinges, and springs for any signs of rust or corrosion. If necessary, lubricate these parts to ensure smooth operation. By regularly adjusting and maintaining your RV awning arms, you can ensure a smooth and hassle-free camping experience.
So, the next time you’re preparing for a camping trip, don’t forget to give your awning arms some much-needed attention.
FAQs
How do I adjust the tension on my RV awning arms?
To adjust the tension on your RV awning arms, locate the tension knobs or levers on the arms. Loosen them slightly to release the tension, then adjust the arms up or down to the desired height. Once in place, tighten the tension knobs or levers to secure the arms in position.
Can I adjust the angle of my RV awning arms?
Yes, you can adjust the angle of your RV awning arms. Most awning arms have multiple holes along their length, allowing you to change the angle. Simply remove the locking pins, adjust the arms to the desired angle, and insert the pins back into the corresponding holes to secure them in position.
How often should I adjust the tension on my RV awning arms?
It is recommended to check and adjust the tension on your RV awning arms at least once a season. This helps ensure that the awning is properly supported and extends and retracts smoothly. You may also need to make adjustments if you notice the awning sagging or if it becomes difficult to operate.
What do I do if my RV awning arms won’t extend or retract properly?
If your RV awning arms are not extending or retracting properly, the first thing to check is the tension. Make sure it is properly adjusted and not too loose or tight. If the tension is correct and the arms still won’t move, there may be an issue with the awning mechanism or the arms themselves. It is best to consult the owner’s manual or contact a professional for assistance.
My RV awning arms are stuck, how can I fix this?
If your RV awning arms are stuck and won’t move, try lubricating the moving parts with a silicone-based lubricant. This can help loosen any dirt or debris that may be causing the arms to stick. If lubrication doesn’t solve the issue, there may be a mechanical problem and it is advisable to seek professional help.
How can I prevent my RV awning arms from rusting?
To prevent your RV awning arms from rusting, it is important to keep them clean and dry. Regularly wash them with mild soap and water, and make sure to thoroughly dry them afterwards. You can also apply a protective coating or wax to the arms to provide an extra layer of protection against rust.
Can I adjust the height of only one side of my RV awning?
Yes, you can adjust the height of only one side of your RV awning. Some models have independent arm height adjustments, allowing you to raise or lower one side to accommodate uneven terrain or provide additional shade. Simply follow the same steps as adjusting the tension, but only make changes to the desired side.