
Are you tired of a worn-out or damaged RV awning arm? Don’t worry, replacing it is easier than you think! Whether your awning arm has been damaged by a storm or simply worn out over time, replacing it can restore your RV’s shade and protection. In this blog post, we will guide you through the process of replacing your RV awning arm step by step. From selecting the right replacement arm to installing it properly, we’ve got you covered.
So, let’s dive in and get your RV awning arm back in top shape!
Table of Contents
Introduction
If you’re an RV owner and find yourself in a situation where you need to replace your awning arm, you may be wondering how to go about it. Fortunately, it’s a task that can be done with a bit of patience and the right tools. The first step is to determine what type of awning arm you have, as there are different styles that require different installation methods.
Once you’ve identified the correct replacement arm, gather your tools and remove the old arm by carefully detaching it from the RV and the awning tube. Before installing the new arm, make sure to inspect the area for any damage or wear that may have caused the old arm to fail. Once the area is prepped, carefully attach the new arm, following the manufacturer’s instructions.
It’s important to take your time and double-check your work to ensure that the new arm is securely in place. With a little bit of effort, you’ll have your RV awning looking good as new in no time.
What is an RV awning arm?
RV awning arm is an essential component of an RV awning system. It is responsible for providing support and stability to the awning fabric, allowing it to extend and retract smoothly. The awning arm is usually made of metal and is designed to be durable and lightweight.
It consists of two arms, one on each side of the awning, connected to the RV’s exterior wall. These arms can be adjusted to different angles to control the amount of shade and protection provided by the awning. Additionally, the arms can be locked in place to secure the awning during windy conditions.
Overall, an RV awning arm is an important part of an RV awning system, adding functionality and convenience to any RV camping experience.
Why would you need to replace the RV awning arm?
“Why would you need to replace the RV awning arm?” Introduction: Replacing the RV awning arm may not be something that RV owners think about regularly, but there are several reasons why it may become necessary. RV awning arms are an essential component of the awning system that provides shade and protection from the elements. Over time, these arms can become damaged or worn out due to exposure to sun, wind, rain, and other environmental factors.
In this blog post, we will explore some of the common reasons why you may need to replace your RV awning arm, and why it’s important to address these issues promptly. Whether you’re a seasoned RV owner or new to the world of RVing, understanding when and why to replace your awning arm can help ensure that your outdoor experience remains comfortable and enjoyable. So, let’s dive in and explore the various scenarios that may warrant a replacement of the RV awning arm.
Preparing for the Replacement
When it comes to replacing your RV awning arm, preparation is key. Before you begin, make sure you have all the necessary tools and replacement parts on hand. This might include a ladder, a screwdriver, and a new awning arm.
You’ll also want to ensure that you have a clear workspace and enough room to maneuver. Once you’ve gathered your materials, it’s time to remove the old awning arm. Start by retracting the awning and loosening the screws that hold the arm in place.
Carefully detach the arm from the RV, being mindful not to damage any surrounding components. Once the old arm is removed, it’s time to install the new one. Begin by attaching the arm to the RV and tightening the screws.
Then, extend the awning to its full length and secure the arm in place. Lastly, test the awning to ensure that it operates smoothly and securely. With a little bit of preparation and the right tools, replacing your RV awning arm can be a manageable task.
So go ahead and get ready to enjoy the fresh air and shade that your new awning will provide!
Gather the necessary tools and materials
To prepare for a window glass replacement, gathering the necessary tools and materials is essential. You will need a few basic tools, such as a putty knife, a glazier’s knife, glass suction cups, a tape measure, and a caulk gun. These tools will come in handy during the removal of the old glass and the installation of the new one.
Additionally, you will need safety equipment, like safety glasses and work gloves, to protect yourself during the process. As for the materials, you will need the appropriate glass pane, which should be measured accurately to ensure a proper fit. You will also need glazing compound or silicone caulk to secure the glass in place.
Taking the time to gather these tools and materials beforehand will make the window glass replacement process much smoother and allow for a successful and efficient installation.
Ensure your safety
When it comes to preparing for a replacement, one of the most important considerations is ensuring your safety. Whether you’re having a new appliance installed or getting a part replaced on your vehicle, taking the necessary precautions can prevent accidents and injuries. Before the replacement begins, make sure to clear the area of any obstacles or hazards that could potentially cause harm.
It’s also a good idea to wear appropriate safety gear, such as gloves or goggles, to protect yourself from any potential dangers. Additionally, if you’re hiring a professional to do the replacement, be sure to do your research and choose someone who is qualified and experienced in the task at hand. By taking these steps, you can ensure that the replacement process goes smoothly and safely.
So, remember to prioritize your safety and make the necessary preparations before any replacements.
Steps to Replace the RV Awning Arm
Are you looking to replace the awning arm on your RV? Don’t worry, it’s not as difficult as it may seem. First, you’ll want to start by purchasing a new awning arm that matches the specifications of your RV’s awning. Once you have the new arm, you’ll need to remove the old one.
Start by extending the awning fully and supporting it with some type of prop to keep it in place. Next, locate the tension knob on the awning arm and loosen it. This will release the tension on the arm and allow you to detach it from the RV.
Once the old arm is removed, you can then install the new arm by reversing the steps. Be sure to properly secure the arm to the RV and tighten the tension knob to ensure the awning operates correctly. With a little bit of patience and the right tools, you can easily replace the awning arm on your RV and have it looking good as new in no time!
Step 1: Detach the awning fabric
RV awnings are a great addition to your camping experience, providing shade and protection from the elements. However, over time, the awning arm may become damaged or worn out and in need of replacement. While the process may seem daunting, it can actually be quite simple if you follow the right steps.
Step one is to detach the awning fabric from the arm. Start by extending the awning completely and securing it in place. Next, locate the screws or bolts that hold the fabric in place and remove them using a screwdriver or wrench.
Once the screws are removed, carefully detach the fabric from the arm, being mindful of any tension or spring mechanisms. It’s important to take your time during this process to ensure that you don’t damage the fabric or other components of the awning. With the fabric detached, you’re ready to move on to the next step in the process – removing the damaged awning arm.
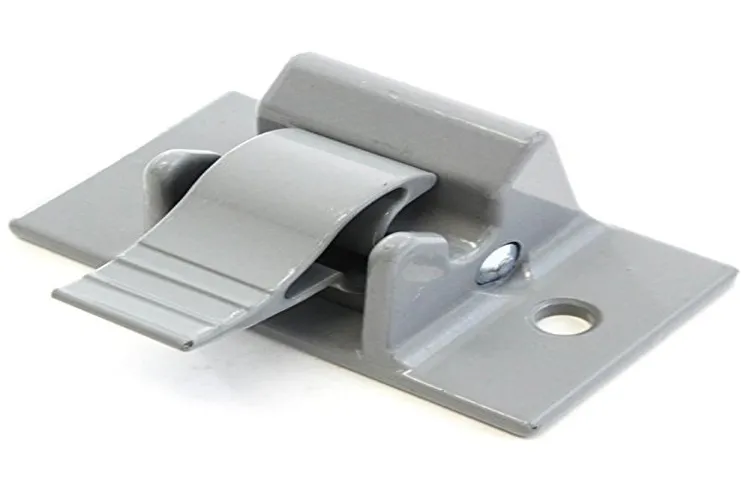
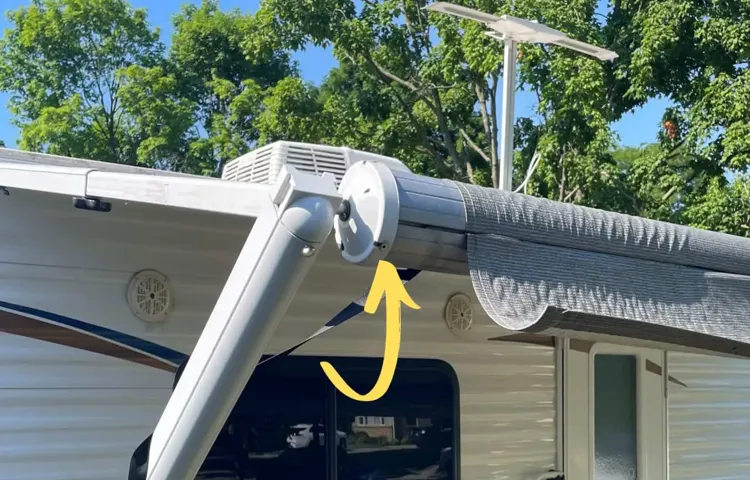
Step 2: Remove the old awning arm
awning arm replacement
Step 3: Install the new awning arm
The next step in replacing your RV awning arm is to install the new arm. This is an important part of the process, as it ensures that your awning will be secure and functional. To begin, make sure you have all the necessary tools and materials on hand.
This may include a drill, screws, and any brackets or hinges that came with your new arm. Once you have everything ready, start by removing any remaining screws or bolts from the old arm. Then, align the new arm with the existing holes on the side of your RV.
This may require some adjusting and measuring to ensure a perfect fit. Once you have the arm properly aligned, begin inserting the screws or bolts to secure it in place. Make sure to tighten them securely, but be careful not to overtighten or strip the holes.
Once the new arm is securely in place, give it a test run by extending and retracting the awning a few times to make sure it operates smoothly. If everything is working properly, congratulations! You have successfully replaced your RV awning arm. Now sit back, relax, and enjoy the shade and protection of your new awning.
Step 4: Attach the awning fabric
In this step-by-step guide, we will walk you through the process of replacing your RV awning arm. The next step is to attach the awning fabric to the new arm. This is an important step as it will ensure that your awning functions properly and looks great.
To attach the fabric, start by aligning the awning rail with the slot on the new arm. Slide the fabric into the slot and make sure it is securely fastened. Next, attach the fabric to the roller tube by sliding it into the groove and securing it with the fabric retainer.
Once the fabric is attached to both the arm and the roller tube, you can extend the awning to its full length to ensure that everything is aligned and functioning properly. With the fabric securely attached, your awning is now ready to provide shade and protection on your next camping trip.
Tips and Considerations
If you’re in need of replacing the awning arm on your RV, there are a few tips and considerations to keep in mind. First, it’s important to determine the type of awning arm you have, as there are several different styles and designs. Once you’ve identified the specific arm you need to replace, make sure to purchase a new one that matches in size and model.
Before you begin the replacement process, take the time to thoroughly inspect the rest of the awning system to ensure there are no other areas that need attention. When you’re ready to replace the arm, have a friend or family member assist you to make the task easier and safer. Follow the manufacturer’s instructions and use the appropriate tools, taking care to remove the old arm carefully.
Once the new arm is installed, give it a test run to make sure it operates smoothly and securely. Remember, if you’re not comfortable with this type of DIY project, it’s always best to seek professional assistance to ensure the job is done correctly and safely. With these tips in mind, you can successfully replace the awning arm on your RV and continue to enjoy your outdoor adventures.
Inspect the awning fabric for damage
awning fabric, damage, inspect
Use caution when working with springs and tension
When it comes to working with springs and tension, it’s important to exercise caution and take certain factors into consideration. One key tip is to always wear protective gear, such as gloves and eye protection, when handling springs. This will help protect you from any potential accidents or injuries that could occur if the spring were to snap or break under tension.
Another important consideration is to be mindful of the amount of tension you apply to a spring. Applying too much tension can cause the spring to become overloaded and potentially break, while insufficient tension may cause the spring to not function properly. It’s important to find the right balance and follow the guidelines provided by the manufacturer for the specific spring you are working with.
Additionally, it’s important to handle springs with care and avoid bending or twisting them. Doing so can weaken the spring and affect its overall performance. By taking these tips and considerations into account, you can work with springs and tension safely and effectively.
Consider seeking professional help if you’re unsure
mental health, professional help, unsure If you find yourself unsure about your mental health or struggling with your emotions, it may be time to consider seeking professional help. It can be difficult to make the decision to reach out for assistance, but it’s important to remember that there is no shame in seeking support when it comes to your mental well-being. A mental health professional can provide you with the guidance, tools, and resources to help you navigate your emotions and develop coping mechanisms.
They are trained to assess and diagnose mental health conditions and can offer personalized treatment plans tailored to your specific needs. Whether you’re dealing with anxiety, depression, or any other mental health concern, seeking professional help can make a significant impact on your overall well-being. Remember, you don’t have to face your struggles alone – there is support available to you.
Conclusion
So, now you know how to replace an RV awning arm like a pro. Whether you accidentally ran into a low-hanging branch or just want to upgrade to a stronger arm, this step-by-step guide has got you covered. Remember, safety first! Always ensure you have the necessary tools and protective gear before attempting any repairs.
And don’t forget to enlist the help of a friend or family member to make the process both quicker and more enjoyable. Just like a well-oiled machine, your RV awning will be back in action in no time. With your newly installed arm, you’ll have the freedom to relax and enjoy the shade, no matter where your adventures take you.
So, say goodbye to those flimsy arms and hello to a sturdier, more reliable awning. And who knows, maybe your newfound awning repair expertise will earn you the title of “The Awning Whisperer” amongst your fellow RV enthusiasts. Now, go forth and conquer that awning arm replacement like the seasoned RVer you were always meant to be.
And remember, a smooth and successful repair is just a few steps away. Happy awning adventures, my friends!”
Enjoy your newly replaced RV awning arm
Once you’ve successfully replaced your RV awning arm, it’s time to sit back, relax, and enjoy the shade it provides. However, there are a few tips and considerations to keep in mind to ensure you get the most out of your new awning arm. First, it’s important to properly maintain your awning to prevent any damage or wear and tear.
Regularly clean it with mild soap and water, and make sure it is completely dry before retracting it. This will help extend the lifespan of your awning arm. Additionally, be mindful of the weather conditions when using your awning.
Strong winds can put strain on the arm and potentially damage it, so it’s best to retract it during gusty conditions. Lastly, always double-check that the arm is securely locked in place before leaving it unattended. This will help prevent any accidents or damage.
By following these tips and considerations, you can enjoy your newly replaced RV awning arm for years to come.
FAQs
How do I replace a damaged RV awning arm?
To replace a damaged RV awning arm, first, make sure to have a new arm ready for installation. Then, unroll the awning fabric and detach it from the damaged arm. Next, remove any screws or bolts attaching the damaged arm to the RV. Carefully take out the old arm and attach the new one in its place. Secure it tightly with screws or bolts, making sure it is properly aligned. Finally, reattach the awning fabric to the new arm and roll it up.
Can I replace an RV awning arm myself, or do I need professional help?
Replacing an RV awning arm is a task that can be done by most RV owners themselves. However, it is important to have some basic knowledge of tools and mechanics. If you don’t feel comfortable or confident in doing it yourself, it is recommended to seek professional help to ensure the replacement is done correctly.
Where can I buy replacement RV awning arms?
Replacement RV awning arms can be purchased from various sources. Some options include RV dealerships, online RV parts stores, or specialty RV awning suppliers. It is advisable to have the make and model of your RV awning on hand when looking for a replacement to ensure compatibility.
How often do RV awning arms need to be replaced?
The lifespan of RV awning arms can vary depending on usage, quality, and maintenance. Generally, RV awning arms can last several years before needing replacement. However, if the awning arms are exposed to harsh weather conditions or experience excessive wear and tear, they may need to be replaced sooner.
Can I upgrade my RV awning arms to a stronger and more durable material?
Yes, it is possible to upgrade RV awning arms to a stronger and more durable material. Many RV awning manufacturers offer aftermarket options for upgrading to aluminum or steel awning arms, which are known for their increased strength and durability. It is recommended to consult with a professional or the manufacturer for the specific upgrade options available for your RV awning.
Are there any maintenance tips to prolong the lifespan of RV awning arms?
Yes, there are maintenance tips that can help prolong the lifespan of RV awning arms. Regularly inspecting the arms for any signs of damage, such as cracks or bends, is important. It is also recommended to keep the arms clean and free from debris that can cause corrosion or wear. Lubricating the moving parts of the awning arms with an appropriate lubricant can also help prevent friction and extend their lifespan.
Can I replace just one RV awning arm, or do I need to replace both?
In most cases, it is recommended to replace both RV awning arms, even if only one is damaged. This is because the new arm may have slightly different dimensions or characteristics compared to the older arm, which can lead to uneven tension on the awning fabric. Replacing both arms ensures proper alignment and equal tension, which is essential for the longevity and functionality of the RV awning.