
Are you looking to add some extra shade and protection to your RV? Installing an awning is a great way to do just that. An awning not only provides shade from the sun but also keeps your outdoor space protected from the elements. It’s like having an extra room attached to your RV, where you can relax and enjoy the outdoors without worrying about rain or sunburn.
But how exactly do you install an awning on your RV? In this blog post, we’ll walk you through the process step by step, so you can start enjoying the benefits of an awning in no time. Whether you’re a seasoned RV owner or a newbie, this guide will make the installation process a breeze. From selecting the right awning for your RV to securing it in place, we’ve got you covered.
So, grab your tools and let’s get started!
Table of Contents
Introduction
Are you ready to hit the road in your RV and enjoy the great outdoors? One essential upgrade for your RV is installing an awning. Not only does an awning provide shade and protection from the elements, but it also adds extra outdoor living space to your RV. So, how do you install an awning on an RV? Don’t worry, it’s easier than you think.
In this blog post, we’ll guide you through the process step by step, so you can enjoy the benefits of an awning on your next camping trip. Whether you’re a seasoned RVer or new to the RV lifestyle, installing an awning is a simple and rewarding project that will enhance your overall camping experience.
What is an Awning and Why Install it on an RV
awning, RV, installation
Benefits of Having an Awning on an RV
“Benefits of Having an Awning on an RV” Introduction: So, you’ve just purchased an RV and you’re ready to hit the road and embark on new adventures. But before you take off, have you considered the benefits of having an awning on your RV? An awning is like a magical extension of your living space, providing shade and protection from the elements. It’s like having your own little oasis on wheels.
In this blog post, we’ll explore the numerous advantages of having an awning on your RV, from keeping cool in the summer to protecting yourself from unexpected rain showers. So, let’s dive in and discover why having an awning is a must-have for any RV owner!
Types of Awnings
Installing an awning on an RV is a great way to add comfort and functionality to your outdoor space. There are several different types of awnings to choose from, depending on your needs and preferences. One popular option is the manual retractable awning, which can be easily installed and operated by hand.
These awnings typically come with a crank handle that allows you to extend or retract the awning as needed. Another option is the electric awning, which is even more convenient to use. These awnings can be extended or retracted with the push of a button, making them ideal for those who prefer a hands-free operation.
There are also slide-out awnings, which are designed specifically for slide-out sections on RVs. These awnings can be installed on the sides of the slide-out to provide shade and protection from the elements. Whether you choose a manual, electric, or slide-out awning, installing one on your RV can greatly enhance your outdoor living experience.
Roll-Out Awnings
Roll-out awnings are a fantastic addition to any outdoor space, providing much-needed shade and protection from the elements. When it comes to choosing the perfect roll-out awning, there are several different types to consider. One popular option is the retractable awning, which allows you to extend or retract the fabric as needed.
This is great for flexibility, as you can adjust the awning depending on the weather or time of day. Another type of roll-out awning is the motorized awning, which can be controlled with a remote or switch. This makes it easy to open and close the awning with just the push of a button.
For those who prefer a more traditional look, there are also manual roll-out awnings available. These awnings can be operated by hand, allowing you to easily adjust the shade to your liking. No matter which type of roll-out awning you choose, you can enjoy the benefits of a shaded outdoor space all year round.
Whether you’re entertaining guests or simply relaxing with a book, a roll-out awning is a must-have for any outdoor living area.
Retractable Awnings
retractable awnings, types of awnings. Are you looking to add some shade and style to your outdoor space? Look no further than retractable awnings! These versatile and convenient awnings are a great addition to any patio or deck, providing protection from the sun and rain while also adding a touch of elegance to your outdoor living area. But with so many types of awnings to choose from, how do you know which one is right for you? One of the most popular types of retractable awnings is the manual crank awning.
As the name suggests, these awnings are operated by turning a crank or handle to extend or retract the awning. This type of awning is great for those who prefer a more hands-on approach and don’t mind a little extra effort to set up and take down their awning. If you’re looking for something a little more high-tech, motorized awnings are the way to go.
These awnings are operated with the push of a button, making them incredibly easy to use. Simply press a button, and the awning will extend or retract automatically. Motorized awnings are perfect for those who want the convenience of a retractable awning without the hassle of manual operation.
For those with limited space or who want a more permanent solution, there are also wall-mounted awnings. These awnings are attached directly to the wall of your home or building, providing a sturdy and secure shade solution. Wall-mounted awnings can be manually operated or motorized, depending on your preference.
No matter which type of retractable awning you choose, you can’t go wrong with this stylish and functional addition to your outdoor space. So why wait? Get your retractable awning today and start enjoying the benefits of shade and style all season long.
Slide-Out Awnings
Slide-out awnings are a fantastic addition to any RV or camper. They provide shade and protection from the sun and rain, allowing you to enjoy the outdoors in comfort. There are several types of slide-out awnings to choose from, each with its own unique features and benefits.
One popular type is the electric slide-out awning. This type of awning can be easily extended or retracted with the touch of a button, making it incredibly convenient. Another option is the manual slide-out awning, which requires a bit more effort to operate but is generally less expensive.
Finally, there are also slide-out awnings that are specifically designed to protect against the elements, such as wind and snow. These awnings are made with heavy-duty materials and are built to withstand harsh weather conditions. No matter which type of slide-out awning you choose, you can rest assured knowing that you’ll have a comfortable and enjoyable outdoor experience.
Choosing the Right Awning for Your RV
Installing an awning on your RV can greatly enhance your outdoor experience while on the road. But with so many options available, it can be overwhelming to choose the right one. When selecting an awning for your RV, it’s important to consider factors such as size, material, and ease of installation.
You’ll want to measure the area of your RV where the awning will be installed to ensure a proper fit. Additionally, consider the material of the awning. Most RV awnings are made from durable vinyl fabric, but there are also options available in acrylic and polyester.
Lastly, consider how easy it is to install the awning. Some awnings require professional installation, while others can be easily installed with a few tools and some DIY know-how. By taking these factors into account, you can choose the right awning for your RV and enjoy the added comfort and shade it provides on your next adventure.
Considerations Based on RV Type and Size
Awning for an RV When it comes to choosing the right awning for your RV, there are a few considerations to keep in mind. One of the first things to think about is the type and size of your RV. Different awnings are designed to fit different types of RVs, so it’s important to choose one that is compatible with your vehicle.
Whether you have a motorhome, travel trailer, pop-up camper, or fifth-wheel, there is an awning out there that’s just right for you. Another factor to consider is the size of the awning. The size of your RV will dictate the size of the awning you need.
A larger RV will require a longer awning to provide adequate coverage, while a smaller RV may only need a shorter awning. It’s important to measure the length of your RV’s roof to determine the appropriate size for your awning. Additionally, you’ll want to think about the materials and features of the awning.
Do you want a manual or motorized awning? Motorized awnings are more convenient, as they can be easily extended and retracted with the push of a button. On the other hand, manual awnings require a bit more effort to set up and take down, but they can save you money. Consider the materials as well.
Fabric awnings are a popular choice for RV owners, as they are lightweight, durable, and come in a variety of colors and patterns. Vinyl awnings are another option, which are known for their durability and resistance to UV rays. Some awnings even come with additional features like built-in LED lights, privacy screens, or wind sensors.
In conclusion, choosing the right awning for your RV involves considering the type and size of your vehicle, as well as the materials and features of the awning. By taking these factors into account, you can find an awning that perfectly suits your needs and enhances your RVing experience. So go ahead, make a shade-loving choice and enjoy the great outdoors with a high-quality awning for your RV.
Integration with Existing RV Features
When it comes to choosing the right awning for your RV, there are a few factors to consider. One of the most important aspects is how well the awning integrates with your existing RV features. You want an awning that seamlessly blends in with the aesthetics of your vehicle, enhancing its overall appearance.
Additionally, you’ll want to ensure that the awning is easy to install and use, without requiring any major modifications to your RV. This way, you can quickly set up your awning and start enjoying the shade and protection it provides. Another key consideration is the awning’s compatibility with other RV features, such as slide-outs or exterior lighting.
You’ll want to make sure the awning doesn’t impede the functionality of these features or create any unnecessary obstacles. By carefully considering how an awning integrates with your existing RV features, you can make a well-informed choice that meets all your needs and enhances your overall RV experience.
Budget and Cost Factors
budget, cost factors, choosing the right awning, RV Are you considering adding an awning to your RV but not sure where to start? Budget and cost factors are an important consideration when it comes to choosing the right awning for your RV. There is a wide range of options available, each with its own price tag. Before making a decision, it’s essential to determine your budget and what features are most important to you.
Do you want a manual awning that requires manual labor to set up and take down, or would you prefer the convenience of a motorized awning that can be operated with the push of a button? Additionally, the cost of installation should be factored into your budget. Will you be installing the awning yourself, or will you need to hire a professional? Understanding your budget and cost factors will help you narrow down your options and choose the right awning for your RV.
Tools and Materials You’ll Need
When it comes to installing an awning on your RV, there are a few tools and materials you’ll need to get the job done. First and foremost, you’ll need the awning itself, which typically comes with all the necessary hardware. You’ll also need a drill with various drill bits, as well as a screwdriver set.
In addition, you may need a ladder or step stool to reach the top of your RV, depending on its height. It’s also a good idea to have some silicone sealant on hand to ensure a watertight installation. Lastly, you’ll want to have some measuring tape and a level to ensure that your awning is installed straight and level.
With these tools and materials, you’ll be well-equipped to install an awning on your RV and start enjoying the shade and protection it provides.
Awning Kit
If you’re thinking about installing an awning kit, it’s important to have the right tools and materials on hand to make the process go smoothly. First and foremost, you’ll need a measuring tape to accurately size up the area where you want to install the awning. This will ensure that you purchase the right size kit and that it fits perfectly once installed.
Additionally, you’ll need a level to make sure that the awning is straight and properly aligned. A drill with the appropriate drill bits will be necessary to secure the mounting brackets to the wall. It’s also a good idea to have a ladder or step stool on hand to reach higher areas safely.
When it comes to materials, you’ll need the awning kit itself, which should include the fabric, frame, and mounting brackets. Depending on the type of awning kit you choose, you may also need additional hardware such as screws or anchors. Overall, having the right tools and materials is essential to ensure a successful and hassle-free installation of your awning kit.
Screwdriver and Drill
screwdriver, drill A screwdriver and a drill are essential tools that every homeowner should have in their toolbox. Whether you want to tighten a loose screw or hang a shelf on the wall, these versatile tools can be your best friends. To get started, you’ll need a few key materials.
First, you’ll need a screwdriver set that includes different sizes and types of screwdrivers, such as flathead and Phillips head. This will ensure that you have the right tool for any job. Additionally, you’ll need a set of drill bits for your drill.
Drill bits come in different sizes and can be used to make holes in various materials like wood, metal, or plastic. Finally, don’t forget to have a selection of screws and wall anchors on hand. These will be necessary for attaching things securely to walls or other surfaces.
With these tools and materials, you’ll be ready to tackle any DIY project that comes your way. So, grab your screwdriver and drill, and let’s get to work!
Tape Measure
tape measure, tools and materials, measuring, DIY projects, accurate measurements
Level
level, tools and materials
Preparation
So, you’ve decided to add an awning to your RV and you’re ready to start the installation process. Installing an awning on your RV can enhance your outdoor experience by providing shade and protection from the elements. Before you get started, it’s important to gather all the necessary tools and materials.
You’ll need a ladder or step stool, a drill, screws, a tape measure, a level, and of course, the awning and its components. It’s important to read the manufacturer’s instructions carefully before you begin. They will provide specific details on how to assemble and install your awning.
Once you have everything you need, find a suitable location on the side of your RV where you want to attach the awning. It should be a level and sturdy surface. Measure and mark the desired height and position of the awning brackets.
Using a level, ensure that the brackets are perfectly straight. Then, using a drill and the appropriate screws, attach the brackets to the RV. Finally, assemble the awning according to the manufacturer’s instructions and attach it to the brackets.
Make sure everything is secure and tightly fastened. Voila! You now have a beautiful awning ready to provide shade and shelter during your outdoor adventures.
Measure and Mark the Awning Placement
“awning placement” When it comes to installing an awning, one of the first and most crucial steps is measuring and marking the awning placement. This preparation stage is vital for ensuring that your awning is positioned correctly and will provide maximum shade and protection. To begin, you’ll want to gather your measuring tape, level, and a pencil.
First, decide where you want your awning to be positioned and carefully measure the width and height of the designated area. Take note of any obstacles or challenges that may affect the installation, such as nearby windows or doors. Once you have your measurements, use a level to ensure that your markings are straight and level.
Mark each corner and midpoint of the awning placement with a pencil, ensuring that your lines are easily visible. This will serve as a guide during the installation process. Taking the time to measure and mark the awning placement accurately will ensure a successful and aesthetically pleasing installation.
Check for Obstacles or Interference
“When it comes to starting a new project, preparation is key. And one crucial step in the preparation process is checking for obstacles or interference. This might sound like common sense, but you’d be surprised how often people overlook this important step.
Picture this: you’re all set to begin your project, you’ve got your tools ready, and you’re raring to go. But then, you realize there’s a big tree right in the middle of your workspace, obstructing your progress. Now you’ve got to figure out a way to navigate around it, wasting precious time and effort.
But if you had taken a few moments to check for obstacles beforehand, you could have avoided this problem entirely. So, before you dive headfirst into your project, take a look around and make sure there’s nothing in your way. It could save you a lot of hassle in the long run.
“
Prepare the RV Exterior
“RV exterior preparation is an essential step in getting your vehicle ready for your next adventure on the road. When it comes to preparing the exterior of your RV, there are several key areas to focus on. First and foremost, give your RV a thorough wash to remove any dirt, grime, and residue that may have accumulated.
This will not only make your RV look clean and presentable but also help to prolong the life of its exterior surfaces. Once your RV is clean, it’s time to inspect for any damage or wear and tear. Check for any cracks, leaks, or areas in need of repair.
This includes inspecting the roof, windows, doors, and any seams. It’s also a good idea to inspect and clean your RV’s awnings, slide-outs, and exterior lighting. And don’t forget about the tires! Make sure they are properly inflated and have adequate tread.
Finally, give your RV a fresh coat of wax to protect the exterior and give it that extra shine. By taking the time to prepare the exterior of your RV, you’ll not only be maintaining its appearance but also ensuring its longevity and enjoyment on the open road.”
Installation Steps
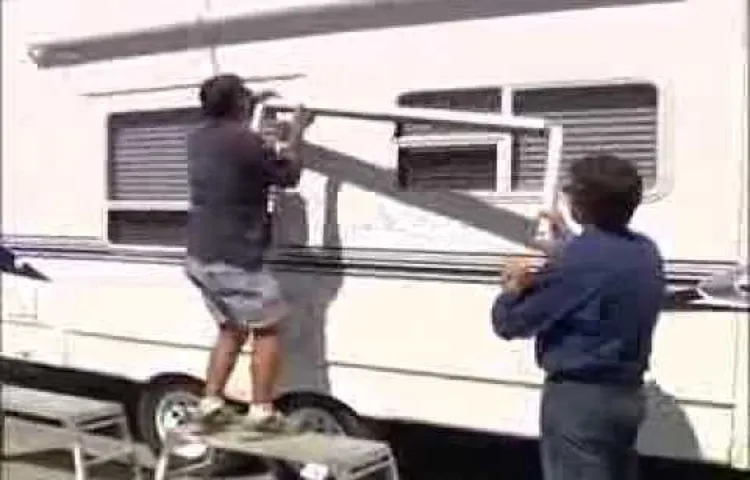
Installing an awning on your RV may seem like a daunting task, but with the right tools and a little bit of patience, it can be done! Here are the steps to follow to properly install an awning on your RV. First, measure and mark the placement of the awning on your RV. Make sure to choose a spot that is sturdy and can support the weight of the awning.
Next, gather all the necessary tools and materials, including the awning itself, brackets, screws, and a drill. Begin by attaching the brackets to the side of your RV, making sure they are securely fastened. Then, carefully attach the awning to the brackets, ensuring it is level and straight.
Finally, use the screws to secure the awning in place. Test the awning by extending and retracting it a few times to make sure it is working properly. And there you have it – you have successfully installed an awning on your RV! Now you can enjoy some shade and protection on your next camping trip.
Attach Awning Brackets to RV
awning brackets, attach, RV, installation steps
Mount Awning Arms and Roller Tube
mount awning arms and roller tube
Connect Awning Fabric to Roller Tube
awning fabric, roller tube, installation steps
Extend and Secure Awning
extend and secure awning, awning installation steps Installing an awning can be a great way to enhance your outdoor space and provide shade during the hot summer months. But before you can start enjoying the benefits of an awning, you need to go through the installation process. Here are the steps to follow to extend and secure your awning properly.
First, you need to decide on the location where you want to install your awning. Look for a spot that will provide adequate shade and cover the area you want. Once you have found the perfect place, mark it with a chalk line or tape measure to ensure the awning is aligned correctly.
Next, gather all the necessary tools and materials for the installation. This may include a ladder, drill, screws, brackets, and the awning itself. Make sure you have everything you need before you start, as it will make the installation process much smoother.
Now it’s time to mount the brackets. Position the brackets on the wall according to your measurements, making sure they are level and securely attached. Use a drill to screw the brackets in place, ensuring that they are tightly secured.
Once the brackets are in place, it’s time to extend the awning. Most awnings come with a retractable mechanism that allows you to extend or retract the fabric as needed. Carefully extend the awning using the designated mechanism, making sure it is fully extended and that the fabric is taut.
Finally, secure the extended awning in place. Most awnings have locking mechanisms or straps that can be used to secure the fabric in position. Follow the instructions provided by the manufacturer to lock the awning in place, ensuring that it is secure and won’t move or collapse under strong winds or rain.
Maintenance and Care
If you’re looking to add some shade and protection to your RV, installing an awning is a great idea. Not only does it provide a comfortable space to relax outdoors, but it also helps to keep the interior of your RV cool and protected from the sun’s harmful rays. But how do you go about installing an awning on your RV? Well, first you’ll need to decide what type of awning you want to install.
There are two main types: manual and automatic. Manual awnings require you to manually extend and retract the awning, while automatic awnings can be operated with the push of a button. Once you’ve chosen the type of awning you want, you’ll need to measure the area where you want to install it and gather all the necessary tools and materials.
It’s important to follow the manufacturer’s instructions carefully and take your time during the installation process to ensure a secure and stable awning. With the right tools and a little bit of patience, you’ll have your awning installed on your RV in no time!
Cleaning and Regular Inspection
Maintaining a clean and well-functioning commercial door is essential for the overall safety and security of your business. Regular cleaning and inspections can prevent unexpected malfunctions and ensure that the door remains in optimal condition. Start by cleaning the door and its components regularly, removing any debris or dirt that may have accumulated.
This will not only keep the door looking clean but also prevent potential damage or obstructions. Additionally, it’s important to inspect the door for any signs of wear and tear, such as loose screws or hinges, damaged weather stripping, or misaligned tracks. By addressing these issues promptly, you can avoid more significant problems down the line.
Regular inspections will also allow you to identify any potential safety hazards, such as broken glass or malfunctioning sensors, and address them accordingly. Remember, a well-maintained commercial door not only enhances the appearance of your business but also ensures the safety and security of your employees and customers. So, make it a priority to clean and inspect your commercial door regularly.
Repairing Tears or Damage
When it comes to maintaining and caring for our belongings, one of the common challenges we face is dealing with tears or damage. Whether it’s a torn shirt, a cracked phone screen, or a damaged piece of furniture, these imperfections can be frustrating. However, with a little effort and the right tools, many tears and damages can be repaired.
There are a variety of methods and products available for repairing different types of damage. For example, fabric glue or patches can be used to mend torn clothing, while phone screen repair kits can fix cracked screens. Additionally, there are fillers and adhesives specifically designed for repairing furniture.
Taking the time to repair these tears and damages not only extends the life of our belongings but also saves us money in the long run. So next time you encounter a tear or damage, don’t despair – with a little care and attention, you can easily fix it up and continue to enjoy your belongings for years to come.
Storing the Awning
Storing the awning properly is essential for its longevity and to ensure it stays in good working condition. To effectively store the awning, there are a few maintenance and care tips to keep in mind. Firstly, make sure to clean the awning thoroughly before storing it.
This includes removing any debris, dirt, or stains that may have accumulated over time. Use a mild detergent and a soft brush or sponge to gently scrub the fabric. Rinse it off with clean water and allow it to dry completely before folding or rolling it up.
It’s also important to check for any tears or damages and repair them before storing the awning. Additionally, consider using a protective cover or bag to shield the awning from dust, moisture, and UV rays while in storage. Finally, choose a suitable storage area that is dry, well-ventilated, and away from any potential hazards.
By following these maintenance and care tips, you can ensure that your awning will be ready to use when the next sunny day arrives.
Conclusion
So there you have it, the foolproof guide to installing an awning on your RV. With just a few simple steps and some handy tools, you can transform your humble vehicle into a stylish and functional mobile oasis. Whether you’re seeking shade from the scorching sun or protection from a sudden downpour, an awning is the ultimate RV accessory.
Remember, though, to always measure twice and drill once – there’s no turning back once that hole is made! So go forth, my fellow adventurous souls, and enjoy the great outdoors in comfort and style. Just don’t forget to invite me over for a siesta under your newly installed awning!
Enjoying the Benefits of Your New RV Awning
maintenance of RV awnings, caring for RV awnings, maintaining your RV awning, caring for your RV awning, RV awning maintenance tips, RV awning care, how to care for your RV awning, RV awning cleaning, cleaning your RV awning, RV awning maintenance guide, RV awning maintenance checklist, RV awning care and maintenance. Intro: So, you’ve just installed a brand new awning on your RV and can’t wait to start enjoying all the benefits it has to offer. But before you dive into the fun, it’s important to make sure you properly maintain and care for your new awning.
By following a few simple steps, you can extend the life of your RV awning and keep it looking and functioning its best for years to come. Regular Cleaning: The first step in maintaining your RV awning is regular cleaning.
Over time, dirt, dust, and other debris can accumulate on the surface of your awning, making it look dirty and worn. To clean your awning, simply use a mild soap and water solution and gently scrub the surface with a soft brush or sponge. Rinse thoroughly with water and allow it to air dry before retracting.
Inspect for Damage: Another important aspect of awning maintenance is regularly inspecting for any signs of damage. Check for tears, holes, or loose stitches, as these can compromise the integrity of your awning.
If you notice any damage, it’s important to address it promptly to prevent further issues. Small tears or holes can often be repaired using a patch kit designed specifically for awnings.
Keep it Dry: When not in use, it’s important to make sure your awning is dry. Wet awnings can lead to mold and mildew growth, which can cause unpleasant odors and damage to the fabric. If your awning gets wet, make sure to fully extend it and allow it to dry completely before retracting.
FAQs
How do I install an awning on my RV?
To install an awning on your RV, first, measure the length of the RV where you want to install the awning. Then, purchase an awning kit that fits your measurements. Next, position the awning rail on the RV where you want the top of the awning to be. Secure the rail with screws or adhesive. Finally, attach the awning fabric to the rail and tension the fabric using the instructions provided with the awning kit.
What tools do I need to install an awning on my RV?
To install an awning on your RV, you will need a few tools. These include a measuring tape, a level, a drill, screws or adhesive, a ladder (if needed), and a helper (if available). Additionally, you may need a sealant or caulking gun to seal any holes made during the installation process.
How long does it take to install an awning on an RV?
The time it takes to install an awning on an RV can vary depending on your level of experience, the complexity of the awning kit, and any additional steps required for your specific RV. On average, it may take a few hours to complete the installation, but it is recommended to set aside a full day to ensure you have enough time for the installation without rushing.
Can I install an awning on my RV by myself?
Yes, it is possible to install an awning on your RV by yourself, especially if you have some basic DIY skills and tools. However, it can be helpful to have a helper to assist with holding the awning in place and aligning the fabric during installation. If you are unsure or uncomfortable with the installation process, it is always recommended to seek professional assistance.
How much does it cost to install an awning on an RV?
The cost to install an awning on an RV can vary depending on factors such as the type of awning, the size of the RV, and any additional accessories or features desired. On average, the cost can range from $500 to $1500 for the awning and installation. It is recommended to research and compare prices from different suppliers and installers to get an accurate estimate for your specific RV.
Can I transfer an awning from one RV to another?
Yes, it is possible to transfer an awning from one RV to another, but it may require some modifications and adjustments. First, you will need to remove the awning from the current RV, ensuring to keep all necessary parts and hardware. Then, you will need to measure and assess the new RV to determine if the awning can be installed without major modifications. It is recommended to consult with a professional to ensure a safe and proper transfer of the awning.
Can I install an awning on a motorhome or camper van?
Yes, awnings can be installed on motorhomes and camper vans. The installation process may vary slightly depending on the type and size of the motorhome or camper van, but the general steps remain the same. Measure the area where you want to install the awning, purchase the appropriate awning kit, position and secure the awning rail, and attach the fabric according to the instructions provided with the awning kit.