
Have you been trying to figure out how to remove your RV awning? It can definitely seem like a daunting task, but with the right tools and steps, it can be done efficiently and easily. Whether you need to replace your awning, make repairs, or simply clean it, removing it is the first step. But where do you even begin? Don’t worry, we’ve got you covered.
In this blog, we’ll walk you through the process of removing your RV awning, step by step. Think of it like dismantling a giant puzzle – but don’t worry, the end result will be worth it. So let’s get started!
Table of Contents
Tools You Will Need
Removing an RV awning may seem like a daunting task, but with the right tools, it can be done easily. First, you will need a ladder to access the awning. Next, you should have a drill or screwdriver to loosen screws or bolts that hold the awning in place.
Along with that, you will need pliers to remove any nuts or washers. A helper can also be beneficial to hold the awning in place while you work on detaching it. Lastly, make sure to have protective gloves and eyewear, especially if you’re working with metal parts that may have sharp edges.
By having the necessary tools on hand, you can safely and efficiently remove your RV awning.
Step 1: Release Awning Tension
Before attempting to release the tension of your awning, you will need a few tools to properly complete this step. One crucial tool is a sturdy ladder, which should be tall enough to safely reach the awning. You’ll also need a pair of pliers or a crescent wrench to manipulate the awning lock or ratchet.
For safety purposes, it’s important to wear protective gloves and eye goggles to prevent any injuries or accidents that might occur during the process. Lastly, don’t forget a screwdriver in case any screws need to be loosened or tightened. With these tools in hand, you’re ready to release the tension of your awning and move on to the next step of the process.
Remember, safety should always come first when working with these types of tools and equipment.
Step 2: Remove Support Arms
When it comes to removing support arms, having the right tools is crucial. You’ll need a socket wrench, a pair of pliers, and a screwdriver. These tools will help you to easily detach the support arms from the body of the vehicle.
It’s important to note that there are different types of support arms, so the process may vary slightly depending on your specific make and model. In general, the first step is to locate the bolts that hold the arms in place and use your socket wrench to unscrew them. Once the bolts are out, you can use your pliers to remove any retaining clips or pins that may be holding the arms in place.
Finally, you can use your screwdriver to gently pry the arms free from the body of the vehicle. With the right tools and a bit of patience, you can easily remove support arms and get your car back on the road in no time.
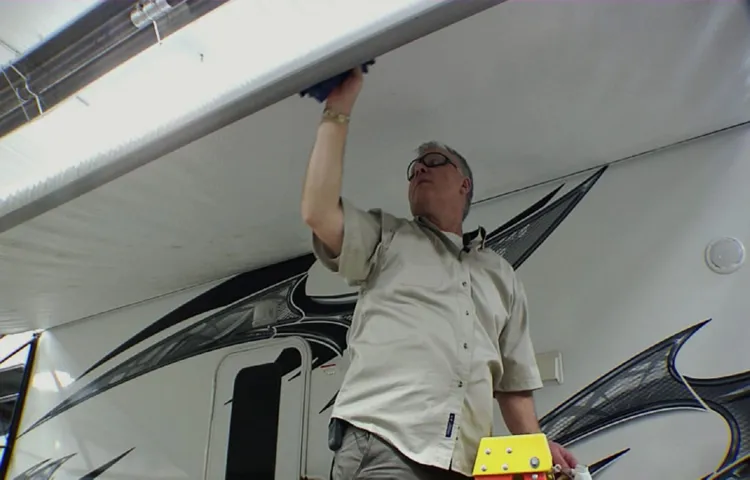
Step 3: Remove Awning Fabric
When it comes to removing the awning fabric, you’ll need a few tools to get the job done properly. First on the list is a pair of pliers, which will be used to remove any cotter pins or retaining clips that are holding the awning in place. You’ll also want a flathead screwdriver, which can be helpful for prying off any stubborn clips or fasteners.
A ladder is another essential tool, as it will allow you to access the top of the awning and remove the fabric safely. Depending on the type of awning you have, you may also need a drill or socket wrench to remove any bolts or brackets that are holding it in place. With these tools in hand, you’ll be ready to remove the old awning fabric and get started on the next step of your replacement project.
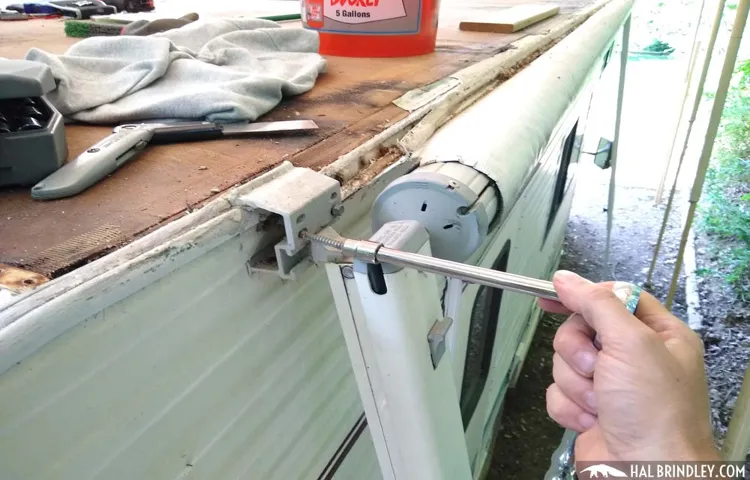
Step 4: Remove Awning Roller and Torsion Assembly
When it comes to removing an awning roller and torsion assembly, it’s important to have the right tools on hand to make the process as smooth as possible. Firstly, you’ll need a drill with a Phillips head bit to remove any screws holding the awning in place. You’ll also need a flathead screwdriver to release the tension on the torsion assembly.
It’s important to wear gloves and safety glasses during this step to protect yourself from any potential injuries. Once you’ve fully disassembled the awning and torsion assembly, it’s important to keep all the screws and bolts in a safe place for reassembly later on. By having the right tools, you can easily and safely complete the process of removing your awning roller and torsion assembly.
Tips for Success
Removing an RV awning can seem like a daunting task, but with the right tools and steps, it can be done easily. The first thing to do is to gather the necessary materials, including a ladder, screwdriver, and wrench. Then, you should ensure that both ends of the awning are secure before unscrewing the brackets and removing the bolts that lock the awning in place.
Once the awning is detached, carefully roll it up and place it in a safe and dry location. It’s important to note that different awnings may require slightly different steps, so be sure to consult the manufacturer’s instructions beforehand. By following these tips, you can successfully remove your RV awning and keep it in top-shape for your next adventure.
Tip 1: Mark Your Awning Placement
If you’re planning to install an awning on your property, there are a few things you need to keep in mind to make it a success. The first and most important tip is to mark your awning placement. This means identifying the exact location where you want your awning to be installed.
This will help you ensure that the installation is done correctly and that your awning is properly positioned. Marking the placement will also help you to visualize the end result, and ensure that it is exactly what you want. By doing this, you’ll avoid the frustration of having to relocate your awning after installation, which could be costly and time-consuming.
So, take the time to measure, plan and mark your awning placement before installation, and rest assured that your awning will look great and serve its purpose perfectly.
Tip 2: Work with a Partner
Having a trusted partner in your business journey can give you a significant advantage in achieving success. Working with someone who shares your vision can help you navigate difficult situations and provide valuable feedback. You can divide tasks and responsibilities, which allows each of you to focus on your strengths and improve your productivity.
It also provides a sense of accountability, which can help you stay motivated and consistent. When you face challenges or obstacles, your partner can provide support, encouragement, and new perspectives that you may not have considered. Finding a partner who complements your skills and personality can be challenging, but it’s worth the effort.
Make sure you share the same values and have a similar work ethic. Building a strong partnership takes time and effort, but it can be a game-changer for your business’s growth. So take your time and find the right person who can help you make your dreams a reality.
Tip 3: Wear Protective Gear
If you’re into extreme sports or outdoor activities such as mountain biking, skateboarding, snowboarding or rollerblading, it’s crucial to wear the right gear. Protective gear plays a vital role in keeping you safe from injuries, even more so if you’re pushing yourself to new levels. So, whether you’re a novice or an experienced rider, don’t compromise on safety.
Make sure you have a good quality helmet, knee and elbow pads, wrist guards, and gloves. These can help prevent concussions, broken bones, and other serious injuries. Even if you’re just practicing basic maneuvers or cruising around your neighborhood, it pays to be careful.
Remember, it only takes one fall to cause significant harm to your body. So, invest in the right gear and ride with confidence!
Conclusion
Removing an RV awning is no easy feat, but with the right tools and a bit of know-how, you can have it down in no time. Think of it like a game of Jenga – one wrong move, and the whole thing could come crashing down (literally). But with patience, a steady hand, and a willingness to take things apart piece by piece, you’ll be able to remove your awning and enjoy the open road with a newfound sense of accomplishment.
And who knows, you might just impress some fellow RVers with your newfound skills – just don’t forget to pack your awning instructions for re-installation!”
FAQs
What tools do I need to remove a RV awning?
You will need a ladder, a screwdriver, pliers, a socket wrench, and possibly a drill.
How do I remove a manual awning from my RV?
First, retract the awning fully and lock it in place. Then, remove the bolts or screws on the awning arms and slide the awning out of the track.
Can I remove an electric RV awning by myself?
It is not recommended to remove an electric awning by yourself unless you are experienced with electrical work and have the proper safety gear.
What should I do if I encounter rusted awning hardware during removal?
Use a rust penetrant or lubricant to help loosen the rusted bolts. If they still won’t budge, consult a professional for assistance.
How do I know if my RV awning needs to be replaced, rather than just removed temporarily?
Signs that your awning needs replacement include tears in the fabric, bent or broken hardware, or any signs of rot or damage to the awning arms.
Do I need to remove my awning in the winter?
It is recommended to remove the awning in areas with heavy snowfall or high winds to prevent damage.
Can I remove my RV awning without damaging the RV siding or roof?
Yes, with proper tools and techniques, the awning can be removed without causing damage to the RV. It is important to follow the manufacturer’s instructions and use caution while removing the awning.