
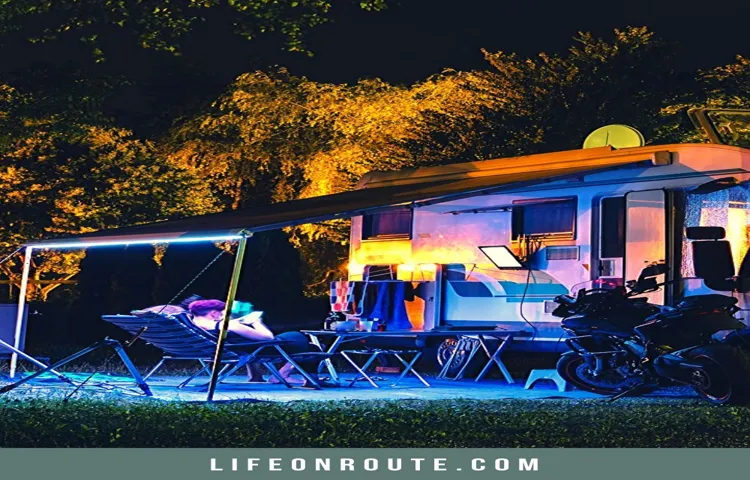
Are you looking to spice up your RV trips with some extra lighting? Whether it’s for ambiance or practical purposes, installing LED lights on your RV awning can be a game changer. Not only do they provide a warm and inviting atmosphere, but they also provide additional lighting for outdoor activities at night. The best part? They are easy to install and don’t require a professional.
In this blog post, we will guide you through the step-by-step process of installing LED lights on your RV awning. So, grab your toolbox, and let’s get started!
Table of Contents
Materials Needed
If you want to add some extra pizzazz to your RV experience, installing LED lights on your awning can really make your outdoor living space shine. However, before you embark on this project, it’s important to gather all the materials you’ll need. First and foremost, you’ll need the LED lights themselves, which come in a range of colors and lengths.
You’ll also need adhesive tape or clips to attach the lights to your awning, as well as a power source, such as a battery or a 12-volt power supply. Depending on the layout of your RV, you may need extension cords or other electrical equipment to ensure that your LED lights are properly powered. Taking the time to gather all the materials you need before you begin will make the installation process go much more smoothly and ensure that your LED lights provide the right amount of illumination for your outdoor space.
LED Light Strip
If you’re looking to add some ambiance to your home or workspace, an LED light strip is a simple and cost-effective solution. To get started, you’ll need a few materials. First, you’ll need the LED light strip itself.
Be sure to choose the right length for your space and consider whether you want a color-changing option or a solid color. You’ll also need a power supply, which will depend on the length of your LED strip. An adhesive backing is also important to ensure the strip stays in place.
Finally, consider a remote control for easy adjustments. With these materials in hand, you’ll be able to install your LED light strip and enjoy a cozy and inviting atmosphere in no time. Keyword: LED light strip.
Power Source
When creating a power source, there are a few materials that you will need to make things work. First and foremost, you will need a source of energy. This can come in many forms, such as solar power, batteries, or even generators.
Depending on your desired power output and use case, you may also need components such as capacitors and resistors in order to regulate the flow of energy and prevent overload. Additionally, wiring and connectors will be needed to transport the energy from the source to your device or system. It’s important to choose high-quality materials that are suited to your specific needs to ensure a safe and reliable power source.
By taking the time to carefully select your materials, you can create a power source that meets your needs and provides consistent, stable energy.
Wire Cutters/Strippers
When it comes to wire cutters/strippers, there are a few essential materials that you’ll need to be able to use them properly. Firstly, you’ll need the wire cutters/strippers themselves. There are many different types on the market, so it’s important to choose the right one for your specific needs.
You’ll also need a steady surface to work on, as well as a clear workspace free from clutter. Additionally, it’s a good idea to have some spare wire on hand, as well as some electrical tape just in case you need to make any repairs. Another important material to have is a pair of safety glasses, as wire cutters/strippers can sometimes produce small metal shards that can potentially cause eye injury.
By having these materials at the ready, you can ensure that your wire cutting/stripping work goes smoothly and safely.
Electrical Tape
When working on electrical projects or fixing equipment, electrical tape is an essential material that should always be on hand. It is a versatile tool that can be used to insulate and secure electrical connections, cover exposed wires, and protect against moisture and humidity. To use electrical tape efficiently, you need to gather the necessary materials first, including a pair of wire cutters or scissors, a wire stripper, and of course, electrical tape.
It is important to choose electrical tape that is of high quality and suitable for the intended purpose, such as heat-resistant or weather-resistant tape. When applying electrical tape, make sure to clean the surface first and wrap the tape tightly to ensure a secure hold. By having the proper materials and techniques, you can safely and effectively use electrical tape for all your electrical needs.
Screwdriver
When it comes to DIY projects or home repairs, one of the most essential tools you’ll need is a screwdriver. There are different types and sizes of screwdrivers, so it’s essential to know what materials you’ll need for the specific job you’re working on. For starters, you’ll need a set of screwdrivers that includes different sizes of flathead and Phillips head screwdrivers.
You may also need a set of precision screwdrivers for smaller screws. Apart from the screwdrivers, you’ll also need screws to install or tighten a variety of things. It’s important to choose screws that are the right size and type for the job you’re working on.
It’s also necessary to have a drill and drill bits on hand if you’re working with harder materials such as wood or metal. Finally, safety equipment like goggles can help protect your eyes while working with screws and other tools. So, before starting any screwdriver task, make sure you have all the necessary materials ready to ensure a safe and successful project.
Pre-Installation Steps
Installing LED lights on an RV awning can be a great way to brighten up your night-time camping experience. Before getting started, make sure you have all of the necessary tools and equipment, including the LED lights, a power source, wiring connectors, and a drill. It’s also important to choose the right type of LED lights for your awning size and personal preferences.
Once you have everything you need, start by planning out where you want to install the lights and measuring the awning’s length to determine how many lights you’ll need. Then, attach the lights to the awning using the included clips or mounting brackets. Finally, connect the lights to a power source and test them to make sure they are working correctly.
With these pre-installation steps completed, you’ll be ready to enjoy your beautiful new LED lights on your next camping adventure!
Clean Awning Surface
When it comes to installing an awning, there are a few key steps to take before you even start with the actual installation process. One of the most important of these steps is cleaning the surface where you plan to install the awning to ensure that it is free of any dirt, debris, grime, or other contaminants that could interfere with the installation process or potentially harm the awning itself. To clean the surface, start by removing any loose debris or dirt with a stiff-bristled brush or broom.
Then, use a mild cleaning solution and a soft cloth or sponge to wipe down the surface, making sure to pay extra attention to any areas that may be particularly dirty or stained. Finally, rinse the surface thoroughly with clean water and allow it to dry completely before moving on to the next step of the installation process. By taking the time to clean the surface properly before installing your awning, you can help ensure that it stays looking great and functioning properly for years to come.
Measure Light Strip
Before installing your light strip, it’s essential to measure the area where you plan to install it. This step will help you determine the length of the light strip that you need to purchase and ensure that it fits perfectly in the desired space. To measure the length of your light strip, you can use a measuring tape and measure the length of the surface where you plan to install it.
Once you have the measurement, make sure to add an extra inch or two to account for any bends or corners along the way. It’s also recommended to take note of the power source location and ensure that your light strip can reach it without any issues. Taking these pre-installation steps can save you time and prevent unnecessary frustration during the installation process.
Now that you have measured your space, you can move on to the exciting part of installing your light strip and bringing your space to life.
Test Light Strip
If you’re about to install a light strip, there are a few things you need to consider beforehand to ensure it will work properly. First and foremost, make sure that the surface you’re going to adhere the light strip to is clean and dry. Remove any dust or debris that may interfere with the adhesive.
Once you’re confident that the surface is clean, you should also test the light strip before installation. This will ensure that it’s functioning properly and will save you the hassle of having to remove and re-install it later on if there are any issues. When testing the strip, it’s essential to make sure that all the connections are secure and that there are no frayed wires.
Once you’ve completed this pre-installation checklist, you’re ready to install your light strip and enjoy the ambiance it provides. Remember, proper preparation leads to a smooth installation.
Installation Steps
Installing LED lights on your RV awning is a great way to add some extra charm to your camping trip. Before getting started, you will need to gather all the necessary tools and equipment such as LED lights, wiring, a power source, and some mounting clips. The first step is to decide where you want to install the lights.
A popular spot is underneath the awning because it provides a nice ambiance and also makes it easy to see what you’re doing in the evening. Once you’ve found the perfect location, you can start running the wiring. After attaching the lights, test them out to make sure they are working correctly.
If you’re not comfortable with doing the installation yourself, it’s always a good idea to call a professional. With these steps, you can make your RV awning look festive and bright no matter where you go.
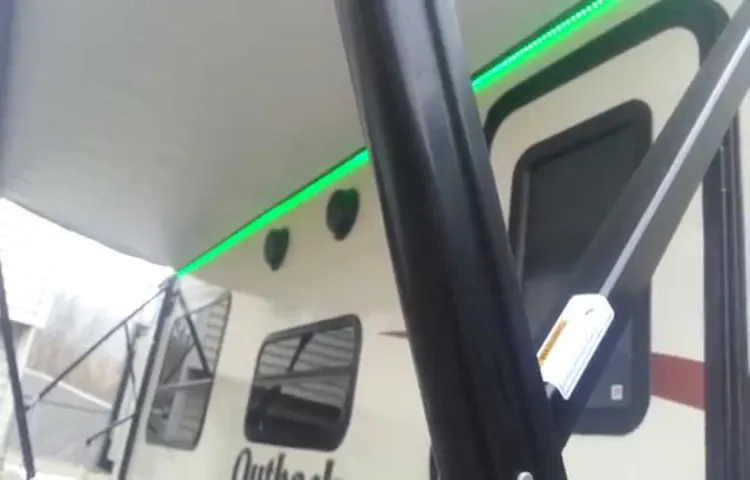
Attach Light Strip to Awning
If you’re looking to enhance your outdoor living space, attaching a light strip to your awning can be an easy and effective way to do so. The first step is to determine where you want the light strip to be placed and how much length you will need. Next, measure the awning and cut the light strip to fit.
Clean the area where you plan to attach the strip to remove any dirt or debris. Then, use tape or adhesive to secure the light strip to the awning. You can also use clips or brackets designed for outdoor use to attach the light strip.
Finally, connect the light strip to a power source, and enjoy your new and improved outdoor space! Whether you are hosting a party or just relaxing in your yard, adding a light strip to your awning creates a cozy and inviting atmosphere. So, go ahead and try it out today!
Connect Wires to Power Source
When it comes to installing electrical wiring, connecting the wires to a power source is a crucial step. Before starting this step, make sure that you have switched off the power supply to the area where you’re working to avoid electrical shock. Begin by identifying the hot wire (usually black or red) and the neutral wire (usually white or gray).
Connect the hot wire to the gold-colored screw on the power source and the neutral wire to the silver-colored screw. Make sure that you tighten the screws firmly so that the wires are securely connected. If your power source requires a ground wire, connect it to the green-colored screw.
Once you’ve connected all the wires, use a voltage tester to ensure that the power is off before switching it back on. Following these steps will help ensure that your electrical wiring is safely and securely connected to the power source.
Secure Wires with Electrical Tape
When it comes to securing wires, electrical tape is a handy tool that can help prevent electrical accidents. Here are some installation steps to follow to ensure that your wires are properly secured. First, cut a length of electrical tape that is longer than the wire being secured.
Then, wrap the tape tightly around the wire, starting at one end and working your way down to the other. Avoid stretching the tape too much or it may lose its adhesive properties. Be sure to cover all exposed wires and check that the tape is snugly in place.
If needed, add additional layers of tape until the wire is fully covered. Once you’re finished, your wire should be safely secured and protected from any electrical mishaps. Remember to always use caution when dealing with electricity and consult a professional if you’re unsure about your electrical work.
With these simple steps, you can ensure your wires stay secure and your home remains safe.
Attach Power Source to RV
When it comes to RVs, attaching a power source is a crucial step in getting everything up and running. The first thing to do is to check the voltage and amperage requirements of the RV so that you can purchase the correct power source. Next, you will need to locate where the power source will be mounted.
Most RVs will have a designated spot for the power source, but if yours doesn’t, you will need to find a secure and dry spot. Once you have the power source and location sorted, you can begin the installation process. This may involve some drilling and wiring, so make sure you have the necessary tools and have read the instructions carefully.
As you connect the power source, you will need to ensure that everything is properly grounded to prevent electrical shock hazards. Finally, once the power source is installed, make sure to test it thoroughly before taking your RV out on the road. With these steps complete, you’ll have a reliable and safe source of power for all your RV adventures.
Post-Installation Steps
Installing LED lights on your RV’s awning can really enhance the ambiance of your outdoor living space. But the installation process doesn’t end once the lights are mounted. There are a few post-installation steps that you should take to ensure the lights work properly and to prolong their lifespan.
First and foremost, test the lights to make sure each bulb is working. This will help you identify any faulty bulbs that need replacing before the entire string is up. Next, secure any loose wires or connections to prevent them from touching the RV’s metal surface, which can cause a short circuit.
Finally, invest in a high-quality surge protector to protect your LED lights from power surges and voltage spikes. Follow these simple post-installation steps and your RV awning LED lights will provide you with many nights of enjoyment under the stars.
Test Lights Again
After installing your lights, you should test them again to ensure that everything is working correctly. First, turn off the mains and switch on the new lights. Check to see if everything is working as intended.
If there are any issues such as flickering or dimming, you’ll need to investigate further. It’s essential to ensure that the connections are made correctly and that all the wires are tightly connected. Once you’re happy that everything is working correctly, switch off the lights once again and turn on the mains.
You can then switch on the lights again and test once more. Testing your lighting installation is crucial to ensure that everything is working correctly and that you haven’t missed anything during the installation process. Even a simple step such as turning on the mains can reveal any issues that might need addressing.
By checking your lights after installation, you can prevent any accidents, such as fires caused by exposed wires or faulty fixtures. Plus, ensuring that your lights are working correctly can save you money in the long run by reducing energy consumption and replacing faulty bulbs promptly. So, test your lights again after installation, and rest assured that your home is safe and well-lit.
Enjoy Your New LED Awning Lights!
Congratulations on installing your new LED awning lights! The next step is to sit back, relax, and enjoy the ambiance they bring to your outdoor space. But before you do that, there are a few post-installation steps you should take to ensure top-notch performance and longevity of your new lights. First and foremost, test your lights to make sure they are functioning correctly.
Check all the bulbs and wires for any defects or faults. If everything appears to be in order, add a protective layer of sealant to the wires to prevent water damage. Additionally, make sure to clean the lights periodically, especially after harsh weather conditions, to avoid any dirt or debris buildup.
Lastly, to extend the life of your LED awning lights, consider installing a timer switch to turn them off during the day and back on at night. This will conserve energy and keep your lights shining bright for years to come. Happy lounging!
Conclusion
In conclusion, installing LED lights on your RV awning is a fun and functional way to enhance your outdoor living space. With the right tools and a little bit of know-how, you can easily add some colorful ambiance to your campsite. And who knows, maybe your neighbors will be so impressed with your new lighting setup, they’ll start following you around the campground like fireflies on a summer night.
Happy camping!”
FAQs
What are the benefits of installing LED lights on RV awning?
LED lights provide energy efficiency, long-lasting performance, and improved visibility and ambiance for outdoor activities.
Are there any safety measures to consider when installing LED lights on RV awning?
Yes, it is important to follow manufacturer instructions, use the correct voltage and wiring, and avoid overloading the electrical system. Also, make sure the lights are secured properly and do not pose a fire hazard.
How do I choose the right LED lights for my RV awning?
Factors to consider include brightness, color, durability, water resistance, power source, and installation method. Make sure the lights fit your personal preferences and are compatible with your RV’s electrical system.
Can I install LED lights on my RV awning myself, or should I seek professional help?
It depends on your skill level and familiarity with electrical work. If you are uncertain about how to install the lights or have any concerns about safety, it is best to hire a professional. Otherwise, follow manufacturer instructions carefully and take necessary precautions.
How do I maintain my LED lights on RV awning?
Regular cleaning, inspection, and replacement of damaged parts can help prolong the lifespan of your LED lights. Also, avoid exposing them to extreme temperatures, moisture, or physical damage.
Can LED lights on RV awning be dimmed or controlled remotely?
Yes, many modern LED lights come with dimming or remote control features. This allows you to adjust the brightness, color, and ambiance of your awning lights easily.
What are some creative ways to use LED lights on RV awning?
LED lights can be used for various outdoor activities such as camping, tailgating, or backyard parties. Some creative ideas include setting up themed lighting, creating a cozy atmosphere, or enhancing outdoor cooking and dining experiences.