

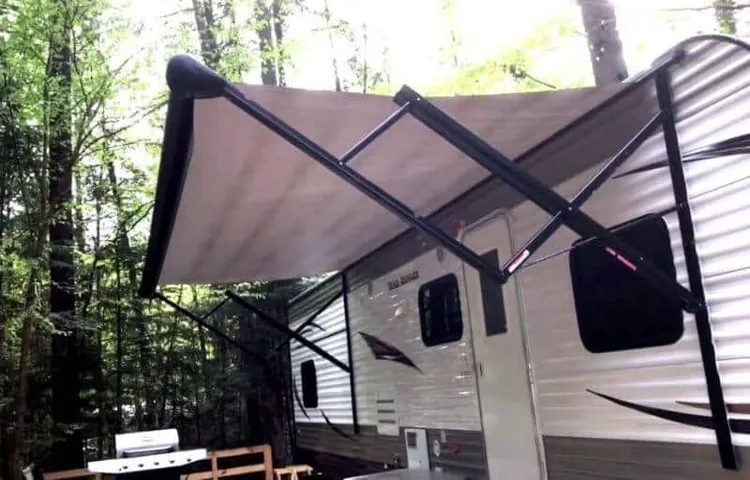
Your RV awning provides a much-needed shade during your camping trips, protecting you from the scorching heat of the sun. But after prolonged use, it can accumulate an unsightly amount of dirt, dust, and bird droppings, tarnishing its appearance and reducing its effectiveness. Cleaning your RV awning isn’t exactly the most exciting task, but neglecting it can lead to more damage and costly repairs in the future.
In this blog post, we’ll guide you on how to properly clean your RV awning to keep it in great condition for years to come. So, let’s roll up our sleeves, put on our gloves, and get to work!
Table of Contents
- 1 Tools and Materials You Will Need
- 2 Steps to Clean Your RV Awning
- 2.1 Step 1: Unblock Your Awning and Ensure It Is Dry
- 2.2 Step 2: Mix the Mild Soap or Awning Cleaner with Water
- 2.3 Step 3: Wet the Awning with Water
- 2.4 Step 4: Apply the Soap Mixture to the Awning
- 2.5 Step 5: Scrub the Awning with the Soft-bristled Brush or Sponge
- 2.6 Step 6: Rinse the Awning with a Garden Hose
- 2.7 Step 7: Let the Awning Dry Completely
- 3 Conclusion
- 4 FAQs
Tools and Materials You Will Need
Cleaning your RV awning is crucial in keeping it in top shape and extending its lifespan. To clean your RV awning, you will need to gather some tools and materials. The first item you need is a good quality cleaner.
You can either purchase a specific cleaner for your RV awning or use a mild soap mixed with water. A soft-bristled brush is also necessary for scrubbing off the dirt and grime from the awning. Furthermore, a ladder may be required for reaching the high areas of the awning.
If you have a pressure washer, it can be helpful in blasting away the dirt, but be sure to use it on low pressure to avoid damaging the awning material. Lastly, you will need a bucket, a hose, and a clean cloth or sponge for rinsing off the soap or cleaning solution from the awning. By having these tools and materials on hand, you can effectively and efficiently clean your RV awning and maintain its appearance for years to come.
Mild Soap or Special Awning Cleaner
When it comes to cleaning your awning, there are a few options to consider. You can either use a mild soap or a special awning cleaner. Mild soap, such as dish soap, can be effective for removing dirt and grime from your awning fabric.
However, it’s important to make sure the soap is gentle and won’t damage the fabric. Special awning cleaners are designed specifically for cleaning awnings and can be more effective than mild soap. They can remove stubborn stains and help protect the fabric from future damage.
Whichever option you choose, you’ll need some tools and materials to get the job done. You’ll need a bucket, a soft-bristled brush or sponge, a hose, and either mild soap or awning cleaner. It’s also a good idea to wear gloves to protect your hands while you clean.
By following these steps, you can keep your awning looking great for years to come.
Soft-bristled Brush or Sponge
When it comes to cleaning your kitchen, having the right tools and materials can make all the difference. One essential item you’ll need is a soft-bristled brush or sponge. These are gentle enough to use on a variety of surfaces, yet tough enough to remove stubborn grime and dirt.
Soft-bristled brushes are ideal for scrubbing pots and pans, and can even be used to clean countertops and appliances. Sponges, on the other hand, are perfect for wiping down surfaces and dishes. They come in a variety of shapes and sizes, and can be used with or without cleaning solution.
When using either tool, be sure to rinse it out thoroughly and let it dry after each use to prevent the buildup of bacteria. With a soft-bristled brush or sponge in your arsenal, you’ll be able to tackle even the toughest kitchen messes with ease.
Garden Hose with a Spray Nozzle
If you’re looking to upgrade your gardening game, a garden hose with a spray nozzle is an excellent place to start. To get started, here are the tools and materials you’ll need: a garden hose, a spray nozzle, and possibly some hose connectors if your hose doesn’t fit your spigot or nozzle properly. When choosing a garden hose, you’ll want to consider the length you need based on the size of your garden.
A 50-foot hose is a good starting point for most yards, but you may need a longer one if you have a larger property. Look for a hose made of durable material that won’t kink easily, so you don’t have to keep stopping to untangle it. Next, choose a spray nozzle that fits your needs.
Some have different spray patterns, such as mist, shower, or jet, while others only have one setting. Consider what types of plants you’re watering and what jobs you’ll use the nozzle for when making your selection. Finally, if your hose doesn’t fit your spigot or nozzle, you may need some hose connectors to make everything fit together smoothly.
These are usually inexpensive and can be found at any garden center or hardware store. With your new garden hose and spray nozzle, you’ll be able to water your plants more efficiently and effectively than ever before. And who knows, you may even find yourself looking forward to watering your plants now that you have the right tools for the job!
Bucket
When it comes to DIY projects, having a reliable bucket can make all the difference. Whether you’re painting a room or tackling a plumbing project, a sturdy bucket is essential for keeping your tools and materials organized and easily accessible. To start, you’ll need to choose a bucket that is durable and able to hold up to heavy use.
Look for a bucket made of sturdy plastic with a reinforced handle for maximum strength. Additionally, you’ll need a lid for your bucket to keep your materials dry and protect them from dust and debris when you’re not working. When it comes to selecting tools to go inside your bucket, you’ll want to choose items that are specific to your project.
For instance, if you’re painting, you’ll need paintbrushes, rollers, and a paint tray. If you’re working on electrical or plumbing projects, you’ll need wire strippers, pliers, and a wrench. A well-stocked bucket will make any DIY project much more manageable.
With the right tools and materials, you’ll be able to complete your project with ease and efficiency.
Ladder
When it comes to using a ladder, safety is key. Before even beginning a project, it is essential to gather the necessary tools and materials to ensure a secure setup. Firstly, check that the ladder is appropriate for the job and in good condition, without any cracks or missing pieces.
Secondly, invest in sturdy work gloves and slip-resistant shoes to protect you from slipping. Additionally, a tool belt can come in handy to hold smaller tools like hammers or screwdrivers, so they’re easily accessible while working on the ladder. Lastly, be sure to have someone hold the ladder steady and supervise while using it, ensuring the utmost safety.
By properly equipping yourself with these tools and materials, you can guarantee a productive and secure experience with your ladder.
Steps to Clean Your RV Awning
If you’re wondering what to use to clean your RV awning, there are a few steps you can take to ensure that it looks great and lasts for a long time. First, you’ll want to gather the necessary supplies, including a good quality cleaner, soft-bristled brush, and a ladder. Then, you’ll want to extend the awning fully and use a garden hose to rinse it off.
Once it’s wet, apply the cleaner to the surface and scrub gently with the brush. Be sure to rinse the cleaner off thoroughly with the hose, and allow the awning to air dry completely before retracting it. By taking the time to clean your RV awning, you can help to protect it from sun damage, mold, and mildew, which can extend its lifespan and keep it looking great for years to come.
Step 1: Unblock Your Awning and Ensure It Is Dry
One of the most important things to remember when cleaning your RV awning is to start by unblocking it and making sure it’s completely dry. This may sound like an obvious step, but it’s crucial to avoid any damage to your awning. First, remove any debris that may have accumulated between the folds of the awning.
Using a soft brush, gently scrub the entire surface of the awning to remove any dirt or grime. Once you’ve given it a thorough scrubbing, rinse it off completely with a hose or power washer. Next, it’s important to let the awning dry completely before folding it back up.
This will prevent any mold or mildew from forming and ensure that your awning lasts as long as possible. Taking the time to properly clean and dry your RV awning will not only make it look great, but it will also extend its lifespan and keep it in top condition for all your future camping trips.
Step 2: Mix the Mild Soap or Awning Cleaner with Water
When it comes to cleaning your RV awning, mixing a mild soap or awning cleaner with water is an essential step. This mixture not only helps in removing dirt and grime but also prevents any damage to the awning’s fabric material. To mix this solution, first, fill a bucket with water and add the recommended amount of awning cleaner or mild soap.
Stir the mixture gently until it’s evenly combined. Avoid using bleach or harsh chemicals as they can damage the awning’s waterproofing. Additionally, if you have a multi-colored or patterned awning, it’s essential to test the cleaning solution in a small, inconspicuous area before applying it to the entire awning surface.
This measure ensures that the cleaning mixture won’t cause any discoloration or damage to the fabric. Overall, a proper mixture of mild soap or awning cleaner and water is the key to cleaning your RV awning effectively.
Step 3: Wet the Awning with Water
When it comes to cleaning your RV awning, one important step is to wet it with water before starting the cleaning process. This will help loosen any dirt or grime that may have accumulated on the surface of the awning. You can spray water onto the awning using a hose or pressure washer, making sure to cover the entire surface evenly.
It’s important to use a gentle sprayer setting to avoid damaging the awning material. Once the awning is thoroughly wet, you can move on to the next step of the cleaning process. By wetting the awning first, you’ll make it easier to effectively clean every inch of the surface and leave it looking like new.
So, grab your hose and start wetting your awning to give it the best cleaning possible.
Step 4: Apply the Soap Mixture to the Awning
Once you’ve finished mixing your soap solution, it’s time to start applying it to your RV awning. It’s important to work in sections, as you don’t want the soap to dry before you’ve had a chance to scrub it off. Using a soft-bristled brush or sponge, apply the soap solution to a small area of the awning and gently scrub in circular motions.
Be sure to pay extra attention to any areas with stubborn stains or dirt build-up. As you work your way across the awning, periodically rinse off your brush or sponge to remove any debris that has accumulated. Remember, never use a pressure washer on your RV awning, as it can cause damage to the fabric.
By taking your time and being gentle with the awning, you’ll be able to clean it effectively without causing any harm.
Step 5: Scrub the Awning with the Soft-bristled Brush or Sponge
After soaking the RV awning, it’s time to scrub it with a soft-bristled brush or sponge. This step is crucial to remove any dirt, grime, or stains that may have accumulated on the surface. Using a firm and gentle motion, start from the top and work your way down to ensure that all areas are cleaned thoroughly.
Be mindful of the pressure you are applying, as too much force may damage the fabric or cause it to tear. If you encounter stubborn stains, apply a specialized cleaner or a solution of warm water and dish soap to the affected area and let it sit for a few minutes before scrubbing it again. Remember to rinse the awning thoroughly with a hose once you’ve finished scrubbing it to prevent any soap residue from building up.
With this step completed, your RV awning should look clean and fresh, ready for your next adventure on the open road.
Step 6: Rinse the Awning with a Garden Hose
After scrubbing away dirt and grime from your RV awning, it’s important to give it a good rinse with a garden hose to ensure any remaining residue is removed. This step is crucial in making sure your awning stays looking clean and new. When rinsing, start at the top and work your way down, making sure you cover every inch of the awning.
Be sure to use a high-pressure stream to ensure all dirt and debris are washed away. Additionally, it’s important to rinse both the top and underside of the awning to ensure all of the cleaning solution is removed. By taking the time to properly rinse your RV awning, you’ll be able to enjoy it for years to come and maintain its appearance.
Step 7: Let the Awning Dry Completely
After completing the previous steps in cleaning your RV awning, it is important to let it dry completely before retracting it. This step is essential to prevent mold and mildew growth that can result from dampness. Ideally, you should leave your awning open for at least 24 hours to ensure that it dries completely.
Avoid folding or storing the awning until it is entirely dry, as this can also cause mildew and unpleasant odors. If the weather is not favorable or you are short on time, you can use a clean cloth to dry the awning manually. Once the awning is dry, you can retract it and store it safely until your next outdoor adventure.
Remember, the key to extending the lifespan of your RV awning is to keep it clean and well-maintained, so don’t neglect these essential steps.
Conclusion
In conclusion, when it comes to cleaning your RV awning, just remember the three Cs: Care, Caution, and Cleaning products. Take care to protect your awning from damage, use caution when applying cleaning products, and choose the right cleaning products for the job. With a little know-how and elbow grease, you can keep your awning looking like new for years to come.
Happy cleaning!”
FAQs
What is the best product to clean an RV awning?
There are several options: a mild dish soap and water solution, a specialized RV awning cleaner, or a mixture of water and bleach.
Is it necessary to clean an RV awning regularly?
Yes, it is recommended to clean your RV awning at least twice a year to prevent mold and mildew buildup.
How do I remove stubborn stains from my RV awning?
For tough stains, try using a mixture of baking soda and water or a solution of vinegar and water. These mixtures can help lift and remove stains.
Can I pressure wash my RV awning?
While pressure washing can be effective, it can also cause damage to your RV awning. It is recommended to only use a gentle spray or soft brush for cleaning.
Should I use a UV protectant on my RV awning after cleaning?
Yes, using a UV protectant can help prolong the life of your RV awning and prevent fading or cracking from sun exposure.
Is it safe to use bleach on my RV awning?
While bleach can be effective for removing stains, it can also cause damage to the fabric of your RV awning. It is recommended to dilute the bleach and test it on a small, inconspicuous area first.
How do I properly store my RV awning when it’s not in use?
When storing your RV awning, make sure it is completely dry and free of debris to prevent mold and mildew. It is also recommended to roll it up and store it in a protective cover.