
Are you an avid RV enthusiast looking to patch up your awning? Perhaps you’ve noticed some wear and tear, or maybe a pesky little tear that’s been bothering you. Whatever the case may be, it’s important to address these issues as soon as possible to keep your RV in tip-top shape for all your future travels. Luckily, patching an RV awning is a relatively simple process that can easily be done at home with a few basic tools and materials.
In this post, we’ll cover everything you need to know to get your awning looking and performing its best. So grab a cup of coffee and let’s get started!
Table of Contents
Introduction
Are you noticing wear and tear on your RV awning and wondering how to patch it up? Don’t worry, it’s not as complicated as it may seem. First, inspect the area that needs repairing to determine if it requires a patch or a full replacement. Once you’ve identified the damaged section, clean the area thoroughly with soap and water and let it dry completely.
Then, apply a patch kit following the manufacturer’s instructions. Be sure to use a patch that matches the material of your awning to ensure the repair is secure. Remember, regular maintenance and inspection of your RV awning can prevent costly repairs in the future.
By taking care of it properly, your awning can provide you with shade and protection for many adventures to come!
Explanation of what an RV awning is and why it is important to have it in good condition
An RV awning is an essential part of any recreational vehicle. It is a retractable shade that extends out from the side of an RV to provide shelter and shade from the sun or rain. The importance of having an RV awning in good condition cannot be overstated, as it provides a comfortable outdoor living space while on the road.
The awning acts as a barrier against the elements, protecting the interior of the RV from weather damage and keeping the interior cool during hot temperatures. Additionally, it provides a space for outdoor activities such as cooking, dining or relaxing, allowing you to enjoy the great outdoors without being directly exposed to the weather. Maintaining your RV awning in good condition will help to ensure that it continues to function properly, protecting your RV and enhancing your overall camping experience.
So, it’s crucial to regularly clean and check your awning for any damage to keep it in top-notch condition for your next outdoor adventure.

Identifying the Damage
If you’re looking for ways to patch an RV awning, the first step is to identify the damage. Is there a tear or hole in the fabric? Is the stitching coming apart? Are there rust spots on the metal frame? Once you’ve determined the extent of the damage, you can decide what type of patch you need. For small tears or holes in the fabric, you can use a patch kit with adhesive or sew on a patch of durable material.
If the stitching is the issue, you may need to restitch the seams or hire a professional to do so. Rusty metal parts can be cleaned and painted to prevent further damage. By identifying and addressing the specific problem, you can prolong the life of your RV awning and ensure that it provides shade and protection for many more adventures to come.
Detailed explanation on how to identify the damaged area of the awning
Identifying the Damage When it comes to identifying a damaged area on your awning, there are a few things you can look out for. The first thing to do is to inspect the awning thoroughly, looking for any signs of wear and tear, including holes, tears, or frayed edges. Another indication of damage is discoloration or staining, which can be a sign of mold or mildew growth.
These can also lead to damage and weaken the awning fabric over time. It’s also essential to pay attention to the awning’s frame and structure. Any cracks, broken parts, or bent components can cause the awning fabric to sag or warp.
If your awning has a motorized retractable mechanism, listen for any unusual noises as you extend and retract it. Any grinding sounds, groaning, or screeching can indicate damage to the motor or gears. To find the source of leaks, inspect the seams and edges of the awning.
These are areas where water and moisture can seep through and cause damage. Pay close attention to any areas where the awning fabric is stretched or pulled tightly, as these areas are susceptible to damage. In summary, identifying the damage on your awning involves a thorough inspection of both the fabric and the structure.
Look for any signs of wear and tear, discoloration, and mold growth. Check the frame and mechanism for any cracks, broken parts, or unusual noises. Finally, inspect the seams and edges for any signs of leaks.
By doing this, you can determine the extent of the damage and take the necessary steps to repair or replace your awning.
Materials Needed
If you’re on the road frequently with your RV, it’s not uncommon for the awning to experience some wear and tear. However, just because it’s a common occurrence, that doesn’t mean it’s not frustrating to deal with. Fortunately, patching an RV awning is a pretty simple process if you have the right materials.
In addition to the awning repair tape, you’ll also need a clean surface to work with. Be sure to clean the damaged area before applying the tape to ensure that it will adhere properly. Another helpful tool to have on hand is a utility knife for trimming the tape to fit evenly.
With these few materials, you’ll be able to patch up your RV awning in no time.
List of materials needed to repair the damaged area
If you’re planning to repair a damaged area, you need to have a list of materials at hand to make the job easier and more efficient. First and foremost, you need to assess the kind of damage you’re dealing with. Do you need to replace a tile or a piece of drywall? Once you’ve identified the problem, you can gather the materials needed.
For example, if you need to replace a tile, you will need a new tile, tile adhesive, a trowel, and a grout float. If you’re fixing drywall, you will need a putty knife, drywall screws, sandpaper, and joint compound. Other materials you might need include paint, brushes, and rollers, depending on the extent of the damage.
Remember to take measurements beforehand so that you don’t run out of supplies mid-project. With the right materials at hand, you’ll be able to fix any damaged area in no time. So don’t stress over the damage, just get the needed materials and get to work!
Preparation
If you’re looking to patch an RV awning, there are a few things you’ll need to do to prepare. First, you’ll need to determine the type of damage your awning has. Is it a tear or a hole? Is it on the fabric or the frame? Knowing the extent of the damage will help you gather the necessary materials and tools for the job.
You’ll likely need an adhesive patch, a patch kit, or a fabric repair kit. Make sure you also have a clean and dry work surface, such as a table or a clean section of the ground. Before getting started, it’s important to properly measure and cut your patch to the appropriate size.
This will ensure that it fits properly and doesn’t cause any additional damage to your awning. Taking the time to properly prepare before patching your RV awning will help ensure the repair is effective and long-lasting.
Step-by-step guide on how to prepare the damaged area for patching
When preparing a damaged area for patching, the first step is to thoroughly clean the damaged area with soap and water. Next, inspect the area for any loose or cracked pieces that need to be removed before patching. If there are any loose pieces, gently remove them with a putty knife or other tool.
After removing any loose pieces, use sandpaper to roughen up the surface around the damaged area. This will help the patching material adhere better. If necessary, use a degreaser to remove any grease or oil from the surface.
Once the area is clean and prepped, it’s ready for patching. Remember to follow any instructions provided on the patching material to ensure the best results. By properly preparing the damaged area, you’ll be able to create a strong and long-lasting patch.
Patching the Awning
If you’re an RV owner, a damaged awning can be a major inconvenience and can ruin your trip. Fortunately, patching an RV awning is a relatively simple task that you can do on your own. The first step in patching an RV awning is to assess the damage.
Depending on the type of material your awning is made of, the patching process may vary. If you have a vinyl awning, you can use a vinyl repair kit to patch any small holes or tears. For larger tears, you may need to replace a section of the awning altogether.
If you have a canvas awning, you’ll need to use a canvas repair kit. These kits typically come with a patch and adhesive, which you’ll need to apply to the damaged area. Before you begin any repairs, be sure to clean the damaged area thoroughly and allow it to dry completely.
With a little bit of patience and some handy supplies, you can easily patch up your RV awning and hit the road without any further issues.
Step-by-step guide on how to patch the damaged area of the awning
If you’ve noticed a tear or puncture in your awning, you may be wondering how to go about fixing it. Luckily, patching the damaged area isn’t as difficult as it may seem. Here’s a step-by-step guide on how to patch the awning yourself.
Firstly, clean the area around the damaged portion of the awning. Use a mild detergent to remove any dirt, grime or mildew. Rinse the area with a garden hose and allow it to dry completely before proceeding.
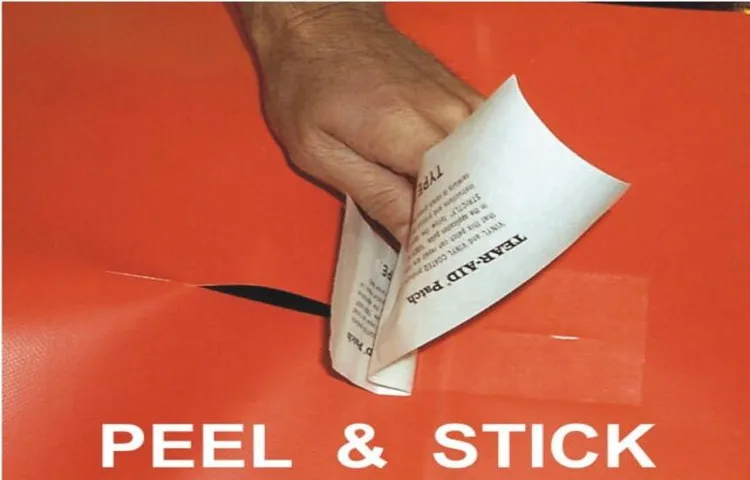
Next, cut a patch material to size. This can either be a fabric patch, duct tape patch or an RV awning patch. If using a fabric patch, it’s important to use a fabric that is compatible with the awning material.
Apply a generous amount of adhesive on the patch material and on the damaged area of the awning. Ensure that the adhesive is spread evenly and not too thick. Carefully place the patch over the damaged area, being sure to press firmly all around to ensure it sticks.
If using duct tape, ensure that it overlaps the damaged area by a few inches in all directions. Allow the adhesive to dry completely, following the manufacturer’s instructions. Once dry, inspect the area to make sure the patch is securely attached and no excess adhesive is present.
And voila! Your awning is patched and ready to use. Remember that prevention is key to avoid future damage, so take the proper steps to maintain your awning properly. Happy camping!
Test the Patch
When it comes to fixing an RV awning, the last thing you want is for your patch to fail when you need it the most. That’s why it’s important to test your patch before hitting the road. Begin by thoroughly examining your patch to ensure it’s properly secured.
Then, simulate various weather conditions such as wind, rain, and sunlight to see how your patch holds up. Try tugging on the area around the patch to confirm it’s firmly attached. If you notice any issues, make any necessary adjustments before hitting the road.
Remember, a damaged awning can ruin your camping trip and cause extensive damage to your RV, so it’s always best to take the time to patch it up correctly. By testing your patch before heading out, you can feel confident in your repairs and enjoy a stress-free trip.
Tips on how to test the effectiveness of the patch
If you want to ensure that the patch you have developed is effective, testing is essential. Fortunately, there are several ways to test the effectiveness of the patch before you release it to the public. The first step is to conduct a risk assessment to determine the potential threats that your patch is designed to mitigate.
Once you have identified these risks, you can perform vulnerability scans to identify any security weaknesses in your patch. Additionally, penetration testing can help you verify whether your patch can withstand attacks from determined hackers. Finally, user acceptance testing should be performed to ensure that the patch works as expected from the user’s perspective.
Ultimately, thorough testing is crucial to verify that your patch works effectively and can keep users safe from threats.
Maintenance Tips
Have you noticed a tear or hole in your RV awning? Don’t worry, it’s a common problem that can be easily fixed with some basic tools and materials. First, clean the area around the tear or hole with soap and water, being sure to remove any dirt or debris. Then, measure the size of the damaged area so you can purchase an appropriately-sized patch.
Cut the patch to size, ensuring it overlaps the damage by at least two inches on all sides. Apply a waterproof adhesive to the patch and press it firmly in place over the tear or hole. Allow the adhesive to dry completely according to the manufacturer’s instructions.
Finally, test the repair by retracting and extending the awning a few times to make sure the patch has adhered properly and won’t come loose during use. With these simple steps, you can easily patch an RV awning and keep it in good shape for your next adventure.
Advice on how to care and maintain the awning to prevent further damage
Having an awning is a great way to add extra living space to your home. It can also help protect you and your furniture from the harmful UV rays of the sun. To get the most out of your awning and prevent further damage, regular maintenance is necessary.
One of the easiest ways to keep your awning in good condition is to clean it regularly. Use a soft-bristled brush and mild soap to remove dirt and debris. Be sure to rinse it thoroughly, as soap can leave a residue that can cause discoloration.
Check the awning for any signs of damage, such as rips or tears. If you notice any areas of concern, it’s better to address them sooner rather than later. Finally, when not in use, retract your awning to prevent it from being damaged by wind or severe weather.
By following these tips, you can prolong the life of your awning and save yourself money in the long run.
Conclusion
In conclusion, patching an RV awning may seem daunting, but with the right tools and a little bit of patience, it’s a breeze. It all boils down to being prepared, finding the right patch, and taking your time to make sure the repair is secure. So, next time you find yourself under a torn awning, don’t panic, just follow these simple steps and you’ll be back to enjoying the great outdoors in no time! Happy patching!”
Summary of the steps and the importance of a well-patched RV awning
Keeping your RV awning properly maintained is crucial for your safety and comfort during camping trips. One of the most important steps in maintaining your RV awning is to ensure that it is well-patched and free of any tears or holes. This is especially important because it can prevent strong winds from getting under the awning and potentially damaging your RV.
To patch any rips or tears, you can use a self-adhesive patch kit specifically designed for RV awnings. In addition, it’s essential to regularly clean your awning and check for any signs of wear and tear. This will help extend the life of your awning and keep you safe and comfortable during your camping adventures.
Don’t neglect the importance of maintaining your RV awning – it can make all the difference in your camping experience.
FAQs
What supplies do I need to patch an RV awning?
You’ll need a patch kit (typically includes adhesive and patch material), a clean cloth, scissors, and a ladder.
Can I patch a tear in my RV awning myself or do I need to hire a professional?
With the right supplies and some DIY skills, you can patch a tear in your RV awning yourself. However, if the tear is extensive, it may be best to consult a professional.
What should I do to prepare the awning before patching it?
Make sure the area around the tear is clean and dry. Remove any debris or loose threads. If necessary, use a mild soap and water solution to clean the area.
What is the best type of patch material to use for an RV awning?
This can vary depending on the type of awning you have. Check with the manufacturer for recommended patch materials. If a specific patch kit is not available, a high-quality, weather-resistant adhesive tape can be used.
How long does it take to patch an RV awning?
Depending on the size and severity of the tear, patching an RV awning can take anywhere from 30 minutes to a few hours.
How long will a patch last on my RV awning?
The longevity of a patch will depend on several factors, including the quality of the patch material used, the severity of the tear, and the climate in which the RV is stored. However, a properly applied patch can last for several years.
Can I still use my RV while the awning patch dries?
It’s best to wait until the patch is completely dry before using the awning again. This usually takes at least 24 hours, depending on the patch material used and the weather conditions.