
Do you own an RV that has an awning? Sometimes, awnings can get stuck or unwound due to strong winds or improper usage. Fortunately, rewinding an RV awning is not a complicated process, and with a little bit of guidance, you can get your awning working again in no time! In this blog post, we will guide you through the steps you need to take to rewind your RV awning safely and efficiently. So, let’s get started and learn how to rewind an RV awning like a pro!
Table of Contents
Materials Needed
If you’re looking to rewind your RV awning, there are a few materials you’ll need to make the process go smoothly. First and foremost, you’ll need a sturdy ladder that can support your weight. You’ll also need a pair of pliers, a screwdriver, and a wrench.
Additionally, you’ll want to have some lubricant on hand to help loosen any stubborn bolts or screws. Finally, you may need to replace any frayed or damaged parts, so it’s a good idea to have some spare pieces of awning material and hardware on hand as well. With these materials at the ready, you’ll be able to successfully rewind your RV awning in no time!
– Screwdriver
When it comes to fixing things around the house, a screwdriver is an essential tool to have in your toolbox. Whether it’s a loose doorknob or a loose screw on a piece of furniture, a screwdriver can make the job much easier. The good news is that you don’t need a lot of materials to use a screwdriver effectively.
All you need is a screwdriver with a comfortable grip and a durable head that can tighten or loosen screws. The type of screwdriver you need will depend on the type of screw you’re working with, so it’s important to have a set of screwdrivers with different sized heads. This will ensure that you have the right tool for the job and can avoid damaging the screws.
In addition to a screwdriver, you may also need other materials such as replacement screws or washers if the ones you’re working with are damaged or worn out. By having the right tools and materials on hand, you can quickly and easily tackle any repair job without having to call in a professional.
– Rubber Mallet
When it comes to DIY projects, having the right tools on hand can make all the difference. One essential tool that should be in your toolbox is a rubber mallet. This versatile mallet can be used for a variety of tasks, from shaping metal to installing tile.
So, what exactly is a rubber mallet? Simply put, it’s a hammer-like tool with a soft rubber head. This design makes it ideal for tasks that would otherwise require a traditional hammer but could risk damaging the surface you’re working on. When it comes to materials needed for your DIY projects, a rubber mallet is definitely on the list.
It’s a budget-friendly tool that can save you time and money by helping you complete tasks with precision and ease. From furniture assembly to woodworking, a rubber mallet is an essential item to have in any DIY enthusiast’s toolbox. So the next time you’re planning a DIY project, don’t overlook the importance of having a rubber mallet on hand.
It might just be the tool you need to get the job done right!
– RV Awning Tension Adjustment Tool
When it comes to RV awnings, ensuring the proper tension is crucial to prevent damage or costly repairs. One handy tool for adjusting the tension is an RV awning tension adjustment tool. This tool is simple to use and can save you time and money by allowing you to easily make adjustments yourself.
To use the tool, you’ll need a few materials, including a cordless drill, a screwdriver bit, and the tension adjustment tool itself. The tool typically comes with instructions on how to use it, but it often involves simply attaching the tool to your drill, inserting it into the awning’s torsion assembly, and turning it to adjust the tension as needed. By having this tool on hand, you can quickly and easily make adjustments to keep your awning in top condition and ready for your next adventure.
Steps to Rewind RV Awning
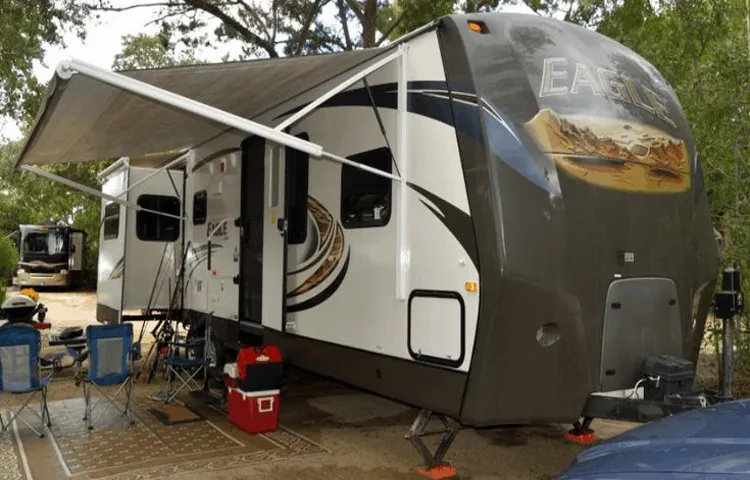
If you’re wondering how to rewind a RV awning, it’s actually a pretty simple process. First, make sure that the awning is completely dry before beginning. Then, loosen the tension on the awning by using the release lever located at the end of the roller tube.
Once the tension has been released, pull the strap attached to the tube to roll up the fabric. Keep rolling until you reach the end, making sure that the fabric is straight and free from any wrinkles or bunching. Once the awning is completely rolled up, lock it in place using the lock lever.
It’s important to take your time when rewinding the awning to ensure that it’s done correctly and no damage is caused. With a little patience and practice, rewinding your RV awning will become a quick and easy task.
– Step 1: Release the Awning Tension
When it comes to rewinding your RV awning, there are a few steps you need to follow to ensure it’s done correctly. Step one is releasing the tension on your awning. This is an important step because it prevents any potential damage to the awning.
The tension on the awning can be released by opening the awning fully and then locating the tension knobs on either side of the awning. You’ll need to loosen the knobs to take the tension off the awning. Once the tension is released, you’ll be ready to move onto the next step.
Remember, taking the time to follow each step will ensure your awning is rewound correctly and ready to use for your next outdoor adventure.
– Step 2: Secure the Roller Tube
When it comes to rewinding your RV awning, securing the roller tube is a crucial step. To do this, you will need to make sure the awning is fully retracted and the lead rail is locked in place. You can then slide the awning bead out of the rail and loosen the screws that hold the end cap on the roller tube.
Once the screws are loosened, you can remove the end cap and free the spring tension. Be sure to keep a firm grasp on the roller tube and slowly let it unwind until all the tension has been released. With the roller tube now secured, you can move on to the next step in rewinding your RV awning.
By following these steps and taking the time to correctly secure the roller tube, you can avoid potential injuries and easily complete the rewinding process.
– Step 3: Loosen the Fabric From the Roller Tube
If you’re looking to rewind your RV awning, it’s important to follow the steps carefully to avoid any mishaps. Step 3 in the process involves loosening the fabric from the roller tube. To do this, you’ll need to locate the screws that secure the fabric to the roller tube.
Once you’ve found them, use a screwdriver to remove them, taking care not to damage the fabric or the tube. Once the screws are removed, you can gently unwind the fabric from the roller tube, being sure to keep the tension even throughout. It’s important to take your time with this step to avoid any tears or damage to the fabric.
Once you’ve successfully loosened the fabric from the roller tube, you can move on to the next step in the process. Remember to stay focused and take your time to ensure a successful rewinding process.
– Step 4: Wind the Awning Manually
Rewinding an RV awning might seem like a daunting task, but it’s actually fairly simple. To begin, you’ll want to start by locating the awning rail release lever. This lever can typically be found near the bottom of the awning arm.
Once you’ve located the lever, pull it towards the center of the awning to release the tension. Next, use your hand to pull the awning down towards the ground until it’s fully extended. Once your awning is extended, locate the awning cranking mechanism and insert the crank.
Use the crank to turn the awning in a clockwise motion until it’s completely wound up. Finally, use your hand to push the awning back up towards the RV until it clicks into place. It’s important to ensure the awning is securely fastened before traveling.
By taking the time to manually wind your RV awning, you’ll extend the life of your equipment and have peace of mind knowing it’s secure during travel.
– Step 5: Tighten the Awning Tension
After successfully unwinding your RV awning, it’s time to rewind it once again. To get started with the process, pull the awning out to your desired length, ensuring that it’s level and properly aligned with your RV. Next, turn the manual hand crank to towards ‘close’ or ‘roll up’ to retract the awning.
Whilst doing so, keep an eye on the fabric and make sure there aren’t any signs of creasing or pinching. Once the awning is almost completely rolled up, take a look at the tension. If it’s sagging or feeling loose, grab the black tension knob and turn it clockwise to tighten it gradually.
The correct tension depends on your awning model and individual preference, but it’s typically somewhere between 6-8 turns on the knob. Continuously check the fabric for any sign of creases, and adjust accordingly if needed. Finally, lock the knob in place and you’re good to go! Remember not to over-tighten it, as it may cause damage to the fabric in the long run.
Following these steps will have your RV awning rewound and ready to go for your next adventure.
Tips for RV Awning Maintenance
If you’re an RV owner, you know how important it is to maintain your awning. Not only does it keep you and your fellow travelers cool and protected from the sun, but it also adds an extra bit of living space to your RV. One important aspect of awning maintenance is knowing how to rewind it properly.
This can be helpful during times when you need to store your RV or are experiencing high winds. To rewind your RV awning, first, make sure it’s fully extended. After that, locate the control arm on the side of the awning and turn it to loosen the tension.
Once the tension is released, it’s time to start rolling up the awning by using the retracting mechanism located on the opposite end of the control arm. Continue rolling until the awning is fully retracted, and then tighten the control arm to prevent it from unrolling. Properly rewinding your RV awning not only protects it from damage but provides worry-free traveling experience.
– Clean the Fabric Regularly
When it comes to maintaining your RV awning, one crucial step is regular cleaning. Dust, dirt, and grime can accumulate on the fabric, leading to stains and even mold growth if left untreated. To clean the fabric, start by rinsing it with water to remove any loose debris.
Then, use a mild detergent and a soft-bristled brush to gently scrub the fabric. Rinse thoroughly with clean water, and allow the fabric to air dry completely before retracting the awning. Avoid using harsh chemicals or power washing, as these can damage the fabric and diminish its lifespan.
By keeping your RV awning fabric clean, you can ensure that it lasts longer and looks great for many adventures to come.
– Check the Tension Regularly
RV awning maintenance is essential for ensuring a comfortable and enjoyable trip. One of the most important aspects of maintaining an RV awning is to regularly check the tension. Over time, the tension may begin to loosen, causing the awning to sag and potentially causing damage to the fabric.
It’s important to check the tension regularly and adjust it as needed to ensure that the awning stays taut and secure. This not only helps to protect the awning from damage but also ensures that it can provide adequate shade and protection from the sun. So, the next time you take your RV on a trip, make sure to check the tension of your awning before setting up camp.
Remember, a little bit of maintenance can go a long way in keeping your RV awning in top condition.
– Protect the Awning from Weather Damage
RV awnings are great for providing shade and shelter, but they can be susceptible to weather damage if not properly maintained. One of the best ways to protect your RV awning is to keep it clean and dry. If you leave it out in the rain or snow for long periods of time, the moisture can seep into the fabric and cause mold or mildew to grow.
This can not only damage the awning, but also create an unpleasant odor. Additionally, if you live in an area with harsh weather conditions such as extreme heat or cold, it’s important to take extra precautions. You can invest in an awning cover or shade screen to protect it from the sun’s harmful UV rays, or use a snow rake to remove snow buildup during the winter months.
By taking these steps to protect your RV awning, you can ensure that it will last for many years to come and provide you with a comfortable outdoor living space no matter where you travel.
Conclusion
And there you have it, folks! Rewinding a RV awning is a delicate dance between strength and finesse, patience and efficiency. It’s like performing a carefully choreographed routine to ensure that your awning goes back in smoothly, without any twists or tangles. So, if you ever find yourself in need of rewinding your RV awning, don’t panic – just follow these simple steps and you’ll be a pro in no time.
Who knows, you may even get some envious glances from your fellow RVers as they struggle with their own awnings. As they say, practice makes perfect – so get practicing and let the awning-rewinding games begin!”
FAQs
How do I know if my RV awning needs to be rewound?
If your RV awning is sagging, stuck, tearing, or making unusual noises, it’s time to consider rewinding it.
What tools are necessary to rewind an RV awning?
A cordless drill, screwdriver, and ladder, depending on the model of your RV awning, are the basic tools you’ll need.
Is it necessary to lubricate the RV awning prior to rewinding it?
Yes, it is a good idea to apply silicone spray to the RV awning track to ensure easy rewinding and to help prevent future problems.
Can I rewind my RV awning on my own or should I hire a professional?
It is possible to rewind an RV awning on your own if you have the necessary tools and experience. If you are unsure, hiring a professional is recommended.
What is the cost to rewind an RV awning?
The cost to rewind an RV awning can vary from approximately $100 to $500 depending on the model and whether you choose to do it yourself or hire a professional.
How often should an RV awning be rewound?
Generally, it is recommended to rewind an RV awning once a year to prevent any potential issues and to ensure its longevity.
Can I repair a torn RV awning when rewinding it?
It is possible to repair small tears or holes in the RV awning fabric prior to rewinding it. However, for major repairs, it is recommended to seek professional help.