
Installing a Dometic RV awning is a great way to enhance your outdoor experience and provide some much-needed shade during those hot summer months. However, figuring out how to install the awning strap can be tricky for those who are new to RVing. Luckily, the process is not as daunting as it may seem.
In this blog post, we will walk you through the steps for installing your Dometic RV awning strap. With our helpful tips and tricks, you’ll be able to enjoy a shaded area in no time! So, put on your DIY cap and let’s get started!
Table of Contents
Step 1: Gather Necessary Materials
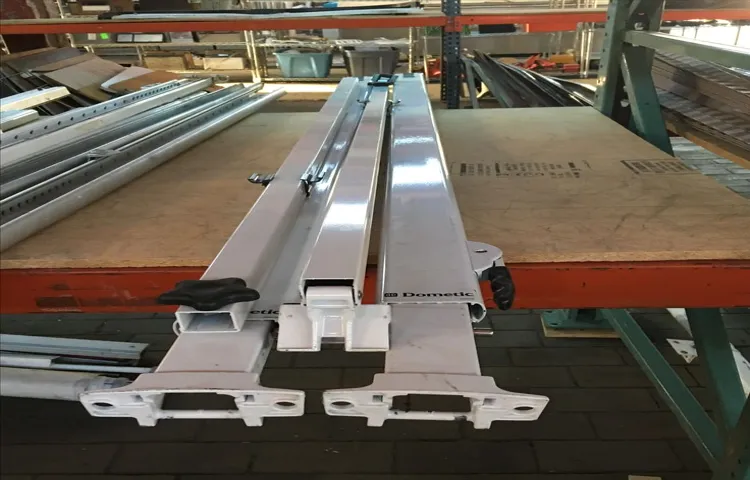
If you’re looking to install a Dometic RV awning strap, the first step is to gather all the necessary materials before diving in. You want to make sure you have everything you need so that you’re not running back and forth to the store halfway through the installation process. You’ll need a screwdriver, pliers, a ladder (or some way to get up to the awning), and of course, the Dometic RV awning strap.
You may also want to have some rubbing alcohol on hand to clean the area around the installation site before you start. Having all of your materials in one place and ready to go will make the installation process quicker and less frustrating.
Gather your awning strap, ladder, and a helper (optional)
To begin setting up your awning, you’ll need a few essential materials: your awning strap, ladder, and possibly a helper to make things easier. The awning strap is crucial for attaching your awning securely to your vehicle, so ensure that you have it before starting. You may also need a ladder to reach the attachment points on your vehicle, depending on its height and the size of your awning.
If you have a helper, this can make the entire process much smoother by allowing them to hold the awning in place while you attach it. Remember to take your time and be careful while setting up your awning to avoid any accidents or damage to your vehicle or awning. With all of your necessary materials on hand, you’re ready to move on to the next step and begin setting up your awning.
Step 2: Position Ladder and Open Awning
When it comes to installing a Dometic RV awning strap, the second step is all about positioning the ladder and opening up the awning. This may seem like a straightforward task, but there are a few things you should keep in mind to ensure a safe and hassle-free installation process. Firstly, make sure that your ladder is sturdy and properly secured before climbing up.
You don’t want to take any unnecessary risks when working at a height. Once you’ve positioned the ladder correctly, carefully unfurl the awning and lock it into place. Take your time with this step to ensure that the awning is fully extended and secure.
With the ladder in place and the awning open, you’re now ready to move on to the next step of the installation process. Using the right tools and following these steps carefully will help you install your Dometic RV awning strap with ease.
Place ladder against your RV and open your awning for easier access
Now that you’ve gathered your tools, it’s time to position your ladder and open your awning. First, place your ladder against your RV in a location that provides easy access to the awning. Be sure to position it on level ground and secure it to the RV.
Remember to always face the ladder when climbing up or down. Next, carefully open your awning to ensure it is fully extended and locked into place. Opening your awning will provide easier access to clean or repair any damages.
Plus, it’s a great way to create additional shaded space outside your RV for you and your family to enjoy. By following these simple steps, you’ll be able to get up close and personal with your RV’s awning without the need for a professional. Just remember to use caution and never attempt any repairs if you feel unsure or uncomfortable.
Step 3: Locate and Remove Old Strap
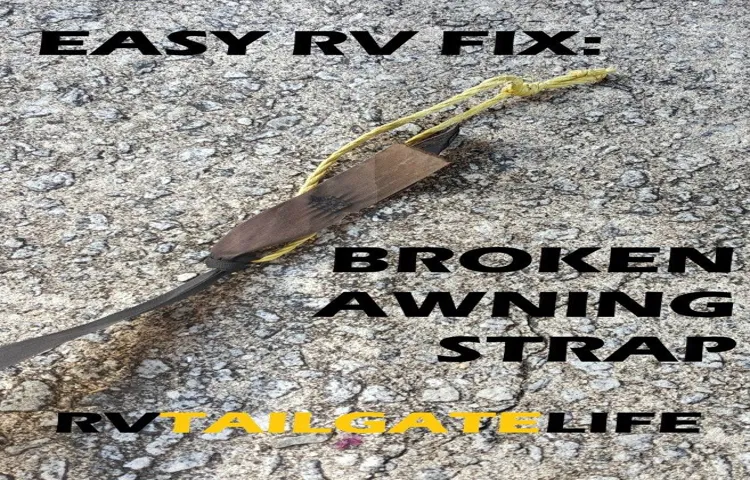
Now that you’ve safely retracted your Dometic RV awning and detached the tension arms, it’s time to move on to the third step of installing the new strap – locating and removing the old one. This step shouldn’t be too difficult, but it’s important to take care and avoid damaging the awning or any of its components while removing the old strap. First, inspect the awning carefully and locate the end of the old strap, which may be attached to a spring mechanism or other hardware near the roller tube.
Using a pair of pliers or another tool if necessary, remove any screws or clips holding the strap in place. Then, gently pull the strap out of the groove in the roller tube until it’s completely removed. Be sure to dispose of the old strap properly and double-check that the mounting area is clear and ready for the new strap to be installed.
With the old strap gone, you’re now one step closer to having a fully operational awning once again.
Find the old awning strap and remove it from the roller tube
awning strap When it comes to replacing an awning strap, the first step is to locate and remove the old strap from the roller tube. This may seem like a no-brainer, but it’s important to take your time and make sure you are removing the correct strap. Look for the strap that is attached to the roller tube and follows down to the arm of the awning.
Once you have found the correct strap, use a pair of pliers to remove any screws or bolts that may be holding it in place. Be sure to keep the old strap handy, as you may need to use it as a reference when installing the new one. With the old strap removed, you can now move on to the next step in replacing your awning strap.
Remember, taking your time during this step will ensure a smooth and successful replacement process.
Step 4: Attach New Strap to Roller Tube
To install a Dometic RV awning strap, the next step after removing the old strap is to attach the new one to the roller tube. Begin by sliding the strap loop over the end of the roller tube, making sure that the fabric is facing outward. Then, insert the end of the roller tube into the awning arm and secure it with the cotter pin.
Finally, tighten the tension on the strap by turning the tension knob or using a ratchet tool until the fabric is taut. This will ensure that your RV awning is secure and provides adequate shade during your outdoor activities. Remember to regularly inspect and maintain your awning to prolong its lifespan and avoid costly repairs in the future.
With these simple steps, you are well on your way to enjoying your RV adventures in comfort and style.
Thread the new awning strap through the slot and attach to the roller tube
After removing the old awning strap, it’s time to attach the new one to the roller tube in this fourth step. Start by threading the new strap through the slot on the tube. Ensure that it’s inserted in the correct direction and that it’s securely in place.
Next, attach the end of the new strap to the roller tube using the screw provided in the awning kit. Tighten the screw until it’s snug, but be careful not to strip the threads or over-tighten. Once the new awning strap is attached to the roller tube, give it a tug to ensure that it’s tight and won’t come loose while extending or retracting the awning.
With this step complete, you’re one step closer to having a fully functional and secure awning for your outdoor adventures.
Step 5: Attach New Strap to Ground Anchor
Now that you have removed the old and damaged strap from your Dometic RV awning and have attached the new strap to the roller tube, it’s time to secure the other end of the strap to the ground anchor. First, lay the strap out flat on the ground and attach one end to the ground anchor. Make sure the anchor is securely inserted into the ground so that it can effectively hold the weight of the awning.
Then, thread the other end of the strap through the clutch mechanism on the awning roller. Ensure that the strap is properly aligned with the notch on the clutch to prevent slipping. Finally, give the strap a gentle tug to ensure that it is firmly attached to the ground anchor and that the awning is securely fastened.
With these simple steps, your Dometic RV awning should be ready to use once again. Remember to regularly inspect the strap for any signs of wear and tear to prevent any damage or accidents from occurring.
Securely attach new awning strap to ground anchor and test strength
Now that you have removed the old awning strap and anchor, it’s time to securely attach the new strap to the ground anchor. Start by threading the new strap through the anchor and looping it back over itself. Make sure to tighten it down as much as possible to ensure maximum strength.
Once you’ve attached the strap, give it a test tug to make sure it’s holding up. You don’t want to have to redo this step again anytime soon! Checking the strength of the strap is crucial for both safety and longevity purposes. Remember, your new awning strap needs to be able to withstand all types of weather conditions, so it’s important to take your time with this step and ensure it’s done properly.
Doing so will keep your awning secure and prevent any unnecessary damage to your property.
Step 6: Retest Awning Operation
Congratulations! You’re almost done with the installation of your Dometic RV awning strap. Before you officially wrap things up, it’s important to retest the operation of your awning to ensure everything is working correctly. Make sure to extend and retract the awning a few times to ensure the strap is secure and functioning properly.
Check for any strange noises or inconsistencies in movement. If you notice anything is off, double-check your installation and make any necessary adjustments. Once you’re confident everything is operating as it should, you can now sit back, relax, and enjoy the shade provided by your Dometic RV awning strap.
Test the awning by opening and closing it a few times to ensure proper installation
After installing your new awning, it’s important to double-check your work and ensure that everything is operating as it should be. To do this, you’ll want to test the awning by opening and closing it a few times. This will help you identify any issues with the installation and make any necessary adjustments.
One thing to look out for is the smoothness of the operation. Your awning should move up and down effortlessly without any hiccups or pauses. Additionally, you want to make sure that it is properly secured in its open and closed positions.
If you notice any problems during the test, take the time to investigate and address them before your next use. By thoroughly testing your awning, you can have peace of mind that it will function properly and provide you with the desired shade and protection.
Enjoy Your New Awning Strap!
Are you ready to install your new Dometic RV awning strap? Here’s a simple step-by-step guide to help you get started. First, make sure you have all the necessary tools and equipment, such as a ladder and screwdriver. Next, locate the old strap and remove it carefully.
Then, take your new strap and attach it to the awning’s roller tube by wrapping it around and securing it with screws. Once the strap is in place, check for any adjustments that need to be made and test it out to ensure it is functioning properly. Enjoy your new awning strap and the extra convenience it brings to your RV adventures.
Conclusion
Well, there you have it folks, the easiest way to install a Dometic RV awning strap is simply to follow the instructions provided with the product, and if you don’t have those, you can always refer to the trusty internet for guidance. Remember that safety should always come first, so avoid any unnecessary risks and be sure to use the proper tools and equipment while installing your awning strap. With a little patience and a lot of determination, you’ll have that awning strap up and ready in no time, and you’ll be able to enjoy plenty of shade and shelter on your next camping adventure.
Happy RVing!”
FAQs
What is a Dometic RV awning strap?
A Dometic RV awning strap is a strap used to secure your RV awning in place while it is in storage or during windy conditions.
How do I install a Dometic RV awning strap?
To install a Dometic RV awning strap, first, locate the strap attachment point on your awning. Then, attach the strap to the point using the provided hardware. Finally, tighten the strap to secure the awning in place.
What is the recommended tension for a Dometic RV awning strap?
The recommended tension for a Dometic RV awning strap is snug, but not overly tight. This will ensure that the awning is securely held in place without causing damage to the awning or the RV.
Can I use any type of strap for my Dometic RV awning?
It is not recommended to use any type of strap for your Dometic RV awning as it may not be strong enough to hold the awning in place during windy conditions. Always use the recommended strap provided by the manufacturer.
How often should I check the tension on my Dometic RV awning strap?
It is recommended to check the tension on your Dometic RV awning strap before each use and adjust as necessary. Additionally, check the tension periodically throughout the season to ensure the awning is securely held in place.
Can I leave my Dometic RV awning strap on while using my awning?
It is recommended to remove the Dometic RV awning strap before using your awning. Failure to do so may result in damage to the awning or RV.
What should I do if my Dometic RV awning strap becomes damaged?
If your Dometic RV awning strap becomes damaged, it should be replaced immediately to ensure the awning is securely held in place during storage or windy conditions. Contact the manufacturer for replacement parts or visit a local RV dealer.