
If you’re faced with a punctured tire in the middle of nowhere, one tool that can come to your rescue is a tire iron. This handy tool helps you loosen stubborn lug nuts and remove the tire with ease. But if you’ve never used one before, the prospect of using a tire iron can seem a bit daunting.
Don’t worry – we’ve got you covered. In this step-by-step guide, we’ll walk you through the process of using a tire iron to change a tire in an easy and hassle-free way. Picture this: you’re driving on the highway, enjoying your music, and suddenly you hear a loud POP! Your tire has blown out, and you’re stranded on the side of the road with a flat tire.
What do you do? If you’re equipped with a tire iron, changing a tire is a breeze. This tool is designed to remove the lug nuts that hold the tire in place, allowing you to replace it with a spare. If you’re new to using a tire iron, don’t worry – it’s not as complicated as it seems.
With a little practice, you’ll be changing a tire like a pro in no time. In this blog post, we’ll guide you through the process of using a tire iron step-by-step, from loosening the lug nuts to removing the tire and installing a spare. So, sit back, relax, and let’s get started!
Table of Contents
- 1 What is A Tire Iron?
- 2 When to Use a Tire Iron
- 3 Tools Required For Using A Tire Iron
- 4 Steps for Using A Tire Iron: Changing a Tire
- 4.1 Step 1: Locate Your Spare Tire and Tools
- 4.2 Step 2: Loosen the Lug Nuts with a Wrench
- 4.3 Step 3: Lift the Vehicle with a Jack
- 4.4 Step 4: Remove the Lug Nuts
- 4.5 Step 5: Remove the Flat Tire
- 4.6 Step 6: Place the Spare Tire on the Vehicle
- 4.7 Step 7: Replace the Lug Nuts
- 4.8 Step 8: Lower the Vehicle
- 4.9 Step 9: Tighten the Lug Nuts
- 5 Conclusion
- 6 FAQs
What is A Tire Iron?
If you’re wondering what a tire iron is, it’s a tool used to remove and install lug nuts on car wheels. Tire irons come in different shapes and sizes, but most have a curved shape with a flat end for prying off the wheel hubcaps and a hexagonal socket end to fit over the lug nuts. Knowing how to use a tire iron is essential for every driver, especially when faced with a flat tire or the need to change your wheels.
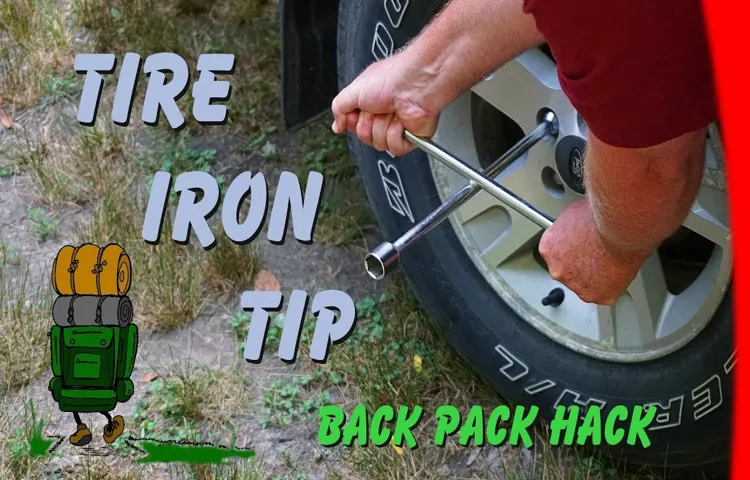
To use a tire iron, start by loosening the lug nuts using a lug wrench. Then, use the flat end of the tire iron to pop off the hubcap or wheel cover. Next, insert the hexagonal end of the tire iron onto the lug nut and turn it counterclockwise to loosen it.
Once all the lug nuts are loose, lift the car using a car jack, remove the lug nuts and take off the flat tire. Reverse the process to install the new tire and tighten the lug nuts with the tire iron. Remember to tighten them in a star pattern and make sure they are snug to avoid any accidents on the road.
Definition of a Tire Iron
A tire iron is a tool used for changing tires on vehicles. It typically has a long, flat, curved shape with one end shaped like a hook or claw for removing the tire and the other end being a flattened wedge used for prying the tire off the rim. The tire iron is an indispensable tool for anyone who has ever changed a tire.
Whether you are a professional mechanic or just an average person, having a tire iron in your toolbox is essential. It is used to remove lug nuts, which hold the tire tight to the wheel, and to pry the tire off the rim. A tire iron is designed to be strong and durable, as it must withstand high levels of force and pressure.
The size and shape of the tire iron depend on the type of tire and the vehicle it is being used for. Overall, a tire iron is a simple yet vital tool for maintaining the safety and functionality of your vehicle.
Types of Tire Iron
A tire iron is a tool used to change a tire on a vehicle. It is a long, thin bar made of steel or other durable materials. There are several types of tire irons, including the standard L-shaped tire iron, the X-shaped tire iron, and the straight tire iron.
Each type has a different shape and size, which can make a difference in the ease and speed of changing a tire. The L-shaped tire iron is the most common type and is often included with the spare tire in a car’s trunk. It has a 90-degree angle at one end, providing good leverage to loosen and tighten lug nuts.
The X-shaped tire iron is similar to the L-shaped tool, but it is more compact and does not have a right angle. Instead, it has four arms that can be used to turn the lug nuts with less effort. The straight tire iron is the simplest and most basic type, consisting of a single straight bar with a flattened end that fits over the lug nuts.
This type takes up less space than the L-shaped or X-shaped tire irons, but it requires more effort to loosen and tighten the nuts. No matter which type of tire iron you choose, it is essential to have one in your car’s trunk as you never know when you may need to change a tire on the road.
When to Use a Tire Iron
If you’re a driver, you may have encountered a flat tire on the road, and that’s when having a tire iron comes in handy. Knowing how to use a tire iron can save you time and money by allowing you to replace your tire on your own. To use a tire iron, you first need to locate the lug nuts, which hold the tire in place.
Then, use the tire iron to loosen the lug nuts by turning them counterclockwise. Be sure to exert enough force to break the initial grip of the lug nuts, but not too much that you strip them. Once you’ve loosened the lug nuts, use a car jack to lift the car so that the flat tire is off the ground.
Finally, remove the lug nuts and flat tire, and replace it with the spare tire. Use the tire iron to tighten the lug nuts by turning them clockwise, but be careful not to over tighten them, as this can cause damage to the tire. Overall, using a tire iron is a simple process that can save you a lot of trouble when you’re on the road.
Identifying When You Need A Tire Iron
If you are a seasoned driver, you’ve probably had to deal with changing a flat tire at some point. And one of the tools you need for this task is the tire iron. But when do you actually need to use it? Well, if you are removing a tire’s lug nuts, you’ll definitely need a tire iron.
With it, you can loosen and tighten the lug nuts with ease. It’s also important to use a tire iron when putting on a spare tire. Since spare tires are usually stored in the trunk, they’ve been sitting there for a while and may have gotten stuck onto the tire mounts.
With a tire iron, you can easily twist off the lug nuts and fix the stuck spare tire. However, always make sure to use the right size tire iron for your vehicle’s lug nuts, as using the wrong one can damage both the nuts and the tire iron. After all, it’s always better to be safe than sorry.
Tools Required For Using A Tire Iron
If you’re looking to change your own tires, knowing how to use a tire iron is an essential skill. But before you get started, you’ll need to make sure you have the right tools on hand. The most important tool is, of course, the tire iron itself.
You’ll want to choose a tire iron that’s sturdy and durable, with a good grip for better leverage. It’s also important to have a lug wrench, which you’ll use to loosen and tighten the lug nuts on your tires. Other tools you might need include a valve stem core remover, which is used to remove the valve stem core when you need to deflate your tire; a tire pressure gauge, which is used to check the pressure of your tires; and a jack stand, which is used to lift your vehicle off the ground while you work on the tires.
Once you have all of these tools on hand, you’ll be ready to use your tire iron with confidence and skill.
What You Will Need
When it comes to changing a tire, having the right tools is essential. One of the most important tools you’ll need is a tire iron. This handy tool is designed to help you remove the lug nuts that keep the tire in place.
To use a tire iron, you’ll need to have a few other tools on hand as well. Most importantly, you’ll need a good quality jack to lift the vehicle off the ground. You may also need a wheel chock or block to prevent the car from rolling or sliding while you work.
In addition, it’s always a good idea to have a pair of gloves on hand to protect your hands from dirt and grime. With these tools in your arsenal, you’ll be able to change a tire quickly and easily in the event of an emergency.
Steps for Using A Tire Iron: Changing a Tire
Changing a tire can be a daunting task, especially if you’re not familiar with the tools involved. However, with the right knowledge and technique, you can easily do it yourself. One of the most important tools you’ll need is a tire iron.
This tool is used to remove and tighten lug nuts that hold the tire in place. To use it, start by loosening the lug nuts before lifting the vehicle with a jack. Once the tire is off the ground, you can fully remove the lug nuts with the tire iron.
Place the tire iron on the lug nut and turn it counterclockwise to loosen it. To tighten the lug nut, turn the tire iron clockwise. It’s important to remember not to over-tighten the lug nuts, as this can cause damage to the wheel and brakes.
After changing the tire, double-check the lug nuts to make sure they are securely tightened. Following these steps and properly using a tire iron will ensure a successful tire change.
Step 1: Locate Your Spare Tire and Tools
When it comes to changing a tire, the first step is to locate your spare tire and tools. This may seem like a no-brainer, but you’d be surprised how many people don’t know where their spare tire is located or how to access it. Typically, it’s located in the trunk or underneath the vehicle.
Once you’ve located the spare, you’ll need to gather your tools, including a tire iron, a jack, and a lug wrench. Using a tire iron can be intimidating, especially if you’ve never done it before, but it’s a necessary skill to learn. The tire iron is used to loosen and loosen the lug nuts that secure the tire to the vehicle.
It’s important to remember to loosen the nuts before jacking up the car, as it’s much easier to turn the lug nuts while the tire is still on the ground. Once the lug nuts are loose, you can use the jack to lift the car off the ground and remove the tire. With a little practice, using a tire iron will become second nature and changing a tire will be a breeze.
Step 2: Loosen the Lug Nuts with a Wrench
When it comes to changing a tire, the first step is to prepare your tire iron and loosen the lug nuts. This might seem like a simple task, but it requires some physical exertion and the proper tools. Using a tire iron, place it over the lug nut and turn it counterclockwise.
You may need some force to break the tightness of the lug nut, so use your body weight and apply pressure in a careful and steady motion. Loosening the lug nuts before lifting the vehicle is crucial to prevent the tire from spinning or falling off, which can be dangerous and cause further damage to your car. Take your time and make sure all the lug nuts are loose enough to be turned by hand.
With this step completed, you can now move on to the next step of lifting the vehicle off the ground using a jack. Remember to keep safety a top priority and avoid any sudden movements that could put you in harm’s way.
Step 3: Lift the Vehicle with a Jack
When it comes to changing a tire, using a jack is a crucial step in the process. To begin, park your vehicle on a flat and level surface, turn on your hazard lights, and place wheel chocks behind the wheels. Locate the jacking points on your car, which are usually located behind or in front of the wheels.
Once you’ve found them, place the jack underneath one of the jacking points and slowly pump the handle until the jack begins to lift the car. It’s important to never get under the car when it’s being lifted by the jack. Once your tire is high enough off the ground to be able to remove the flat tire easily, you’re ready to move on to the next step of the process.
Remember, safety should always be a top priority when changing a tire with a jack.
Step 4: Remove the Lug Nuts
Removing the lug nuts is the next step in changing a tire, after safely jacking up the vehicle. You’ll need to use the tire iron to loosen the lug nuts so you can take them off completely. Place the tire iron onto the first lug nut and turn it counterclockwise to loosen it.
You may need to use some force at first, especially if the lug nuts are tightly fastened. Once the first lug nut is loose, move on to the next one and repeat the process until all of the lug nuts have been loosened. Be sure to keep the lug nuts in a safe place where they won’t get lost.
With the lug nuts removed, you can now take off the flat tire and replace it with the spare tire. Remember to tighten the lug nuts securely when you put the spare tire on, but don’t overtighten them – you can always double-check the tightness once the vehicle is back on the ground.
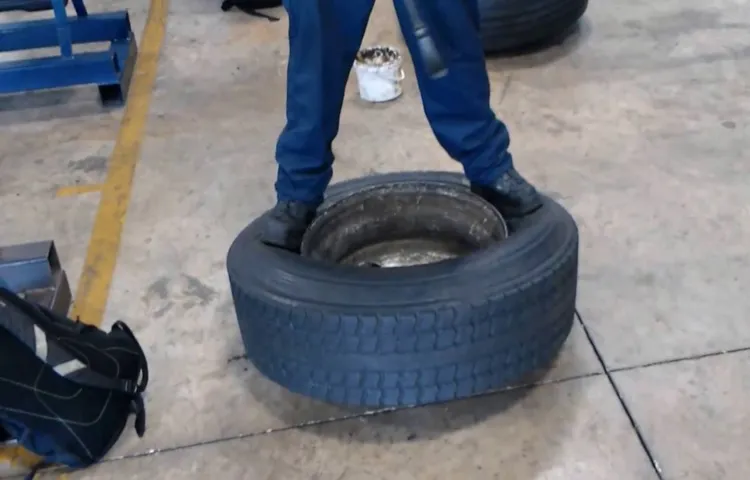
Step 5: Remove the Flat Tire
One of the most crucial steps in changing a tire is removing the flat one with a tire iron. Start by loosening the lug nuts with the iron, but don’t take them completely off just yet. Once they’re all loose, place the jack under the vehicle according to the manufacturer’s instructions, and lift the vehicle up until the tire is six inches off the ground.
This will ensure that you have enough space to remove the tire safely. With the vehicle secure, use the tire iron to completely unscrew the lug nuts, and carefully pull the flat tire off of the hub. Be sure to place the lug nuts in a secure location so that they don’t get lost or misplaced during the next steps of the process.
Finally, inspect the hub and make sure that there are no visible signs of damage or wear that could cause issues with the new tire. Now that the flat is out of the way, it’s time to move on to installing the spare tire.
Step 6: Place the Spare Tire on the Vehicle
Once you’ve successfully removed the flat tire, it’s time to put on the spare! But, before you do so, make sure to check the spare tire’s air pressure. If it’s low, you’ll want to inflate it to the recommended pressure before putting it on. This will ensure that the spare tire is safe to drive on.
Once you’ve checked the pressure, align the spare tire with the wheel studs and slide it onto the hub. Make sure that the spare tire is centered and flush against the hub before tightening the lug nuts by hand. Once they are snug, use your tire iron to tighten them further.
Remember to tighten the lug nuts in a star pattern to ensure that the spare tire is properly secured. Once you’ve tightened the lug nuts as much as possible, lower the vehicle until it’s sitting on all four wheels. Finally, use the tire iron to give each lug nut a final tightening.
And there you have it, you’ve successfully changed your tire! Remember, it’s always a good idea to have your flat tire repaired or replaced as soon as possible. Don’t leave the spare tire on for too long, as it’s typically not meant for long-term use.
Step 7: Replace the Lug Nuts
When it comes to changing a tire, replacing the lug nuts is the final step. But before we get into that, let’s first make sure we have everything in place. Make sure you have your tire iron, spare tire, and car jack ready.
Begin by loosening the lug nuts on your flat tire with the tire iron. Turn the nuts counterclockwise until they are loose enough to be removed by hand. Next, use the car jack to lift the car until the flat tire is completely off the ground.
Remove the loosened lug nuts and the flat tire, and replace it with the spare tire. Then, put the lug nuts back in place and turn them clockwise with the tire iron until they are tight. Don’t forget the order here – tighten them in a star pattern to ensure the tire is securely in place.
Finally, lower the car back to the ground and give each lug nut a final tightening. You’re all set! Remember, keeping up with your car’s maintenance and checking your tire pressure regularly can help you avoid the need to change a tire unexpectedly on the side of the road. Stay safe, and happy driving.
Step 8: Lower the Vehicle
Lowering the vehicle is an essential step in the tire-changing process. Once you’ve tightened the lug nuts, it’s time to lower the vehicle to the ground using your tire iron. Be sure to do this carefully and slowly to avoid damaging the tire or the car.
Depending on the type of jack you’re using, you may need to turn the handle or pump the mechanism to lower the vehicle. It may take a few tries to get the hang of it, so don’t rush the process. As the vehicle gradually comes down, you’ll hear the tire touch the ground.
This confirms it’s time to remove the jack and lower the car completely. Once the vehicle is on all four wheels, double-check that the lug nuts are snugly secured, and you’re good to go. Remember, safety first! Always keep a steady hand and be mindful of your surroundings while working on your car.
Step 9: Tighten the Lug Nuts
Now that you have successfully attached the new tire to your vehicle, it’s time to move onto the next step: tightening the lug nuts. This is a crucial step that cannot be overlooked, as loose lug nuts can result in a dangerous driving situation. To tighten the lug nuts, use your tire iron to turn each one clockwise.
Make sure to do this in a star pattern, rather than going around in a circle. This will ensure that the tire is secured evenly around the hub. Use your body weight to apply pressure and tighten as much as you can.
However, be careful not to overtighten, as this can cause the studs to break. Once you’ve gone over each lug nut multiple times, take a step back and double-check them all to make sure they’re all secure. This simple step can give you peace of mind as you continue your journey on the road.
Remember, safety first!
Conclusion
In conclusion, using a tire iron is as easy as taking candy from a baby (but, you know, don’t actually take candy from babies). Just position the iron onto the lug nuts and give it a good twist until they loosen and the tire comes loose. Remember to keep the iron straight and steady to avoid any mishaps, and voila! You’re ready to swap out your flat tire for a fresh one.
So, don’t be afraid to get your hands dirty – with a trusty tire iron by your side, you’ll be a pro in no time. Happy tire-changing!”
Summary of Tire Iron Use
Using a tire iron is a necessary skill for anyone who owns a car. In order to change a tire, there are a few steps that need to be followed. The first step is to make sure your car is parked on a flat surface and the emergency brake is engaged.
Then, locate the spare tire and the tire iron in the trunk. Use the tire iron to loosen the lug nuts on the flat tire by turning them counterclockwise. Once the lug nuts are loose, use a jack to lift the car off the ground, and remove the lug nuts and the flat tire.
Place the spare tire on the car’s hub and replace the lug nuts, tightening them by turning them clockwise with the tire iron. Finally, lower the car back to the ground and use the tire iron to fully tighten the lug nuts. It’s important to make sure the lug nuts are tightened securely to ensure safe driving.
With practice, using a tire iron to change a tire can become second nature, and you’ll be back on the road in no time.
Additional Tips and Recommendations
Using a tire iron is a crucial skill to have in case of emergencies such as changing a tire. The first step in using a tire iron is to loosen the lug nuts on the wheel you intend to replace. This is accomplished by placing the iron on the lug nut and turning it counterclockwise until it becomes loose enough to remove by hand.
Next, you’ll need to lift the car off the ground using a jack. Once the car is lifted securely, remove the lug nuts by hand and gently slide the tire off the wheel bolts. To replace the tire, slide the new tire onto the wheel bolts and tighten the lug nuts by hand.
Then, use the tire iron to give each nut a final tightness. It’s essential to make sure the tire is securely tightened, so be sure to check the torque specifications for your vehicle’s make and model. Remember to store your tire iron and jack safely in your trunk in case of any future emergencies.
In addition to using a tire iron, it’s essential to follow a few other tips to ensure your safety and the safety of others. Always make sure to wear appropriate clothing and protective gear when changing a tire. Additionally, be sure to work on a flat surface and away from any traffic.
If possible, try to change your tire in a well-lit area during daylight hours. Finally, it’s crucial to regularly inspect your tires and have them rotated and replaced when necessary to avoid any issues on the road. By following these steps and recommendations, you’ll be prepared for any flat tire emergency that comes your way.
FAQs
What is a tire iron used for?
A tire iron is used for removing lug nuts and changing tires on a vehicle.
How do I use a tire iron to loosen lug nuts?
Place the tire iron over the lug nut and turn it counterclockwise to loosen it. Apply force as needed, but don’t overtighten.
Can a tire iron be used to tighten lug nuts too?
Yes, after replacing a tire, the lug nuts should be tightened with a tire iron by turning it clockwise.
What are other uses for a tire iron?
Besides changing a tire, a tire iron can also be used to pry open stubborn lids, doors or can be used as a makeshift hammer.
How do I store my tire iron?
A tire iron should be kept with your car’s spare tire in a safe and secure place.
Do all cars require the same size tire iron?
No, tire iron sizes can vary depending on the vehicle. Check your car’s manual for the correct size or use a universal tire iron.
Can a tire iron be used on other types of vehicles besides cars?
Yes, tire irons can be used on other vehicles like motorcycles or ATVs, but always check for the correct size and use caution to avoid damaging rims or lug nuts.