Picture yourself driving down a smooth asphalt road on a beautiful, sunny day. Suddenly, you feel a subtle wobbling in your vehicle. You try to ignore it, but soon you realize that your tire bead is leaking.
Nothing can ruin a perfect day like a flat tire. Fortunately, there’s a comprehensive guide to help you fix this common issue and get back on the road. A tire bead leak is a result of an improperly sealing tire due to either corrosion, damage, or a gap between the tire and the rim.
In this guide, we will walk you through the steps on how to fix a tire bead leak and keep your tires in tip-top condition. From identifying the problem to replacing the tire bead, we’ll cover everything you need to know. Let’s get started and put an end to those pesky tire bead leaks!
Table of Contents
Introduction
Tire bead leaks can be a frustrating issue to deal with, but luckily it’s something that can be fixed relatively easily. First, you’ll want to inspect the tire for any damage or punctures that may have caused the leak. If there’s no obvious damage to the tire, the issue is most likely with the bead itself.
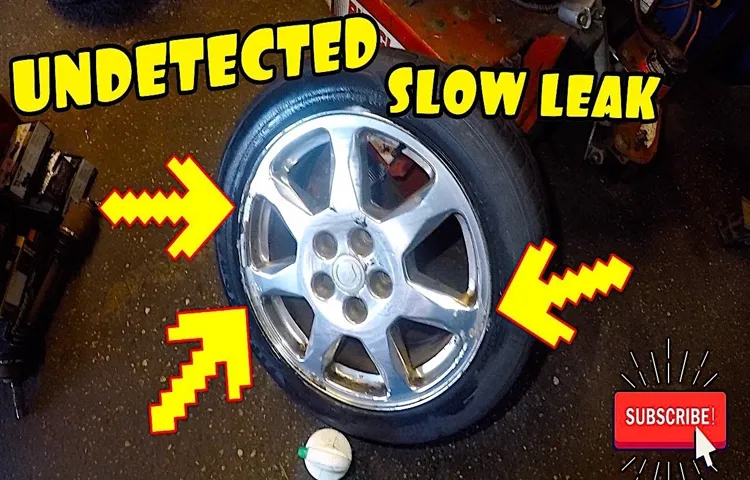
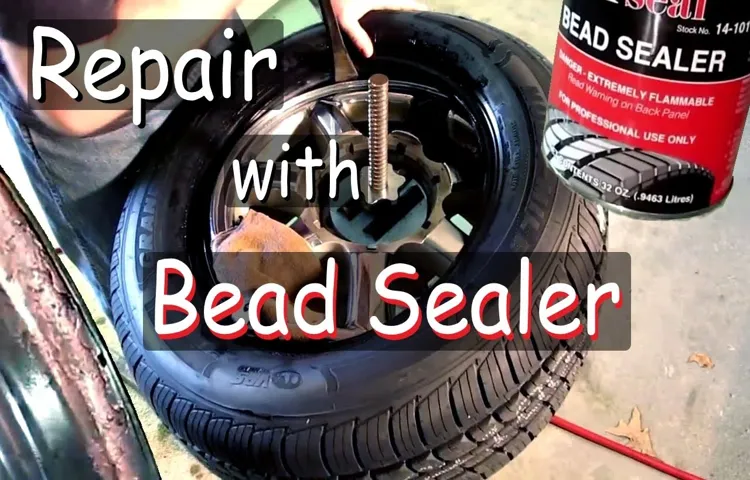
One possible cause of a bead leak is a buildup of rust or debris on the rim. To fix this, thoroughly clean the rim and bead with soap and water. If the issue persists, you can try applying a bead sealer to the problem area.
Be sure to follow the manufacturer’s instructions carefully and let it dry completely before reinflating the tire. If all else fails, you may need to take your tire to a professional for further inspection and repair. By following these steps and taking care of your tires regularly, you can prevent bead leaks from happening in the future.
Explanation of Tire Bead Leaks
Tire bead leaks can be quite a frustrating experience for any vehicle owner. These leaks occur when the tire’s bead fails to seal properly against the wheel’s rim, resulting in the loss of air pressure in the tire. This can lead to reduced fuel efficiency, poor vehicle handling, and even unsafe driving conditions in extreme cases.
However, before we dive into the causes of tire bead leaks and how to fix them, let’s first understand what a tire bead actually is. The tire bead is a reinforced rubber ring that encircles the inner edge of the tire and creates a seal against the wheel rim when inflated.

Signs of a Tire Bead Leak
If you find yourself constantly filling up air in your tires, there is a possibility that there may be an issue with your tire bead. The tire bead is the part of the tire that connects to the wheel, and if there is a leak in this area, it can cause tire pressure to decrease rapidly. There are a few signs to look out for when it comes to a tire bead leak.
One of the most noticeable signs is a flat tire that won’t inflate or one that loses pressure quicker than usual. If you see rust or damage to the wheels or tire rims, this may also be an indication of a bead leak. Another telling sign is a hissing noise coming from the tire area.
If you notice any of these symptoms, it’s important to get your car checked out by a professional mechanic to fix the issue. By addressing a tire bead leak early, you can prevent further damage to your tire and improve your car’s overall safety and performance.
Tools and Materials Required
One of the most frustrating experiences for drivers is a tire bead leak. It’s not only annoying but can be dangerous on the road as well. To fix this problem, you’ll need a few tools and materials.
Firstly, you’ll need a jack to lift the car off the ground. You’ll also need a lug wrench to remove the wheel’s lug nuts. After that, you’ll need a tire iron to remove the tire from the rim.
A tire patch kit will be required to fix the leak after you’ve identified where it is. Finally, an air compressor and pressure gauge will be necessary to check the pressure of the tire and inflate it after fixing the leak. Following these steps, you’ll be able to fix your tire bead leak quickly and efficiently.
List of Required Tools and Materials
When it comes to DIY home repairs, having the right tools and materials is essential for getting the job done properly. Depending on the task at hand, you may need a variety of tools ranging from basic hand tools like hammers and screwdrivers to more complex power tools like saws and drills. Other essential items include safety equipment such as gloves, goggles, and respirators.
For specific projects, you may also need specialized materials like adhesives, paints, and sealants. It’s important to take stock of your inventory before starting any project to ensure you have all the necessary tools and materials on hand. This will not only save you time and frustration but also ensure your safety while working on the project.
Remember to always follow manufacturer’s guidelines and take necessary safety precautions throughout the project. With the right tools and materials, any DIY project can be tackled successfully.
Step-by-Step Guide
If you’re experiencing a tire bead leak, don’t fret, it’s a common issue that can be tackled with a bit of elbow grease and know-how. First, locate the air leak by putting soap and water on the tire’s rim and inflating it to check for bubbles. Once you’ve found the problematic area, deflate the tire, remove it from the rim, and clean both surfaces with a wire brush or sandpaper.
Apply a bead sealer to the rim and reposition the tire, making sure it’s properly aligned and seated. Inflate the tire to the recommended pressure and voila, your leak is fixed! Remember to always check your tire’s integrity regularly to prevent future issues.
Step 1: Remove the Tire from the Rim
So, you’re looking to remove a tire from its rim? Maybe you’re changing a flat or just doing some routine maintenance. Either way, it’s important to follow the proper steps to ensure a safe and successful process. The first step is to remove the tire from the rim.
This may sound simple enough, but it requires some attention to detail. First, you’ll need to deflate the tire completely. Use a tire pressure gauge to check that the tire has no pressure left in it.
Once deflated, loosen the lug nuts on the tire with a lug wrench. Then, use a tire iron to pry the tire away from the rim. Be careful when doing this, as you don’t want to damage the rim or the tire.
Once the tire is fully removed from the rim, inspect both the tire and rim for any damage or wear. And that’s it! With this first step complete, you can move on to the next step in the process.
Step 2: Clean the Bead Seat and Rim Flange
After removing the tire from the rim, the next step is to clean the bead seat and rim flange. This area is where the tire and rim meet, and it’s essential to ensure there is no debris, rust, or corrosion present, as it can lead to air leaks and other tire-related issues. The process of cleaning the bead seat and rim flange is straightforward.
First, use a wire brush or sandpaper to remove any rust or corrosion on the rim’s surface. Next, use a mild detergent and a damp cloth to wipe down the bead seat. Avoid using any harsh chemicals or solvents as they can damage the tire.
After cleaning, inspect the area for any visible dents or cracks that could compromise the seal. If there are any issues, it’s best to replace the rim before installing a new tire. By taking the time to clean and inspect the bead seat and rim flange, you can ensure a secure and safe tire fit, preventing any potential accidents or mishaps.
Step 3: Apply Bead Sealer to the Rim Flange
After cleaning the rim flange, the next step in prepping for a tire change is to apply bead sealer. This step is essential in creating an airtight seal between the tire and the rim, which helps prevent air loss and potential tire blowouts. Bead sealer comes in a paste or spray form and should be evenly applied to the rim flange, ensuring complete coverage.
It’s important to note that too much sealer can result in difficulties mounting the tire, while too little sealer can result in air leaks. Therefore, it’s crucial to follow the manufacturer’s recommended amount and to apply the sealer precisely to the rim flange. After applying the bead sealer, allow it to dry before mounting the new tire.
Don’t rush this process as the sealer’s drying time is crucial in achieving the perfect seal. By following this step-by-step guide, you’ll be well on your way to successfully changing your tire and keeping yourself safe on the road.
Step 4: Reinstall the Tire on the Rim
To reinstall a tire on the rim after patching or replacing a tube, you’ll need a few tools and some patience. Start by taking the tire off the rim and inspecting the inside thoroughly. Ensure that there are no sharp objects or debris still embedded in the tire as this can lead to another puncture.
Once you’re satisfied that it’s safe, you can reposition the tire onto the rim. Begin by aligning the tire label with the valve stem. Carefully work the tire onto the rim, starting at the valve and working your way around until it’s fully seated.
Use your fingers or a tire lever if necessary, but don’t use excessive force as it might cause damage to the tire. Once the tire is seated on the rim, inflate it slowly and check the seating and alignment. Look for even seating on both sides of the tire, and ensure no part of the tire is bulging or causing unevenness in the rubber.
Inflate the tire to the recommended pressure, check the alignment, and give it a spin to ensure everything moves smoothly. With your tire now safely reinstalled, you’re ready to hit the road with confidence!
Preventing Future Tire Bead Leaks
If you’re having issues with tire bead leaks, preventing them is the key to avoiding further headaches. One of the best ways to do this is to ensure that your wheels are always clean and free of debris. Dirt, grime, and other particles can cause the tires to lose their seal, leading to leaks.
You should also make sure that your tires are installed correctly and that they’re properly inflated. Incorrect installation or low tire pressure can cause the bead to slip and result in a leak. To fix a tire bead leak, you should remove the tire and clean the bead area thoroughly before reinstalling it.
Using a tire sealant can also help prevent leaks by filling any gaps and creating a seal around the bead. Overall, regular maintenance and proper installation are key to preventing tire bead leaks in the future.
Regular Maintenance
Regular maintenance is the key to preventing future tire bead leaks. Many people neglect their tires, even though they are one of the most important parts of any vehicle. One of the main causes of tire bead leaks is improper installation or damage to the bead, which is the part of the tire that contacts the rim.
To prevent this problem, it is important to have your tires checked regularly by a professional mechanic or tire specialist. They can inspect the tire for damage, make sure it is properly inflated, and ensure the bead is correctly seated on the rim. Additionally, driving on rough or pothole-filled roads can also cause bead damage, so it is important to avoid these conditions whenever possible.
By taking these simple steps, you can prevent future tire bead leaks and keep your vehicle running smoothly for years to come.
Proper Tire Inflation
Proper tire inflation is crucial in preventing future tire bead leaks. When your tire is underinflated, it causes the sidewalls to flex and bend, which puts pressure on the tire bead. Over time, this can cause the tire bead to weaken and eventually break.
On the other hand, overinflation can lead to the bead being pushed too tightly against the wheel rim, causing it to warp and eventually resulting in a leak. It’s best to always consult your vehicle’s owner manual or the tire manufacturer for the recommended tire pressure. Checking your tire pressure regularly and making sure it’s at the proper level will not only prevent bead leaks but also improve fuel efficiency and extend the lifespan of your tires.
Remember, proper tire inflation is a simple maintenance task that can save you from costly repairs and keep you safe on the road.
Conclusion
In conclusion, fixing a tire bead leak requires patience and persistence. It’s important to identify the root cause of the issue, which can be anything from rusted rims to improperly seated tires. With the right tools and technique, anyone can repair a tire bead leak and get back on the road.
So don’t let a pesky leak deflate your spirits, tackle it head on and keep on rolling!”
FAQs
What causes a tire bead leak?
A tire bead leak can be caused by corrosion, dirt, or damage to the tire bead itself.
How can I tell if I have a tire bead leak?
You may notice a hissing noise coming from the tire, or the tire may be losing air pressure more quickly than usual.
Can I fix a tire bead leak myself?
It is possible to fix a tire bead leak yourself, but it can be difficult and requires some specialized tools. It may be best to take your tire to a professional.
How much does it cost to fix a tire bead leak?
The cost of fixing a tire bead leak will depend on the severity of the leak and whether you do it yourself or take it to a professional. It could range from a few dollars for a DIY fix to $50 or more for professional repair.
Is a tire bead leak dangerous?
A tire bead leak can be dangerous because it can cause the tire to lose air pressure and potentially lead to a blowout while driving.
How long does it take to fix a tire bead leak?
The time it takes to fix a tire bead leak will depend on the severity of the leak and whether you do it yourself or take it to a professional. It could take anywhere from a few minutes to a few hours.
Can a tire bead leak be prevented?
Regular tire maintenance and cleaning can help prevent a tire bead leak. Additionally, avoiding hitting curbs or driving over rough terrain can also prevent damage to the tire bead.


