
When it comes to outdoor adventures, a roof rack can be your best friend. Whether you’re hauling bikes, kayaks, skis, or even just extra luggage, a roof rack can make all the difference in getting your gear safely to your destination. But if you’re new to the world of roof racks, you might be wondering: how do you install one? Don’t worry, we’ve got you covered.
In this blog post, we’ll walk you through the steps of how to install a roof rack, so you can hit the road with all your gear in tow. So grab your coffee and let’s get started!
Table of Contents
Check Your Vehicle’s Compatibility
Before you start installing a roof rack on your vehicle, it’s essential to check whether your vehicle is compatible with the rack you’re planning to install. Different car models may require specific types of roof racks, and not all racks fit every car. You can check your vehicle’s compatibility by accessing the manufacturer’s website or a trustworthy third-party website.
The websites usually have a feature for vehicle fitment that helps you to select the right roof rack based on your car’s make, model, and year. Don’t take any chances with compatibility because installing the wrong roof rack can lead to damage to your car or even lead to major accidents on the road. Before buying a roof rack, ensure you confirm compatibility first.
Research Your Vehicle’s Roof
One of the critical things to consider before purchasing a roof rack is to check your vehicle’s compatibility. Not all roof racks are compatible with every vehicle make and model. It’s crucial to research your vehicle’s roof to determine the roof type, weight capacity, and attachment points.
This information will ensure that you choose the right roof rack that fits securely to your vehicle. Failing to check your vehicle’s compatibility can lead to significant problems such as damage to your car or unsafe driving conditions. In short, always do your homework and check your vehicle’s compatibility before purchasing a roof rack.
Confirm Compatibility With Rack Manufacturer
When it comes to finding the right bike rack for your vehicle, it’s important to check for compatibility with your specific vehicle make and model. But even before that, you should confirm compatibility with the bike rack manufacturer. Different brands may have different specifications and requirements for their racks, and you want to make sure that the one you choose fits your vehicle as well as your bikes.
Some manufacturers offer compatibility tools on their websites, while others may require you to reach out directly to their customer service. It’s worth the extra effort to ensure a secure and safe fit for your bikes and peace of mind for your travels. After all, you wouldn’t want to hit the road only to have your bikes come loose or damage your vehicle.
So take the time to confirm compatibility with the rack manufacturer, and enjoy your adventures with confidence.
Gather Necessary Tools and Parts
When it comes to installing a roof rack, the first step is to gather the necessary tools and parts. This is crucial to ensure the installation process goes smoothly and efficiently. Firstly, you will need the roof rack itself, along with any necessary mounting hardware.
It’s essential to ensure that the rack and hardware you choose are compatible with your vehicle’s make and model. Next, gather the necessary tools, such as a wrench, socket set, and screwdriver. These can vary depending on the type of roof rack and hardware you are using, so be sure to check the manufacturer’s instructions for specific requirements.
Additionally, it’s important to have a measuring tape on hand to ensure proper placement and fit of the roof rack. By gathering all necessary tools and parts beforehand, you can avoid any extra trips to the store during the installation process, and ensure a successful roof rack installation.
Read Installation Instructions Carefully
When it comes to installing anything, reading the instructions carefully is crucial to avoid any mishaps. Before starting the installation process, it’s important to gather all the necessary tools and parts to prevent any delays or interruptions. Make sure to review the instructions multiple times to gain a clear understanding of each step and ensure that you have all the required tools and parts.
Skipping ahead or ignoring any steps can lead to a botched installation and may even damage the item you’re installing, leading to additional expenses and wasted effort. Take your time, be patient, and ask for assistance if required. Remember, when you take the time to read and follow the installation instructions precisely, you’ll have a smooth and successful installation without any headaches.
Prepare Your Workspace
Preparing your workspace is an essential task before starting any repairs or projects. Gathering necessary tools and parts is the first step in achieving an efficient workspace. You don’t want to waste time by stopping and searching for a tool or a part when you are in the middle of your work.
Make sure you have a list of all the required tools and parts before you start. Check if you have them available, and if not, place an order or borrow them from a friend. It is better to have extra parts and tools than to face delays due to missing ones.
Always ensure that you have the right kind and size of tools for the job. You don’t want to damage equipment or harm yourself because of the wrong tools. Having everything set up beforehand can make your workspace organized, which will help reduce stress and increase productivity.
By doing so, you can focus on the project rather than looking for tools or parts.
Install Crossbars or Track
Looking to increase your vehicle’s storage space? Installing a roof rack can do just that! If you’re wondering how to install roof rack, one option is to add crossbars or tracks to your vehicle’s roof. Crossbars are usually mounted to your vehicle’s existing roof rails or directly to the roof itself, while tracks are mounted to the roof using screws. Once installed, you can then attach your roof rack to the crossbars or tracks.
It’s important to make sure you’re choosing the right crossbars or tracks for your vehicle and roof type to ensure a secure and safe fit. Additionally, be sure to follow the manufacturer’s instructions closely when installing your crossbars or tracks to avoid any damage to your vehicle. With the right tools and a bit of patience, installing crossbars or tracks can be an easy DIY project for any car owner.
By taking the time to properly install your roof rack, you can enjoy the added convenience and storage space for years to come!
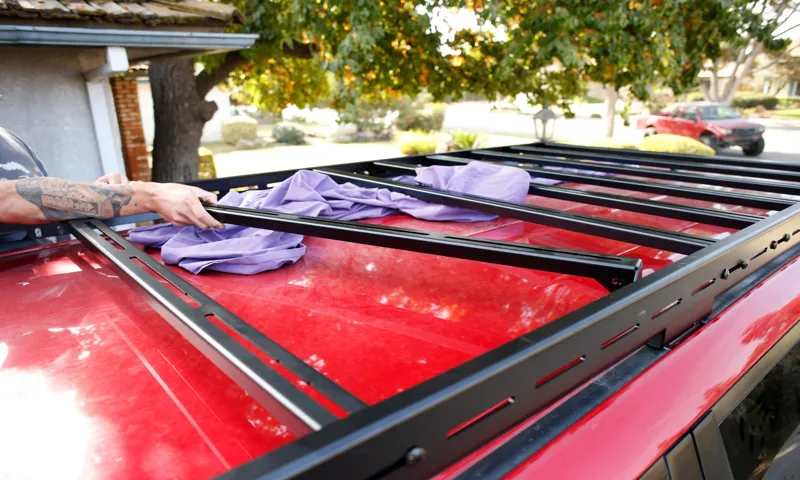
Clean and Prepare Roof Surface
If you’re installing a rooftop carrier on your car, the first step is to clean and prepare the surface of your roof. You want to make sure that the carrier or crossbars have a secure and stable foundation. Next, it’s time to install the crossbars or track.
Crossbars create a foundation for your carrier, while a track system allows for more versatility in placement. If your car already has rails, make sure to check if they are permanent or removable. If they are permanently attached, consider using track systems to avoid any damage.
Installing crossbars or a track system may seem daunting, but it’s a straightforward process that will provide you with added convenience for your next adventure. Remember to securely tighten all bolts and screws and test for stability before hitting the road. Always prioritize safety and enjoy the ride.
Attach Crossbars or Track
If you’re planning on carrying anything on the roof of your car, attaching crossbars or a track is a must. These allow you to securely fasten your gear and prevent it from flying off during travel. Installing crossbars or a track is relatively straightforward, although the process may differ slightly depending on your vehicle and the type of roof you have.
Generally, you’ll need to first measure the distance between your roof rails to determine the correct size crossbars or track. Then, attach the hardware to the roof, making sure it’s tightened down snugly. Finally, attach the crossbars or sliding track to the hardware, and you’re good to go! Just be sure to check your manufacturer’s guidelines to ensure you choose the correct crossbars or track and follow installation instructions to a tee.
With this simple addition, you’ll be able to safely transport all your gear with ease.
Attach Mounting Brackets
When it comes to installing a roof rack, attaching mounting brackets is an essential step. Firstly, it’s important to gather all the necessary tools and parts needed for the installation before starting. Most manufacturers provide brackets, bolts and washers as part of the kit and in the right sizes required for the vehicle’s roof.
Begin by positioning the brackets at equal distances along the car’s roof, where they can fit snugly between the ridges. Next, align the brackets with the pre-drilled holes in the roof. Tighten the bolts with the appropriate socket or wrench to ensure they are secure.
It’s essential to ensure that the brackets are securely attached to the roof to prevent any accidents while driving. Once the brackets are fully installed, the crossbars can then be attached to the brackets, followed by any attachments needed for carrying various gears or luggage. With these simple steps, you can install a roof rack like a pro and get ready for your next adventure on the road with ease.
Secure Brackets to Crossbars or Track
When it comes to attaching mounting brackets to your roof rack crossbars or track, it’s important to ensure you do so securely to keep your gear safe and stable during transport. First and foremost, make sure you have the correct size and style of brackets for your specific crossbars or track system. Then, place the bracket onto the crossbar or track and slide it into place, making sure it is aligned properly.
Depending on the type of bracket you have, you may need to adjust the mounting hardware or use a tool to tighten the bolts. It’s essential to follow the manufacturer’s instructions carefully to ensure a secure attachment. Once you’ve got the brackets securely attached, you can then mount your gear to your roof rack and hit the road with peace of mind.
Remember, a sturdy and dependable mounting system is essential for safe and enjoyable adventures, so don’t skimp on installation.
Install Carrier or Basket
Installing a roof rack can seem like a daunting task, but it’s actually quite simple. One important step is to decide whether you want to install a carrier or a basket onto your roof rack. A carrier is perfect for transporting items such as luggage, whereas a basket is ideal for carrying larger items like bicycles or kayaks.
Once you’ve determined which accessory you want to install, it’s important to carefully follow the manufacturer’s instructions. This includes ensuring that the rack is securely attached to your vehicle and that the carrier or basket is properly positioned and tightened. Don’t forget to double-check everything before hitting the road to ensure a safe and secure transport of your belongings.
With a little bit of patience and attention to detail, anyone can successfully install a carrier or basket onto their roof rack and enjoy the benefits of having extra storage space during their travels.
Attach Carrier or Basket to Mounting Brackets
Installing a carrier or basket to your bike can offer a lot of advantages when it comes to commuting or running errands. First things first, you need to attach the carrier or basket to the mounting brackets securely. When mounting the carrier, ensure that the brackets are tightly fixed in a suitable place at the back of the bike.
This will serve as the foundation for attaching the carrier or basket. The next step is to attach the carrier or basket using bolts, screws, or other hardware that comes with the carrier or basket. Make sure to use the right tools to tighten the screws, bolts, or nuts accordingly.
Once the carrier or basket is in place, it is essential to test it by loading some lightweight items to check the balance and security. It’s crucial to ensure that it’s securely in place before placing heavier items. Proper installation and setup of your bike carrier or basket can make a significant difference in the comfort and convenience of your biking experience.
With a properly installed carrier or basket, you can carry your essentials with ease while cycling around town.
Test Your Installation
So, you’ve just installed your brand new roof rack and you’re excited to put it to use. But before you hit the road, it’s important to test your installation to ensure everything is secure and safe. Start by double-checking that all the bolts and screws are tightened to the manufacturer’s specifications.
Next, load up your gear onto the rack and give it a gentle shake to see how stable it is. If anything feels loose or wobbly, go back and tighten any bolts that may have come undone. It’s also a good idea to take your vehicle for a short test drive to make sure the rack doesn’t rattle or make any unexpected noises.
Once you’ve confirmed that everything is secure and stable, you’re ready to hit the road with confidence knowing your gear is safely secured on your new roof rack. So, now you know how to install roof rack correctly and can enjoy your adventurous trip with your valuable luggage in place.
Ensure Proper Fit and Security
After installing a car seat, it is crucial to test the installation to ensure it provides proper fit and security. The first step is to check the tightness of the seat by grabbing the base and pulling it forward and to the side. If the seat moves more than an inch in any direction, it is too loose.
You should also check the harness straps to ensure that they are snug and secure, with no slack. Make sure the chest clip is at armpit level and the harness straps pass through the appropriate slots for your child’s height. Always refer to the manual for your specific car seat model for proper installation guidance.
Remember, improperly installed car seats can put your child at risk in the event of an accident, so take the time to double-check everything before hitting the road.
Conclusion and Safety Tips
And there you have it, folks! Installing a roof rack may seem daunting at first, but with the proper tools, a little patience, and a lot of elbow grease, it can be done. Just remember to always double-check your work and make sure everything is securely fastened before hitting the road. Now you can load up that extra gear, hit the open road, and as they say, the sky’s the limit.
..on top of your car, that is.
“
FAQs
What is a roof rack and why do I need one?
A roof rack is a set of bars mounted on top of a vehicle that allows you to transport bulky or oversized items that won’t fit inside your car. It can be used for carrying items such as bicycles, kayaks, skis, luggage, and more.
How do I choose the right roof rack for my vehicle?
You should always check the manufacturer’s guidelines for specific fitting instructions. However, generally, you need to know your vehicle’s make, model, and year to ensure compatibility with the roof rack you are considering. You should also consider the weight capacity, style, and price when making your decision.
How do I install a roof rack on my vehicle?
First, remove any existing roof racks or accessories from your vehicle. Then, place the roof rack on top of your vehicle, making sure it’s correctly aligned with your car’s mounting points. Finally, using the appropriate hardware and tool, secure the roof rack to your vehicle according to the manufacturer’s instructions.
Can I install a roof rack on a car with a sunroof?
Yes, you can install a roof rack on a car with a sunroof, but you should take precautions to avoid damaging the sunroof. Make sure the rack is compatible with your car’s sunroof and follow the instructions carefully. You may also need to adjust the placement of the rack to avoid contact with the sunroof.
Is it safe to drive with a roof rack installed on my car?
Yes, it is safe to drive with a roof rack installed on your car if it’s correctly installed and loaded within the manufacturer’s weight capacity guidelines. However, you should take care not to exceed the speed limit and avoid sudden movements or turns that could cause the load to shift.
Can I leave my roof rack on my car when I’m not using it?
Yes, you can leave your roof rack on your car when you’re not using it, but it’s recommended to remove it if you’re not planning to use it for an extended period. This can prevent damage to the roof rack and your car’s paint and reduce wind noise and drag.
How do I maintain my roof rack to ensure it lasts for a long time?
To maintain your roof rack, you should regularly clean it with soap and water to remove dirt and debris. You should also inspect the roof rack before each use to ensure it’s correctly installed and not damaged. Additionally, you should avoid driving through automatic car washes and high-wind conditions that could damage the roof rack or your items.