
Do you need to remove the front tire of your bike for maintenance or storage? It’s a simple task that can seem daunting if you haven’t done it before. But with a few basic tools and some guidance, you can do it without breaking a sweat. It’s like changing a light bulb – once you know how to do it, it becomes second nature.
In this blog post, we’ll walk you through the steps of removing the front tire of your bike, so you can get back to riding in no time. Whether you’re a beginner or an experienced cyclist, this guide is for you. So, grab your tools and let’s get started!
Table of Contents
Safety First
When it comes to taking the front tire off your bike, safety should always come first. The first step is to make sure your bike is secured properly. You don’t want your bike toppling over while you’re trying to work on it.
Use a bike stand or securely prop it against a wall. Next, release the brakes and loosen the nuts or quick release lever that hold the wheel in place. Be sure to pay close attention to which way the wheel comes off and how it is lined up so you can easily reattach it later.
It’s important to note that if you’re not comfortable with this process, take your bike to a professional bike shop. But if you’re up for the challenge, taking your front tire off yourself can save you both time and money. By following these simple steps, you’ll be well on your way to mastering your own bike maintenance.
Secure the Bike
As an avid cyclist, safety should always come first when it comes to hitting the road. One of the best ways to ensure your bike’s safety is through securing it properly. A bike that isn’t properly secured is an easy target for thieves, and you wouldn’t want to come back to find your beloved ride missing.
The first step towards securing your bike is investing in a good quality lock. You can either go for a traditional U-lock or a chain lock, but make sure it’s strong enough to withstand forceful attacks. Another tip is to lock your bike in a well-lit area and in a visible spot.
Keep in mind that thieves don’t like to be seen, so choose a spot where your bike is easily visible to people passing by. Lastly, secure your bike’s components as well. Remove the front wheel and lock it with the frame, and secure the rear wheel with the lock as well.
Always remember to prioritize your bike’s safety, and you’ll have many happy and safe rides to come.
Wear Gloves and Safety Glasses
When it comes to any task that involves handling chemicals or hazardous materials, safety should always be your top priority. Wearing gloves and safety glasses may seem like a no-brainer, but you’d be surprised how many people forget or overlook this crucial step in handling these materials. Gloves help protect your hands and keep any harmful chemicals from coming into contact with your skin, while safety glasses protect your eyes and prevent hazardous materials from splashing into them.
It may seem like a hassle to put on gloves and safety glasses every time you handle these materials, but it’s worth it to protect yourself from potentially dangerous consequences. So next time you’re handling chemicals or hazardous materials, remember: safety first!
Consider Having a Friend Help
When preparing for a move, keeping safety in mind is of utmost importance. Consider having a friend help, as this not only makes the process more manageable, but it can also ensure that someone is around in case of an emergency. Moving heavy objects, such as furniture, can be dangerous if not done properly, and having a friend around to assist can prevent potential accidents.
Additionally, when packing and organizing, it’s helpful to have someone else to bounce ideas off of and to keep an eye out for any potential safety hazards. Moving can be stressful, and having a friend present can not only make it safer but also more enjoyable. Don’t hesitate to ask for help and make safety a top priority during the moving process.
Gather Your Tools
Taking the front tire off a bike can be a daunting task for many, especially for those who are new to cycling. It’s critical to have the right tools before getting started. The first tool that you’ll need is a wrench.
This tool is essential for loosening and tightening the bolts on the fork when you’re removing or re-installing the front tire. A socket wrench may also come in handy, especially if the nuts are hard to loosen using a regular wrench. You’ll also need a bike stand or a sturdy platform where you can rest your bike while working on it.
Lastly, it’s essential to have a set of tire levers to help you remove the tire from the rim. With all of these tools in hand, you’ll be ready to take the front tire off your bike in no time!
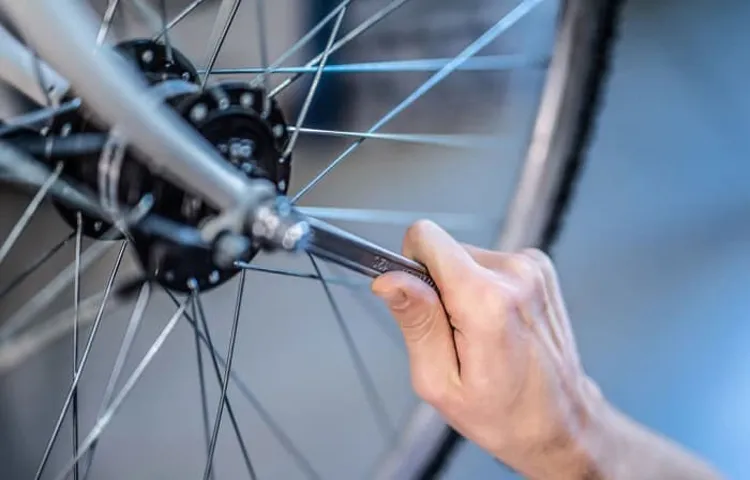
Wheel Wrench
When it comes to changing a tire, having the proper tools on hand can make all the difference. One essential tool is a wheel wrench, also known as a lug wrench. This tool is used to remove and tighten the lug nuts that keep the wheel in place.
Before tackling a tire change, it’s important to gather your tools, including the wheel wrench. Make sure that the wrench fits the size of your lug nuts and that it is in good working condition. A damaged or worn out wrench can make the process much more difficult and time-consuming.
It’s also a good idea to have a jack, spare tire, and tire iron on hand. With the right tools and a little know-how, you can change a tire quickly and safely, getting back on the road in no time.
Hex Wrench Set
When it comes to tackling DIY projects and repairs at home, having the right tools is essential. One tool that should be in every handy person’s arsenal is a set of hex wrenches. These versatile tools come in a variety of sizes and are perfect for tightening or loosening bolts and screws with hexagonal heads.
Whether you’re putting together furniture, fixing a bike or tightening a leaky faucet, a good quality hex wrench set is a must-have. Not only are they a time-saver, but they are also convenient to use and can fit into tight spaces that other tools cannot. So, gather up your tools and add a hex wrench set to your collection, you won’t regret it!
Bike Stand or Block
If you’re an avid cyclist, you understand the importance of having a sturdy and reliable bike stand or block. Not only does it make maintenance and repair easier, but it also ensures your safety while working on your bike. So, before you start tinkering with your two-wheeler, gather your tools and get your workspace ready.
First and foremost, you’ll need a good quality stand or block to hold your bike steady. A stand or block will keep your bike in place without damaging the frame or wheels. Next, you’ll want to gather a set of Allen wrenches, a screwdriver set, tire levers, a chain tool, and a bike pump.
Having the right tools on hand will make your maintenance tasks go much smoother and quicker. Don’t forget to wear gloves to protect your hands and goggles to shield your eyes from debris. By taking the time to gather your tools and gear, you’ll be able to tackle any maintenance task with confidence and ease.
Rag or Towel
When it comes to DIY projects, having the right tools is essential. One item that is often overlooked, but is actually quite important, is a rag or towel. These simple items can be used for a variety of tasks, such as wiping up spills or cleaning off surfaces.
Plus, they are inexpensive and easy to find. Before beginning your project, make sure you have a few rags or towels on hand. They can save you time and make the job go more smoothly.
So next time you’re getting ready to tackle a home improvement task, don’t forget to add a rag or towel to your toolbox. It may seem like a small thing, but it can make a big difference.
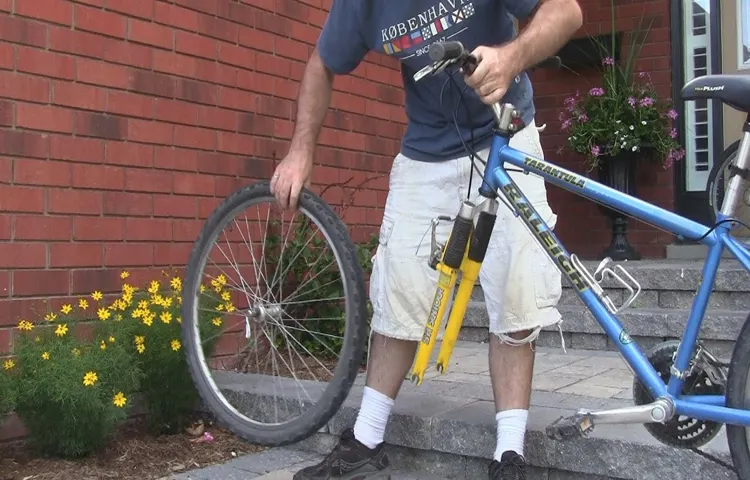
Removing the Wheel
Taking the front tire off a bike might seem daunting at first, but with some patience and practice, it can become a breeze. The first step is to loosen the bolts on the brake calipers, which can be found near the tire. Once the bolts are loose, move the calipers to the side to create enough space for the tire to be removed.
Next, locate the quick release skewer, which is the mechanism holding the tire in place. To release it, flip open the lever on one side and loosen the nut on the other side. Once it’s loose, simply pull the skewer out, and the tire should come off easily.
It’s essential to keep track of all the small parts and not lose any washers or spacers that may come off with the tire. With a little practice, you’ll be able to remove the front tire in no time and be on your way to fixing or replacing it.
Shift Gears to Smallest Chainring
When it comes to removing the wheel of your bike, it’s a good idea to shift into the smallest chainring before getting started. Not only does this help prevent the chain from getting tangled, but it also makes the removal process a lot easier. To do this, simply shift the gear lever on the handlebars until the chain moves to the smallest chainring.
Once you’ve done that, flip your bike upside down and locate the quick-release lever on the wheel you want to remove. Depending on your bike, this lever may be on the front or rear wheel. Pull the lever outwards and loosen the bolts holding the wheel in place.
Now you should be able to slide the wheel out of the dropouts and remove it from your bike. Remember to store the wheel in a safe and clean place until you’re ready to put it back on. Following these steps will make the process of removing your bike’s wheel hassle-free, so you can spend more time enjoying your ride.
Loosen the Quick Release Lever
If you need to remove your bike wheel, the first step is to loosen the quick release lever. This lever sits at the center of the wheel and holds it in place. To loosen it, simply flip the lever to the open position.
Once the lever is open, you can easily remove the wheel from the bike frame. It’s important to note that not all bikes have quick release levers. Some bikes require tools to remove the wheel, such as a wrench or hex key.
If you’re unsure of how to remove your bike wheel, consult your bike’s manual or take it to a professional bike mechanic. By learning how to properly remove and reattach your bike wheel, you’ll be able to perform routine maintenance or repairs with ease.
Remove the Brake Caliper
Removing the wheel is the first step to removing the brake caliper, and it’s important to do it carefully. Start by parking your vehicle on a level surface and engaging the emergency brake. Loosen the lug nuts with a lug wrench, but don’t remove them yet.
Then, use a jack to lift the vehicle off the ground, making sure to place the jack under a secure part of the frame or chassis. Once the vehicle is lifted, remove the lug nuts and the wheel. With the wheel out of the way, locate the brake caliper.
This is the component that squeezes the brake pads against the rotor to slow or stop the wheel when you apply the brakes. It’s important to remove the caliper carefully to avoid damaging it and to make sure you can put it back on properly later.
Lift the Bike and Remove the Wheel
Removing the wheel from your bike is a necessary task if you need to change a tire or perform maintenance. To start, lift the bike off the ground using a bike stand or by leaning it against a sturdy object. Once you have a stable position, locate the quick release lever on the wheel you want to remove.
If there’s no quick release, loosen the nuts on either side of the wheel using a wrench. When you’re ready, press down on the quick release lever or use your wrench to unscrew the nuts. Loosen them enough to release the tension on the wheel, but don’t remove them completely just yet.
Gently lift the wheel off the frame and set it aside. Be sure to take note of where any washers or spacers were located before you removed the wheel, so you can put them back in the proper place when you’re ready to reinstall it. Remember, removing the wheel from your bike can seem overwhelming at first, but with a bit of practice, you’ll become a pro in no time.
Always check for any damage or wear before reinstalling the wheel, and never force anything to fit if it doesn’t seem right. Taking your time and being patient will save you time and frustration in the end. Happy riding!
Reinstalling the Wheel
Taking the front tire off your bike can seem like a daunting task, especially if you’re new to cycling. But fear not, with a few simple steps, you’ll have that tire off in no time. Start by loosening the wheel nuts, which can usually be done with a wrench.
Once those are removed, give the wheel a gentle tug to loosen it from the fork, and then slide it out. Some bikes may have a quick-release lever that makes this process even easier. Once you have the wheel off, you can inspect the tire for any damage or wear, and replace it if necessary.
And don’t worry, reinstalling the wheel is just as easy – simply slide it back into place, tighten the nuts, and you’re ready to ride again. With a little bit of practice, you’ll be a pro at taking off and putting on your bike’s front tire in no time!
Find the Right Orientation
If you’ve ever had to reinstall a wheel, you know how important finding the right orientation can be. It can mean the difference between smooth sailing and a bumpy ride. The same principle applies when it comes to finding the right orientation in life.
It’s essential to take the time to think about what direction you want to go in, set goals, and align yourself with the path that will get you there. Doing so will help you navigate through life with clarity and purpose. It’s easy to get lost in the noise of the world and forget what matters most, but by regularly checking in with yourself and reassessing your direction, you can stay on track and avoid unnecessary detours.
So, take the time to reinstall the wheel and find your true alignment.
Place the Wheel Into the Forks
Reinstalling a bicycle wheel can seem daunting, but with a few simple steps, it can be a breeze. Start by lining up the wheel with the fork dropouts and lowering it into place. Make sure the axle is fully seated in the dropouts and the quick release lever is in the open position.
Then, tighten the quick release lever, making sure it is tight enough that the wheel doesn’t move, but not so tight that it restricts the rotation of the wheel. Finally, give the wheel a spin to make sure it spins smoothly and straight. By following these steps, you can confidently reinstall the wheel on your bike and get back to riding in no time.
Tighten the Quick Release Lever
If you’ve ever taken off your bicycle wheel to transport or repair it, you’ll need to put it back on properly. One crucial step is tightening the quick release lever. This lever holds the wheel securely in place on the frame, so it’s essential to make sure it’s adjusted correctly.
First, make sure the lever is in the open position, then insert the wheel into the dropouts on the fork or frame. Push the wheel up into place, then hold the lever and tighten it to secure the wheel in place. You should feel some resistance as you tighten the lever, and the lever should end up in a position that is easy to reach while you’re riding.
If the lever is too loose, the wheel could wobble or even come off while riding, so take the time to tighten it properly.
Reattach the Brake Caliper
Now that you have successfully replaced your brake pads, it’s time to reattach the brake caliper. Before doing so, make sure that the caliper is clean and free from any dust or debris. Position the caliper over the brake rotor and slide it onto the mounting bracket.
Line up the bolt holes and insert the bolts, tightening them with a wrench or socket. Make sure the bolts are torqued to the manufacturer’s specifications. Once that’s done, it’s time to reinstall the wheel.
Carefully line up the wheel with the studs and hand-tighten the lug nuts. Lower the vehicle and torque the lug nuts in a star pattern. And just like that, you’re all set to hit the road again with your newly installed brake pads.
Remember to always check your brakes and make sure they’re in good working condition before driving.
Test the Brake and Tire Pressure
When it comes to reinstalling a wheel, it’s not just a matter of tightening the bolts and calling it a day. In fact, there are a few key things you need to do to ensure your vehicle is safe and roadworthy. One of the most important things is to test the brake and tire pressure.
Before reinstalling the wheel, make sure you give the brake a good once-over to ensure everything is in working order. This includes checking the brake pads, calipers, and rotors for any damage or wear. Additionally, take the time to check the tire pressure and examine the tires for any signs of wear, such as bulges, cracks, or bald spots.
Proper tire pressure is crucial for safe driving and can affect your vehicle’s handling and fuel efficiency. By taking these steps before reinstalling the wheel, you can help ensure your vehicle is safe and ready to hit the road.
Conclusion
And there you have it, folks! Removing the front tire of a bike may seem like a daunting task, but with patience, precision, and a pinch of boldness, it’s an easy feat to accomplish. With your tire off, you’ll be able to replace those worn-out treads, give your brakes a good tune-up, or maybe even finally start that bike repair business you’ve been dreaming about. Just remember to keep your tools organized, your head clear, and your puns sharp.
Happy wrenching!”
FAQs
What tools do I need to take the front tire off my bike?
To take the front tire off your bike, you will typically need a wrench or socket set, bike tire levers, and a bike stand or something to prop the bike up.
How do I loosen the axle nuts to remove the front tire?
Use a wrench or socket set to loosen the axle nuts on either side of the front wheel. Once they are loose, gently pull the wheel out of the fork.
Do I need to deflate the tire before removing it from the bike?
Yes, it is recommended to deflate the tire before removing it from the bike to make it easier to work with and to prevent any damage to the valve stem.
How do I remove the front brake caliper to take off the tire?
Loosen the bolts that hold the brake caliper in place, and carefully remove the caliper from the brake rotor. Do not twist or damage the brake line as you remove the caliper.
Should I clean the fork and wheel before reassembling?
Yes, it is a good practice to clean the fork and wheel before reassembling. This will help prevent any dirt or debris from getting into the brake, hub, or other components.
How do I know if I need to replace the front tire or tube?
Signs that you may need to replace the front tire or tube include visible damage such as punctures, bulges, or cracks, excessive wear, or poor traction on the road.
How tight should I tighten the axle nuts when reassembling the front tire?
The axle nuts should be tightened to the manufacturer’s recommended torque specification, which can vary depending on the type of bike and wheel. It is important not to over-tighten the nuts, as this can damage the fork or hub.