
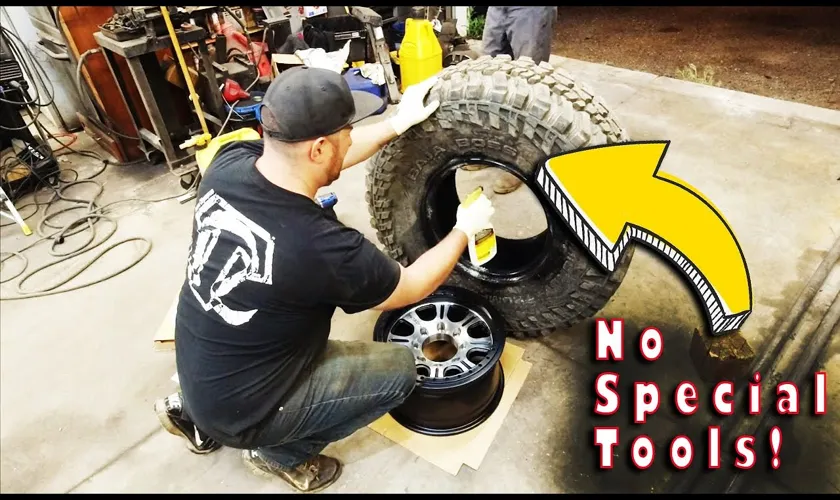
Putting a tire on a rim might seem like a daunting task, but fear not, as this beginner’s guide is here to help! Whether you’re replacing a tire or patching up a puncture, this guide will provide you with the essential steps to ensure a safe and successful tire installation. You might be wondering, “Where do I even begin?” Don’t worry, we’ve got you covered. Firstly, make sure you have all the necessary tools on hand, including a jack, lug wrench, and tire iron.
These items can be found in most car tool kits or purchased separately from an auto parts store. Next, position the jack under the car’s designated jacking point and raise it until the tire is about an inch off the ground. Loosen the lug nuts with the lug wrench and remove them with your fingers.
Gently pull the tire off the wheel hub and lay it flat on the ground. Now comes the tricky part, but with patience and practice, you’ll be a pro in no time. Align the holes on the tire with the wheel studs and slowly push the tire onto the wheel hub.
Maneuver the tire until it’s flush against the hub and tighten the lug nuts with the tire iron in a star pattern. Finally, using the jack, lower the car and give the lug nuts one more turn to ensure they’re tightened to the manufacturer’s recommended torque specification. And voila! Your tire is safely installed on the rim.
See, putting a tire on a rim doesn’t have to be complicated. With a little bit of practice and our beginner’s guide, you’ll be able to tackle this task confidently in no time. Plus, you’ll save money and time by doing it yourself.
So, go ahead, give it a try, and get back on the road with confidence.
Table of Contents
Tools and Equipment Needed
If you’re looking to change a tire at home, you’ll need a few tools and pieces of equipment to get the job done. Firstly, make sure you have a wheel chock or similar device to keep the car from rolling while you work. Secondly, a good quality hydraulic jack and jack stands are essential to lift the car safely off the ground.
You’ll also need a lug wrench to remove the lug nuts and a tire iron to loosen the nuts. Once the nuts are off, you can use a tire machine to mount the tire onto the rim. A common mistake people make is using a screwdriver or other tool to pry the tire onto the rim, which can damage both the tire and rim.
Professional tire shops use tire machines for a reason – they make it easier and safer to install the tire. Once you have the tire on the rim, it’s important to inflate it to the recommended pressure, which can be found in your car’s manual or on the tire itself. With the tire inflated and seated properly on the rim, you can reattach the lug nuts and lower the car back to the ground.
It’s important to torque the lug nuts to the proper specifications, which can again be found in your manual or on the tire itself. And there you have it – a safe and properly mounted tire in the comfort of your own garage.
Tire Irons
Tire irons are essential tools for anyone who wants to change a tire. These tools come in various sizes and shapes, but they all serve the same purpose – to remove the tire from the wheel rim. It is important to have a good quality tire iron that is sturdy and durable if you want to get the job done quickly and efficiently.
Apart from tire irons, there are other tools and equipment needed to change a tire, such as a tire jack, lug wrench, and spare tire. The tire jack is used to lift the car off the ground so that the tire can be removed and replaced. The lug wrench is used to loosen the lug nuts that keep the wheel in place.
And the spare tire is essential in case the damaged tire cannot be repaired. Always make sure to have all the necessary tools and equipment in your car before embarking on a long journey. That way, you can fix a flat tire on the spot and continue with your journey without any hassles.
So, if you’re planning a road trip, don’t forget to include a tire iron and other essential tools in your car toolkit!
Lubricant
When it comes to lubricating parts and machinery, having the right tools and equipment is key to ensuring smooth, efficient operation. Some essential items you’ll need include a grease gun, oil pump, funnel, and rags for cleaning up any spills. Different types of lubricants may require different application methods, so it’s important to read the manufacturer’s instructions carefully.
In addition to basic tools, you may also need specialized equipment for larger or more complex machinery. For example, an automatic lubrication system can help save time and improve the overall performance of your equipment by ensuring that lubricant is evenly distributed. Whatever tools and equipment you choose, remember to always use the appropriate amount of lubricant to prevent damage or excessive wear.
With the right maintenance routine and equipment, you can keep your machinery running smoothly and avoid costly breakdowns.
Rubber Mallet
When it comes to DIY projects around the house, having the right tools and equipment is essential. One such tool that you may need to have in your arsenal is a rubber mallet. A rubber mallet is a versatile tool that can be used for a variety of tasks around the home, such as assembling furniture or installing tile.
Unlike a traditional hammer, a rubber mallet won’t damage the surface you’re hitting, making it a great option for delicate surfaces or materials. When choosing a rubber mallet, look for one with a rubber head that’s durable and shock-absorbing. You’ll also want one with a comfortable grip to reduce strain on your hands.
Whether you’re a seasoned DIY pro or just starting out, a rubber mallet is a must-have tool for any home project.
Preparation
Putting a tire on a rim at home might sound challenging, but with proper preparation, it can be seamless. Firstly, gather all the necessary tools and equipment like tire irons, lubricant, valve stem, and air compressor. Then, inspect both the tire and rim for any damages, dents, or cracks that may hinder the process or result in an unsafe final product.
Remove any debris or excess air from the tire before placing it on the rim. Next, apply lubricant on the inside of the tire bead and the rim edge to make it easier to mount. Begin by placing the tire onto the rim’s drop center and work your way around the rim, using tire irons to stretch the tire over the rim’s side.
Since this step requires precision, take it slow and double-check the alignment before inflating the tire. Finally, inflate the tire to the recommended pressure level and ensure it is evenly seated on the rim before driving. With these steps, putting a tire on a rim at home is simple and can save you time and money.
Safety Precautions
Preparation is key when it comes to safety precautions. Whether you’re going on a hike, driving a car, or working with heavy machinery, making sure you’re properly equipped is essential to avoiding accidents. Before you embark on any activity, take the time to do some research.
Learn about any potential hazards, and make a checklist of the things you’ll need to stay safe. This could include anything from safety harnesses to first aid kits, or even simply wearing the right gear. It’s important to also have a plan in place should something go wrong.
Consider things like a communication device and emergency contact information. By taking these preparations beforehand, you’ll be able to enjoy your activity with the peace of mind that comes with knowing you’re prepared for any eventuality.
Removing the Old Tire
When preparing to remove an old tire, there are a few key steps to take to ensure a smooth and safe process. Firstly, park your vehicle on a level and stable surface, away from any potential hazards. If you have a spare tire, make sure it is easily accessible before you begin.
Next, loosen the lug nuts on the tire you will be removing, but do not remove them completely just yet. You may need to use a lug nut wrench or tire iron to loosen them, as they can be quite tight. It’s important to loosen them before you lift the vehicle, as the tire may spin if you attempt to loosen them while the vehicle is raised.
Once the lug nuts are loosened, use a jack to lift the vehicle off the ground at the designated jack points indicated in your vehicle’s manual. Double-check to ensure the vehicle is stable and secure before fully removing the lug nuts and taking off the old tire. By following these steps, you’ll be well-prepared for a successful tire removal process.
Inspecting the Rim and Tire
When preparing to inspect your rim and tire, there are a few important steps to follow. First, make sure that the vehicle is parked on a flat surface with the emergency brake engaged. Then, visually inspect the rim for any physical damage, such as cracks or dents.
This can indicate issues with the structural integrity of the wheel and requires immediate attention. Next, examine the tire itself for any signs of wear or damage, including punctures or bulges. These can compromise the tire’s ability to function properly and may require replacement.
Additionally, check the tire pressure and adjust as needed to ensure optimal performance and safety. By thoroughly preparing for the inspection process, you can identify any potential issues and address them before they become more serious problems.
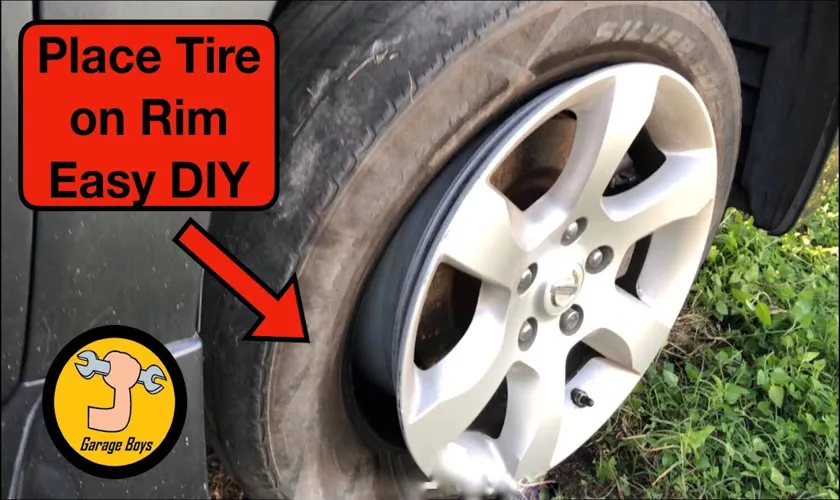
Mounting the New Tire on the Rim
Putting a tire on a rim at home can seem like a daunting task, but with the right tools and steps, it can be done easily. First, make sure the new tire is the correct size and type for your specific rim. Then, lubricate the inside of the tire bead with tire soap or lubricant to ease the process.
Next, position the tire on the rim and use your hands to push the tire bead over the rim edge. If it is difficult to do this by hand, a tire spoon or lever can be used to help pry the bead over the edge. Once the first bead is mounted, repeat the process for the other side of the tire.
Finally, inflate the tire to the proper pressure, and check for any leaks or uneven seating of the tire beads. By following these steps, you can safely and securely mount a new tire on a rim in the comfort of your own home.
Positioning the Tire
Positioning the Tire, Mounting the New Tire on the Rim After removing the old tire and cleaning the rim, it’s time to mount the new tire. Before starting, check that the tire size and specifications match the rim and vehicle to prevent any issues down the road. The first step in mounting a new tire is positioning it correctly on the rim.
Begin by placing one bead of the tire onto the rim’s drop-center, making sure it aligns with the valve stem. Then, insert the opposite side of the tire’s bead into the rim. A tire machine can assist with this task, but most professionals recommend mounting the tire manually to avoid potential rim damage.
Once the tire is in position, ensure the bead sits evenly on both sides of the rim by applying force with a tire iron. With the tire in place, it’s time to inflate it to the recommended pressure levels, typically found in the car’s manual or on the tire wall. Proper tire mounting is crucial to ensure optimal driving conditions and tire longevity, so take care when mounting a new tire.
Lubricating the Beads
When mounting a new tire on the rim, it’s important to lubricate the beads. Your tire bead is the edge of the tire, where it sits on the rim. Without proper lubrication, the tire bead can get stuck on the rim, making it difficult to install or remove the tire.
The lubricant helps the tire seat evenly on the rim and prevents damage to both the tire and the rim. There are various lubricants available in the market, but it’s best to use a specific tire mounting lubricant that’s designed for this purpose. It’s essential to apply the lubricant evenly around the bead to ensure that the tire goes on smoothly.
Too much lubricant can cause the tire to slip on the rim, while too little can make it challenging to install the tire. By lubricating the beads correctly, you can make the mounting process faster and more comfortable, and you can also ensure that your tire lasts longer.
Using the Tire Irons
When it comes to mounting a new tire on the rim, using tire irons is essential. These handy tools allow you to pry the tire off the rim during removal and then help you press the new tire onto the rim during the installation process. It’s important to use caution when using tire irons, as they can easily damage the tire or rim if not used correctly.
To start, position the first tire iron between the rim and the tire bead, then gently pry the tire off the rim. Work your way around the tire, using a second tire iron to keep the tire from slipping back onto the rim. Once you have removed the old tire, use the tire irons to press the new tire onto the rim, working your way around the tire in the opposite direction.
When finished, double-check the tire bead to ensure it is seated properly on the rim before inflating the tire. Using tire irons may seem like a daunting task, but with proper technique and care, anyone can mount a new tire on a rim successfully.
Inflating and Seating the Tire
If you’re wondering how to put a tire on a rim at home, you’ve come to the right place! First things first, you’ll need a few tools: tire iron, valve core remover, soap and water, and an air compressor. Start by cleaning the rim and tire with soap and water to ensure a good seal. Next, lubricate the tire bead with soap to make the process easier.
Now comes the fun part – pushing the tire onto the rim! Use the tire iron to pry the tire onto the rim, being careful not to damage the tire or rim. Once the tire is in place, it’s time to inflate it. Insert the valve core remover and deflate the tire completely.
Then, attach the air compressor hose to the valve stem and slowly inflate the tire to the recommended pressure. As it inflates, listen for any hissing sounds which may indicate a leak. If all is well, you can remove the valve core remover and put the valve cap back on.
Congratulations, you’ve successfully put a tire on a rim at home!
Inflating the Tire
Inflating and seating a tire can seem like a daunting task, but it’s actually pretty straightforward. First, remove the valve cap and attach your tire gauge to the valve stem. Make sure the gauge is firmly connected and the scale is visible.
Then, slowly add air to the tire, checking the pressure reading periodically to ensure you don’t over-inflate. It’s essential to follow the manufacturer’s recommended tire pressure to avoid any safety issues. Once you’ve reached the desired pressure, replace the valve cap and check the tire for any leaks by spraying soapy water around the valve stem and sidewall.
If there are no bubbles, you’re ready to seat the tire by bouncing it gently on the ground. This helps the tire’s bead to seal completely against the rim and prevents any air from escaping. By inflating and seating your tire properly, you’ll ensure its longevity and safety on the road.
Remember to check your tire pressure regularly and before long journeys to avoid any unexpected surprises!
Seating the Beads
Seating the beads of your tire can be a tricky process, but it’s important to ensure proper tire function and safety. Before inflating the tire, make sure the valve stem is properly installed and tightened. Then, inflate the tire to a PSI equal to or slightly above the manufacturer’s recommended level.
If the tire resists inflation, check for obstructions or damage to the valve stem or nozzle. Once the tire is properly inflated, begin the process of seating the beads by firmly tapping the sidewalls with a rubber mallet or tire hammer. You may need to rotate the tire and repeat this process multiple times to evenly seat the beads.
It’s important to remain patient and avoid overinflating the tire, as this can cause the beads to slip and create a dangerous situation. Once the beads are properly seated, deflate and reinflate the tire to the manufacturer’s recommended level and double-check for any leaks or damage before driving. Overall, proper bead seating is crucial for a safe and smooth ride on your newly installed tire.
Final Steps
Now that you’ve got your tire on the rim, it’s time to finish up and put the whole thing back on your vehicle. First, you’ll want to inflate the tire to the recommended PSI. You can find this info in your owner’s manual or on the tire itself.
Once the tire is inflated, make sure to inspect it for any visible damage or wear. If everything looks good, you can then put the tire and rim back on your vehicle, hand-tightening the lug nuts before using a wrench to fully tighten them in a star pattern. This will ensure the tire is centered on the hub and help prevent any wobbling or shaking when you’re on the road.
Finally, lower your vehicle back down and give the lug nuts one final tightening after checking the torque specifications for your specific vehicle. With these final steps complete, you should be good to hit the road again with your newly mounted tire!
Adjusting the Tire Pressure
As the final step in adjusting tire pressure, make sure to recheck all tires and confirm that they are correctly inflated. This is a crucial step that can affect the safety and performance of your vehicle. Additionally, don’t forget to check your spare tire as well.
It would be unfortunate to find out that your spare tire is also underinflated or overinflated when you need it most. Once you have confirmed that all tires have the correct pressure, make sure to replace the valve caps securely. This may seem like a small detail, but it helps prevent dirt and debris from getting into the valve stem and causing leaks.
With all these final steps complete, you can feel confident that your vehicle is ready to hit the road safely and efficiently.
Reinstalling the Wheel and Torquing the Lug Nuts
The final steps of reinstalling the wheel on your vehicle involve torquing the lug nuts. This step is crucial in ensuring the safety and longevity of your ride. Lug nuts hold the wheel securely in place, preventing it from coming off while you’re driving.
It’s important to tighten the lug nuts with the appropriate amount of torque, specified by your vehicle’s manual. Over-tightening or under-tightening can lead to a dangerous wheel wobble or even a complete detachment from your vehicle. It’s always a good idea to double-check the torque with a torque wrench and make sure the lug nuts are evenly tightened in a star pattern.
With these final steps done right, you can hit the road with confidence and enjoy a safe and smooth ride.
Conclusion
Putting a tire on a rim at home might sound like a daunting task, but with a little bit of patience and elbow grease, anyone can do it. Just remember to always follow safety precautions, such as wearing gloves and safety glasses, and double check your work before hitting the road. And who knows, with enough practice, you might even become a bona fide tire-changing wizard – just don’t let it go to your head.
“
FAQs
What tools do I need to put a tire on a rim at home?
You will need a tire lever, valve stem tool, rim brush, lubricant, and a tire pressure gauge.
Can I put a tire on a rim without a tire machine?
Yes, with a tire lever and some lubricant, you can manually mount a tire onto a rim at home.
How do I remove a tire from a rim at home?
Use a tire lever to pry the tire away from the rim, starting opposite the valve stem. Work your way around the tire until it is fully removed.
Can I reuse an old valve stem when putting a tire on a rim?
It’s recommended to replace the valve stem when changing a tire to prevent any leaks.
What is the proper way to balance a tire on a rim at home?
Use a static wheel balancer to balance the tire by adding weights to the rim until it is evenly balanced.
How do I check if a tire is seated properly on a rim at home?
Inflate the tire gradually and check to ensure the tire beads are seated evenly around the rim. You can also check for any leaks using soapy water.
Can I change a tire on a rim without removing the wheel from my car?
It is not recommended to change a tire on a rim while it is still attached to the vehicle, as it can be dangerous and difficult to maneuver. It’s safer to remove the wheel and work on it separately.