Do you love spending time on the open road, towing your trailer behind you? Whether you’re hauling a boat, a camper, or other equipment, taking care of your trailer is essential to ensure a smooth and safe journey. One crucial aspect of trailer maintenance is properly greasing the bearing buddies. If you’ve ever wondered how to do this task correctly, you’ve come to the right place.
In this blog, we’ll guide you through the process of greasing bearing buddies step by step, ensuring your trailer stays in top shape and your adventures remain uninterrupted. So, grab your grease gun and let’s dive in!
Table of Contents
Introduction
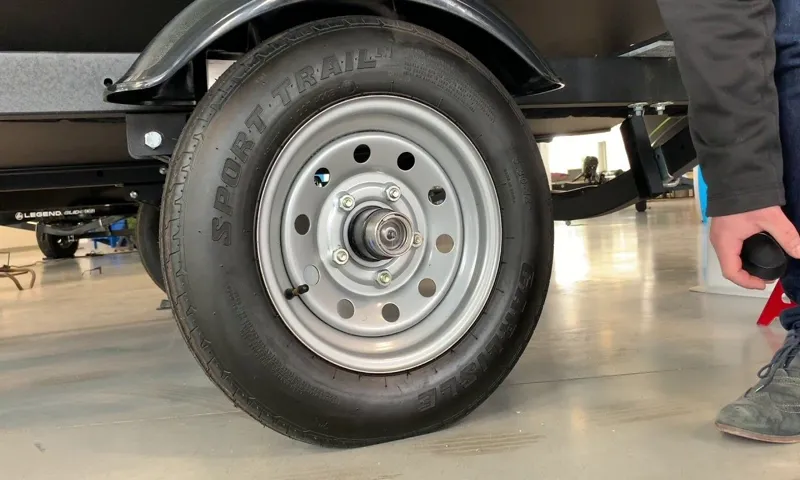
If you’ve ever owned a boat or a trailer, chances are you’ve heard of bearing buddies and the importance of greasing them. But what exactly are bearing buddies, and why is greasing them necessary? Well, bearing buddies are devices that are installed on the ends of a trailer’s axle to protect the wheel bearings from water and dirt. They serve as a constant source of lubrication, ensuring that the bearings stay properly greased at all times.
This is important because if the bearings dry out or become contaminated, they can cause serious damage to the trailer’s axle and wheels. Greasing the bearing buddies is a simple process that involves removing the rubber cover and using a grease gun to pump fresh grease into the fitting. It’s a task that should be performed regularly to prevent any potential problems down the road.
So, if you want to keep your boat or trailer running smoothly, it’s important to know how to grease your bearing buddies properly.
What are Bearing Buddies?
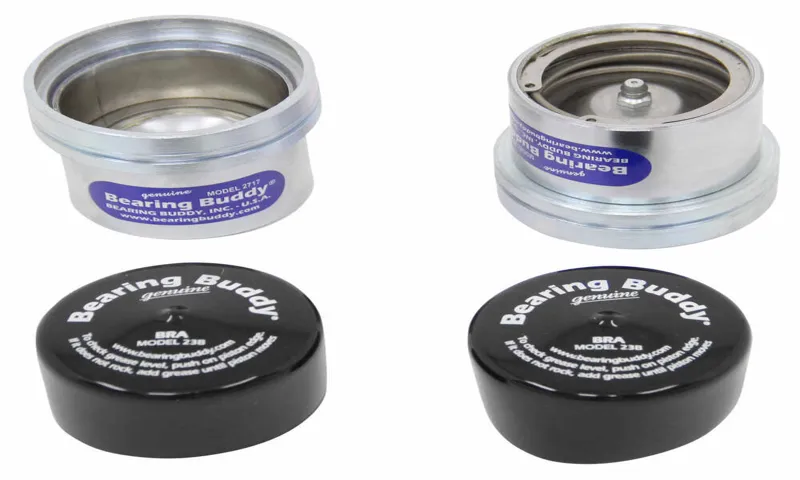
Bearing Buddies are a type of device used on boat trailers to help maintain and protect the wheel bearings. These small metal “buddies” are designed to fit over the end of the wheel hub and create a seal that prevents water from entering and damaging the bearings. They essentially act as a protective barrier, ensuring the bearings stay lubricated and free from debris.
With Bearing Buddies, you can easily add grease to the bearings without having to disassemble the entire hub, making maintenance quick and efficient. This not only extends the life of the bearings but also helps prevent costly repairs or breakdowns while on the road. Whether you’re a seasoned boat owner or new to trailer maintenance, Bearing Buddies are a must-have accessory that can save you time, money, and hassle in the long run.
Importance of Proper Greasing
importance of proper greasing
Tools and Materials
If you own a trailer or a boat with trailer, then you’re probably familiar with bearing buddies. These little tools are incredibly useful for maintaining the health and longevity of your trailer’s bearings. So, how do you go about greasing your bearing buddies? It may seem like a daunting task, but it’s actually quite simple.
First, you’ll need to gather a few tools and materials. You’ll need a grease gun, a tube of high-quality grease, a rag or paper towels, and a wrench or socket. Once you have everything you need, start by removing the rubber cap on the bearing buddy.
This can usually be done by simply pulling it off. Next, use the grease gun to pump fresh grease into the bearing buddy. Fill it until you see the old grease being pushed out from the sides.
Once you’ve done this, wipe away any excess grease with a rag or paper towel. Finally, replace the rubber cap and give your bearing buddy a firm push to make sure it’s securely in place. And that’s it! With just a few simple steps, you can make sure your bearing buddies are properly greased and ready to go.
Necessary Tools
Tools and Materials are essential for any DIY project and having the right ones can make a world of difference in the outcome. Whether you’re a handyman or just a weekend warrior, having a well-stocked toolbox is crucial. Some of the basic tools that should be in every toolbox include a tape measure, screwdrivers (both flathead and Phillips), a hammer, an adjustable wrench, pliers, and a utility knife.
These tools will come in handy for a wide range of tasks, from assembling furniture to hanging shelves. In addition to these basic tools, there are also specialized tools that may be necessary for specific projects. For example, if you’re planning on doing any electrical work, you’ll need wire cutters, wire strippers, and a voltage tester.
If you’re working with wood, a circular saw or a jigsaw will be indispensable. And if you’re tackling a plumbing project, you’ll need pipe wrenches and a pipe cutter. Along with the tools, there are also a variety of materials that are necessary for completing DIY projects.
These can include nails, screws, nuts and bolts, adhesives, sandpaper, paint brushes, and paint rollers, to name just a few. It’s important to have a variety of sizes and types of fasteners on hand to ensure that you have what you need for any given project. And having the right materials for finishing touches, such as painting or staining, will ensure that your project looks polished and professional.
So, before you tackle your next DIY project, take stock of your toolbox and make sure you have all the necessary tools and materials. Having the right tools and materials will not only make your project go smoother but will also help you achieve professional-looking results.
Recommended Grease
grease, recommended grease, tools and materials, lubrication, machinery In order to keep your machinery in optimal condition, it is essential to use the right grease when lubricating various components. The recommended grease will depend on the type of machinery and the specific parts that need to be lubricated. When it comes to selecting the right grease, there are a few factors to consider.
First, you’ll want to determine the temperature range in which your machinery operates. This will help you choose a grease that can withstand the heat or cold without breaking down or losing its effectiveness. Next, you’ll want to consider the load or pressure that the machinery is subject to.
Some greases are specifically formulated to handle heavy loads, while others are better suited for lighter applications. Additionally, you’ll want to think about the specific components that need to be lubricated. For example, bearings may require a different type of grease than gears or chains.
It’s important to choose a grease that is compatible with the materials and conditions in which it will be used. In terms of tools and materials, it’s a good idea to have a grease gun on hand for easy application. A grease gun allows you to apply the grease exactly where it’s needed, ensuring maximum coverage and efficiency.
You’ll also want to have some rags or paper towels for wiping away any excess grease and keeping the machinery clean. Overall, using the recommended grease and having the right tools and materials can significantly prolong the lifespan of your machinery and prevent unnecessary wear and tear. So, take the time to research and select the best grease for your specific needs, and invest in the necessary tools and materials for proper lubrication.
Your machinery will thank you!
Safety Precautions
When it comes to tackling DIY projects, having the right tools and materials is essential. Not only will you be able to work more efficiently, but you’ll also reduce the risk of accidents and injuries. Before starting any project, make sure you have the necessary tools on hand.
This could include items like a hammer, screwdriver set, drill, and saw. It’s also important to have the right materials for the job, such as nails, screws, and wood. By having everything you need in advance, you can avoid running to the store and rushing through your project.
Remember, safety should always be a top priority, so take the time to gather the appropriate tools and materials before getting started.
Step-by-Step Guide
Are you wondering how to grease your bearing buddies? Look no further, because we’ve got you covered with this step-by-step guide. Greasing your bearing buddies is an important maintenance task that helps to ensure the longevity and smooth operation of your trailer bearings. First, start by removing the dust cap from the bearing buddy using a pair of pliers or a screwdriver.
Next, clean out any old grease or debris from the bearing buddy using a rag or a brush. Once the bearing buddy is clean, load it up with fresh grease using a grease gun. Make sure to fill the bearing buddy until you see the new grease oozing out of the sides.
Lastly, replace the dust cap and wipe away any excess grease. By regularly greasing your bearing buddies, you can prevent rust, corrosion, and premature wear, ultimately saving you time and money in the long run. So go ahead, give your trailer some love and keep those bearings rolling smoothly!
1. Cleaning the Bearing Buddies
Cleaning the Bearing Buddies is an essential maintenance task for any boat owner. This step-by-step guide will walk you through the process of cleaning your bearing buddies to ensure smooth and efficient operation. Firstly, gather all the necessary tools and materials, such as a grease gun, bearing buddy cover, and a clean cloth.
Start by removing the bearing buddy cover, which is usually held in place by a tang or a slip-on cover. Once the cover is removed, wipe away any excess grease or dirt from the bearing buddy using a clean cloth. Next, attach the grease gun to the grease fitting on the bearing buddy and slowly pump fresh grease into the bearing.
Keep pumping until you see grease oozing out from the sides of the bearing buddy. Once complete, wipe away any excess grease and reattach the cover. Repeat this process for all the bearing buddies on your boat trailer.
By regularly cleaning and greasing your bearing buddies, you can prolong their lifespan and ensure smooth and safe travels on the water.
2. Applying Grease
applying grease, step-by-step guide, lubrication, mechanical parts Once you’ve thoroughly cleaned your mechanical parts, it’s time to move on to the next step: applying grease. This crucial step ensures that your parts stay lubricated and function smoothly for a longer period of time.
But how do you go about applying grease? Don’t worry, we’ve got you covered with this step-by-step guide! First, make sure you have the right type of grease for your specific application. Grease comes in different formulations to suit various needs, so it’s important to choose the one that is compatible with your mechanical parts. Read the product labels and consult with experts if you’re unsure.
Next, prepare your workspace. Lay down a protective covering, such as a drop cloth, to catch any excess grease and prevent it from making a mess. It’s important to work in a clean and organized area to avoid any contamination.
Now, onto the actual application process. Begin by applying a small amount of grease to your finger or a clean rag. Use this to coat the surface of the mechanical part you’re lubricating.
Be generous with the application, but avoid over-greasing, as this can cause problems in the long run. Make sure to apply the grease evenly on all sides of the part. Pay special attention to areas where friction occurs, such as joints and moving components.
These are the areas that will benefit the most from lubrication. If you’re working with smaller parts or hard-to-reach areas, consider using a grease gun or a syringe-like applicator. These tools can help you apply the grease more precisely and in controlled amounts.
3. Using the Correct Amount of Grease
grease, lubrication, correct amount Imagine driving your car without any oil or lubrication in the engine. It wouldn’t last very long, would it? The same principle applies to machinery and equipment that require grease for proper operation. Using the correct amount of grease is crucial to ensure optimal performance and prevent unnecessary wear and tear.
So, how do you determine the right amount of grease to use? It may seem like a complicated process, but I’ll break it down into simple steps for you. Firstly, it’s important to consult the manufacturer’s guidelines and recommendations. They often provide specific guidelines on how much grease should be applied.
It’s important to adhere to these recommendations as they are based on the equipment’s design and performance. Additionally, take into consideration the operating conditions. If the machinery is subject to high temperatures or heavy loads, it may require a higher amount of grease.
However, don’t overdo it! Applying too much grease can lead to overheating or seal failure. On the other hand, too little grease can result in inadequate lubrication, leading to premature wear. To find the right balance, start with a small amount and then gradually increase if necessary.
Regular checks and inspections are also essential to ensure the correct amount of grease is being used. By following these steps, you can ensure that your machinery operates smoothly and efficiently, providing you with optimal performance and longevity.
4. Checking for Proper Greasing
When it comes to proper greasing, it’s important to follow a step-by-step guide to ensure that everything is done correctly. The first step is to gather all the necessary tools and materials, such as grease, grease gun, and rags. Next, locate the grease fittings on the machine or equipment that need to be greased.
It’s important to clean these fittings thoroughly before applying grease to prevent any contamination. Once the fittings are clean, attach the grease gun to the fitting and pump the grease in. Make sure to pump enough grease to fill the cavity completely, but be careful not to over-grease as this can lead to excess grease being pushed out.
After greasing, wipe off any excess grease with a rag to prevent dirt and debris from sticking to it. Finally, inspect the grease fittings to ensure that grease has been properly distributed and that there are no signs of leakage. By following these steps, you can ensure that your machine or equipment is properly greased and ready for optimal performance.
Maintenance Tips
Bearing buddies are an essential part of maintaining the health and longevity of your trailer’s wheel bearings. These small devices serve as a reservoir for grease, ensuring that the bearings stay properly lubricated while on the road. Greasing bearing buddies is a relatively simple process that can be done by anyone with a little bit of know-how.
First, you’ll want to clean off any dirt or debris from the surface of the bearing buddies to ensure that no contaminants are introduced into the grease. Next, you’ll need to remove the dust cap or cover on the bearing buddy. There are special tools available specifically for this purpose, but a flat-head screwdriver can usually do the trick.
Once the dust cover is removed, you’ll be able to see the zerk fitting on the bearing buddy. This is where you’ll attach the grease gun. Apply steady pressure on the gun while pumping in grease until you see the old grease being pushed out of the bearing buddy.
This is a sign that the old grease has been flushed out and replaced with fresh grease. Finally, replace the dust cap or cover, making sure it fits securely. It’s also a good idea to wipe off any excess grease that may have been pushed out during the greasing process.
Overall, greasing your bearing buddies regularly will help to ensure smooth operation and extend the life of your wheel bearings.
Regular Inspection
Regular inspection is an essential part of maintaining any property, whether it’s a home or a commercial building. By conducting regular inspections, you can identify and address any potential issues before they become major problems. It’s like going to the doctor for a check-up – you want to catch any health problems early so that they can be treated before they become serious.
The same principle applies to property maintenance. By regularly inspecting your property, you can identify any areas that may need repair or maintenance, such as leaky pipes, faulty wiring, or worn-out roofing. This proactive approach will not only save you money in the long run but also ensure that your property remains safe and in good condition.
So, don’t overlook the importance of regular inspections when it comes to maintaining your property and keeping it in top shape.
Proper Storage
One important aspect of maintaining your belongings is proper storage. Whether it’s clothes, furniture, or seasonal items, storing them correctly can extend their lifespan and keep them in good condition. So, how can you ensure that your items are stored properly? First, it’s essential to clean and prepare the items for storage.
For example, before storing clothes, make sure they are clean and dry to prevent mold and mildew growth. When it comes to furniture, it’s a good idea to disassemble it if possible, as this will save space and reduce the risk of damage. Additionally, protecting your items from dust, pests, and moisture is crucial.
Use cardboard boxes or plastic containers with lids to keep your belongings safe from dust and pests. To protect items from moisture, consider using dehumidifiers or moisture absorbers, especially if you live in a humid climate. In addition to proper cleaning and protection, another key tip for maintaining the condition of your stored items is to stack and organize them correctly.
When stacking items, be mindful of weight distribution to avoid putting excess pressure on fragile items or causing instability. Additionally, label your boxes or containers to easily identify their contents, which will save you time when you need to retrieve specific items. It’s also a good idea to create an inventory list, so you have an overview of what you have stored and where.
This will help you avoid unnecessary searching and potential damage caused by rummaging through boxes. Finally, consider the storage environment itself. Choose a storage space that is clean, dry, and well-ventilated.
Avoid storing items in basements or attics where the temperature and humidity levels can fluctuate dramatically. If you don’t have access to a suitable storage space, you may want to consider using professional storage services that offer climate-controlled units. These units maintain a consistent temperature and humidity level, ensuring the optimal conditions for your stored items.
Replacing Bearing Buddies
Replacing bearing buddies is an essential part of regular boat maintenance. These handy little devices help to keep water and dirt out of your boat’s wheel bearings, preventing corrosion and ensuring smooth and safe operation. However, over time, bearing buddies can wear out or become damaged, and when this happens, it’s crucial to replace them as soon as possible.
To replace your bearing buddies, start by removing the old ones using a bearing buddy removal tool or a pair of pliers. Once the old bearing buddies are removed, clean out any debris or dirt from the bearing housing using a rag or brush. Then, apply a small amount of grease to the new bearing buddies and insert them into the bearing housing, making sure they are seated firmly.
After the new bearing buddies are installed, it’s important to regularly check them for proper operation. This can be done by simply pressing on the center of the bearing buddy and ensuring that it moves freely and springs back out. If the bearing buddy feels stiff or does not move, it may need to be replaced again.
By regularly replacing your bearing buddies and checking their operation, you can help to prolong the life of your boat’s wheel bearings and reduce the risk of costly repairs down the line. So don’t forget to include bearing buddy replacement in your regular maintenance routine and keep your boat running smoothly for years to come.
Conclusion
And that, my friends, is how you keep your trailer rolling smoothly with the help of bearing buddies. Just like having a trusty wingman on a night out, bearing buddies are there to ensure your bearings are well-greased and ready for any adventure. Not only do they make greasing a breeze, but they also offer the peace of mind that comes with knowing your trailer is in top-notch condition.
So, embrace the grease and say hello to hassle-free towing with the help of bearing buddies. Your trailer will thank you, and you’ll be rolling down the highway like a boss, ready to conquer the open road with style and confidence. Happy towing!”
FAQs
What are bearing buddies and what do they do?
Bearing buddies are devices that are used to protect and maintain the integrity of the wheel bearings on a trailer. They help to keep the bearings properly lubricated and prevent water and debris from entering the bearing cavity.
How often should I grease my bearing buddies?
It is recommended to grease your bearing buddies every 1,000 miles or once a year, whichever comes first. However, if you frequently take your trailer through water or off-road, you may need to grease them more often.
Can I use any type of grease for my bearing buddies?
It is important to use a high-quality marine wheel bearing grease that is specifically designed for trailer bearings. This type of grease is more resistant to water and can withstand the heavy loads and temperatures generated by trailer axles.
How do I know if my bearing buddies need to be greased?
You can check the condition of your bearing buddies by removing the dust cap and visually inspecting the grease. If the grease appears dirty or has dried out, it is time to clean and repack the bearings.
Do I need to remove the bearing buddies to grease the bearings?
No, you do not need to remove the bearing buddies to grease the bearings. The bearing buddies have a small grease fitting that you can attach a grease gun to, allowing you to pump grease directly into the bearings.
Can I over-grease my bearing buddies?
Yes, it is possible to over-grease your bearing buddies, which can lead to excess pressure and cause damage to the seals. It is important to only add enough grease to fill the voids in the bearings and not force grease past the seals.
Can I use a grease gun to grease my bearing buddies?
Yes, a grease gun is the most common tool used for greasing bearing buddies. Make sure to use a grease gun with a flexible hose attachment to easily access the grease fitting on the bearing buddies.