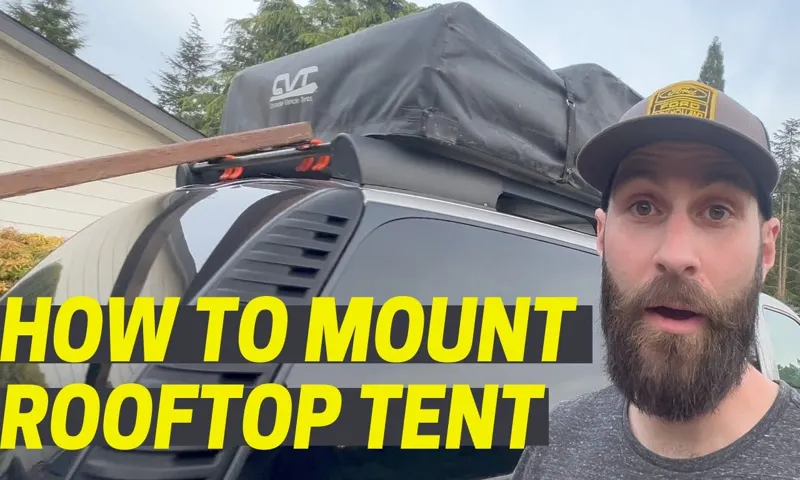
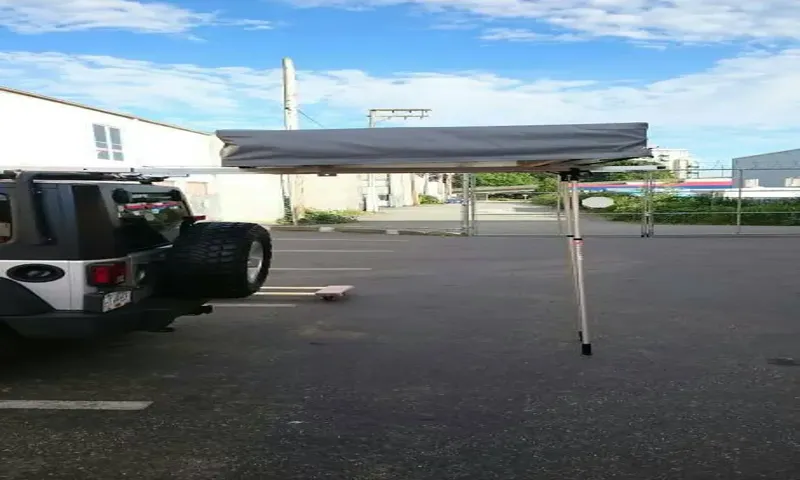
So, you’ve decided to embark on your next camping adventure and are considering the convenience and comfort of a roof top tent. But the question on your mind is, can you install it by yourself? Well, fret not fellow adventurer, because I’m here to put your mind at ease. Installing a roof top tent may seem like a daunting task at first, but with a little know-how and some basic tools, it is absolutely possible to do it yourself.
Think of it as putting together a giant puzzle that will elevate your camping experience to new heights. Just like any DIY project, the key is to start with proper research and preparation. Familiarize yourself with the specific instructions provided by the manufacturer of your roof top tent.
This will ensure that you have a clear understanding of the installation process and any specific requirements. Before you begin the installation, make sure you have all the necessary tools at hand. You may need a wrench, screwdriver, drill, and other basic tools depending on the type of roof top tent you have.
It’s always a good idea to have a helping hand, as some parts of the installation may require an extra set of hands. Installing a roof top tent is similar to assembling a piece of furniture. It may take some time and patience, but the end result will be worth it.
Think of the satisfaction you’ll feel when you’re lying in your cozy tent, gazing at the stars above. Remember, practice makes perfect. It may take a couple of tries before you become an expert in installing roof top tents.
But rest assured, the more you do it, the easier it will become. And soon enough, you’ll be able to set up your camp in no time, no matter where your adventurous spirit takes you. So, to answer your question, yes, you can install a roof top tent by yourself.
Table of Contents
- 1 Introduction
- 2 Step-by-Step Guide to Installing a Roof Top Tent
- 2.1 Step 1: Check your Vehicle’s Roof Strength
- 2.2 Step 2: Gather the Necessary Tools and Equipment
- 2.3 Step 3: Positioning the Roof Top Tent
- 2.4 Step 4: Installing Mounting Brackets or Rails
- 2.5 Step 5: Attaching the Roof Top Tent to the Mounting Brackets or Rails
- 2.6 Step 6: Testing the Stability and Security of the Installation
- 3 Tips for Installing a Roof Top Tent By Yourself
- 4 Conclusion
- 5 FAQs
Introduction
Installing a rooftop tent on your vehicle may seem like a daunting task, but it is definitely doable by yourself. With a little bit of patience and some basic tools, you can successfully set up your own rooftop tent and be ready for your next outdoor adventure. The process may vary depending on the brand and model of the tent, but most rooftop tents come with detailed instructions that are easy to follow.
It’s important to read through the instructions thoroughly before you begin, and to have a clear understanding of the steps involved. Additionally, it can be helpful to have an extra set of hands to assist you with lifting and securing the tent onto your vehicle. Overall, as long as you take your time and follow the instructions carefully, you can install a rooftop tent by yourself and start enjoying the great outdoors in no time.
Benefits of Installing a Roof Top Tent
roof top tent, installing, benefits

Factors to Consider Before Installing a Roof Top Tent
roof top tent, installing a roof top tent, factors to consider before installing a roof top tent Introduction: So, you’re thinking about installing a roof top tent on your vehicle? That’s a great idea! Roof top tents offer a convenient and comfortable way to enjoy the great outdoors. Whether you’re an avid camper or just looking to try something new, a roof top tent can be a game-changer. But before you go ahead and make the leap, there are a few important factors to consider.
In this blog post, we’ll explore some key considerations to help you make the right decision and ensure you get the most out of your roof top tent experience.
Step-by-Step Guide to Installing a Roof Top Tent
Yes, you can definitely install a roof top tent by yourself! While it may seem like a daunting task, with the right tools and instructions, it can be done easily. Here is a step-by-step guide to help you through the process. Firstly, gather all the necessary tools and materials.
You will need a wrench or socket set, a drill, screws, and brackets that come with the tent kit. It’s also important to have a ladder or step stool to reach the top of your vehicle. Next, find a suitable location on your vehicle’s roof for the roof top tent.
Make sure it is a sturdy and flat surface that can support the weight of the tent and occupants. Measure and mark the placement of the brackets on the roof. Now, it’s time to attach the brackets to your vehicle’s roof.
Use the drill to make holes in the marked locations and secure the brackets with screws. Make sure they are tightly fastened to ensure stability. Once the brackets are securely installed, it’s time to mount the roof top tent.
Lift the tent onto the brackets and line up the holes on the tent with the holes on the brackets. Insert the screws through the holes and tighten them using the wrench or socket set. After the tent is securely attached to the brackets, double-check all the screws and fittings to ensure everything is tight and secure.
Give the tent a gentle shake to make sure it is stable and won’t come loose during travel. Finally, test out the roof top tent by setting it up and taking it down a few times to familiarize yourself with the process. This will make it easier for future camping trips.
Step 1: Check your Vehicle’s Roof Strength
In this step-by-step guide, we will walk you through the process of installing a roof top tent on your vehicle. The first step in this process is to check your vehicle’s roof strength. This is an important step as it will determine whether your vehicle can safely support the weight of the roof top tent.
To check your vehicle’s roof strength, you can refer to your vehicle’s owner’s manual or consult with a professional. It’s important to ensure that your vehicle’s roof has a sufficient weight capacity to support the roof top tent, as a weak or damaged roof could be a safety hazard. Once you have confirmed that your vehicle’s roof is strong enough, you can move on to the next step in the installation process.
Step 2: Gather the Necessary Tools and Equipment
roof top tent installation, car camping, camping gear, camping equipment Installing a roof top tent for your car is a great way to take your camping experience to the next level. But before you can embark on your outdoor adventure, you need to gather the necessary tools and equipment to get the job done. The first item you’ll need is a roof rack for your car.
This is what will support the weight of the tent and ensure it stays secure while you’re on the road. Make sure to choose a roof rack that is compatible with your vehicle’s make and model. Next, you’ll need a set of crossbars to attach to the roof rack.
These crossbars will create a stable platform for the tent to sit on. Again, be sure to choose crossbars that are compatible with your vehicle and the roof rack you’ve selected. Once you have your roof rack and crossbars in place, it’s time to move on to the actual tent installation.
You’ll need a set of mounting brackets that will attach the tent to the crossbars. These brackets are typically included with the tent, but if not, you can purchase them separately. In addition to the mounting brackets, you’ll need a set of tools to assemble the tent.
This may include a wrench, screwdriver, and socket set. Make sure to have these tools on hand before you begin the installation process. Lastly, you’ll want to gather any additional accessories you may need for your roof top tent.
This could include a ladder to help you climb in and out of the tent, a rainfly to protect against wet weather, and a mattress pad for added comfort. By gathering all of these tools and equipment beforehand, you’ll be well-prepared to install your roof top tent and start enjoying the great outdoors in comfort and style. So get ready for your next camping adventure and make sure you have everything you need for a successful installation.
Step 3: Positioning the Roof Top Tent
When it comes to installing a roof top tent, positioning is key. After you have chosen the right spot on your vehicle’s roof, it’s time to carefully position the tent. Start by unzipping the cover and folding it back, making sure it is out of the way.
Then, lift the tent and line it up with the mounting brackets on your vehicle’s roof rack. It’s important to have someone assist you with this step to ensure it is properly aligned. Once the tent is in place, gently lower it onto the brackets, making sure it is sitting evenly.
Check that all the mounting points are securely fastened and tighten any bolts or screws if necessary. Finally, make sure the tent is secure by giving it a gentle shake. If it feels stable, you are ready to move on to the next step in installing your roof top tent.
Step 4: Installing Mounting Brackets or Rails
roof top tent installation, mounting brackets, roof rails
Step 5: Attaching the Roof Top Tent to the Mounting Brackets or Rails
“roof top tent installation” So, you’ve made it to step 5 of installing your roof top tent – attaching it to the mounting brackets or rails. This step is crucial in ensuring the security and stability of your tent while you’re up there enjoying the great outdoors. First, make sure you have the necessary tools on hand, such as wrenches or screwdrivers, to attach the tent securely.
Start by aligning the mounting brackets or rails with the corresponding holes on the bottom of your roof top tent. It’s important to double-check that everything lines up properly before you begin tightening any bolts or screws. Once you’re certain of the alignment, go ahead and start fastening the brackets or rails to the tent using your chosen hardware.
Remember, you want to make sure the tent is securely attached but avoid overtightening, as this could cause damage to the tent or the mounting system. Take your time and make sure each bolt or screw is properly tightened before moving on to the next one. Once you’ve completed this step, take a moment to inspect the attachment points and give everything a final check.
Ensure that the tent is securely attached and that there is no wiggle or movement when you tug on it. Congratulations, you’ve successfully attached your roof top tent to the mounting brackets or rails! Now you can look forward to many adventures and comfortable nights spent under the stars.
Step 6: Testing the Stability and Security of the Installation
In the final step of installing a roof top tent, it’s important to test the stability and security of the installation. After all, you want to make sure your tent is safe and secure before you start using it. Start by inspecting all the bolts and brackets to ensure they are properly tightened.
Give the tent a gentle shake to see if it feels sturdy. If it wobbles or feels unstable, you may need to tighten the bolts or adjust the brackets. Next, check the latches and zippers to make sure they are working properly.
Test the latches by opening and closing them several times, and check the zippers to ensure they glide smoothly. If anything seems loose or broken, make the necessary repairs or replacements before using the tent. It’s also a good idea to check for any leaks by spraying the tent with water and inspecting the interior for any signs of water penetration.
By thoroughly testing the stability and security of your roof top tent, you can ensure a safe and enjoyable camping experience.
Tips for Installing a Roof Top Tent By Yourself
Installing a roof top tent by yourself may seem like a daunting task, but with a little preparation and careful planning, it is definitely possible. Before you start the installation process, make sure you have all the tools and equipment needed. It’s also important to carefully read and follow the manufacturer’s instructions for your specific roof top tent model.
One tip to make the installation process easier is to enlist the help of a friend or family member. They can assist you in holding the tent in place while you secure it to your vehicle. However, if you don’t have any extra hands available, there are ways to do it on your own.
One technique is to use clamps to temporarily hold the tent in place while you secure it. Additionally, using a step stool or ladder can make it easier to reach and secure the mounting brackets. Remember to take your time and double-check that everything is properly secured before taking your roof top tent on its maiden voyage.
With a little patience and determination, you can successfully install a roof top tent by yourself.
Tip 1: Read the Instruction Manual Carefully
roof top tent installation tips, installing a roof top tent, instruction manual, DIY roof top tent installation
Tip 2: Get Help When Necessary
Installing a roof top tent by yourself can be a challenging task, especially if you’re not experienced. However, with the right tips and techniques, it is possible to do it alone. One important tip to keep in mind is to get help when necessary.
While it may seem tempting to try and handle everything on your own, having a helping hand can make the process much smoother and safer. When it comes to installing a roof top tent, there are certain steps that require more than one person. For example, lifting and mounting the tent onto your vehicle can be difficult to do alone.
Having someone to help you with this task not only makes it easier, but also reduces the risk of injury. Additionally, having a second person can provide an extra set of eyes to ensure that everything is being done correctly. Another instance where getting help is important is when it comes to tightening and securing the tent to your vehicle.
This is typically done using straps or other fasteners, and having someone assist you in this process can make it more efficient and ensure that everything is properly secured. It’s also worth mentioning that some roof top tents come with installation instructions that recommend having two or more people involved in the setup. Ignoring these instructions can not only jeopardize your safety but also the integrity of the tent itself.
In conclusion, when installing a roof top tent by yourself, it’s important to get help when necessary. Whether it’s lifting and mounting the tent or tightening and securing it to your vehicle, having a second person can make the process safer and more efficient. Don’t hesitate to reach out to a friend or family member for assistance, as it can make all the difference in the world.
Tip 3: Take Your Time and Double-Check Everything
Installing a roof top tent by yourself can be a daunting task, but with the right tips and tricks, it can be done successfully. One important tip to keep in mind is to take your time and double-check everything. Rushing through the installation process can lead to mistakes or overlooked steps, which could compromise the safety and stability of your tent.
By taking your time, you can ensure that each step is done correctly and that all components are properly secured. Double-checking everything is also crucial to avoid any potential issues or accidents later on. It’s better to be safe than sorry, so take the extra time to review each step and ensure everything is in place before using your roof top tent.
Tip 4: Seek Professional Help If You’re Unsure
installing a roof top tent, seek professional help, unsure. Installing a roof top tent on your vehicle can be a challenging task, especially if you’re doing it by yourself. While it may seem like a simple DIY project, it’s important to remember that safety should always come first.
If you’re unsure about the installation process or if you don’t have the necessary skills and tools, it’s best to seek professional help. Hiring a professional to install your roof top tent can save you a lot of time, effort, and potential headaches. They have the experience and expertise to ensure that your tent is securely and correctly installed, giving you peace of mind when you’re out on your adventures.
Plus, they can also provide valuable advice and recommendations on the best type of tent for your vehicle and specific needs. So, if you’re unsure about tackling the installation yourself, don’t hesitate to reach out to a professional for assistance.
Conclusion
Installing a rooftop tent by yourself is like embarking on a solo adventure – it requires determination, resourcefulness, and a touch of bravery. Think of it as pitching a cozy camp in the sky, where the stars are your neighbors and the wind whispers you to sleep. Sure, the idea of hoisting a tent above your vehicle may seem daunting at first, but fear not, intrepid explorer! With a pinch of patience and a dash of can-do attitude, you’ll have that tent securely mounted in no time.
Just imagine the freedom this rooftop abode brings. No longer confined to traditional campsites, you can park your portable sanctuary wherever your heart desires – atop majestic mountains, by serene lakes, or even in the midst of mysterious forests. No need to wait for a helping hand or endure the frustration of depending on others.
You are the master of your rooftop domain, the architect of your own adventure. Plus, let’s be honest, being able to brag about your solo tent installation skills to your friends adds an extra level of coolness. But beware, oh brave DIY-er, for conquering the rooftop tent installation is only the first step of your journey.
Once up there, you’ve opened the door to a universe of breathtaking views, unforgettable experiences, and endless story-sharing material. So, can you install a rooftop tent by yourself? Absolutely! It’s an ode to independence, a testament to resilience, and a gateway to the untamed wonders of the great outdoors. Embrace the challenge, welcome the thrill, and let your roof become the launchpad for the wildest adventures of your life.
Happy tent-ing, fearless explorer!”
FAQs
Can I install a roof top tent by myself?
Yes, you can install a roof top tent by yourself. However, it is recommended to have someone help you as it can be a two-person job due to the weight and size of the tent.
Is it difficult to install a roof top tent?
Installing a roof top tent can be relatively straightforward, but it does require some basic mechanical skills. As long as you carefully follow the instructions provided by the manufacturer, you should be able to complete the installation without much difficulty.
What tools do I need to install a roof top tent?
The specific tools required may vary depending on the tent model, but typically you will need basic hand tools such as a socket set, wrenches, screwdrivers, and potentially a drill. It’s always a good idea to check the manufacturer’s instructions for the exact tool requirements.
How long does it take to install a roof top tent?
The installation time can vary depending on your experience and the complexity of the tent model, but on average, it can take between 1 to 3 hours to complete the installation. It is always recommended to allocate more time in case of any unexpected challenges.
Can I install a roof top tent on any vehicle?
Roof top tents are designed to fit a variety of vehicles, including SUVs, trucks, and certain types of cars with roof racks or crossbars. However, it is important to check the weight capacity and compatibility specifications of your vehicle and roof rack system before installation.
Do I need to make any modifications to my vehicle to install a roof top tent?
In most cases, no modifications are needed to install a roof top tent. However, if your vehicle does not have existing roof racks or a compatible mounting system, you may need to purchase and install additional roof rack components to properly secure the tent.
Can I remove the roof top tent once it is installed?
Yes, roof top tents can be easily removed from your vehicle if needed. This can be useful if you want to use your vehicle for other purposes or need to store the tent when not in use. Simply follow the reverse steps of the installation process to safely remove the tent.


