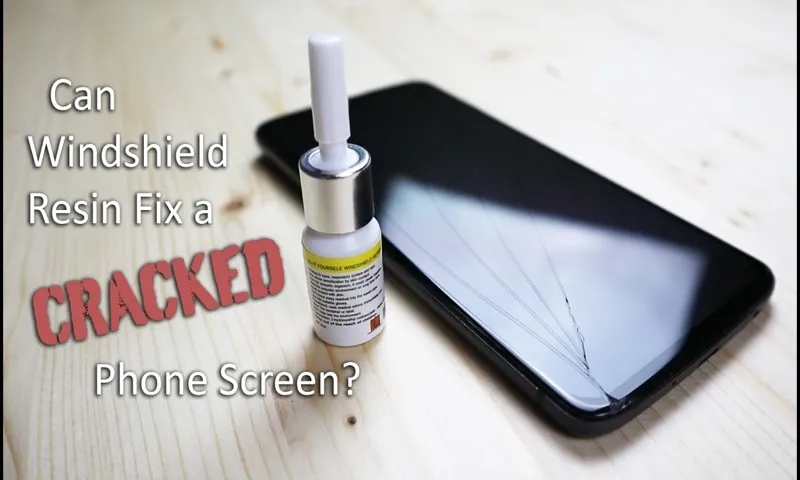
Do you feel a sense of dread every time you drop your cell phone and see the shattered screen? It’s a common problem that many of us face, and the cost of getting it repaired can be quite hefty. But what if I told you that there was a way to fix your cell phone screen yourself, without breaking the bank? That’s right, with a windshield repair kit, you can easily repair your cell phone screen in no time! You might be wondering how a windshield repair kit can possibly fix a cell phone screen. Well, think of it this way – both windshields and cell phone screens are made of glass, and they can both crack or shatter when dropped.
So it only makes sense that a windshield repair kit, which is designed to fix cracks and chips in glass, can also be used to repair your cell phone screen. The great thing about using a windshield repair kit is that it’s quick and easy to use. You don’t need any special skills or tools – just follow the instructions included in the kit, and you’ll have your cell phone screen looking as good as new in no time.
Plus, it’s much more affordable than taking your phone to a repair shop. So how does it work? Well, the windshield repair kit comes with a special adhesive resin that fills in the cracks or chips in your cell phone screen. You simply apply the resin to the damaged area, cover it with a clear film, and then use a special UV light to cure the resin and make it harden.
Once it’s hardened, you can remove the film and polish the repaired area to make it blend in with the rest of the screen. Using a windshield repair kit to fix your cell phone screen is a cost-effective solution that anyone can do themselves. Not only will you save money, but you’ll also have the satisfaction of knowing that you fixed your phone all on your own.
So next time your cell phone screen gets cracked, don’t panic – just grab a windshield repair kit and get to work!
Table of Contents
Introduction
If you’ve accidentally cracked the screen on your cell phone, you may be wondering if there’s a way to repair it yourself without having to pay for an expensive replacement. One option that you may have heard of is using a windshield repair kit. These kits are typically designed for repairing small chips and cracks in car windshields, but some people have used them to repair their cell phone screens as well.
However, it’s important to keep in mind that cell phone screens are made of different materials and have different properties than car windshields. Therefore, using a windshield repair kit may not be the best solution for repairing your cell phone screen. In fact, it could potentially make the damage even worse.
It’s always best to consult a professional or contact the manufacturer of your cell phone for advice on how to properly repair a cracked screen.
What is a windshield repair kit?
windshield repair kit, introduction
Why use a windshield repair kit for your cell phone screen?
windshield repair kit for cell phone screen, benefits of using a windshield repair kit for your cell phone screen Introduction: We’ve all been there – that heart-stopping moment when your cell phone slips out of your hands and onto the hard ground. The fear of picking it up and finding a cracked screen can make your heart sink. But fear not, because there is a solution – a windshield repair kit.
Yes, you read that right. While these kits are typically used for repairing windshields on cars, they can also be used to fix cracks and chips on your cell phone screen. But why go through the trouble of using a windshield repair kit for your cell phone? Well, in this blog post, we’ll explore the benefits of using such a kit and why it could be the perfect solution for your damaged cell phone screen.
So, let’s dive in and find out why using a windshield repair kit for your cell phone screen is a smart choice.
Step 1: Prepare Your Workstation
So, you’ve accidentally cracked your cell phone screen, and now you’re wondering if you can repair it using a windshield repair kit. Well, you’re in luck! With a few simple steps and the right tools, you can potentially fix your phone screen and save yourself some money. The first step is to prepare your workstation.
Find a clean and well-lit area where you can comfortably work on your phone. Make sure you have all the necessary tools and materials, such as a windshield repair kit specifically designed for cell phone screen repairs. These kits usually come with resin, a curing agent, and tools like syringes and suction cups.
It’s important to read the instructions carefully and familiarize yourself with the contents of the kit before you start. Take your time to set up your workstation properly so that you have everything you need within reach. With a well-prepared workstation, you’ll be ready to move on to the next step and start working on your cell phone screen.
Gather all necessary tools and materials
nutrition, meal plan, healthy lifestyle, recipe, ingredients
Choose a well-lit and clean area to work in
“workstation, well-lit, clean area, prepare, workspace, productivity, concentration.” Choosing the right workspace can have a significant impact on your productivity and concentration levels. When preparing your workstation, it is essential to select a well-lit and clean area.
Natural light can boost your mood and energy levels, making it easier to focus on your tasks. Additionally, a clean workspace can help reduce distractions and create a sense of calmness. Eliminating clutter and keeping your surroundings tidy can contribute to a more organized mind, allowing you to work more efficiently.
So, before you start working, take a moment to find a spot in your home or office that is well-lit and free from any unnecessary mess. Your environment plays a significant role in your overall success, so make sure you choose a workspace that sets you up for victory.
Step 2: Clean the Screen
So, you’ve decided to take matters into your own hands and repair your cell phone screen using a windshield repair kit. Good for you! The first step in this process is to clean the screen thoroughly. Just like with a windshield, any dirt, dust, or debris on your cell phone screen can interfere with the repair process and impact the final result.
To clean the screen, start by wiping it gently with a microfiber cloth to remove any smudges or fingerprints. Then, dampen another cloth with a small amount of isopropyl alcohol and gently wipe the screen once again. This will help remove any stubborn dirt or oils that may be present.
Make sure to let the screen dry completely before moving on to the next step. Cleaning the screen may seem like a small and simple task, but it’s an important one that sets the stage for a successful repair. So take your time, be thorough, and get that screen sparkling clean before moving on to the next step.
Use a microfiber cloth to remove any dust or debris
In order to maintain the cleanliness of your screen and ensure optimal visibility, it’s important to regularly clean it. One of the best tools to use for this task is a microfiber cloth. These soft and gentle cloths are designed to effectively remove dust and debris from your screen without causing any scratches or damage.
Simply take the microfiber cloth and gently wipe the surface of the screen, making sure to cover all areas. The tiny fibers in the cloth will attract and capture any loose particles, leaving your screen looking clean and clear. Additionally, using a microfiber cloth is a great eco-friendly option as it eliminates the need for disposable wipes or harsh cleaning chemicals.
So, the next time your screen needs a good cleaning, reach for a microfiber cloth for a quick and effective solution.
Apply a small amount of cleaning solution to the cloth
“cleaning solution”, “cloth”, “clean the screen” Now that you have gathered all the necessary materials, it’s time to tackle the task of cleaning your screen. You want to make sure you apply the cleaning solution appropriately to avoid any damage. Start by applying a small amount of the cleaning solution to the cloth you have chosen.
Be careful not to saturate the cloth too much, as you don’t want it to be dripping wet. Just a light dampness is sufficient to do the job effectively. This way, you can ensure that the cleaning solution will effectively remove any dirt marks or smudges on your screen without leaving behind residue or streaks.
Taking a little bit of extra care in this step will go a long way in giving you a clean and sparkling screen.
Gently wipe the screen in a circular motion
clean the screen, wipe the screen, circular motion. Have you ever noticed smudges and fingerprints on your screen that seem impossible to remove? It can be frustrating, especially when you’re trying to enjoy your favorite movie or show. But don’t worry, cleaning your screen is easier than you think.
One of the first steps you can take to get rid of those pesky smudges is to gently wipe the screen in a circular motion. This method allows you to cover the entire surface of the screen and ensures that all the dirt and grime are removed. Just imagine your screen as a canvas and your cloth or cleaning tool as a paintbrush.
By gently swirling in a circular motion, you’re effectively cleaning the entire screen without missing any spots. So the next time you notice smudges on your screen, don’t panic. Just remember to wipe in a circular motion, and your screen will be looking clean and clear in no time.
Step 3: Apply the Repair Solution
So you’ve got a cracked cell phone screen, and you want to try and fix it using a windshield repair kit? Well, it might sound unconventional, but it’s actually a technique that many people have found success with. The process is quite simple. First, you’ll want to thoroughly clean the cracked area of your screen using a microfiber cloth and a cleaning solution.
This will ensure that there is no debris or dirt that could interfere with the repair process. Once the screen is clean and dry, you can apply the windshield repair solution. You’ll want to carefully follow the instructions that come with the kit, as different products may have slightly different application methods.
Typically, though, you’ll apply the solution to the crack and then use a curing strip or film to seal it off. This will create a strong bond and help prevent further cracking. After a few hours, the solution should harden and create a smooth, clear surface.
Keep in mind, though, that this repair is not guaranteed to be as effective or long-lasting as a professional repair or screen replacement. However, if done properly, it can be a quick and affordable solution to fixing a cracked cell phone screen.
Select the appropriate resin for your cell phone screen
In the previous steps, we learned about how to prepare your cell phone screen for repair and select the appropriate resin for the job. Now, it’s time to move on to step 3: applying the repair solution. This is the crucial step where you will actually fix the cracks and damages on your screen.
First, make sure you have read and understood the instructions that came with the repair solution. Different products may have slightly different application methods, so it’s important to follow the manufacturer’s guidelines. Start by cleaning the screen thoroughly.
Use a microfiber cloth or a specialized screen cleaning solution to remove any dirt, dust, or fingerprints. This is important because any debris on the surface can interfere with the adhesive properties of the repair solution. Next, apply a small amount of the repair solution to the cracks or damages on your screen.
You can use the applicator tip that comes with the solution or a small brush. Be careful not to apply too much pressure, as this can cause the resin to spread unevenly or even leak out of the cracks. After applying the repair solution, use a UV light to cure it.
This is an essential step as it activates the adhesive properties of the resin and helps it bond with the screen. Make sure to follow the recommended curing time, which is usually around 5-10 minutes. Once the repair solution is cured, give your screen a final wipe-down to remove any residue.
Use a clean microfiber cloth or a lint-free cloth to gently buff the surface. This will ensure a smooth and clear finish. And that’s it! You have successfully applied the repair solution to your cell phone screen.
Follow the instructions on the windshield repair kit
windshield repair kit, apply repair solution. Now that you have cleaned the affected area and prepared it for repair, it’s time to apply the repair solution from the windshield repair kit. This solution is specially designed to fill in the crack or chip in your windshield and restore its strength and integrity.
To begin, make sure you have read the instructions provided with your windshield repair kit. Each kit may have slightly different application methods, so it’s important to follow the specific guidelines for the kit you are using. Once you are familiar with the instructions, take the repair solution and carefully apply it to the damaged area.
The solution may come in the form of a resin or adhesive, and you may need to use a syringe or applicator tool to apply it accurately. Gently squeeze the repair solution onto the crack or chip, making sure to fill it completely. Take your time and be precise with your application, as this will ensure the best results.
After you have applied the repair solution, you may need to use a curing agent or UV light to help the solution harden and bond with the glass. Again, follow the instructions provided with your kit to determine the correct curing time and method. Once the repair solution has hardened, you can remove any excess or overflow with a razor blade or scraper, being careful not to damage the surrounding glass.
Remember, the key to a successful windshield repair is in the details. Take your time, follow the instructions, and be meticulous in your application. With the right technique and the right windshield repair kit, you can easily fix small cracks and chips, saving you time and money in the long run.
Apply the resin to the cracks or chips on your screen
When it comes to fixing cracks or chips on your screen, one of the best solutions is to apply a repair resin. This resin is specially designed to fill in the gaps and restore the integrity of your screen. Applying the resin is a simple process that anyone can do.
First, make sure the area you’re working on is clean and dry. Then, carefully apply the resin to the crack or chip, making sure to fill it completely. Use a small brush or applicator to spread the resin evenly and remove any excess.
Once the resin is applied, you’ll need to let it dry for a specified amount of time. This will depend on the brand of resin you’re using, so be sure to follow the instructions carefully. Once the resin has dried, you can use a buffing cloth to polish the area and make it look as good as new.
Applying a repair resin is an effective and affordable way to fix cracks and chips on your screen, so give it a try and see the results for yourself.
Step 4: Cure the Resin
So you’ve successfully applied the resin to your cracked cell phone screen using a windshield repair kit. Now what? Well, the next step is to cure the resin and solidify the repair. This is where patience is key, as the curing process can take some time.
Most windshield repair kits come with a UV light, which you’ll need to use to cure the resin. Simply shine the light directly onto the repaired area for the recommended amount of time. This UV light helps to speed up the curing process, ensuring that the resin hardens and forms a strong bond with the screen.
It’s important to follow the instructions provided with your repair kit, as the curing time can vary depending on the brand and type of resin you’re using. Once the resin is fully cured, you can proceed to the final step of finishing and polishing the repaired area.
Place the curing strip or film over the repaired area
Once you have applied the resin to the damaged area, it is time to cure it so that it can harden and create a strong bond. This step is crucial in ensuring the longevity and effectiveness of the repair. To cure the resin, you will need to place a curing strip or film over the repaired area.
This strip or film acts as a catalyst, helping the resin to cure and harden quickly. It also helps to protect the resin from any outside elements that could potentially interfere with the curing process. Once the strip or film is in place, you will need to apply heat to the area.
This can be done with a heat gun or a UV lamp, depending on the type of resin you are using. The heat will activate the catalyst and speed up the curing process. It is important to follow the manufacturer’s instructions on the curing time and temperature for your specific resin.
Once the resin has cured, you can remove the curing strip or film and evaluate the repair.
Expose the screen to direct sunlight or use a UV lamp
When it comes to screen printing, one crucial step is curing the resin on the screen. Curing the resin is necessary to ensure that the design on the screen is permanent and won’t fade or wash away. There are a couple of different ways to cure the resin, one being to expose the screen to direct sunlight.
This method works best on a sunny day, as the UV rays from the sun help to harden the resin. Simply place the screen in a location where it will receive direct sunlight, making sure that the entire design is exposed. Another option for curing the resin is to use a UV lamp.
UV lamps emit ultraviolet light, which also helps to cure the resin. This method is especially useful if you don’t have access to direct sunlight or if the weather isn’t cooperating. The process is straightforward – just position the UV lamp above the screen, ensuring that the entire design is covered.
Both sunlight and UV lamps are effective at curing the resin, but it’s essential to give the process enough time. Depending on the type of resin and the intensity of the sunlight or UV lamp, curing can take anywhere from a few minutes to several hours. It’s crucial to follow the instructions provided with the resin to ensure that it is fully cured before moving on to the next steps in the screen printing process.
So, whether you choose to expose your screen to direct sunlight or use a UV lamp, curing the resin is an important step that shouldn’t be overlooked.
Leave the curing strip or film in place for the recommended time
In the fourth step of the resin curing process, it’s important to leave the curing strip or film in place for the recommended time. This is a crucial step in ensuring that the resin cures properly and creates a strong and durable final product. The curing strip or film acts as a barrier between the resin and the air, helping to prevent any dust or debris from settling on the surface of the resin before it fully cures.
It also helps to maintain the temperature and humidity levels needed for the resin to cure effectively. Depending on the type of resin you’re working with, the curing time may vary. Some resins require only a few hours to cure, while others may need to cure for several days.
It’s important to carefully read the instructions provided by the manufacturer to determine the correct curing time for your specific resin. During the curing process, it can be tempting to remove the curing strip or film early in order to see the progress of the resin. However, it’s important to resist this temptation and allow the resin to cure for the recommended time.
Removing the curing strip too early can lead to a weak or tacky final product. While it may be difficult to wait patiently during the curing process, remember that good things come to those who wait! By allowing the resin to fully cure, you’ll be rewarded with a strong and beautiful finished piece that you can be proud of. So sit back, relax, and let the resin work its magic!
Step 5: Clean and Polish the Screen
So you’ve managed to successfully apply the windshield repair kit to your cell phone screen and now it’s time to bring it back to its original shine. Step 5 in the repair process is all about cleaning and polishing the screen for a flawless finish. To clean the screen, start by using a microfiber cloth to gently wipe away any excess repair kit residue.
Be sure to remove any dust or debris that may have accumulated during the repair process. Once the screen is clean, you can move on to polishing. Polishing the screen will help to restore its clarity and remove any remaining imperfections.
Apply a small amount of the polishing agent that came with your windshield repair kit to another clean microfiber cloth. Gently rub the cloth in circular motions across the entire screen, paying extra attention to any areas that may still have visible damage. As you polish, you may notice that the screen starts to regain its original luster.
Keep polishing until you’re satisfied with the results. It’s important to note that the polishing process may take some time, so be patient and thorough in your efforts. Once you’re finished, take a step back and admire your handiwork.
Your cell phone screen should now be looking as good as new, all thanks to the windshield repair kit you used. With a little bit of patience and the right tools, you can successfully repair your cell phone screen and save yourself the hassle and expense of a professional repair.
Remove the curing strip or film
screen cleaning, polishing the screen, curing strip or film removal
Use a microfiber cloth to remove any excess resin
microfiber cloth, remove excess resin, clean and polish the screen After applying resin to your phone screen for a DIY repair, it’s essential to clean and polish the screen to remove any excess resin and restore its original clarity. To do this, you’ll need a microfiber cloth, which is specifically designed to clean delicate surfaces without causing scratches. Gently wipe the screen in a circular motion to remove any remaining resin.
The microfiber cloth will help pick up the resin particles without leaving behind any streaks or smudges. Continue wiping until the screen is clean and free from any residue. You’ll be amazed at how the screen shines once it is properly cleaned and polished.
So, take a few minutes to give your phone screen some TLC and enjoy a crystal clear display once again.
Apply a screen polish to restore clarity and smoothness
“Apply a screen polish to restore clarity and smoothness” If you’ve been using your electronic device for a while, you may have noticed that the screen has become a bit dull or scratched. Don’t worry, because there’s a quick and easy way to fix that! All you need is a screen polish and a soft microfiber cloth. Screen polish is designed specifically for electronic device screens and can help restore clarity and smoothness to your screen.
It works by filling in tiny scratches and removing smudges and smears, leaving your screen looking brand new. To apply the screen polish, start by turning off your device and unplugging it if necessary. Then, dab a small amount of the polish onto your microfiber cloth, making sure not to use too much.
Gently rub the cloth in circular motions across the screen, applying light pressure. Be sure to cover the entire surface of the screen, paying extra attention to any scratches or marks. After you’ve finished applying the polish, let it sit for a few minutes to allow it to dry.
Then, take a clean portion of the microfiber cloth and buff away any excess polish, using gentle strokes. This will help to smooth out the screen and remove any remaining residue. Once you’re satisfied with the results, turn your device back on and admire the restored clarity and smoothness of your screen.
It’s like having a brand new device all over again! Remember, it’s important to regularly clean and polish your screen to keep it looking its best. By following these simple steps, you can easily restore the clarity and smoothness of your electronic device screen and enjoy a better viewing experience.
Conclusion
In the vast and ever-expanding world of do-it-yourself repair, sometimes we find ourselves facing unconventional challenges. And what could be more unconventional than using a windshield repair kit to fix a cell phone screen? While some may scoff at the idea, we fearless DIY enthusiasts know that creativity knows no bounds. After all, who needs a dedicated phone repair kit when you have a trusty windshield repair kit at your disposal? But before we delve into this uncharted territory, let’s have a moment of appreciation for the noble windshield repair kit.
Designed to fix those unsightly cracks and chips in your car’s windshield, this kit is a true miracle worker. So, it’s only fair that we put its exceptional mending powers to the test on our precious cell phone screens. Now, I must warn you, attempting this repair is not for the faint of heart.
It requires a steady hand, a sprinkle of mechanical prowess, and perhaps a dash of mad scientist vibes. But fear not, intrepid adventurer, for the rewards are worth the risks. First, extract the windshield repair kit from its solemn confines and gather all the necessary tools: the resin, the suction cups, and the mysterious utensils whose names you’ll never remember.
Take your shattered cell phone screen, wipe away the tears (both yours and the phone’s), and prepare it for its miraculous transformation. Carefully follow the instructions provided by the windshield repair kit, adapting them to the scale of your mission. Instead of vacuuming out a car windshield’s crack, you’ll be delicately tending to your phone’s shattered surface.
Remember, precision is your greatest ally. With a touch of wizardry (or at least the contents of the kit), the resin will work its magic, filling the voids and sealing the cracks, just like it does on windshields. And voila! Your cell phone screen will be restored to its former glory, ready to face the world once again.
So, my fellow innovative repair warriors, the next time someone tells you it’s impossible to repair a cell phone screen with a windshield repair kit, silence them with your triumphant success. Show them that creativity knows no boundaries and that the world of DIY repair is a playground of endless possibilities. But remember, always tread with caution, and perhaps don’t mention your unconventional methods at the next phone repair shop visit.
Inspect the repaired screen for any imperfections
Once you have finished repairing the screen on your device, it’s important to thoroughly inspect it for any imperfections. This step is crucial in ensuring that the repair was successful and the screen looks as good as new. Take a close look at the screen from different angles and under different lighting conditions to spot any scratches, cracks, or other blemishes that may have been missed during the repair process.
If you notice any imperfections, you may need to go back and make additional repairs. It’s better to take the time to fix any issues now rather than having to deal with them later. Once you are satisfied with the overall appearance of the screen, it’s time to move on to the next step: cleaning and polishing.
Enjoy your newly repaired cell phone screen!
cell phone screen repair, clean and polish the screen, repair your cell phone screen, fix cracked cell phone screen
FAQs
Can a windshield repair kit be used to fix a cell phone screen?
No, a windshield repair kit is designed specifically for repairing cracks in car windshields and may not work effectively on a cell phone screen.
What is the best way to repair a cell phone screen without using a windshield repair kit?
The best way to repair a cell phone screen without using a windshield repair kit is to take it to a professional repair service or follow a DIY tutorial using specific cell phone repair kits.
Are cell phone screens and car windshields made of the same material?
No, cell phone screens and car windshields are made of different materials. Cell phone screens are typically made of glass or a combination of glass and plastic, while car windshields are made of laminated safety glass.
Is it safe to attempt repairing a cell phone screen without professional help?
Repairing a cell phone screen without professional help can be risky, as it requires careful handling of delicate components. It is recommended to seek professional assistance or follow comprehensive DIY tutorials for better results.
Can using a windshield repair kit on a cell phone screen cause further damage?
Yes, using a windshield repair kit on a cell phone screen can potentially cause further damage if not done correctly. The chemicals and tools in the kit may not be suitable for use on a cell phone screen, leading to irreversible damage.
What are some alternative methods to repair a cracked cell phone screen?
Some alternative methods to repair a cracked cell phone screen include using adhesive screen protectors, applying clear nail polish to seal cracks temporarily, or replacing the entire screen assembly.
Are there any DIY methods available specifically for repairing cell phone screens?
Yes, there are various DIY methods available for repairing cell phone screens, such as using screen replacement kits, following online tutorials, or purchasing specialized repair tools. However, caution should be exercised to avoid causing further damage.