If you’re an avid RV traveler, there’s nothing quite like relaxing under the shade of your awning on a sunny day. But what if your awning is damaged or unusable? It’s time to consider replacing it. Don’t worry, you don’t have to be a seasoned handyman to get the job done.
With this step-by-step guide, you can easily replace your RV awning and have it looking as good as new in no time. So let’s roll up our sleeves and get started!
Table of Contents
Assessing the Damage
If you’ve experienced damage to your RV awning, the first step is to assess the extent of the damage. Start by examining the fabric and frame of the awning to determine whether repairs are possible or if a full replacement is needed. If the fabric is ripped, torn, or has holes, it may be possible to patch it up or sew a new section of fabric in its place.
However, if the frame is bent or broken, a replacement may be necessary. To replace an RV awning, you’ll need to purchase a new one that matches the size and style of your current awning. You may also need to purchase hardware and tools to install the new awning properly.
It’s important to be patient and take your time during the replacement process to ensure that everything is done correctly. Once the new awning is installed, you’ll be able to enjoy the shade and protection it provides once again.
Checking for Material Type and Size
When assessing damage to a structure, it’s crucial to check for the material type and size. Different building materials have different strengths and weaknesses, and understanding these properties can help assess the extent of the damage. For example, if the material is wood, damage caused by water could lead to rotting and weakening, while metal materials could corrode over time.
Additionally, the size of the damage can indicate how severe it is. Small cracks could be easily repaired, while large areas of damage may require replacement. By checking for material type and size, one can better understand the damage and formulate an effective plan for repair.
Inspecting the Hardware and Frame
When inspecting the hardware and frame of a damaged item, it’s essential to assess the extent of the damage before attempting any repairs. Start by examining the hardware, such as screws, bolts, and hinges, for any signs of rust, corrosion, or damage. If any hardware is missing or damaged, it may need to be replaced.
Similarly, check the frame for cracks, dents, or other signs of damage. A damaged frame is a serious issue that requires immediate attention as it can not only compromise the item’s stability but also create safety hazards. The best way to assess the damage is by taking your time and inspecting the item thoroughly.
Don’t rush the process or overlook any potential issues. Use a flashlight to help you see any hidden areas and a magnifying glass to inspect tiny details. By doing a thorough inspection, you can determine if the item is repairable or if it needs to be replaced altogether.
It’s always better to be safe than sorry, and addressing issues promptly can save you time, money, and frustration down the road. Remember, a little work now can prevent significant problems later.
Removing the Old Awning
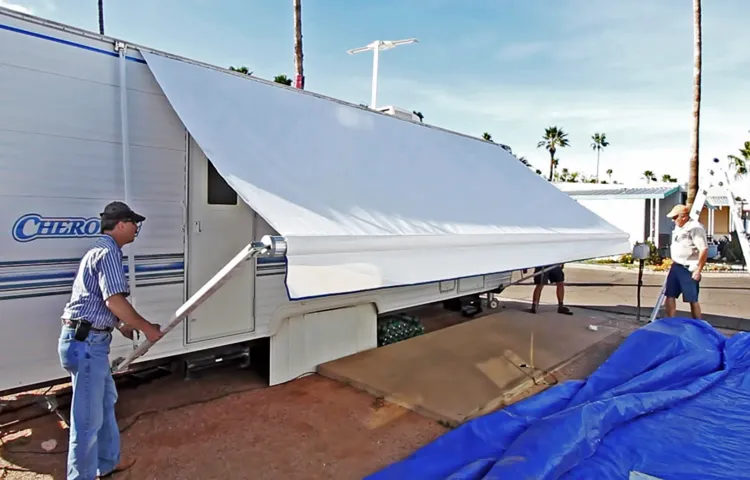
If you want to replace your RV awning, the first step is to remove the old one. This may sound daunting, but with the right tools and a little bit of patience, it can be done easily. The first thing to do is to disconnect any electrical or mechanical components that are attached to the awning.
Then, remove any screws or bolts that are holding the awning in place. You may need to use a drill or a screwdriver for this task. Once the screws or bolts are removed, carefully lift the awning off the RV.
It’s essential to have another person help you with this step, as the awning can be heavy and unwieldy. Once the awning is removed, inspect the RV for any damage or wear and tear before proceeding with the installation of the new awning. With a little bit of care, removing the old awning is a straightforward process that will make way for a new and improved RV awning.
Disconnecting the Torsion Assembly
When it comes to removing an old awning, the first step is to disconnect the torsion assembly. This can be a tricky process, but with the right tools and a little patience, it can be done easily enough. The torsion assembly is what holds the awning in place, and is usually located at the top of the unit.
To disconnect it, you’ll need to find the tension bolt that holds it in place. Loosen this bolt carefully, making sure not to damage any of the surrounding parts. Once the bolt is loose, the assembly should come free quite easily.
This step is crucial in ensuring that the old awning is safely and securely removed without causing any damage to the surrounding area. By disconnecting the torsion assembly first, you’ll be able to move on to the next steps of the removal process with ease.
Detaching the Awning Fabric
If you’re looking to update your outdoor space, swapping out the old awning can make a significant difference. Removing the old awning fabric is a crucial step in this process. The first thing you’ll want to do is remove any hardware that’s holding the awning in place.
Once this is done, you can detach the awning fabric carefully. It’s important to take your time with this step to avoid damaging the fabric. Be sure to note how the old awning was attached so that you can properly install the new one.
With the old fabric removed, you’ll have a much better idea of what needs to be replaced and how your new awning will fit. Overall, taking the time to remove the old awning carefully will ensure that your new one looks and functions as it should. So, don’t rush this step and take your time, and of course, if you need any help, consider consulting a professional handyman near you.
Removing the Mounting Brackets and Rails
Removing the old awning can seem intimidating, but it’s actually quite simple. The first step is to remove the mounting brackets and rails that held the old awning in place. Depending on the type of awning, these may be attached to the wall or the roof.
Use a ladder or step stool if necessary to access the brackets and rails. Be sure to have someone hold the awning in place as you work, as it could be heavy or unwieldy. Use a power drill or wrench to detach the bolts attaching the brackets and rails to the wall or roof.
Once the bolts have been removed, carefully slide the brackets and rails off of the awning frame. With the brackets and rails removed, you can now focus on taking down the awning itself. By following these steps, you’ll be well on your way to replacing your old awning with a fresh, new one.
Installing the New Awning
Replacing an RV awning may seem like a daunting task, but it’s actually a straightforward process that can be done with the right tools and some patience. First, you’ll need to choose the correct replacement awning for your RV’s make and model. Once you have the new awning, begin by removing the old one carefully.
Check for any damages or wear and tear on the hardware before installing the new awning. Make sure to follow the manufacturer’s instructions and use the correct hardware to ensure that your new awning is securely fastened. Once it’s installed, test it out to make sure it opens and closes without any issues.
With a little bit of knowledge and some elbow grease, you can have your RV looking like new with a brand-new awning.
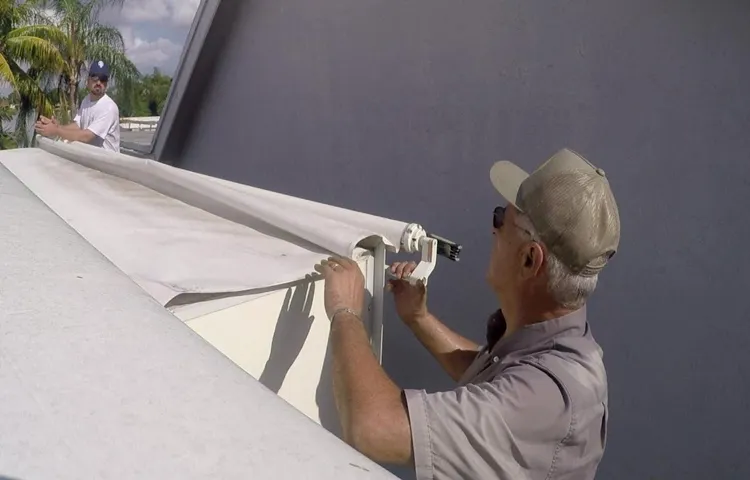
Attaching the Mounting Brackets and Rails
Attaching the mounting brackets and rails is a crucial step in installing your new awning. The first thing you need to do is to determine the exact location where you want to install your awning. Once you have identified the spot, mark it using a pencil or marker.
Then, using a drill and appropriate sized bit, drill holes for the mounting brackets. Make sure to follow the instructions provided by the manufacturer for the correct placement of the brackets. Once the mounting brackets are installed, it’s time to attach the rails.
Place the rails onto the brackets and secure them with screws. It’s important to check that the rails are level and straight before tightening the screws. Once the brackets and rails are firmly attached, you can proceed to attach the awning to the rails.
It’s always important to follow the manufacturer’s instructions and recommendations to ensure that the installation is done correctly. With proper installation, your awning will provide you with years of shade and comfort.
Securing the New Awning Fabric
If you’ve recently invested in a new awning, you want to make sure it’s installed securely. The last thing you want is for it to come loose during a storm and get damaged or cause damage to surrounding areas. To install your new awning, start by measuring the area where it will be installed.
Make sure to measure accurately, as this will affect the stability and tension of the fabric. Once you’ve measured and marked the area, you can start installing the support brackets. Make sure these are attached securely to the wall or post, and that they are level.
Once the brackets are installed, you can attach the awning fabric. Make sure to pull it tight and evenly across the support brackets to ensure a taut, stable installation. Finally, double-check that everything is secure and tight to prevent any potential damage or mishaps.
By taking these steps, you can enjoy your beautiful new awning with peace of mind knowing that it’s securely installed.
Reconnecting the Torsion Assembly
After successfully replacing the fabric material of your awning, the next step is to reconnect the torsion assembly so that your awning can be opened and closed effortlessly. First, locate the winding mechanism and align it with the ball detent of the opposite end. Make sure that the torsion spring is properly in place and engages in the winding mechanism.
Slowly rotate the winding mechanism to ensure that the torsion spring is properly aligned and seated. Once you have confirmed that the torsion spring is correctly positioned, reattach the end cap to secure the assembly in place. This is a crucial step in the installation process because it enables your awning to function properly.
Take your time and ensure that all the components are securely connected so that you can enjoy your new awning without encountering any problems. With these simple steps, you can install your new awning and enjoy its many benefits for years to come.
Additional Tips and Safety Precautions
Replacing an RV awning may seem daunting, but with the right tools and preparation, it can be a relatively straightforward task. Before you begin, make sure to turn off all power sources and disconnect any electronics that may be connected to the awning. Check the manufacturer’s instructions for specific details on how to remove and install the awning, as each model may differ.
It’s also important to have a helper on hand to assist in holding the awning and ensuring it doesn’t fall while you’re working on it. When removing the old awning, take note of the way it was attached, as this will help you with the installation of the new one. As you install the new awning, make sure all screws and bolts are secured tightly, and test the awning by extending and retracting it several times to ensure proper operation.
Overall, taking your time and following all safety precautions will help ensure a successful and safe awning replacement.
Conclusion
Replacing an RV awning may seem like a daunting task, but with the right tools and a bit of DIY attitude, it can be a breeze. Just like with any home improvement project, follow the steps carefully and be patient. Remember, not only will you be able to enjoy a fresh and sturdy awning, but you’ll also get the satisfaction of knowing you did it yourself.
Plus, you’ll be ready for any spontaneous road trips or impromptu camping adventures! As they say, a well-functioning RV awning is a shade above the rest.”
FAQs
What tools do I need to replace an RV awning?
To replace an RV awning, you will need a ladder, drill, pliers, screwdrivers, a tape measure, and a helper.
Can I replace an RV awning myself or do I need a professional?
It is possible to replace an RV awning yourself, but it requires some skill and knowledge. If you are not confident in your abilities, it may be best to hire a professional.
How long does it take to replace an RV awning?
The time it takes to replace an RV awning varies based on the size and type of awning. On average, it can take anywhere from 2-6 hours.
Is it necessary to adjust the tension on the new RV awning?
Yes, it is important to adjust the tension on the new RV awning to ensure it operates properly and does not get damaged.
How do I measure the size of the RV awning I need to replace?
To measure the size of the RV awning you need to replace, measure the distance between the center of the left arm to the center of the right arm.
Can I replace just the fabric on my RV awning?
Yes, it is possible to replace just the fabric on your RV awning. However, it may be more cost-effective to replace the entire awning instead.
How do I clean and maintain my RV awning to prolong its lifespan?
To clean and maintain your RV awning, use a soft bristle brush and a mild soap solution to scrub away any dirt or grime. You should also make sure to retract the awning during rainy or windy weather to avoid damage.