Ready to hit the road with your RV and enjoy the great outdoors? One thing you’ll want to have on hand is an awning to provide some shade and shelter from the elements. Installing an awning on your RV may sound daunting, but with a little bit of guidance, it can be a simple and rewarding DIY project. So, let’s dive in and learn how to install an awning on your RV.
With just a few tools and some basic knowledge, you too can enjoy the comfort and convenience of having an awning on your next adventure.
Table of Contents
Preparation
“Are you thinking of adding an awning to your RV, but unsure of how it fits? Don’t worry, the process is quite simple. First, measure the length of your RV’s awning rail to determine the correct size for the awning. When purchasing, make sure to select an awning that matches the length of the rail.
Additionally, consider the pitch of the awning – a steeper pitch allows for better rain drainage. Once you have your awning, attach the mounting brackets to the side of the RV, keeping them level and secure. Finally, carefully roll out the awning, making sure it is centered and straight.
Voila, you’re now ready to enjoy the shade and shelter of your new awning! Remember to always practice caution and safety when installing or using any RV accessory.”
Check the measurements of the RV and awning
When it comes to RV camping, it’s essential to check the measurements of your RV and awning before hitting the road. This is particularly important if you plan on staying at a campsite with designated RV spots. Knowing the size of your RV and your awning beforehand can save you from a lot of stress and frustration.
A small error in size could mean the difference between comfortably parking your RV and struggling to fit it in the space provided. Additionally, you want to ensure that your RV and awning aren’t too big or too small for the campsite’s designated area. By doing some simple measurements and research beforehand, you can have a hassle-free camping experience without any surprises.
So, before you hit the road, make sure you take the time to prepare by measuring your RV and awning and researching the campsite’s space allocation. This simple step can make a big difference in your overall experience.
Gather necessary tools and equipment
When it comes to starting a new project, preparation is key. Gathering all the necessary tools and equipment beforehand can save you time and frustration later on. Depending on the task at hand, the required items can vary.
For instance, if you’re planning to paint a room, you’ll need brushes, rollers, drop cloths, and paint. Or, if you’re assembling furniture, you’ll need screwdrivers, wrenches, and possibly a power drill. It’s important to assess what you need before you begin, so you can make a list and gather everything beforehand.
Not only will this help you stay organized, but it will also prevent unexpected trips to the hardware store mid-project. In short, take the time to gather all your necessary tools and equipment before you begin any project to save yourself time and frustration later on.
Clean the surface where the awning will be mounted
Before installing your new awning, it’s essential to thoroughly clean the surface where it will be mounted. This step will ensure that the awning adheres properly and prevents any damage to the surface. The first thing you need to do is remove any loose debris, such as dirt, leaves or cobwebs, from the area.
Next, use a mild cleaning solution and a soft-bristled brush to remove any dirt or grime that has settled on the surface. Be sure to rinse the area thoroughly with water and allow it to dry completely before mounting the awning. By taking the time to prepare the surface, you will not only prolong the life of your awning but also ensure that it looks neat and clean for years to come.
Installation
If you’re planning to install an awning on your RV, it’s important to familiarize yourself with the process to ensure a safe and secure fit. Firstly, you’ll need to choose the right size and type of awning for your RV, as they come in a variety of shapes and sizes. Once you have your awning, you can begin the installation process by following the manufacturer’s instructions.
Typically, this involves mounting brackets to the RV’s exterior and then attaching the awning to these brackets. It’s essential to use the correct tools, hardware, and fasteners specified in the instructions to ensure a secure installation. Additionally, it’s important to check and tighten all connections periodically to ensure the awning stays in place during travel.
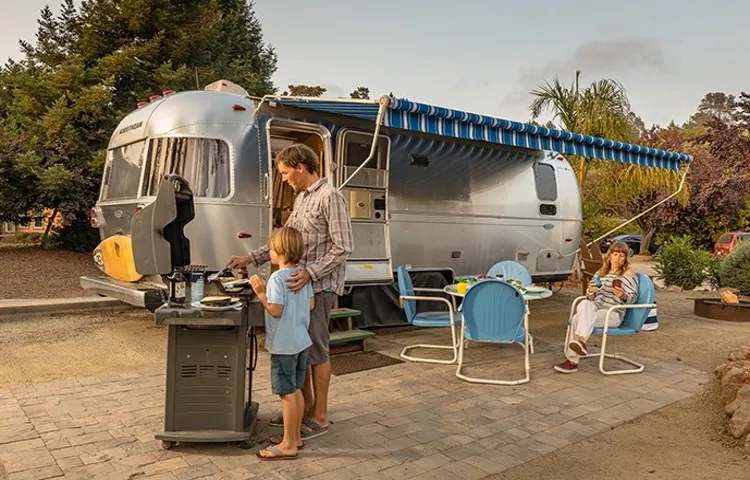
A properly installed awning can provide shade and protection from the elements, making your RV experience more comfortable and enjoyable.
Attach the mounting brackets to the RV
When it comes to attaching the mounting brackets to your RV, there are a few important things to keep in mind. First and foremost, you’ll need to make sure that your RV is level, as this will make the installation process much easier and more efficient. Once you’ve got that sorted, you can start attaching the brackets to the frame of your RV, using screws or bolts to secure them firmly in place.
It’s important to ensure that the brackets are evenly spaced out and level, so take your time and measure carefully as you go. Once you’re satisfied that the brackets are securely attached, you can move on to wiring up the solar panels themselves. With the right preparation and attention to detail, installing solar panels on your RV can be a great way to save on energy costs and enjoy more sustainable travel.
So go ahead and get started – your wallet (and the environment) will thank you for it!
Slide the awning into the mounting brackets
When it comes to installing an awning, sliding it into the mounting brackets is a crucial step, as it secures the awning in place and prevents it from falling or flying away in windy conditions. To start, you’ll need to position the mounting brackets on the wall or roof where your awning is intended to be placed. Make sure that the brackets are level and align with the holes in the awning frame.
Next, carefully slide the awning into the brackets, ensuring that it is properly seated and level. Depending on the type of awning you have, you may need to secure it in place with screws or other fixings. Lastly, give the awning a quick test by opening and closing it a few times to ensure that it operates smoothly and securely.
By following these steps, you can install your awning with confidence, knowing that it’s firmly anchored in place and ready to provide shade and shelter whenever you need it.
Secure the awning in place with nuts and bolts
When it comes to installing an awning, one of the most important steps for ensuring its stability and safety is securely fastening it in place with nuts and bolts. These sturdy fasteners will keep your awning anchored firmly to your home or other structure, reducing the risk of it collapsing or blowing away in strong winds. When choosing nuts and bolts for the job, be sure to select ones that are appropriate for the weight and size of your awning, as well as the material of your home or structure.
Additionally, it’s important to ensure that the nuts and bolts are tightened to the appropriate degree, neither too loose nor too tight. With the right nuts and bolts, and proper installation techniques, you can enjoy your awning worry-free, knowing it’s safely secured in place.
Extend and adjust the awning for proper tension and angle
To properly install an awning, it’s important to extend and adjust it for the right tension and angle. The first step is to extend the awning fully, ensuring that it’s securely fastened to the wall. Once extended, adjust the angle of the awning based on the time of day and the desired amount of shade.
It’s important to note that the angle of the awning will need to be adjusted regularly throughout the day to ensure optimal shading. Next, adjust the tension of the awning to ensure proper support of the fabric and to prevent sagging. This can be done by tightening or loosening the adjustment knobs on the arms of the awning until the desired tension is achieved.
Finally, take the time to inspect the awning for any signs of wear or damage. If any issues are detected, be sure to address them before using the awning. With proper installation and maintenance, an awning can provide many years of shade and protection.
Maintenance
If you own an RV, you might be thinking about adding an awning for some extra shade and protection from the elements. But how does an awning fit to an RV? Firstly, decide on the type of awning you want, as there are manual and electric options. A manual awning is manually operated via a hand crank, while electric options are generally easier to use and come with a remote control.
Once you have your awning, the hardware is typically mounted on the side of your RV. You’ll want to make sure the hardware is securely fastened and properly aligned to ensure a smooth and durable installation. After that, simply attach the awning fabric to the hardware and you’re ready to go! Remember to keep your awning clean and maintained for longevity and optimal performance.
Now, you can relax in the shade and enjoy the outdoors with your new RV awning.
Regularly check for loose bolts or damage
Regularly checking for loose bolts or damage is an essential part of maintenance for any machinery or equipment. It can be easy to forget about this kind of routine check, but neglecting it can lead to serious consequences. Loose bolts can cause parts to come apart, leading to malfunctions and potential safety hazards.
Damage, whether visible or hidden, can also compromise the inner workings of equipment and cause it to fail unexpectedly. Taking the time to inspect your machinery regularly can not only prevent accidents but also prolong its lifespan. By keeping an eye out for loose bolts or damage, you ensure that your equipment is running at its best and reduce the risk of costly repairs down the road.
So, don’t wait until something goes wrong before giving your machinery a once-over. Incorporating this simple maintenance habit can save you time, money, and maybe even your safety.
Clean the awning and lubricate moving parts
Maintaining your awning is an essential aspect of keeping it in good condition. It not only prolongs its lifespan, but it also prevents costly repairs in the future. One of the crucial maintenance tasks is cleaning the awning.
Over time, grime, dirt, and debris accumulate on the fabric, resulting in unsightly stains and discoloration. To clean the awning, start by hosing it down with water to remove loose dirt. Next, create a cleaning solution by mixing a mild detergent with water, then gently scrub the fabric with a soft-bristled brush.
Rinse the awning thoroughly with water until all the soap is gone. Once you’ve cleaned the awning, it’s essential to lubricate the moving parts, such as the hinges, roller tube, and brackets. This step ensures that your awning operates smoothly, prevents rust, and eliminates annoying squeaks.
You can use silicone lubricant, which is an excellent option for outdoor use as it repels water and does not attract dust or dirt. By following these simple maintenance steps, you can keep your awning in top shape and enjoy its benefits for years to come.
Conclusion
In conclusion, fitting an awning to an RV isn’t rocket science, but it does require patience, precision, and a little bit of elbow grease. Just like a well-fitted suit can elevate your style, a properly installed awning can enhance your RV’s functionality and aesthetic appeal. So, whether you’re seeking shelter from the sun or rain, or simply looking to add a touch of character to your RV, following the manufacturer’s instructions and enlisting the help of a friend can go a long way.
After all, a wise man once said, “the greatest journeys in life are the ones that lead you back to the comfort of your RV with a perfectly fitted awning”. Well, maybe we just made that up, but you get the point!”
FAQs
What is an RV awning?
An RV awning is a retractable shade that attaches to the exterior of an RV to provide shade and protection from the sun and rain.
How does an awning fit to an RV?
An awning is typically installed on the side of an RV using brackets that attach to the exterior wall. The awning then rolls out and is secured in place with support legs.
What types of RV awnings are available?
There are several types of RV awnings, including manual, electric, and hybrid models. Manual awnings require physical effort to set up and take down, while electric awnings can be opened and closed with the push of a button. Hybrid awnings combine both manual and electric features.
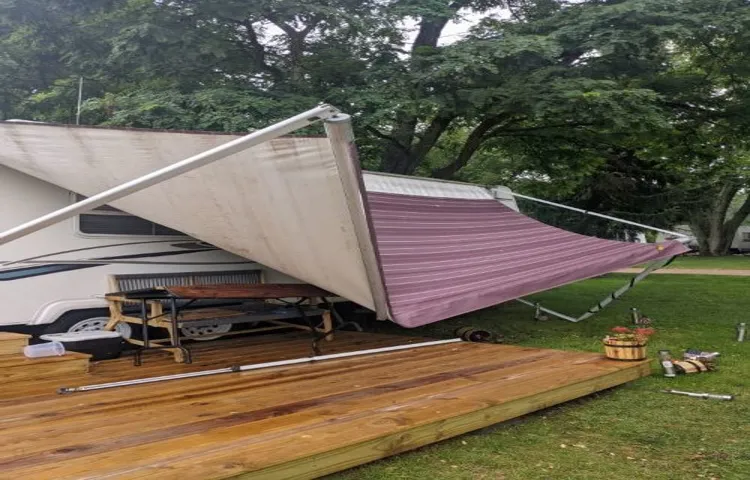
Can an RV awning be damaged in high winds?
Yes, RV awnings can be damaged in high winds. To prevent damage, it’s important to retract the awning during windy conditions.
How do I clean my RV awning?
To clean an RV awning, first, retract it fully. Then, use a soft-bristled brush and a mild soap solution to gently scrub away any dirt or stains. Rinse the awning thoroughly with a hose, and let it dry completely before retracting it.
Do I need to lubricate my RV awning?
Yes, it’s important to lubricate the moving parts of your RV awning regularly to prevent rust and corrosion. Use a silicone-based lubricant to keep things moving smoothly.
Can I replace my RV awning myself?
While it is technically possible to replace an RV awning yourself, it’s generally recommended to have a professional do it. RV awnings involve complex mechanisms and can be difficult to maneuver, so it’s best to leave it to the experts.