
Adding coolant to your car is an essential task that every driver should know how to do. Properly maintaining your coolant system can prevent your car from overheating and potentially causing severe engine damage. However, if you’ve never added coolant before, it can be a daunting task.
The good news is that it’s a simple process that can be completed in just a few simple steps. So, don’t panic! Whether you’re a new driver or just need a refresher, this guide will help you add coolant to your car with ease.
Table of Contents
Step 1: Locate the Coolant Reservoir
So, you want to know how to add coolant to your car? Well, the first step is to locate the coolant reservoir. This is usually a clear plastic tank that’s easy to spot under the hood. If you’re having trouble finding it, refer to your car’s owner manual or do a quick online search for your specific make and model.
Once you’ve located the reservoir, take a look at the markings on it. You’ll see a minimum and maximum level indicator. Before pouring in any coolant, make sure the level is below the maximum mark.
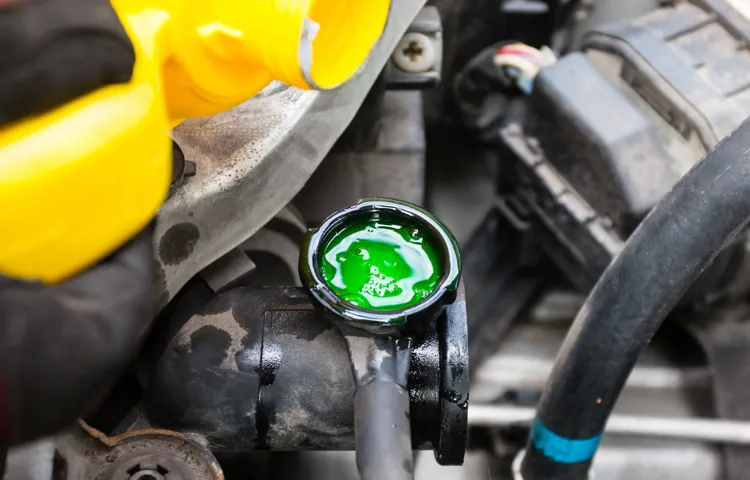
If it’s low, simply unscrew the cap and pour in the coolant. Make sure to use the coolant recommended by your car’s manufacturer to ensure the best results. Once you’ve poured in the coolant, screw the cap back on and start the engine to circulate the fluid throughout the engine.
It’s that easy! Just be sure to check the coolant level regularly to prevent any engine damage due to overheating.
Check your owner’s manual if unsure
When it comes to maintaining your car’s coolant system, it’s important to know where to start. The first step is often locating the coolant reservoir. This can be found under the hood of your vehicle, typically near the engine.
However, if you’re unsure where to find it, don’t worry. Simply refer to your owner’s manual for guidance. Once you’ve located the reservoir, check the coolant level by observing the markings on the side of the container.
If the level is low, it’s important to replenish it with the proper coolant mixture recommended for your specific make and model. By taking these steps, you’ll help ensure that your car’s engine stays cool and operates efficiently, reducing the risk of expensive repairs down the road. So don’t forget to check your coolant system regularly and refer to your owner’s manual if you’re ever unsure about the process.
Step 2: Check the Coolant Level
Now that you’ve checked the engine oil level, the next step in maintaining your car’s health is to check the coolant level. The coolant is the fluid that helps regulate the temperature of the engine and protects it from overheating. To check the coolant level, first, make sure the engine is cool, then locate the coolant reservoir, which is usually a translucent container with “coolant” marked on it.
Remove the cap and check the level; it should be between the minimum and maximum marks. If it’s low, you can add more coolant by pouring it directly into the reservoir. Make sure you use the proper type of coolant and mix it with distilled water if needed.
Remember to wipe any spilled coolant to prevent damage to the engine or other components. Regularly checking and adding coolant to your car can help extend its life and prevent costly repairs down the line.
Make sure the engine is cool before opening the reservoir cap
When it comes to checking your vehicle’s coolant level, it’s important to follow the proper steps to ensure your safety and the health of your engine. Step 2: Check the coolant level by opening the reservoir cap, but make sure the engine is cool first. Your engine can reach extremely high temperatures when running, so opening the reservoir cap on a hot engine can lead to serious burns.
Wait until the engine has completely cooled down before checking the coolant level to avoid any accidents. Once the engine is cool, the next step is to locate the coolant reservoir. It can usually be found near the radiator and has a clear or semi-transparent plastic tank with a line indicating the minimum and maximum levels of coolant.
Carefully remove the cap and check the coolant level. If it is below the minimum line, then you need to add more coolant. Using the right type of coolant is also crucial.
Different types of engines require different coolants, and using the wrong one can damage the engine. Make sure to check your owner’s manual to find out which type of coolant your engine needs. In conclusion, checking your vehicle’s coolant level is an important part of maintaining your engine’s health.
However, it’s important to follow the proper steps and safety precautions to avoid any accidents. Always make sure the engine is cool before opening the reservoir cap and use the correct type of coolant to keep your engine running smoothly.
Step 3: Add the Coolant
Now that you’ve located the coolant reservoir, it’s time to add the coolant. But before you get started, make sure the engine is cool to the touch. You don’t want to add coolant to a hot engine, as it can cause serious burns.
Once the engine has cooled down, remove the cap from the coolant reservoir and carefully pour in the coolant. Make sure you use the type of coolant recommended in your car’s manual, as using the wrong type can cause damage to your engine. Also, be careful not to overfill the reservoir, as too much coolant can cause problems as well.
As you pour in the coolant, keep an eye on the level and stop when it reaches the “full” line. Once you’ve added the coolant, replace the cap and start the engine. Let it run for a few minutes, then check the coolant level again to make sure it’s still at the proper level.
With these simple steps, you can add coolant to your car safely and ensure your engine runs smoothly.
Use a funnel to prevent spillage and add the recommended coolant type
If you want to prevent spillage and ensure a smooth coolant refill process, using a funnel is undoubtedly the way to go. Make sure that the funnel you choose has the right size and shape that fits perfectly into your car’s coolant filler neck. You don’t want to buy a funnel that’s too small or too big, or else coolant will spill everywhere, and you’ll end up wasting both time and money.
Once you’ve got the right funnel, it’s time to add the recommended coolant type. While there are different types and colors of coolants available in the market, it’s essential to use the one that’s specified in your car’s maintenance manual. Mixing different coolants can damage your car’s radiator and engine, leading to costly repairs.
On top of that, using the wrong coolant type can also lower your car’s fuel efficiency and overall performance. So, make sure to double-check the coolant type and follow the recommended proportions while adding it. By doing so, you’ll avoid any potential damage and keep your car’s engine running smoothly for years to come.
Step 4: Replace the Cap
Now that you’ve added the coolant, it’s time to replace the cap. Make sure the cap is securely tightened before closing the hood. It’s important to note that you should never add coolant to a hot engine.
Always wait until the engine has cooled off before attempting to add coolant. Remember, low coolant levels can lead to engine overheating, which can cause serious damage to your car. So, it’s important to regularly check and maintain your coolant levels to ensure your car is running smoothly.
By following these simple steps, you can easily add coolant to your car and avoid any potential engine troubles.
Make sure the cap is securely fastened and wiped clean
When it comes to replacing the cap on your item, it’s important to make sure that it’s securely fastened and wiped clean. This is especially important for items that contain liquids or other substances that could potentially leak or spill out if the cap is not properly sealed. To replace the cap, first, make sure that it’s the correct size and shape for your item.
Then, carefully screw it back on, making sure to tighten it enough so that it’s secure but not so much that it’s difficult to remove later on. Finally, take a clean cloth or paper towel and wipe down the outside of the cap to remove any residue or dirt that may have collected there. By following these simple steps, you can help ensure that your item stays securely sealed and protected from leaks and spills.
Step 5: Check for Leaks
After adding coolant to your car, it’s important to check for leaks. One way to do this is to visually inspect all the hoses and connections for any signs of coolant leakage. You might also notice puddles of coolant underneath your car, which could indicate a leak.
Another way to check for leaks is to use a coolant pressure tester. This tool pressurizes the cooling system and can help you identify any leaks. If you do find a leak, it’s important to address it quickly to avoid more serious damage to your engine.
Simply adding more coolant won’t fix the problem, so it’s best to bring your car to a mechanic to diagnose and repair any leaks. By taking care of your car’s cooling system, you can help ensure that it runs smoothly and stays in top condition. So, make sure to add coolant when needed and check for leaks regularly to keep your car running smoothly and avoid costly repairs down the road.
Run the engine and check for any leaks or overheating issues
After running the engine for a few minutes, it’s essential to check for any leaks. Leaks can develop in different places in the engine, such as the radiator, hoses, or water pump. Check the ground underneath the car for any visible puddles of coolant.
If you notice any fluid dripping from the engine, it’s a sign of a leak. Pay close attention to the color of the fluid as it can indicate the type of fluid leaking. Coolant is usually green or orange, while oil is brown or black.
If you detect any leaks, stop the engine immediately and take it to a mechanic to get it fixed. It’s also essential to monitor the engine’s temperature gauge and ensure it stays within the normal range. If the engine overheats, it can cause severe damage, and stopping to fix the issue immediately can save you from costly repairs.
Overall, it’s crucial to check for leaks and overheating issues before hitting the road to ensure your car runs smoothly.
Conclusion
Adding coolant to your car is like giving it a refreshing drink on a hot day. Just like you can’t survive without water, your car can’t survive without coolant. So, don’t let your car get thirsty, keep an eye on the coolant level and top it off when needed.
Your car will thank you with a smooth and cool ride!”
Properly maintaining your vehicle’s coolant system ensures optimal performance and longevity
One crucial step in maintaining your vehicle’s coolant system is checking for leaks. Ignoring leaks can lead to low coolant levels and engine overheating. To check for leaks, make sure to inspect the radiator, hoses, water pump, and reservoir for any signs of damage or wear.
You can also check for leaks by inspecting the ground beneath your vehicle for any coolant puddles. If you do detect a leak, have it repaired as soon as possible to prevent further damage to your vehicle’s engine. Remember that regular maintenance and prompt repairs can help ensure optimal performance and longevity of your vehicle’s coolant system.
Don’t neglect this essential step in keeping your engine running smoothly!
FAQs
Why is it important to add coolant to my car?
Coolant helps regulate the temperature of your car’s engine, preventing overheating and potential damage.
How often should I add coolant to my car?
It’s recommended to check your coolant level monthly and add more as needed. However, some cars may require more frequent coolant top-ups.
Can I use any type of coolant in my car?
No, it’s important to use the type of coolant recommended by your car’s manufacturer to ensure proper function and prevent damage.
How do I know if my car needs more coolant?
Check the coolant level in your car’s reservoir tank and add coolant if it’s below the appropriate level. Your car may also display a warning light on the dashboard if the coolant level is low.
Can I add coolant to my car while the engine is hot?
No, it’s recommended to wait until your car’s engine has cooled down before adding coolant to prevent burns or other injury.
Is it possible to overfill my car’s coolant reservoir?
Yes, overfilling your car’s coolant reservoir can cause the excess coolant to overflow and potentially damage other parts of your car. Be sure to only add the recommended amount of coolant.
What should I do if my car’s engine is overheating despite adding more coolant?
If your car’s engine is overheating despite adding more coolant, there may be other issues at play. It’s recommended to have your car inspected by a mechanic to determine the root cause of the problem.