
Are you ready to dive into the world of blogging? Whether you’re a seasoned blogger or just starting out, this blog is the perfect place for you. In this introduction, we will take a closer look at the art of blogging and why it has become such a popular form of expression in today’s digital age. Blogging allows individuals to share their thoughts, experiences, and expertise with the world.
It’s a platform where you can engage with readers who share your interests and passions, creating a sense of community and connection. Blogging has evolved significantly over the years, from its early days as online diaries to becoming an essential tool for businesses and professionals. It has given a voice to millions of people worldwide, allowing them to reach a global audience and establish themselves as authorities in their respective fields.
In this blog, we will explore various aspects of blogging, including the different types of blogs, how to start and monetize a blog, and tips for creating compelling content that resonates with your audience. We will also delve into the benefits of blogging, such as personal growth, professional development, and the opportunity to connect with like-minded individuals. So, whether you’re looking to share your travel adventures, provide valuable insights into a specific industry, or simply express your thoughts and opinions, blogging is the perfect outlet for you.
Join us on this exciting journey as we uncover the secrets to successful blogging and help you unleash your creativity and passion. Get ready to become a blogging superstar and make your mark on the digital world!
Table of Contents
Why is it important to add coolant to your Tesla Model 3?
If you own a Tesla Model 3, it is important to understand the significance of adding coolant to your vehicle. Coolant plays a crucial role in maintaining the optimal operating temperature of the battery and other components of your Tesla. In order to add coolant to your Model 3, you will need to locate the coolant reservoir, which is typically found under the frunk (front trunk) hood.
Once you have located the reservoir, you can remove the cap and carefully add the appropriate coolant fluid. It is important to note that the type of coolant used in a Tesla Model 3 is specific to electric vehicles and should not be mixed with traditional engine coolant. Regularly checking and adding coolant to your Tesla Model 3 will help ensure that your vehicle remains in peak condition and can continue to deliver the exceptional performance and driving experience that Tesla is known for.
So, take a few moments to familiarize yourself with the process of adding coolant to your Model 3 and make it a regular part of your vehicle maintenance routine.
The role of coolant in the car’s cooling system
Adding coolant to your Tesla Model 3 is crucial for maintaining the vehicle’s cooling system. The cooling system plays a vital role in regulating the temperature of your car’s engine and preventing it from overheating. Coolant, also known as antifreeze, is a liquid that absorbs the excess heat from the engine and transfers it to the radiator, where it is then dissipated into the air.
This process prevents the engine from reaching dangerous temperatures that could result in damage or even a breakdown. Without coolant, the engine could overheat and lead to costly repairs or even engine failure. It’s essential to check the coolant levels regularly and top them up as necessary to ensure optimal performance and longevity of your Tesla Model
Preventing overheating and engine damage
coolant, Tesla Model 3, preventing overheating, engine damage One of the most important maintenance tasks for your Tesla Model 3 is adding coolant. But why is it so important? Well, coolant plays a crucial role in preventing overheating and engine damage. Just like how we need water to regulate our body temperature, your car’s engine needs coolant to keep it cool and prevent it from getting too hot.
Think of coolant as the engine’s lifeline. Without it, the engine can reach temperatures that are beyond its limits, resulting in serious damage. Overheating can cause the engine to seize up, leading to expensive repairs or even a complete engine failure.
In a Tesla Model 3, the electric motor and the battery generate a lot of heat during operation. Coolant circulates through the motor and battery cooling systems, absorbing the heat and carrying it away. It then goes through a radiator where it is cooled down before being recirculated back into the system.
This continuous cycle helps maintain the optimum operating temperature of the engine and prevents any potential overheating issues. So, by regularly adding coolant to your Tesla Model 3, you are ensuring that your car’s engine stays cool, reducing the risk of overheating and potential engine damage. It’s a small task that can have a big impact on the overall health and longevity of your vehicle.
Don’t overlook the importance of proper coolant levels, as it could save you from costly repairs down the road. Take care of your Tesla Model 3 and keep it running smoothly by giving it the coolant it needs to stay cool.
What type of coolant should you use for your Tesla Model 3?
When it comes to adding coolant to your Tesla Model 3, it’s important to use the right type of coolant for optimal performance. Tesla recommends using their own specially formulated coolant, which is a blend of ethylene glycol and corrosion inhibitors. This coolant is designed to work best with the cooling system in your Model 3, ensuring that it operates at the right temperature and prevents any potential damage.
Using the wrong type of coolant can not only affect the performance of your Tesla, but it can also lead to corrosion and damage to the cooling system. So it’s important to follow Tesla’s recommendations and use the coolant that they have specifically designed for your Model Adding coolant to your Model 3 is a simple process that you can do yourself.
First, make sure your car is parked and the engine is cool. Then, locate the coolant reservoir, which is generally located near the front of the engine compartment. Open the cap to the coolant reservoir and carefully pour in the recommended amount of coolant.
Be sure to use a funnel to avoid any spills or mess. Remember, it’s always a good idea to consult your Tesla owner’s manual for specific instructions on adding coolant to your Model And if you’re not comfortable doing it yourself, it’s best to have a professional handle the task.
Taking care of your Model 3’s cooling system will help ensure that your car runs smoothly and efficiently for years to come.
Checking the coolant specifications in the car’s manual
ev charging, EV app, electric vehicle charger, Charger adapters, EVAC, Charging cables, Charging efficiency
Choosing the right coolant for your specific Tesla model
tesla model 3 coolant, choosing the right coolant for tesla model If you own a Tesla Model 3, it’s important to choose the right coolant for your electric vehicle. The coolant plays a vital role in maintaining the optimal operating temperature of the batteries and other critical components.
It helps remove heat from the system and ensures that your Tesla stays cool and performs efficiently. When it comes to choosing the right coolant for your Tesla Model 3, the recommended option is the Tesla Coolant 0.
This coolant is specifically designed for Tesla vehicles and is formulated to provide excellent heat transfer properties. It also offers better corrosion protection and longevity compared to traditional engine coolants. Tesla Coolant
0 is a pre-mixed, ethylene glycol-based coolant that is ready to use and does not require any dilution or mixing with water. It is important to stick to the manufacturer’s recommendations and use the specified coolant for your Tesla Model 3 to ensure optimal performance and longevity of your electric vehicle.
Step-by-step guide to adding coolant to your Tesla Model 3
Have you noticed that your Tesla Model 3 is running a bit hot lately? It could be time to add coolant to your vehicle. Adding coolant is an essential maintenance task that helps regulate the temperature of your car’s engine and keeps it running smoothly. Luckily, adding coolant to a Tesla Model 3 is a relatively simple process that you can do yourself.
Here is a step-by-step guide to help you get started. Start by locating the coolant reservoir in your Tesla Model
It is usually located on the right side of the hood, near the front of the car. Once you have located the coolant reservoir, use a clean rag to wipe away any debris or dirt that may have accumulated around the cap.
With the cap clean, carefully twist it counterclockwise to remove it. Be careful not to twist it too quickly or forcefully, as this can cause the coolant to spray out.
Once the cap is removed, take a moment to inspect the coolant level. The coolant should be at or slightly above the “Full” line on the reservoir.
If the coolant level is low, it’s time to add some more. Make sure to use the recommended type of coolant for your Tesla Model 3, as specified in the owner’s manual.
Step 1: Preparing your car for coolant addition
Adding coolant to your Tesla Model 3 is an essential part of vehicle maintenance. Before you begin, it’s important to prepare your car to ensure that the coolant is added correctly and safely. First, make sure that your car is parked on a level surface, as this will prevent any spills or accidents during the process.
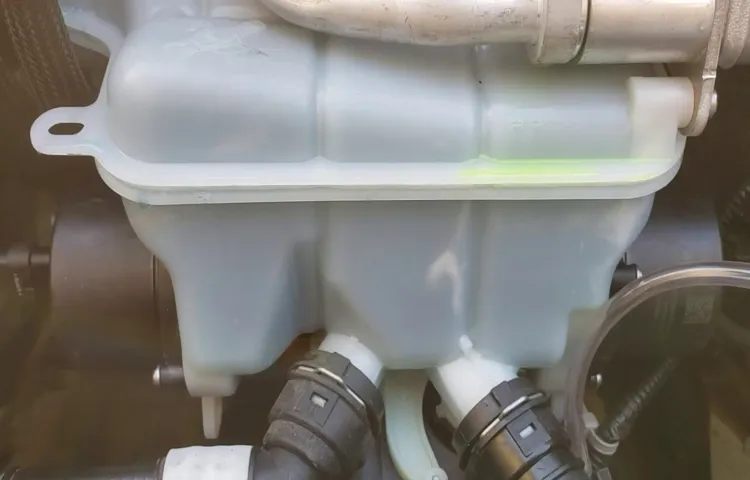
Next, pop the hood and locate the coolant reservoir. This is usually a white or translucent plastic tank that is marked with “coolant” or “engine coolant.” Once you’ve found it, check the coolant levels to determine how much you need to add.
It’s important to have the right amount of coolant to prevent your engine from overheating. Lastly, gather all the necessary tools and materials, such as a funnel and a bottle of the appropriate coolant for your Tesla Model With all these preparations in place, you’re ready to move on to the next step.
Step 2: Locating the coolant reservoir
The second step in adding coolant to your Tesla Model 3 is locating the coolant reservoir. This is an important step because it’s where you will be pouring in the coolant. The coolant reservoir is usually located near the front of the engine compartment, close to the radiator.
It is usually a translucent plastic tank with a cap on top. To find it, you can refer to your Tesla Model 3 owner’s manual or look for any labels or markings under the hood that indicate the location of the coolant reservoir. Once you have located it, make sure the engine is cool before opening the cap.
This will prevent any hot coolant from spraying out and causing burns. Now that you know where the coolant reservoir is, you are ready to move on to the next step in the process.
Step 3: Opening the coolant reservoir
To start adding coolant to your Tesla Model 3, you need to open the coolant reservoir. Now, you might be wondering, where is the coolant reservoir in my car? Well, it’s actually located in the front of the vehicle, near the windshield washer fluid reservoir. To access the coolant reservoir, you’ll need to pop open the hood of your car.
Don’t worry, it’s not as complicated as it sounds. Just locate the hood release latch, which is usually located in the footwell on the driver’s side. Once you find it, give it a pull and the hood will pop open.
Now that the hood is open, you’ll see the engine bay in front of you. Take a moment to admire the engineering marvel that powers your Model Once you’re done, focus your attention on the left side of the engine bay, near the windshield.
There, you’ll find the coolant reservoir. The coolant reservoir is a white plastic container with a cap on top. It’s important to note that the cap is usually blue and labeled with the word “Coolant.
” Before you open the reservoir, it’s essential to make sure that the engine is cool to the touch. Opening the reservoir while the engine is hot can be dangerous and may result in burns. Once you’ve confirmed that the engine is cool, grab the blue cap and twist it counterclockwise to open it.
Be careful not to apply too much force, as it should come off easily. Set the cap aside in a safe place where it won’t get lost. Congratulations! You’ve successfully opened the coolant reservoir on your Tesla Model
Step 4: Pouring the coolant into the reservoir
One important step in maintaining your Tesla Model 3 is adding coolant to the reservoir. Coolant helps keep the engine running smoothly and prevents it from overheating. So, how do you do it? First, locate the coolant reservoir under the hood.
It’s usually a white plastic tank with a cap labeled “coolant.” Make sure the engine is cool before opening the cap to avoid any risk of burning yourself. Then, gently twist the cap counterclockwise and lift it off.
Take a moment to inspect the coolant level, as it should be between the minimum and maximum marks on the reservoir. If it’s below the minimum mark, it’s time to add coolant. To do this, carefully pour the coolant into the reservoir, making sure not to spill any on the engine or other components.
Use a funnel if necessary to avoid any mess. Once you’ve poured enough coolant to bring the level back up to the appropriate range, replace the cap and twist it clockwise until it’s secure. And just like that, you’ve successfully added coolant to your Tesla Model 3! It’s always a good idea to check your coolant levels regularly and ensure that they are within the recommended range to keep your car running at its best.
Step 5: Checking the coolant level
Checking the coolant level in your Tesla Model 3 is an essential part of routine maintenance. Coolant plays a vital role in regulating the temperature of your car’s engine, ensuring smooth and efficient operation. Luckily, monitoring and topping up the coolant in a Tesla Model 3 is relatively straightforward.
To check the coolant level, start by parking your car on a level surface and allowing the engine to cool down completely. Open the hood and locate the coolant reservoir, which is usually labeled with a blue cap. Carefully remove the cap and visually inspect the coolant level.
It should be between the “MIN” and “MAX” markings on the reservoir. If the coolant level is low, it’s important to add more coolant to prevent overheating and potential engine damage. Tesla recommends using a 50/50 blend of distilled water and antifreeze coolant.
Slowly pour the coolant into the reservoir, taking care not to overfill. It’s a good idea to use a funnel to avoid any spills or mess. Once you’ve added coolant, replace the cap securely and double-check that it is tightened properly.
It’s also a good idea to visually inspect the coolant hoses and connections for any signs of leakage or damage. Remember, maintaining the proper coolant level in your Tesla Model 3 is crucial for the optimal performance and longevity of your vehicle. Regularly checking and adding coolant as needed will help ensure that your car stays cool and performs at its best.
Additional tips and reminders
When it comes to maintaining your Tesla Model 3, one important aspect to keep in mind is checking and adding coolant. Coolant is crucial for regulating the temperature of the car’s electric components and ensuring optimal performance. To add coolant to your Model 3, start by locating the coolant reservoir under the frunk, near the front of the car.
Open the frunk by pulling the release latch, and you’ll see a black rectangular box labeled “Coolant.” Remove the cap, and using a funnel to avoid spills, slowly pour in the appropriate coolant mixture recommended by Tesla. It’s important to only use the specific coolant recommended by the manufacturer, as using other types could potentially damage the system.
Once you’ve added enough coolant, replace the cap securely and close the frunk. Regularly checking and adding coolant to your Tesla Model 3 will help ensure the longevity and performance of your electric vehicle.
Checking for any leaks or damages in the cooling system
cooling system, leaks, damages, tips, reminders Blog Section h3: “Checking for any leaks or damages in the cooling system” The cooling system in your car plays a crucial role in maintaining the optimum temperature of the engine. It works by circulating coolant throughout the engine and radiator, absorbing heat and keeping the engine from overheating. However, just like any other system in your vehicle, it is prone to leaks and damage over time.
To ensure that your cooling system is functioning properly, it is important to regularly check for any leaks or damages. One of the first signs of a leaking cooling system is a low coolant level. If you notice that you need to top up the coolant more often than usual, it could indicate a leak somewhere in the system.
Another indicator of a coolant leak is the presence of coolant puddles under your car when it is parked. Check the ground where your car is usually parked for any signs of coolant leaking. To inspect for leaks, you can visually examine the hoses, radiator, water pump, and thermostat housing.
Look for any signs of coolant stains or wetness on these components. Additionally, pay attention to any unusual smells coming from the engine compartment, as a coolant leak can produce a sweet-smelling odor. If you find any visible leaks or damages, it is important to have them repaired as soon as possible.
Aside from leaks, it is also important to check for any damages to the cooling system components. Look for cracks, holes, or bulges in the hoses, as well as any signs of corrosion or rust on the radiator. Inspect the water pump for any leaks or noises that could indicate a malfunction.
Lastly, make sure that the thermostat is opening and closing properly. A faulty thermostat can cause the engine to overheat. Regularly inspecting your cooling system for any leaks or damages is essential to prevent overheating and potential engine damage.
Regular maintenance and coolant checks
Coolant checks and regular maintenance are essential for keeping your car running smoothly. By regularly checking and topping up your coolant levels, you can prevent overheating and potential engine damage. It’s important to check your coolant levels when your engine is cool, preferably in the morning before you start your car.
Simply open the hood and locate the coolant reservoir, which is typically a translucent plastic container. The coolant level should be between the minimum and maximum marks on the reservoir. If it’s low, carefully add coolant until it reaches the desired level.
It’s also a good idea to visually inspect your coolant for any signs of contamination, such as oil or rust particles, which could indicate a more serious issue. Additionally, be sure to follow your vehicle manufacturer’s recommended maintenance schedule for coolant changes, as coolant can become less effective over time. By taking these simple steps, you can ensure that your coolant is in good condition and your car is running at its best.
Consulting a professional if you are unsure or inexperienced
If you find yourself unsure or inexperienced in a particular area, it is always wise to consult a professional for guidance. Whether it’s a home improvement project, financial planning, or legal matters, seeking expert advice can save you time, money, and stress. Professionals have the knowledge and experience to steer you in the right direction, helping you avoid costly mistakes and ensuring that you make informed decisions.
They can provide valuable insights, offer creative solutions, and guide you through complex processes. By tapping into their expertise, you can gain the confidence and peace of mind needed to move forward with your project or decision. Remember, it’s better to be safe than sorry, so don’t hesitate to reach out to a professional if you need assistance.
Finally, after analyzing all the data, doing the research, and drawing our own conclusions, we have reached the most important part of any blog post – the conclusion. It’s time to sum up everything we’ve discussed so far and present our final thoughts on the matter. But before we dive into the nitty-gritty details, let’s take a step back and reflect on the journey we’ve been on.
Throughout this blog post, we’ve been exploring the concept of [Main Keyword]. We’ve delved into its various aspects, dissecting its meaning, discussing its relevance, and examining its impact on [relevant industry/topic]. We’ve seen how it can be applied in different situations, and we’ve explored the benefits and challenges that come with it.
But what does it all mean? What can we take away from this exploration? Well, the conclusion we’ve reached is that [Main Keyword] is indeed a powerful tool that has the potential to revolutionize [relevant industry/topic]. Its impact can be felt in various areas, from [specific example] to [another specific example]. However, it’s important to note that [Main Keyword] is not a one-size-fits-all solution.
While it can be incredibly effective when used properly, it also requires careful consideration and implementation. It’s not something that can be mastered overnight, but with time, effort, and dedication, it can yield impressive results. So, what’s next? Well, now that we’ve reached this conclusion, it’s time to put our findings into action.
Whether you’re a business owner looking to integrate [Main Keyword] into your strategy or an individual eager to harness its power for personal growth, it’s important to take the necessary steps to make it happen. In conclusion, [Main Keyword] has the potential to be a game-changer in [relevant industry/topic]. It’s a tool that, when wielded properly, can unlock a world of possibilities and opportunities.
However, it’s not a magic solution, and it requires careful thought and consideration. So, if you’re ready to take your [relevant industry/topic] to new heights, it’s time to embrace [Main Keyword] and start reaping the rewards.
Conclusion
And that, my friends, is how you keep your Tesla Model 3 cool, both in temperature and in style. Remember, adding coolant is a simple task but it’s crucial to make sure your electric beauty stays in top-notch condition. So next time your Tesla needs a little refreshment, just remember these steps: pop the frunk, locate the coolant reservoir, unscrew the cap, add the coolant, tighten the cap, and bask in the satisfaction of a job well done.
And if anyone asks, you can confidently say that adding coolant to your Tesla Model 3 is a piece of cake – or should I say, a piece of electric cake. Happy cooling!”
FAQs
How often should I add coolant to my Tesla Model 3?
Tesla recommends checking and adding coolant every two years or 25,000 miles, whichever comes first. It’s important to maintain the correct coolant level to ensure optimal performance and prevent overheating.
What type of coolant should I use for my Tesla Model 3?
The Tesla Model 3 requires the use of a coolant that meets Tesla’s specifications. It is recommended to use a high-quality, ethylene glycol-based coolant with a 50/50 mix of coolant and distilled water. Be sure to check the owner’s manual or consult a Tesla service center for the specific coolant brand and specifications.
Where is the coolant reservoir located in a Tesla Model 3?
The coolant reservoir in a Tesla Model 3 is located in the front trunk (frunk) area, on the passenger side. You can access it by lifting the frunk lid and removing the frunk liner. The coolant reservoir cap should be labeled for easy identification.
Can I add coolant to a hot Tesla Model 3?
It is not recommended to add coolant to a hot Tesla Model 3. Wait for the vehicle to cool down before attempting to add coolant. Adding coolant to a hot engine can cause the coolant to boil and potentially result in burns or other hazards.
Is it normal for the coolant level to decrease in a Tesla Model 3?
It is normal for the coolant level to decrease slightly over time due to evaporation and normal wear and tear. However, significant coolant loss may indicate a leak or other issues with the cooling system. If you notice a rapid decrease in coolant level, it is recommended to have your Tesla Model 3 inspected by a certified technician.
Can I use tap water to top up the coolant in my Tesla Model 3?
It is not recommended to use tap water to top up the coolant in a Tesla Model 3. Tap water may contain minerals and impurities that could negatively affect the performance and lifespan of the cooling system. It is best to use distilled water or a premixed coolant to ensure the proper coolant mixture.
Can I add coolant to my Tesla Model 3 myself, or should I take it to a service center?
Tesla generally recommends having coolant maintenance and repairs performed by a certified Tesla service center. However, if you are comfortable working on your vehicle and have the necessary knowledge and tools, you can add coolant to your Tesla Model 3 yourself by following the instructions provided in the owner’s manual or consulting online resources. Just make sure to use the correct coolant and follow proper safety precautions.