So you’ve got a tonneau cover on your F150 truck, but it’s not fitting quite right and you’re not sure how to adjust it. Don’t worry, we’ve got you covered! Adjusting your F150 tonneau cover is a simple process that can be done in just a few minutes. Whether you’ve recently installed a new cover or you’re looking to fix some minor issues, we’ll walk you through the steps to ensure a perfect fit.
In this blog post, we’ll cover everything from why you might need to adjust your tonneau cover to the different methods for making adjustments. So grab your toolbox and let’s get started!
Table of Contents
Introduction
Are you looking to adjust your F150 tonneau cover? Well, you’ve come to the right place! Having a tonneau cover for your truck can offer a variety of benefits, such as protecting your cargo from the elements and keeping it secure. However, over time, you may find that your tonneau cover needs some adjustments to ensure it fits properly and functions correctly. In this blog post, we’ll walk you through the steps on how to adjust your F150 tonneau cover so that it fits snugly and operates smoothly.
Whether you have a hard or soft tonneau cover, we’ve got you covered! So let’s dive in and get your tonneau cover in tip-top shape.
What is a Tonneau Cover?
Introduction So you’re on the hunt for a tonneau cover, but what exactly is it? Well, a tonneau cover is a must-have accessory for truck owners. It’s a type of cover that is installed over the bed of a truck, providing protection and security for whatever you may be transporting. Think of it as a shield for your truck bed, shielding it from harsh weather conditions, potential thieves, and even the prying eyes of curious onlookers.
But a tonneau cover isn’t just about protection, it also adds a touch of style and functionality to your truck. With different types and styles available on the market, there’s a tonneau cover out there to suit every truck owner’s needs. So let’s dive in and explore the world of tonneau covers!
Why Should You Adjust Your F150 Tonneau Cover?
F150 tonneau cover, adjust your tonneau cover
Step-by-Step Guide
If you’re looking to adjust your F150 tonneau cover, you’ve come to the right place! The process may seem daunting at first, but with a step-by-step guide, it becomes much easier. Firstly, locate the tension adjustment bolts on either side of the tonneau cover near the hinges. These bolts allow you to tighten or loosen the cover’s tension.
Use a wrench or socket set to turn the bolts clockwise to tighten the cover or counterclockwise to loosen it. Remember to adjust both sides evenly for a balanced fit. Once you’ve achieved the desired tension, test the cover by opening and closing it to ensure it moves smoothly without any resistance.
If any adjustments are needed, simply go back and fine-tune the tension as necessary. By following these steps, you’ll have your F150 tonneau cover adjusted and ready to go in no time!
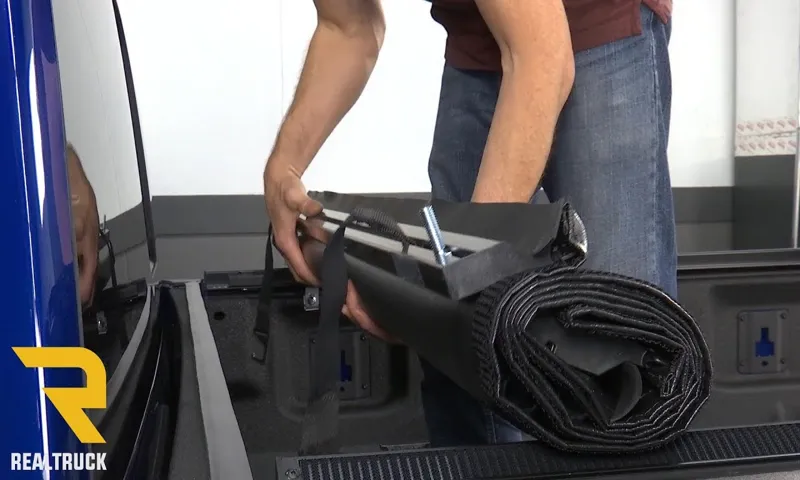
Step 1: Prepare your tools
For any DIY project, it’s important to start off on the right foot by preparing your tools ahead of time. This simple step can save you a lot of frustration and make the task at hand go much more smoothly. Whether you’re building a piece of furniture, fixing a leaky faucet, or working on a craft project, having the right tools on hand is essential.
Take some time to gather all the tools you will need before you dive into the project. This may include a hammer, screwdriver, wrench, pliers, measuring tape, and any other specific tools that are necessary for your task. Make sure that your tools are clean and in good working condition.
If any of your tools are damaged or broken, it’s a good idea to replace them before you get started. Once you have all your tools ready, you’ll be able to tackle your project with confidence and efficiency. So take a few minutes to prepare your tools before you begin, and you’ll be well on your way to completing your DIY project successfully.
Step 2: Locate the adjustment points
In this step-by-step guide, we will go through the process of locating the adjustment points on a device or machinery. Adjustment points are crucial for ensuring that the equipment functions optimally and can be tailored to your specific needs. When it comes to machines, there are often various knobs, dials, or levers that can be adjusted to fine-tune performance.
These adjustment points can vary depending on the equipment, so it is essential to familiarize yourself with the specific machine’s user manual or guide. The manual will provide detailed instructions on locating and identifying the adjustment points for your particular machine. Once you have located these points, you can proceed to the next step of the adjustment process.
Remember to take your time and be careful when making adjustments to avoid any potential damage to the equipment.
Step 3: Loosen the adjustment screws
The next step in adjusting your bike brakes is to loosen the adjustment screws. These screws are located on either side of the brake caliper and are used to fine-tune the positioning of the brake pads. By loosening these screws, you can create more clearance between the brake pads and the rim, allowing for smoother and more efficient braking.
To do this, simply use a Phillips head screwdriver to turn the screws counterclockwise until they are fully loosened. Be sure to loosen both screws equally to maintain balance and prevent any rubbing or misalignment. Once the screws are loosened, you can move on to the next step in the brake adjustment process.
Step 4: Adjust the tension
adjusting tension sewing machine Adjusting the tension on a sewing machine is an essential step for achieving perfect stitches. It can be frustrating when your stitches are too tight or too loose, but luckily, adjusting the tension is relatively simple. To do this, start by selecting a scrap piece of fabric and sewing a test seam.
Examine the stitches and look for any inconsistencies. If the top thread is pulling through to the bottom or vice versa, you’ll need to make some adjustments. To adjust the tension, locate the tension dial on your sewing machine.
This dial is usually found on the front or side of the machine. Gradually turn the dial to the left or right, depending on the direction you need to adjust. A lower number on the dial will decrease tension, while a higher number will increase it.
Make small adjustments and re-sew the test seam each time until you achieve the perfect stitch. While adjusting the tension, it’s important to note that different fabrics may require different tension settings. For example, lightweight fabrics like silk may require a lower tension, while heavy fabrics like denim may need a higher tension.
It’s a good idea to practice on scraps of the fabric you’ll be using for your project to ensure the tension is just right. In addition to adjusting the tension on the machine, you may also need to check the bobbin tension. The bobbin tension is typically adjusted using a small screw on the bobbin case.
If the stitches on the underside of your fabric are too loose or too tight, you may need to adjust the bobbin tension. It’s best to consult your sewing machine’s manual for specific instructions on how to adjust the bobbin tension. By following these steps and making the necessary adjustments, you’ll be able to achieve perfect stitches on your sewing machine.
Step 5: Tighten the adjustment screws
bathroom faucet installation, adjustment screws, tighten, step-by-step guide, DIY, beginner. Completing the installation of your new bathroom faucet is an empowering accomplishment, especially for beginners. Before you can fully enjoy the beauty and functionality of your new faucet, you need to make sure it is securely fastened.
This is where the adjustment screws come into play. These screws are located underneath the sink and are responsible for tightening the faucet to the countertop. To tighten the adjustment screws, you will need a wrench or a screwdriver, depending on the type of screws used in your faucet.
Simply insert the tool into the screw head and turn it clockwise to tighten the screws. It’s important not to over-tighten the screws, as this can cause damage to the faucet or the countertop. Once you feel resistance, stop turning the screws to avoid any unnecessary force.
By following this step-by-step guide, you can ensure that your bathroom faucet is securely installed and ready to use.
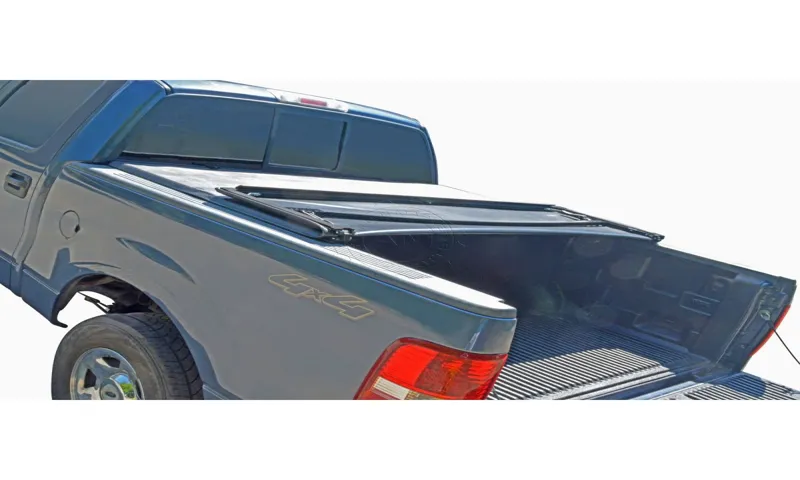
Step 6: Test the tonneau cover
“tonneau cover” So you’ve installed your new tonneau cover on your truck, but now it’s time to test it out and make sure everything is working properly. The first thing you want to do is ensure that the cover is securely fastened to your truck bed. Give it a gentle tug to make sure it doesn’t come loose or move around too much.
Next, check for any gaps or areas where water could potentially leak in. Run your hand along the edges of the cover and feel for any air or moisture. If you notice any gaps, you may need to adjust the cover or add some weather stripping to ensure a watertight seal.
Now, it’s time to test the tonneau cover’s functionality. Open and close it a few times to make sure it operates smoothly. Pay attention to any sticking points or areas where it seems to catch.
You want the cover to open and close easily so that you can access your truck bed without any issues. Additionally, check to see if the cover locks securely in place when closed. The last thing you want is for it to come open while you’re driving down the road.
Finally, take your truck for a spin and listen for any unusual noises or vibrations coming from the tonneau cover. These could be signs that something isn’t quite right, and you may need to make some adjustments. By thoroughly testing your tonneau cover, you can ensure that it is functioning properly and providing the protection you need for your truck bed.
Additional Tips and Considerations
When it comes to adjusting your F150 tonneau cover, there are a few additional tips and considerations to keep in mind. First, it’s essential to read the manufacturer’s instructions carefully. Each tonneau cover may have specific adjustment procedures, so it’s crucial to follow them to ensure proper installation and fit.
Additionally, take note of any weather conditions that may affect the adjustment process. For example, if you’re adjusting the tonneau cover on a hot day, the materials may expand, making it tighter to adjust. On the other hand, colder temperatures can cause the tonneau cover to contract, making it looser.
It’s also a good idea to regularly check the adjustment of your tonneau cover to ensure it remains secure. Over time, vibrations and regular use can cause it to become loose, so periodically tightening it is essential. By following these additional tips and considerations, you can ensure that your F150 tonneau cover is properly adjusted and provides optimal protection for your truck bed.
Check the manufacturer’s instructions
manufacturer’s instructions
Keep your tonneau cover clean
tonneau cover, clean, additional tips, considerations
Conclusion
In conclusion, adjusting your F150 tonneau cover is a bit like solving a Rubik’s Cube – it requires a strategic approach, a touch of finesse, and a good sense of humor. Just like those frustratingly twisty little squares, the process can seem baffling at first, but with a little patience and perseverance, you’ll have it mastered in no time. Think of your tonneau cover as the stylish accessory that completes your F150’s ensemble.
It’s like the perfect pair of sunglasses or a sleek tie. But just like any fashion statement, it needs to fit perfectly to truly make an impact. To begin, make sure you have all the tools at your disposal.
A good set of eyes is essential (and maybe some glasses, if you’re like me and are prone to misplacing things). Some patience and determination will also come in handy – just think of it as a mental workout to keep your mind sharp. Start by assessing the current state of your tonneau cover.
Is it sagging, sitting askew, or just not looking quite right? Take a moment to understand where the problem lies – is it the hinges, the latches, or is the cover itself in need of some TLC? Once you’ve identified the issue, it’s time to take action. First, make sure the hinges are properly aligned and lubricated. A little grease can go a long way in ensuring smooth movement and less strain on the cover.
As for the latches, give them a firm but gentle tug to make sure they’re secure. And if the cover itself needs some adjustment, don’t be afraid to get your hands a little dirty – after all, real truck owners aren’t afraid to roll up their sleeves and get the job done. Remember, Rome wasn’t built in a day – and your tonneau cover adjustment won’t be either.
It may take a few tries and a bit of trial and error before you find that perfect fit. But trust me, the satisfaction of finally getting it just right is worth every ounce of effort. So, my fellow F150 enthusiasts, harness your inner Rubik’s Cube master, channel your sense of style and determination, and get ready to conquer the art of tonneau cover adjustment.
FAQs
How do I adjust the F150 tonneau cover for a tighter fit?
To adjust the F150 tonneau cover for a tighter fit, locate the tension adjusters on the sides of the cover and turn them clockwise to increase tension. This will help prevent any loose or flapping sections.
What is the purpose of adjusting the F150 tonneau cover?
Adjusting the F150 tonneau cover allows you to customize the fit for your truck bed, ensuring maximum security, protection from elements, and aerodynamics. It also helps prevent any noise or flapping during transportation.
Can I adjust the F150 tonneau cover to accommodate larger cargo?
Yes, the F150 tonneau cover can usually be adjusted to accommodate larger cargo. Most covers come with easy-to-use clamps or latch systems that allow you to secure the cover in a partially open or fully open position, providing more space for tall or bulky items.
Are there any specific instructions for adjusting the F150 tonneau cover in different weather conditions?
While adjusting the F150 tonneau cover in different weather conditions, it is important to take into consideration temperature and humidity changes. In colder weather, the cover might become more rigid, so loosening the tension adjusters slightly can prevent any damage or strain. In hot and humid conditions, it is recommended to check for any warping or stretching of the cover and readjust it if necessary.
How often should I adjust the tension of my F150 tonneau cover?
It is a good practice to check and adjust the tension of the F150 tonneau cover regularly, especially after extreme weather conditions or when transporting heavy loads. Aim to do this at least once a month to maintain the optimal fit and performance of the cover.
What tools do I need to adjust the F150 tonneau cover?
Most F150 tonneau covers come with built-in tension adjusters that can be operated by hand. No extra tools are necessary for adjusting the tension. However, it is always good to have a set of pliers or a wrench handy in case any tightening or loosening of bolts is required.
Does adjusting the F150 tonneau cover affect its warranty?
Adjusting the F150 tonneau cover within the specified guidelines typically does not affect its warranty. However, it is best to consult the manufacturer’s instructions or reach out to their customer support to ensure compliance with any warranty terms and conditions.