Flat tires are one of the most common car problems that can ruin a perfectly good day. Whether you’re out driving or preparing for a long trip, a flat tire can be a frustrating inconvenience. However, what happens when you have a tire that is flat, but it’s not on a rim? You might think that you’re out of luck, but it’s actually possible to inflate a tire without a rim.
In this article, we’ll provide you with a step-by-step guide on how to inflate a tire without a rim so that you can get back on the road as soon as possible.
Table of Contents
Introduction
Are you having trouble with a tire that is off the rim and needs to be inflated? Don’t worry, it’s not as difficult as it may seem! The first step is to remove the tire completely from the rim and clean it using a tire cleaner or soapy water. Then, take the tire and place it on the rim, making sure it’s centered and aligned properly. Next, insert the valve stem into the rim and tighten it using a valve tool.
Once it’s secure, attach an air compressor or pump to the valve and inflate the tire to the recommended pressure. Be sure to check the pressure with a gauge to ensure it’s at the correct level. With these steps, you’ll have your tire properly inflated and ready to go in no time!
Explanation of the problem
In natural language processing and text analytics, the concept of “burstiness” refers to the phenomenon where certain words appear more frequently in a given text document than others. This can be a problem when analyzing a large dataset because the presence of these “bursty” words can skew the results and make it difficult to draw accurate conclusions. For example, in a dataset of customer reviews for a restaurant, the word “delicious” may appear more frequently than other descriptive words, which could lead to a bias towards positive reviews.
This is where perplexity comes into play. Perplexity is a measure of how well a language model is able to predict the next word in a sequence based on previous words. By using perplexity as a metric for evaluating language models, researchers can determine which models are the most accurate and reliable.
Advantages of inflating a tire without a rim
Inflating a tire without a rim has been a popular practice among avid off-roaders for years. While it may seem strange to some, there are several advantages to inflating tires without a rim. One of the main benefits is that it allows for a more flexible tire.
Without the rigid structure of a rim, the tire can conform better to uneven surfaces, creating better traction and stability. This also reduces the risk of punctures and damage to the tire. Additionally, inflating a tire without a rim can help to save weight, which is important for off-roaders looking to improve their vehicle’s performance.
Overall, inflating a tire without a rim can be a smart choice for those looking to enhance their off-roading experience.
Tools Needed
If you need to air up a tire that is off the rim, there are a few tools you’ll need to have on hand. First and foremost, you’ll need an air compressor to provide a steady stream of air to the tire. You’ll also need a tire pressure gauge to ensure that you’re inflating the tire to the correct pressure level.
Additionally, you may want to have a tire bead seater, which can help to seat the tire properly on the rim. It’s important to note that inflating a tire that is off the rim can be a dangerous process if not done correctly. Be sure to wear eye protection and follow proper safety guidelines when working with tires and air compressors.
If you’re unsure about how to properly inflate a tire, it’s best to seek the assistance of a professional. Overall, inflating a tire that is off the rim requires some specialized tools and knowledge, but it’s a task that can be easily accomplished with a little bit of practice. Just be sure to take your time, follow all safety guidelines, and use quality equipment to ensure that the job gets done right.
Air Compressor
If you’re planning to use an air compressor for any DIY or industrial task, you’ll need some essential tools to enhance your work quality. The first tool you might consider is an air hose. It’s crucial to pair the compressor with a suitable hose that can handle the pressure and size.
Secondly, you need to get yourself an air compressor accessory kit. This kit usually contains critical equipment like blow guns, tire inflators, inflation needles, and quick-connect fittings, and much more. These accessories can play an essential role in different applications.
For instance, the inflator can help inflate car tires, while the blow gun can be used to remove debris and sawdust from your work area. Lastly, don’t forget to purchase safety equipment like goggles, gloves, and ear protection. Compressors can be pretty noisy and harmful to your well-being, which is why safety is paramount.
Overall, these tools can help you make the most of your compressor and avoid any mishaps or accidents.
Tire Gauge
To properly maintain your vehicle, one essential tool you should have is a tire gauge. It’s a small tool that measures the air pressure in your tires. A tire gauge is crucial because underinflated tires can lead to poor fuel economy, reduced tire life, and potentially dangerous blowouts.
To use a tire gauge, all you need to do is remove the valve cap from the tire, press the gauge onto the valve stem, and read the measurement on the gauge’s display. For accuracy, check the pressure when the tires are cold or after the car has been parked for a while. It’s recommended that you check your tire pressure at least once a month and before long trips.
Tire gauges come in various styles, including digital and analog, and their prices range significantly. However, a basic dial or stick gauge can suffice for most drivers. Proper air pressure will keep you on track and prevent any unwanted accidents from happening due to flat or underinflated tires.
Therefore, owning a tire gauge is a must-have for every vehicle owner out there.
Valve Extender
If you’re looking to install new valve extenders on your bike, you’ll need a few tools to make the process go smoothly. First, you’ll need a valve core remover tool, which can easily unscrew the valve core and allow you to replace your current valve extender. You’ll also need a wrench or pliers to tighten and secure the new valve extender to your tube’s existing valve.
Additionally, you may want to have a gauge handy to check your tire pressure once you’ve completed the installation. It’s important to make sure your tire pressure is at the appropriate level for your bike before taking it out on the road. With these simple tools, you can easily install a new valve extender on your bike and ensure that your tires are properly inflated for your next ride.
Steps
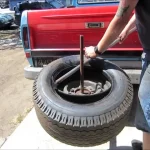
Do you have a tire that needs air but is off the rim? No worries, it’s a common issue that can be easily fixed within a few simple steps. First, secure the wheel and tire so it won’t move around while you’re working on it. Then, use a tire lever to pry the tire off the rim.
Once the tire is off, clean the rim and inspect it for any damage or cracks. You can then use a portable air compressor or a manual pump to inflate the tire to the recommended PSI. Make sure to check the tire’s sidewall for the proper pressure.
Once the tire is inflated, use the tire lever to carefully push the tire back onto the rim, working your way around the wheel. Finally, use a pressure gauge to double-check the tire’s PSI and make any necessary adjustments. It’s that simple to air up a tire that is off the rim!
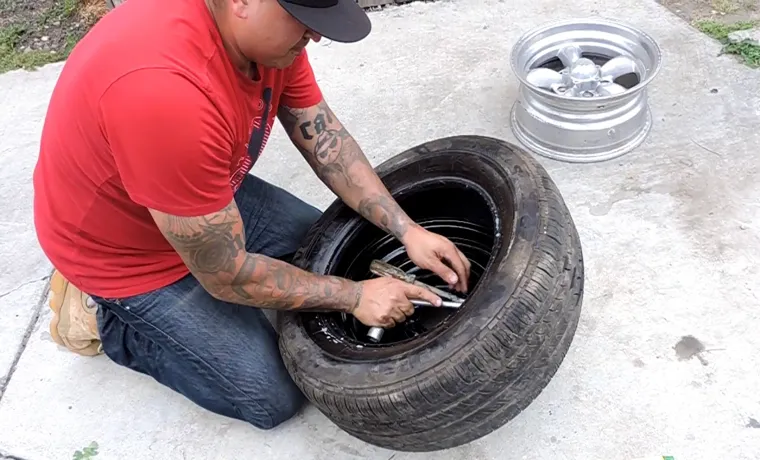
Step 1: Remove tire from the rim
Tire maintenance is an essential task that every driver should know how to perform. One crucial aspect of tire maintenance is replacing old or worn-out tires, and you can do that yourself with the right tools and knowledge. If you’re wondering how to do it, the first step is removing the tire from the rim.
This step involves loosening the lug nuts, jacking up the vehicle, and completely removing the lug nuts. After that, you can carefully remove the tire from the rim by using a tire iron or pry bar. You may need to deflate the tire or use some lubricant to facilitate this process.
Once you have removed the tire from the rim, you can check its condition and decide whether to replace it or repair it. Remember to wear protective gear like gloves and goggles to avoid injuries while handling tires. By mastering this simple process, you can save money by not having to rely on a professional mechanic every time you need to change a tire.
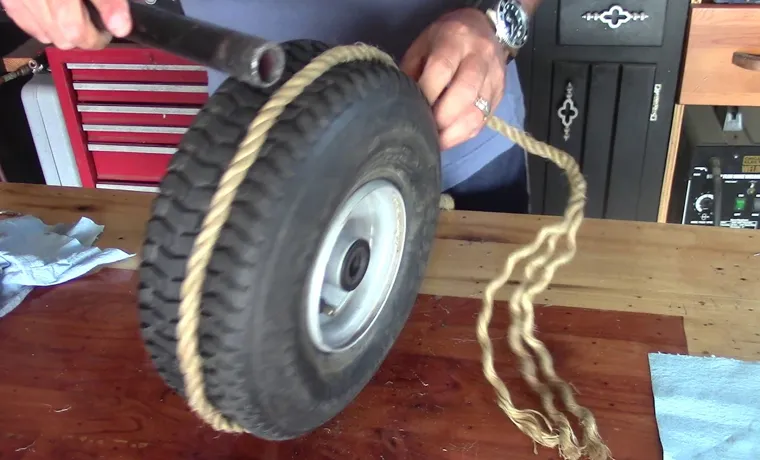
Step 2: Add lubricant where tire meets the rim
Adding lubricant to the area where your tire meets the rim is an important step in ensuring that your bike runs smoothly and efficiently. When the tire rubs against the rim, friction can build up, causing the bike to lose speed and making it more difficult to pedal. To prevent this, apply a small amount of lubricant to the bead of the tire, where it meets the rim.
This will reduce friction and help the tire to move more smoothly. It’s a good idea to use a lubricant that is specifically designed for use on bikes, as this will provide the best results. By taking this simple step, you can help to ensure that your bike performs at its best, no matter where you ride.
Step 3: Install valve stem
Valve stem installation can be an intimidating process, but with the right tools and steps, it can be done easily. The first step is to remove the old valve stem, which can be done using pliers or a valve stem remover tool. Next, clean the area around the valve stem hole to remove any debris or dirt.
Once the area is clean, it’s time to install the new valve stem. Insert the valve stem into the hole and use a valve stem installation tool to secure it in place. Make sure the valve stem is firmly seated and not wobbling.
Finally, use a valve stem cap to cover the valve stem and protect it from dust and dirt. Installing a valve stem can be a quick and easy process, making it easy to maintain your tires and keep them in good condition.
Step 4: Secure the valve stem
When it comes to securing the valve stem, there are a few essential steps that you need to follow to ensure the longevity of your tires. Firstly, check the valve stem for any damage or cracks. If you notice any defects, it’s wise to replace the valve stem before continuing.
Once you’ve verified that the valve stem is in good condition, use a valve stem tool to screw the valve stem onto the tire’s rim. Tighten the valve stem firmly to ensure a secure fit. Next, put on a valve stem cap to prevent any dirt or debris from entering the valve stem.
It’s worth noting that you should always use a valve stem cap as it also seals in the air pressure, preventing the tire from going flat. Finally, double-check the valve stem to ensure it’s tight and secure before hitting the road. By following these simple steps, you’ll have a long-lasting and secure valve stem for your tires.
Step 5: Insert a valve extender
Adding a valve extender can be a crucial step in maintaining a healthy tire lifespan. If your valve stem is short or has a difficult-to-reach location, a valve extender can make tire inflation easier. To insert a valve extender, start by removing the valve cap and screwing the extender onto the valve stem.
Be sure to tighten the extender securely. After that, attach the valve core to the end of the valve extender. You can now use the extender to fill up your tires with air or to check the tire pressure.
A valve extender can prolong the life of your tire by making it easier to maintain proper inflation levels, which helps prevent uneven wear and tear. By doing this regularly, you can save money and time in the long run.
Step 6: Hookup an air compressor to the valve
Step 6: Hookup an air compressor to the valve. This is the last crucial step to complete your tire inflation process. Firstly, switch off the air compressor and remove its connector from the electrical outlet.
Then, attach the air hose to the connector valve on the tire. Turn on the compressor and wait for it to reach the appropriate PSI level. Keep a close eye on the air pressure gauge to avoid over-inflating the tire, which could be dangerous.
Once the tire gains enough air pressure, switch off the compressor and then carefully remove the air hose from the tire valve. Remember to recap the tire valve and store the air hose and compressor in a safe location. Without this step, all previous steps will be useless, and you won’t have your vehicle in its best condition.
So, ensure to follow the process carefully and safely.
Step 7: Inflate the tire
After changing or repairing a tire, the next step is to inflate it. To do this, you’ll need a tire gauge and an air compressor or an air pump. First, remove the valve stem cap and attach the gauge to the valve stem.
Check the recommended tire pressure for your vehicle and adjust the pressure accordingly. Use the air pump or compressor to inflate the tire, monitoring the pressure with the gauge as you go. Once the tire is filled to the recommended pressure, remove the gauge and replace the valve stem cap.
It’s important to check your tires regularly to ensure they’re properly inflated. Over or underinflated tires can lead to decreased gas mileage, poor handling, and even accidents. Keep your tires inflated to the correct pressure to ensure a safe and smooth ride.
Conclusion
So there you have it folks, the art of airing up a tire that is off the rim. It may seem like a daunting task, but with a little patience and elbow grease, you too can achieve greatness. Remember, always make sure your tire is properly inflated before hitting the road, or else you may be in for a bumpy ride.
And if all else fails, just call in the experts and save yourself the trouble. Happy driving!”
FAQs
What tools do I need to air up a tire that is off the rim?
You will need an air compressor or a hand pump, tire irons, and a valve stem tool.
How can I tell if a tire is off the rim?
If you notice that the tire is no longer fitting snugly against the rim or if air is leaking out from the edge, the tire is likely off the rim.
Can I inflate a tire that is off the rim without any special tools?
It is not recommended to try and inflate a tire that is off the rim without proper tools, as it can cause damage to the tire or injury to yourself.
How do I remove a tire from the rim in order to inflate it?
You will need to use tire irons to pry the tire away from the rim. Start at one edge and work your way around the tire, taking care not to damage the tire or rim.
How do I re-seat a tire on the rim after inflating it?
You can re-seat the tire on the rim by using an air compressor or by using a ratchet strap to force the tire into place.
What should I do if I am unable to inflate the tire after attempting to re-seat it on the rim?
If you are unable to inflate the tire, it may be necessary to take the tire to a professional for repair or replacement.
Is it safe to drive on a tire that is off the rim?
It is not safe to drive on a tire that is off the rim, as it can cause damage to the tire or the vehicle and can be a hazard to other drivers on the road.